|
|
Post by mustang1989 on Nov 29, 2018 14:57:13 GMT -7
I picked this one up a couple of months ago while I was working on the '59 El Camino. This is not only a Holy Grail build for me but also would be a Holy Grail 1:1 vehicle for me. If I could ever get my hands on one for the right price...….  . To be very honest about it, these were not fast trucks from the factory. I think the horsepower rating was right about 225 hp and in 1990 it had a TH400 transmission behind it with 3:73 gears. The transmission being only 3 speed automatic made things difficult in an everyday driver due to the 3:73 gears. I guess GM wanted to captivate a middle age audience with the 454 and the nostalgia of the Turbo 400 automatic. In 1991 GM got smart and stuck a 4 speed overdrive transmission behind it to help the driveablity out some. In any case they produced on heckuva good looking vehicle and opened the gate for a slew of fast trucks to follow..... and they are HIGHLY sought after now. . To be very honest about it, these were not fast trucks from the factory. I think the horsepower rating was right about 225 hp and in 1990 it had a TH400 transmission behind it with 3:73 gears. The transmission being only 3 speed automatic made things difficult in an everyday driver due to the 3:73 gears. I guess GM wanted to captivate a middle age audience with the 454 and the nostalgia of the Turbo 400 automatic. In 1991 GM got smart and stuck a 4 speed overdrive transmission behind it to help the driveablity out some. In any case they produced on heckuva good looking vehicle and opened the gate for a slew of fast trucks to follow..... and they are HIGHLY sought after now.
Anyways, Here's the kit and I think I'll be going with a Day 2 build with some NON OOB wheels and tires.
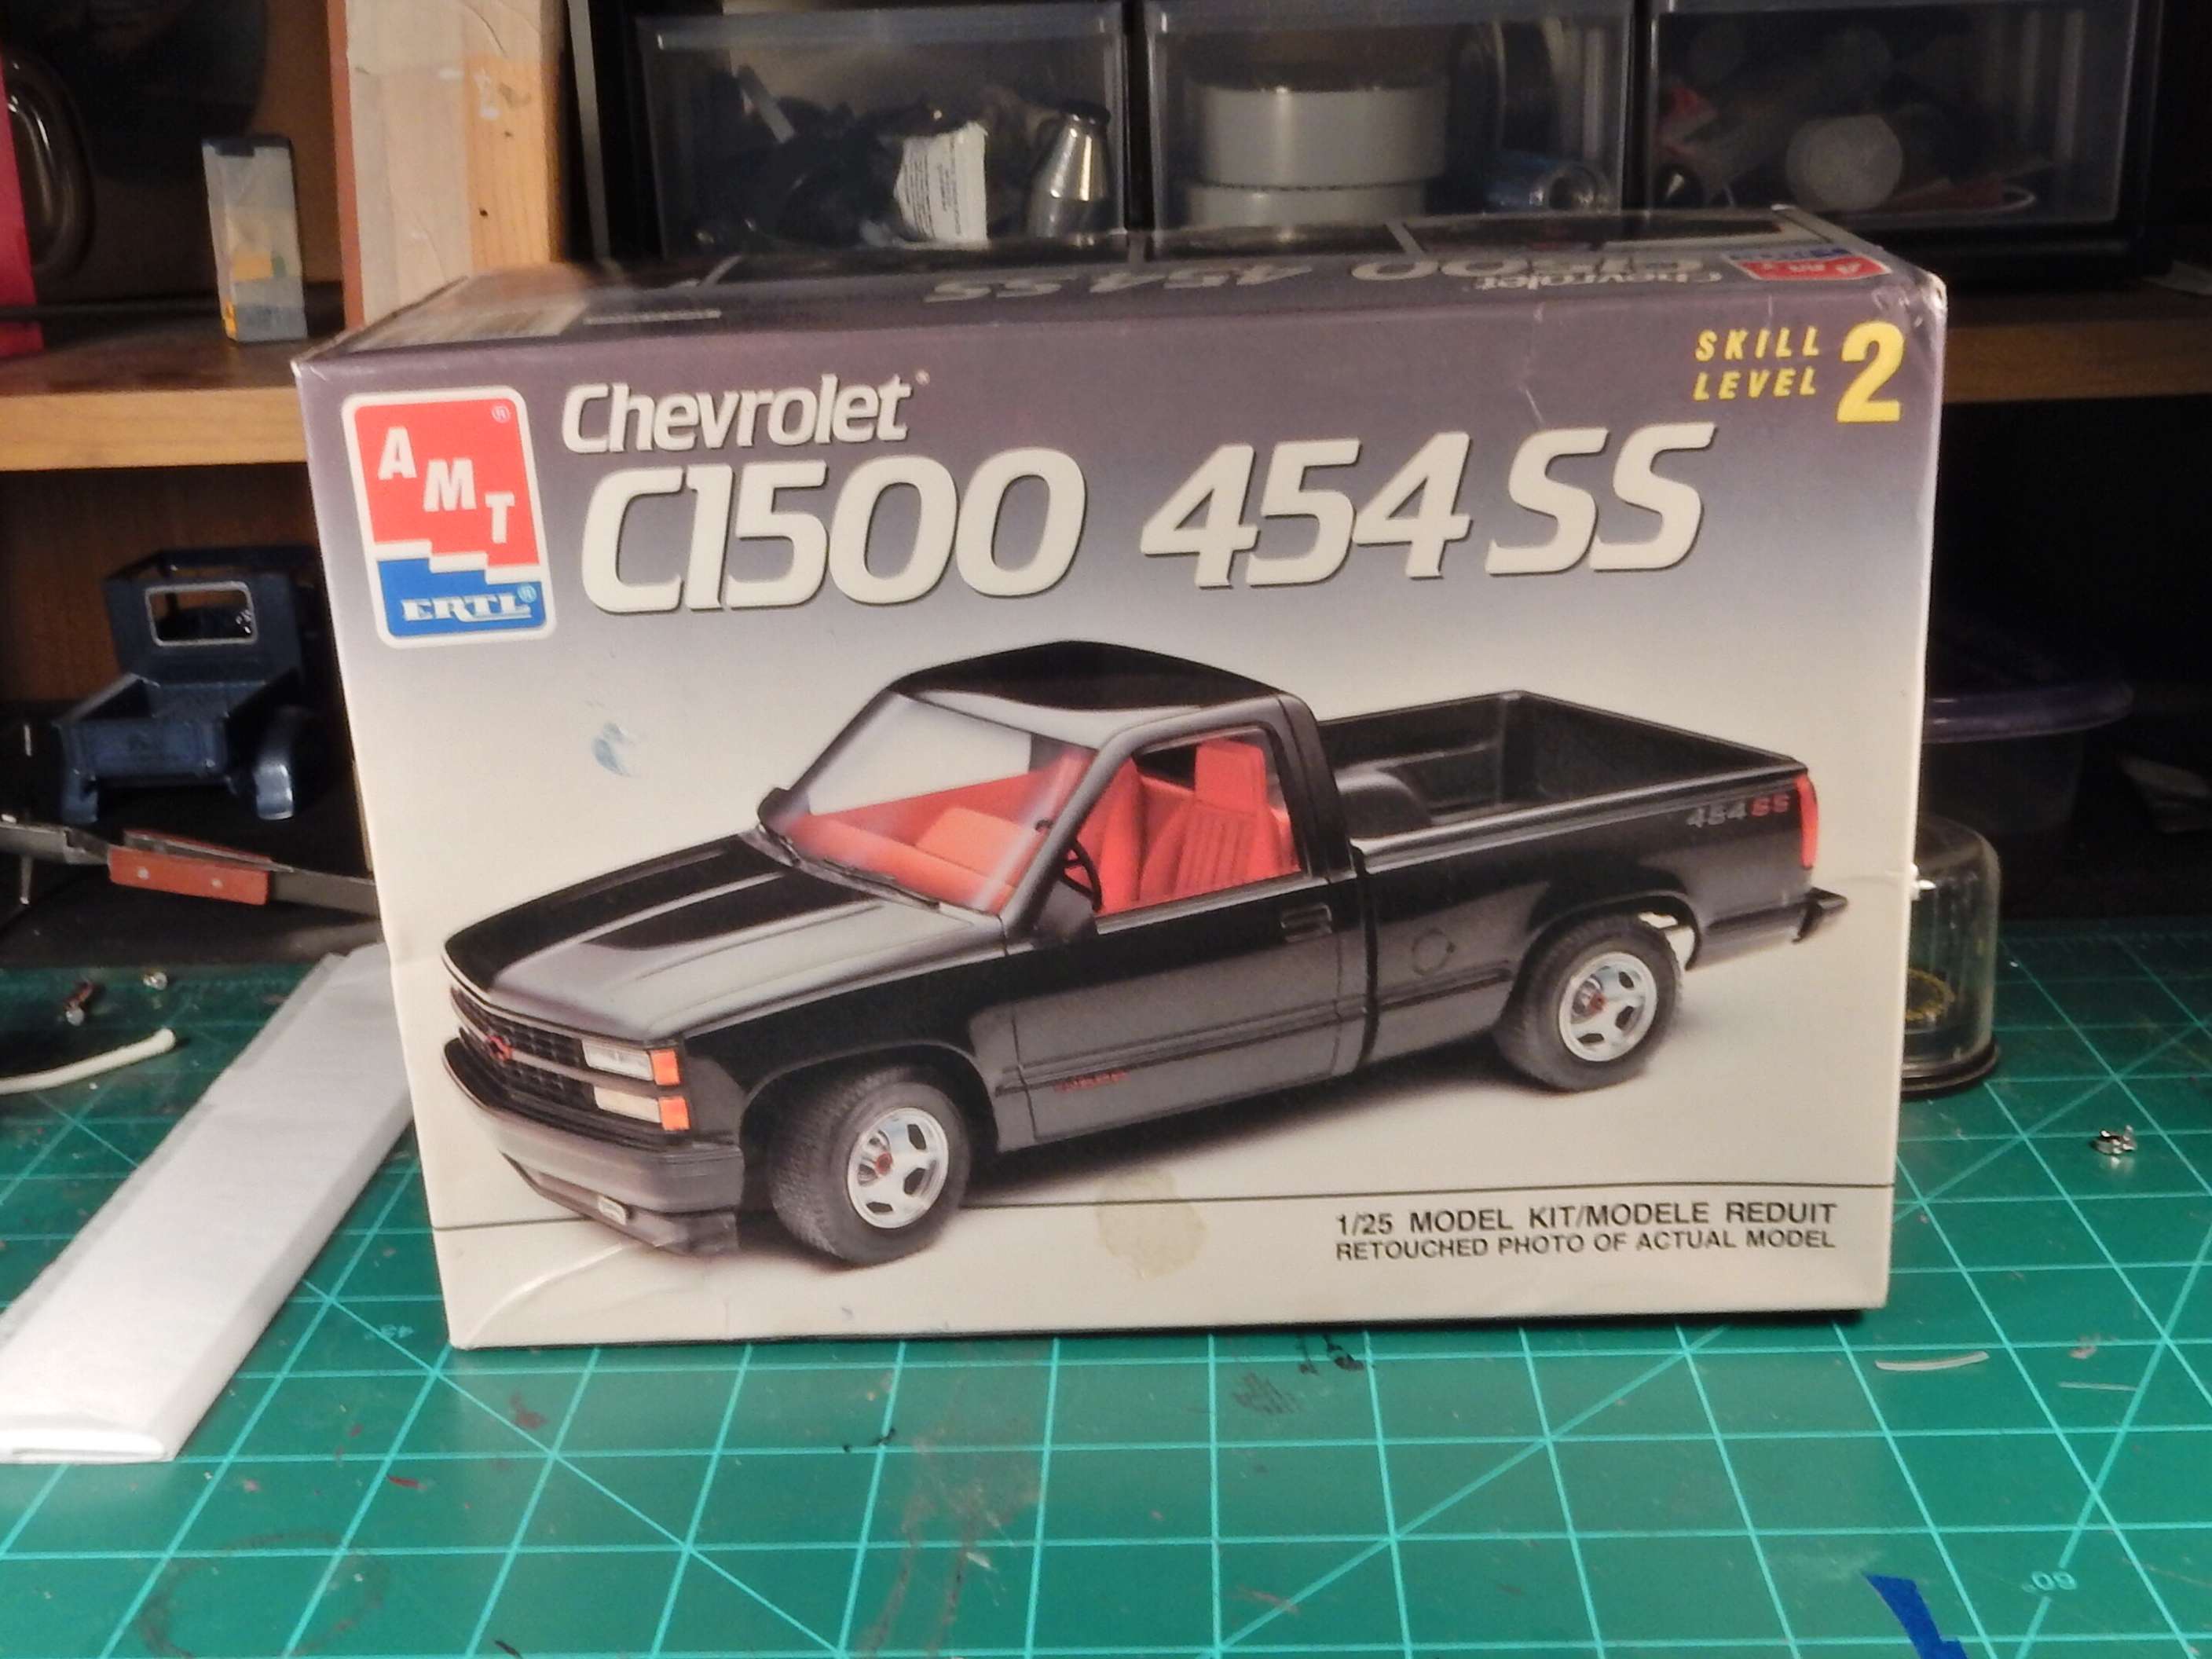
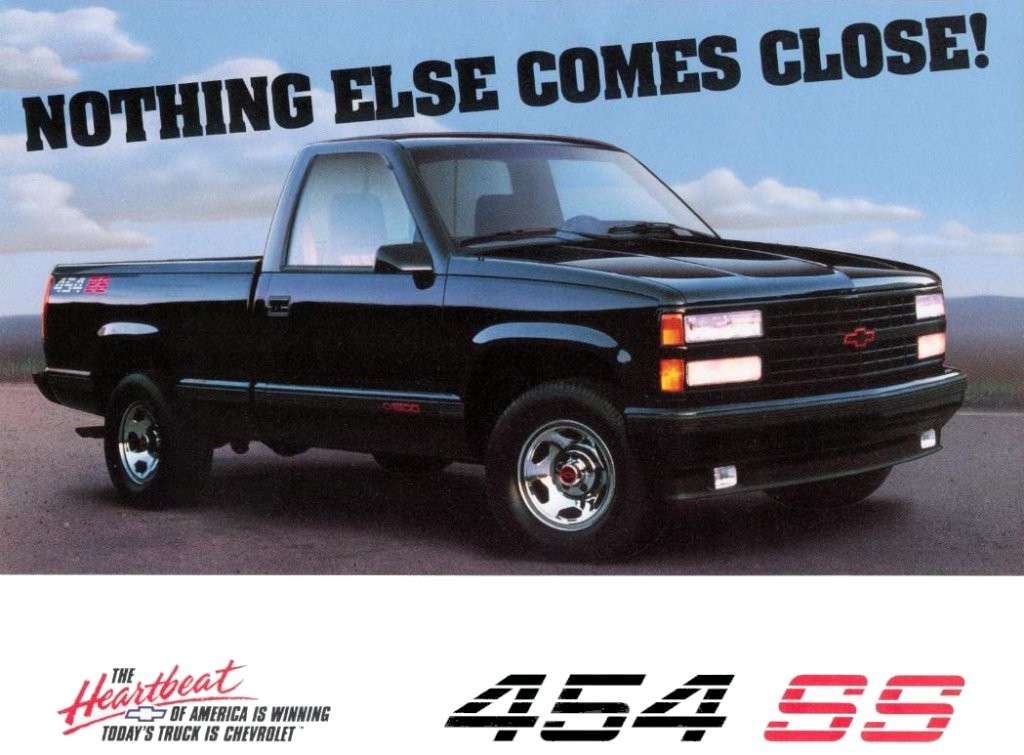
and for giggles.....an original advertisement:
|
|
|
|
Post by mustang1989 on Dec 7, 2018 4:31:12 GMT -7
This kit has a pretty decent engine with lots of parts. The chrome parts all got stripped to include the rocker covers but other than that it's a pretty complete and detailed engine. 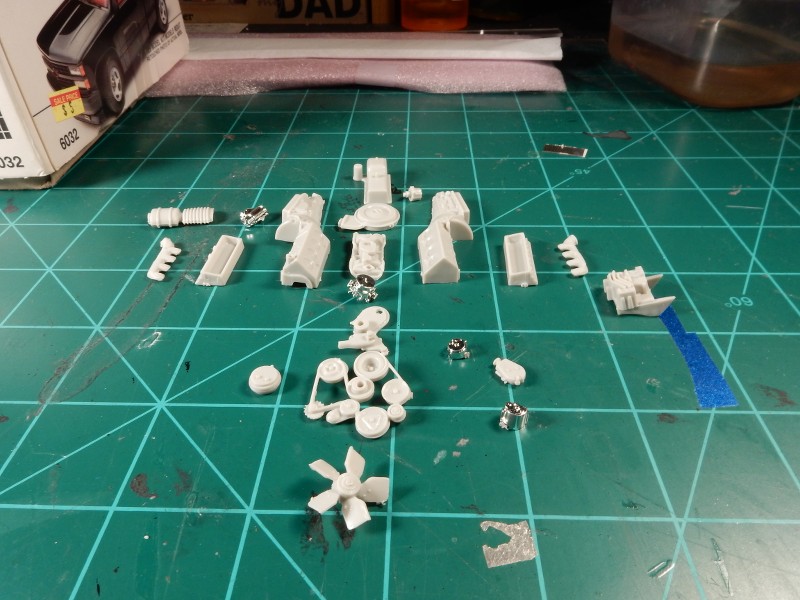 And here we are with the assembled base engine and transmission. Believe it or not....this IS some big time progress for me. I spend a lot of time in research and trying to get the details and colors down. 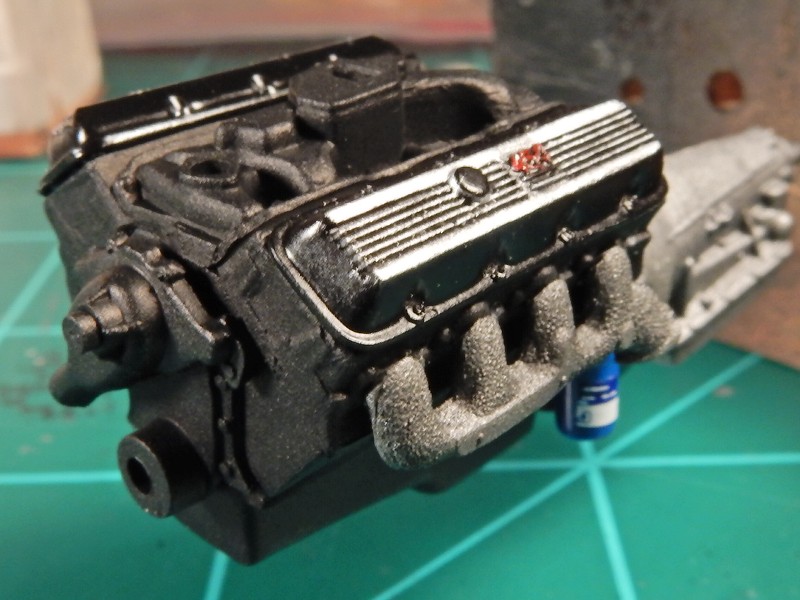 |
|
|
|
Post by jkflash on Dec 12, 2018 15:20:01 GMT -7
Looks good. I personally love muscle trucks such as the 454 SS, Ford Lightning, and the one that started it all... the Dodge Dude. HP numbers are low compared to what we have today (I am still amazed by these 4 and 6 cylinder engines getting around 300hp) but back in 1991 that was probably respectable. Keep up the good work!
|
|
|
|
Post by mustang1989 on Dec 12, 2018 15:27:21 GMT -7
Looks good. I personally love muscle trucks such as the 454 SS, Ford Lightning, and the one that started it all... the Dodge Dude. HP numbers are low compared to what we have today (I am still amazed by these 4 and 6 cylinder engines getting around 300hp) but back in 1991 that was probably respectable. Keep up the good work! Thanks bud. I've always liked all the muscle trucks from back in that era. Typhoons and Cyclones top that list as well for me.  |
|
|
|
Post by jkflash on Dec 12, 2018 17:07:29 GMT -7
I love a Syclone or Typhoon. I built Revells Syclone about a year ago. I plan on finding another kit and trying it again. I also have both 1st and 2nd gen Lightning.
|
|
|
|
Post by mustang1989 on Dec 15, 2018 10:22:07 GMT -7
I saw the first gen Lightning yesterday at HL and was tempted to pick it up but remembered that I wasn’t there to shop for myself! Lol
|
|
|
|
Post by mustang1989 on Dec 20, 2018 8:29:41 GMT -7
Ok folks. I've been on and off at the bench for the last few months so progress has been pretty thin as of late. The bench time will become less frequent during the month of January due to my sons FFA show for a week in mid January. It's gonna be a crazy week with lots of preparation for the show in the days before it so I'll be trying to get what I can in on this bad boy before that.
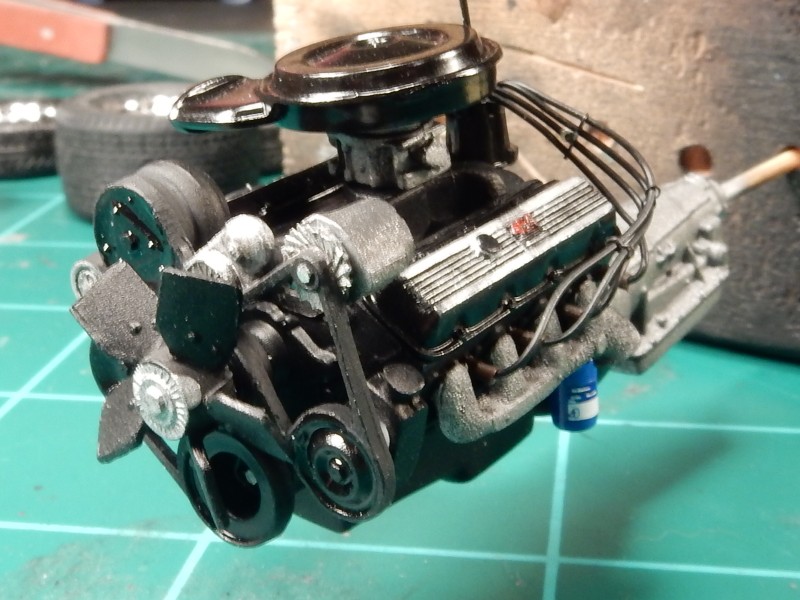
As for now I've got more done on the engine. The air cleaner is merely resting on top of the throttle body in this picture. I be lowering it somewhat as it sits way too high. I'll also be adding some fuel lines to the back of the throttle body, some throttle linkage and will be installing an ignition coil. For such a detailed engine I'm not sure why that part wasn't included in the kit.
|
|
|
|
Post by mustang1989 on Dec 20, 2018 18:27:58 GMT -7
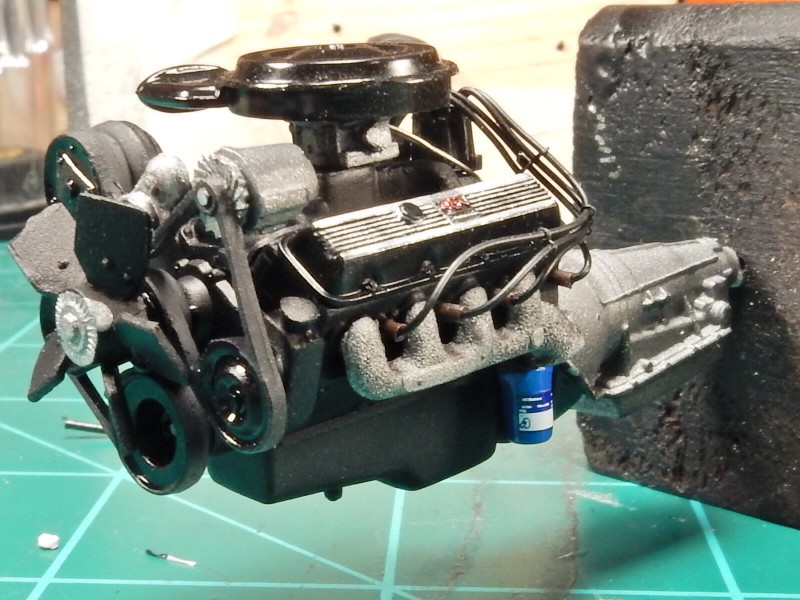
I did a few adjustments to this thing today. I put a little droop in the ignition wires just behind the cylinder heads as they just didn't look right and that air cleaner was waaaaaaaaaaaaaaaaaaaaay too high. I shaved some off of the bottom of the air cleaner and installed at the proper height. I also added an ignition coil and some fuel delivery lines. I was going to add some throttle linkage but everything I had was incorrect and it's much to intricate of detail to scratch build and get to look right so I left that part alone. There'll be an intake duct attaching at the air cleaner inlet and mounting on passengers side inner fenderwell later after the engine gets installed into the truck.
Finished 454:

|
|
|
|
Post by sharp on Dec 24, 2018 7:34:40 GMT -7
Great job Joe!!! This engine looks awesome man!!! and those plug wires look like the real thing.
|
|
|
|
Post by mustang1989 on Dec 25, 2018 4:22:50 GMT -7
Thanks Mike!! I just saw something in one of the photos up there that I need to fix. Looks like some of the Aluminum paint bled back onto the side of the fan clutch area a little. OOPS!!!
|
|
|
|
Post by mustang1989 on Dec 29, 2018 10:49:23 GMT -7
I've been working on the chassis as time allows for the last couple of weeks. Having acquired this kit on Ebay, it was missing one of the front molded coil springs. After looking at the one remaining spring and noting how horrible it looked, I thought it best to up the ante a little bit and make it a little bit more realistic looking. I opted for a set of steel coils that I had in the parts bin. Other than that it has been a rather labor intense seam and injector pin mark clean up. I shot almost all of the chassis parts in a coat of semi gloss black lacquer followed up by a thin shot of semi gloss acrylic paint which resulted in a more life like color to me. Not completed by any means but I thought I'd show a shot of progress to let you all know that I am in fact alive, well and building.
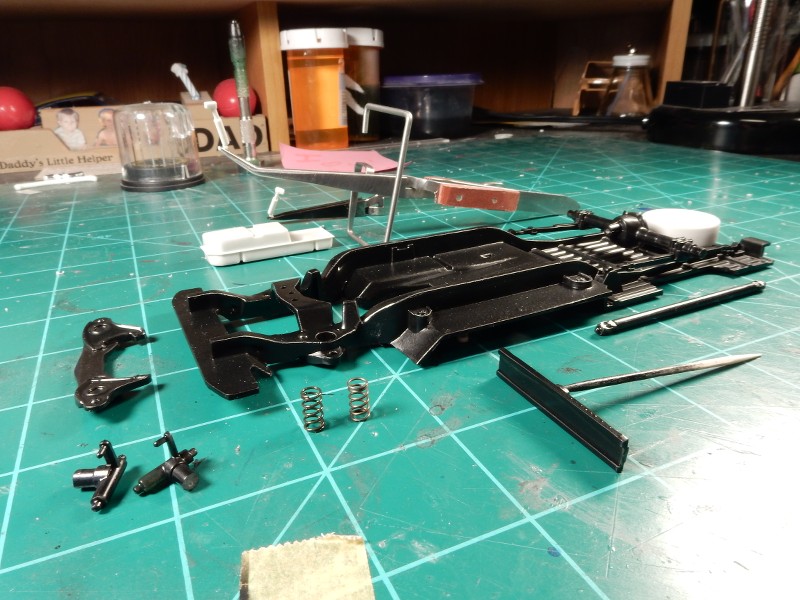
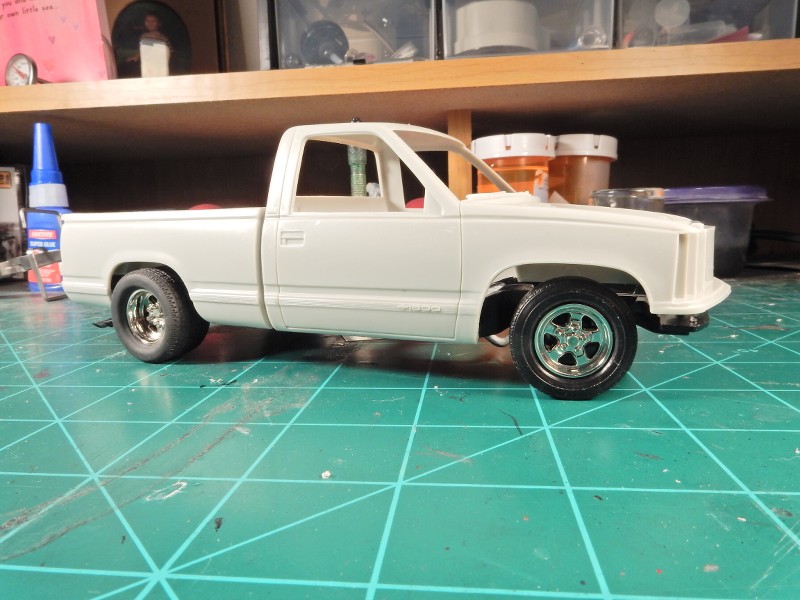
and for all of you who are curious....this will be my only modification to this build. I have too much love for this truck in stock form to do anything else to it. Still have some clean up left on the rear tires to get totally rid of the raised white lettering and then matching both sets of tires up color wise but here's what we're going with.
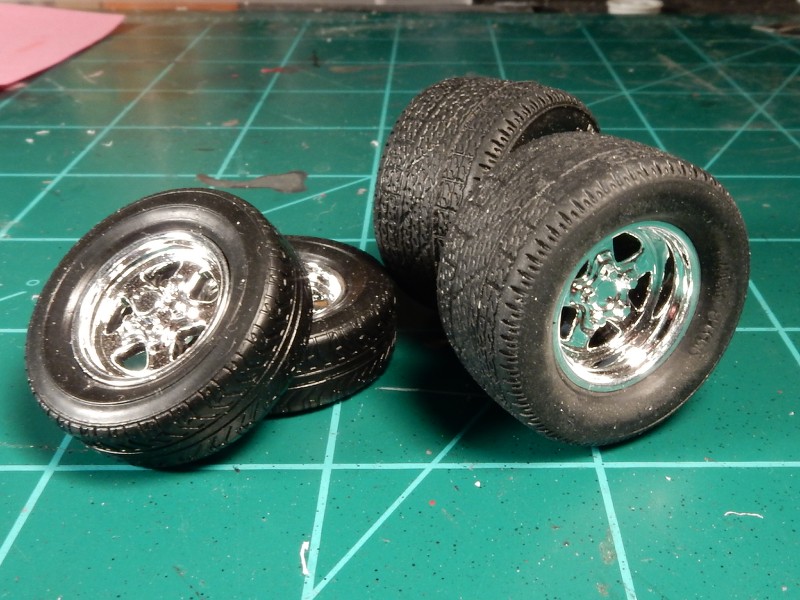
|
|
|
|
Post by sharp on Dec 29, 2018 17:09:05 GMT -7
This is looking great Joe!! those springs are gonna add some nice detail to the model for sure.
|
|
|
|
Post by Grandpabeast on Dec 30, 2018 3:21:36 GMT -7
Looking great ! Rims and tires will be a nice touch to the detailing you have done !
|
|
|
|
Post by kpnuts on Jan 2, 2019 9:45:23 GMT -7
That engine looks great Joe, nice progress
|
|
|
|
Post by mustang1989 on Jan 3, 2019 10:43:00 GMT -7
Thanks fellas!
Chassis is now complete. I painted it all different shades and textures of black with some of the highlights/ raised areas brought out with a very subtle touch of silver lead pencil. The exhaust, even though it's hard to make out in the photos, was one of the hardest paint wise I've had to do yet. For starters it was LACED with seam lines down both sides of the exhaust pipes, converters and mufflers so I first had to remove all of that. I black based the complete exhaust system and shot it all with a coat of Metalizing Aluminum through an airbrush. Next I drilled out both tail pipe ends. After that I lightly coated both converters with a coat of Tamiya Titanium gold and after that dried a light dry brushing of Tamiya Burnt Blue powder from their engine weathering kit. Both mufflers got a treatment of Matte Aluminum Bare Metal Foil for an added effect. The fuel tank was also flat black based and shot with a very light coat of Alclad Polished Aluminum. After that dried I dry brushed a light coat of ground up black pastel onto it to dull it down.
For the front suspension I did make the front wheels steerable as I've always wanted a model with posable front wheels. It was a lot easier to do with this kit than it has been with some of the builds that I've done. The ones in the past and really delicate and finicky parts or they had no option for steering at all. As a matter of fact this whole kit has been a true breath of fresh air in comparison to some of the older crap Revell kits that I've built where I had to do a TON of work just to get them to look even half decent.

|
|
|
|
Post by mustang1989 on Jan 9, 2019 13:01:05 GMT -7
I still have to move the rear tires inwards a little but I've just about got the wheel/ tire and stance set up where I want it. The wheel and tire fit was a little bit of a trick for the rear wheels but I managed to get it to work alright. I coated all wheels with Tamiya Smoke (X-19) to get rid of the toy chrome look. The chassis isn't adhered to the body yet which will pull the body down to set a better stance but you get the idea anyways.
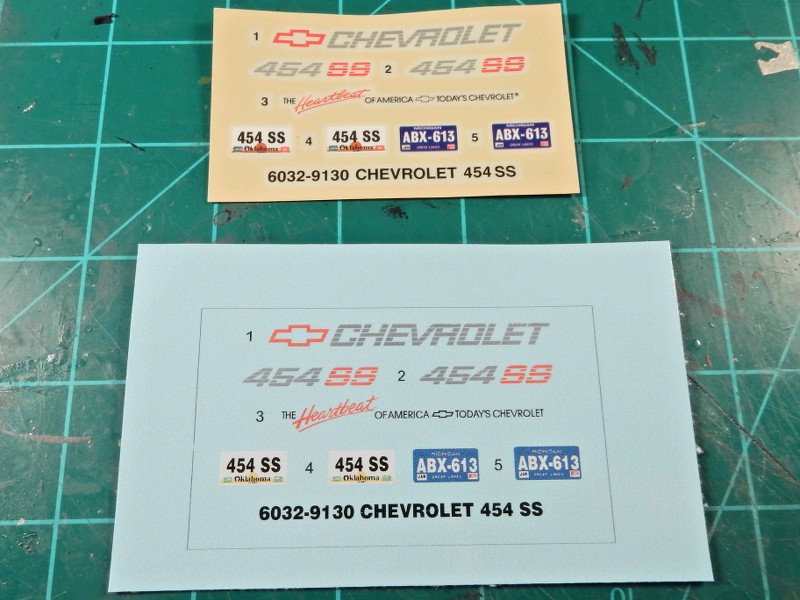
I also received my re-mastered decals from Thomas at Speedway Decals.
|
|
|
|
Post by sharp on Jan 24, 2019 18:08:42 GMT -7
Looking good buddy!!!
|
|
|
|
Post by mustang1989 on Jan 24, 2019 19:03:25 GMT -7
Thanks Mike. Man that's weird....two posts. Just took care of the second one. I'm probably going to finish this truck up and I'm going to revert to an aircraft build. Gotta finish one up from 4 years ago before I got into automotive modeling.  |
|
|
|
Post by mustang1989 on Jan 28, 2019 15:25:45 GMT -7
I had initially primed the interior pieces to include the tub. I was looking at it even with the ejector pin marks on the floor and thinking to myself, "Yeah.....that's gonna......no....no it aint gonna work!!" The ejector pin mark, even though it's in a terrible place I can actually deal with. More on that in a minute. That chintzy brake and accelerator pedal just isn't gonna do at all.
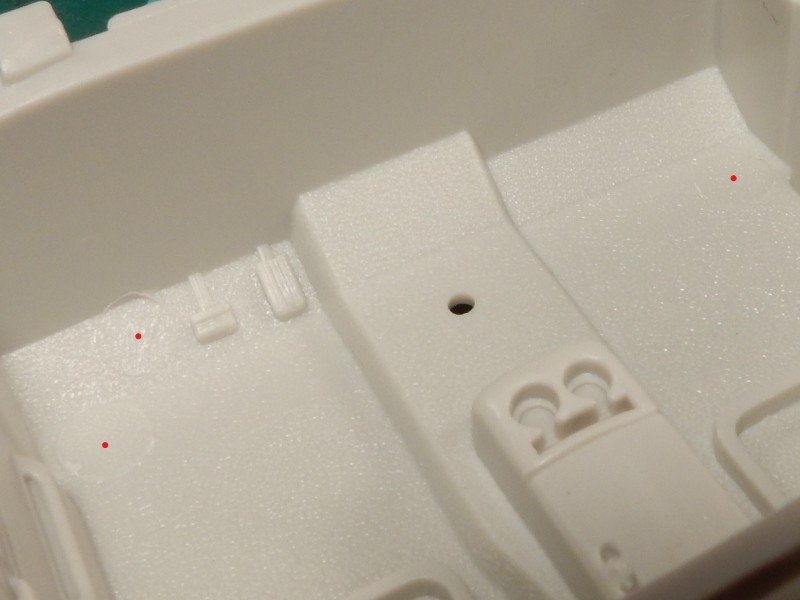
So....I put my thinkin' cap on..
aaaaaand I found another floorboard from a parts kit that I've got in the stash and cut the whole section out of this floor board. Then I cut a section out from the parts donor.

Then the replacement piece was glued into place:
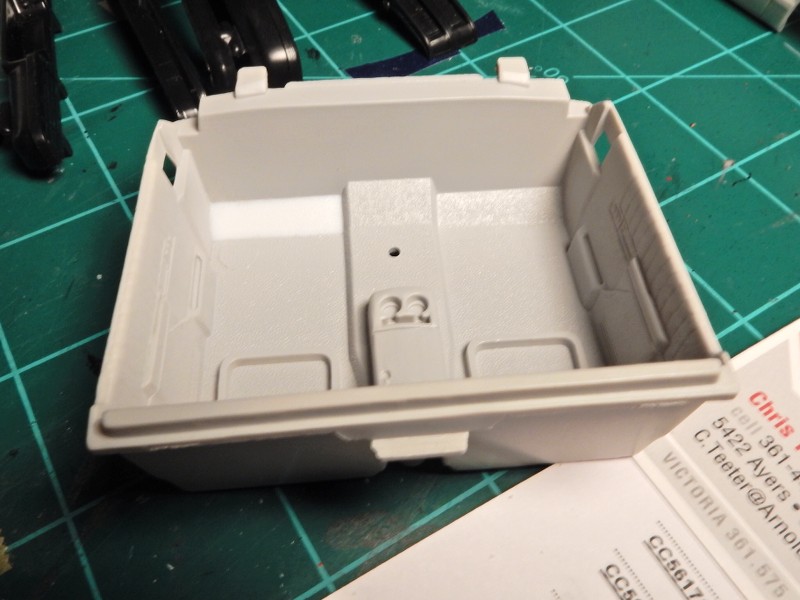
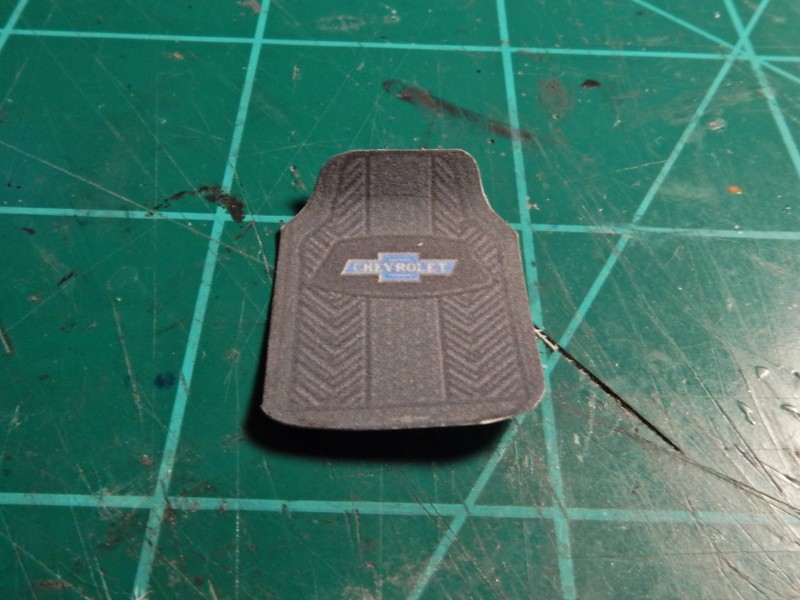
We'll be using some PE pedals to have a little more true to scale and true to references look. Now to address those disgusting ejector pin marks. Those...…..will be covered up by these floor mats that I acquired which just came in the mail a couple of days ago. Those...…..will be covered up by these floor mats that I acquired which just came in the mail a couple of days ago.
|
|
Deleted
Registered: Nov 23, 2024 21:38:01 GMT -7
Posts: 0
|
Post by Deleted on Jan 29, 2019 17:57:41 GMT -7
Sweet! I just wish there were some skinnier matches for those fat Goodyears on the rear (I've got a few sets of those myself).
|
|
|
|
Post by mustang1989 on Jan 30, 2019 10:56:26 GMT -7
I've got plenty of matches for those tires but was afraid of going too skinny on a truck. 
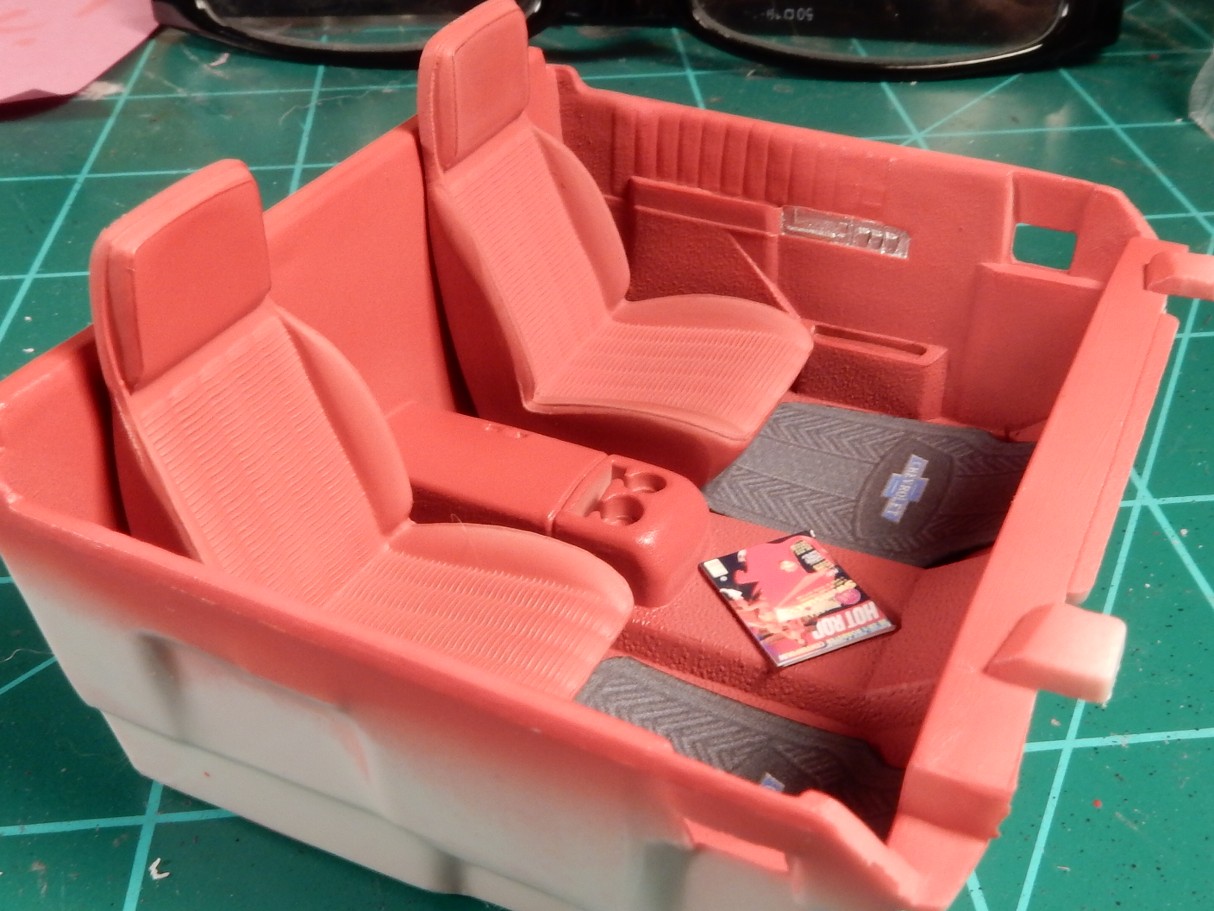
This interior is long from being done so I'm just posting this to post some progress. I've been working on the color tones and surface textures with the differences in the seat fabric, carpet and on the door panels by using different colored pastels. You can see the contrasting colors on the seat between the weaved and the smooth sections of the drivers seat. That seat will directly contrast the passengers side seat which hasn't been touched up yet. I've got the door handle/ switch bezel painted but still have to fill in the details on those and then get the foot pedals taken care of.
Progress so far:
|
|
|
|
Post by mustang1989 on Feb 1, 2019 5:51:07 GMT -7
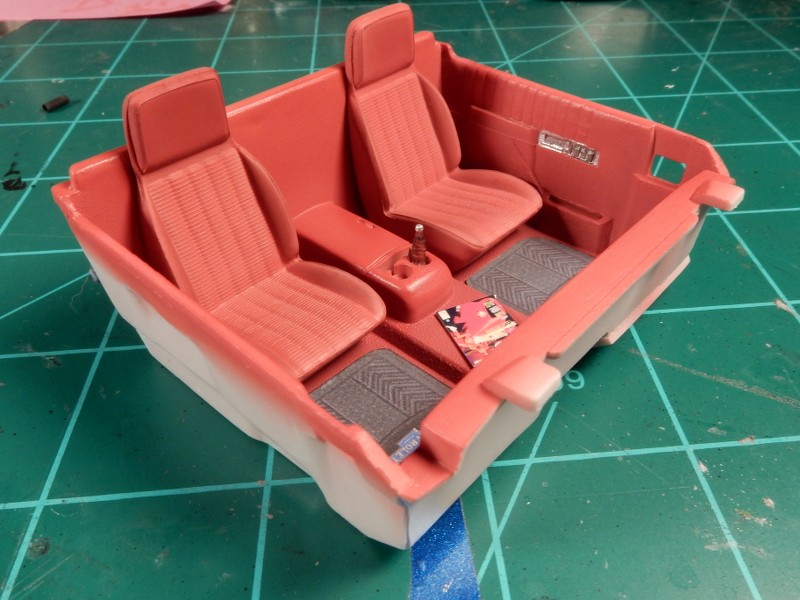
Ok gang. I've got the interior tub pretty much done except for the foot pedals. I really like this photo as it shows the color contrast on the seats very well. I finished up the passengers seat this morning with the color contrast. I left the pleated part of the seat the original color that I painted it and used a mixture of red with a little black ground up pastel and dry brushed it onto smooth parts of the seat to slightly darken the color tone for a subtle yet highly noticeable contrast. I was surprised with the results. Everything is adhered into place. The door handle/ switch bezels and all details have been painted here and I thought I'd add a Coke to the cup holder. I mean....why not? I'm smilin' so why not have a Coke to go with it?
|
|
|
|
Post by kpnuts on Feb 4, 2019 11:44:05 GMT -7
That interior looks sumptuous.
|
|
|
|
Post by mustang1989 on Feb 4, 2019 15:25:13 GMT -7
That interior looks sumptuous. Thanks Ken.
After 4 days of painting and detailing I've got the dash finished. Lots of masking and painting tonal variations and colors involved but I managed to get it done. Next up...….steering column detailing.

|
|
|
|
Post by kpnuts on Feb 4, 2019 23:28:50 GMT -7
Superb attention to the details.
|
|
|
|
Post by Grandpabeast on Feb 5, 2019 3:44:42 GMT -7
Man I am just lovin’ watching this come together! It’s a bad truck so far !!! Great job
|
|
|
|
Post by mustang1989 on Feb 6, 2019 8:24:11 GMT -7
Thanks Ken and Dave.
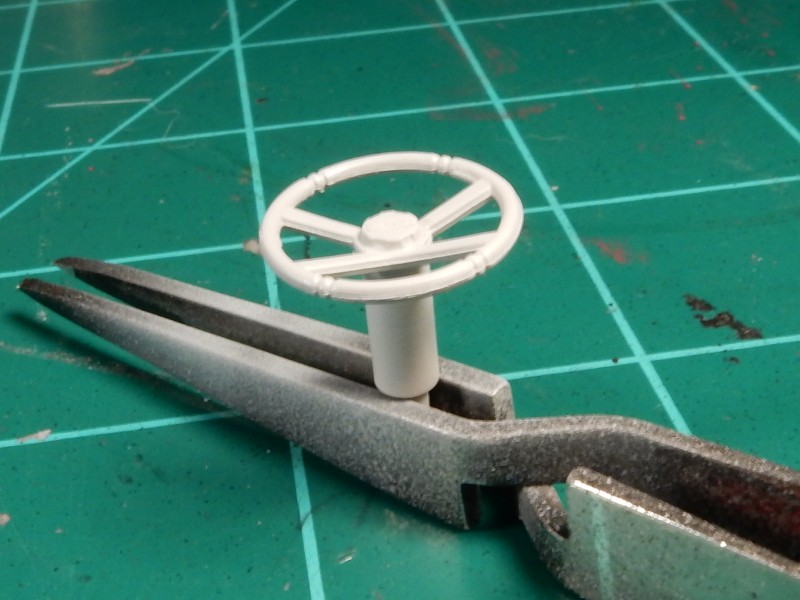
I just couldn't get over the OOB steering column/ wheel. No turn signal lever, no column tilt lever and no shifter lever???!!! Hell at least put a shifter lever on it. Will be adding all these items plus an ignition switch plus doing a whole lot of seam/ mold line clean up.
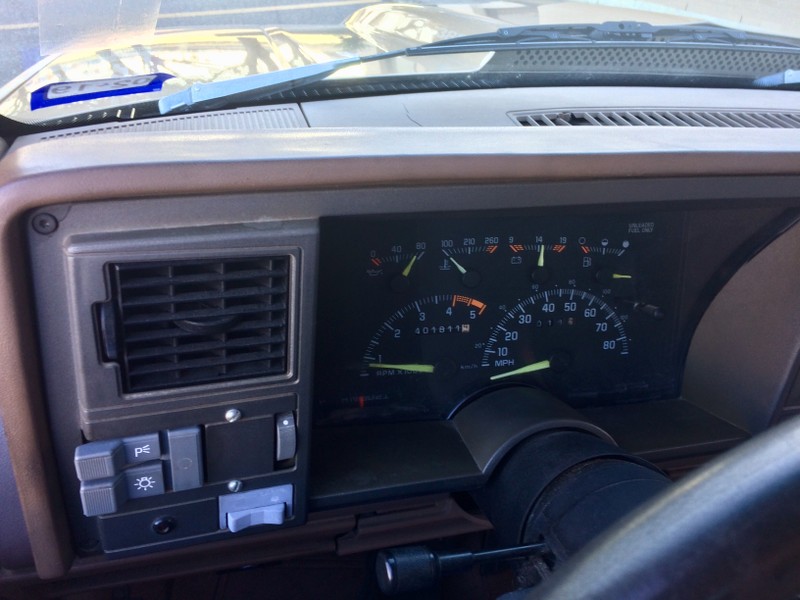
A couple of reference photos from my truck to show the various color tones and detail colors on and around the IP area.

Then the cluster itself....and yes....the odometer is correct at 401,811 miles.
And ummm…..before anybody asks about the tachometer....that ol' truck of mine can back that up.
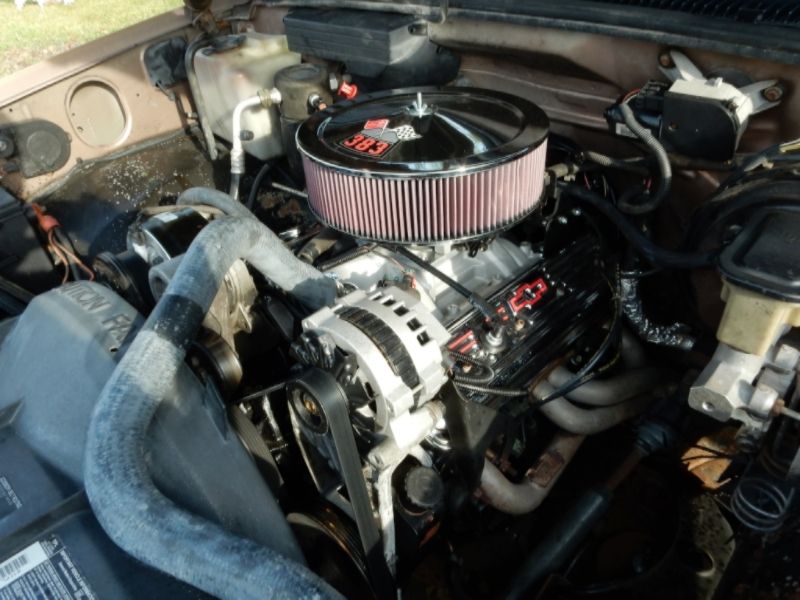
I removed the tired 160hp 350 V-8 and replaced it with a 400hp 383 Stroker late last year with a newly rebuilt 4L60E with a shift kit and a 2000 rpm stall converter. I just got through replacing the 3.42 gears with a set of 3.90's and installed a locker unit while I was back there. This thing is fun to say the least. 
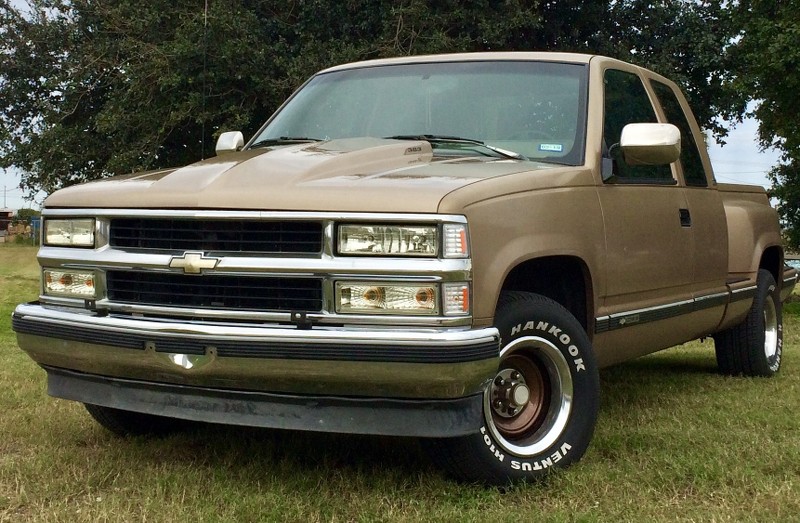
and a shot of the rest of the truck:
|
|
|
|
Post by mustang1989 on Feb 7, 2019 2:53:46 GMT -7
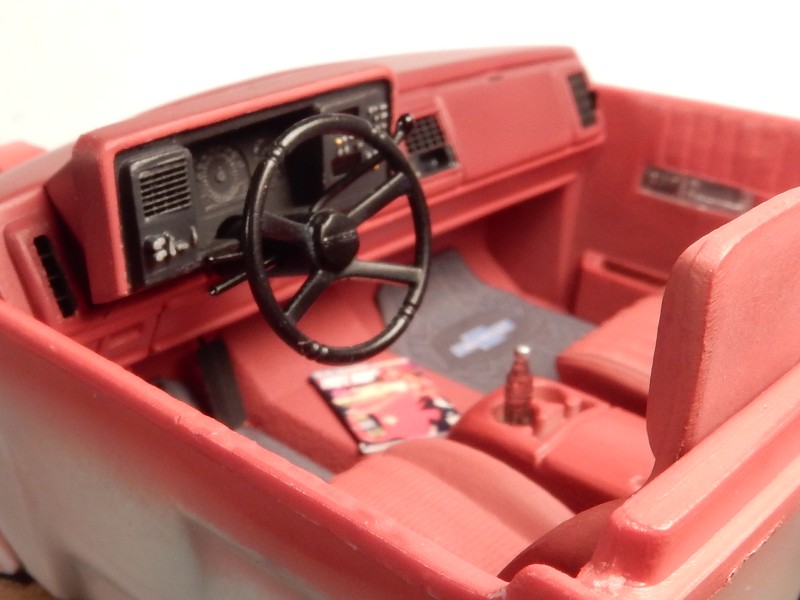
Steering column installed with the scratch built gear shift lever, turn signal/ multifunction switch and tilt lever. I also managed to put an ignition switch as well as the ignition key and door lock key on a key ring. The ignition key was then inserted into the switch and glued into place.
There.....that's more like it:

|
|
|
|
Post by kpnuts on Feb 7, 2019 14:51:32 GMT -7
Incredible detail work.
|
|
|
|
Post by mustang1989 on Feb 8, 2019 7:59:24 GMT -7
Thanks Ken. I really need to tune back into that ship build that you've been doing.
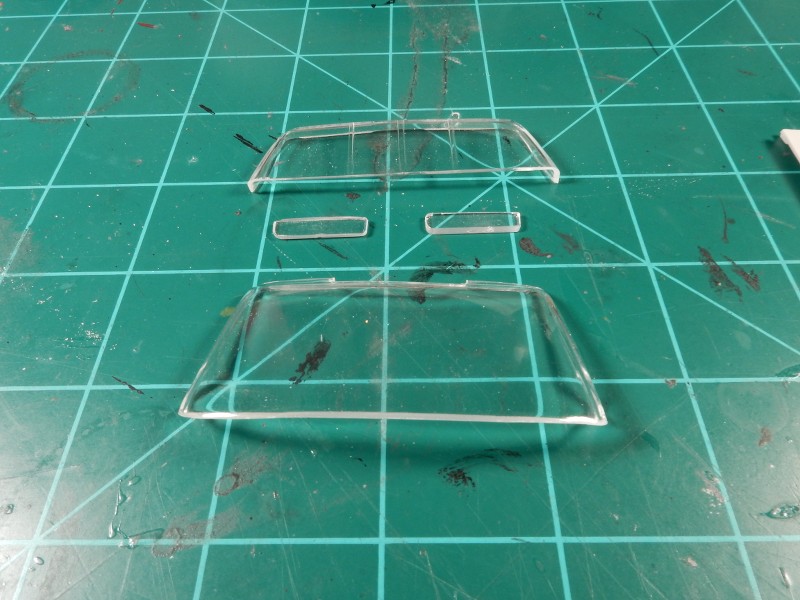
I simply could NOT fathom doing all that work to the interior and then using such a crappy OOB glass assy like this:

So ….. I cut it up into sections and cleaned the sections up some. I also fabricated some sun visors to help the realism out a tad:
|
|