|
|
Post by mustang1989 on Oct 18, 2020 6:06:18 GMT -7
You know fellas.....every once in a while you have to negotiate a TRUE hurdle in modeling. Sometimes it's paint, sometimes it's fit and sometimes it's things like I've been going through for the past week.....the assembly process. I've been building models for a long time and lemme tell ya.....nothing....I mean NOTHING has tested my patience and my abilities as a modeler as much as this aftermarket Liberty shifter from Futureattraction. To put it lightly...this shifter looks absolutely fantastic after it's all been put together. But therein lies the hurdle.....the assembly. At 26 pieces it is one of the most intricate PE items that I have taken on yet. I kid you not....I've got every bit of 7 hours wrapped up in this thing. I had half of it pieced together one morning after spending an hour + on it and the very next day upon picking it up to continue......it all came apart. Yeah....stuff like that and then being under the optivisor the whole time. Eyes hurt...got a headache...got pissed off......contemplated throwing stuff and I think I made up new curse words along the way. Feel free to contact me for the updated curse word list. I've still got to cut that one long pin off ( I'm leaving it in place to be able to work with it for shift rods install) and have just a little clean up left to go as far as glue smears but a little thinner and that'll go away. I felt a TRUE sense of accomplishment when I got up from the bench this morning and wanted to show that to you all. The Liberty Shifter: 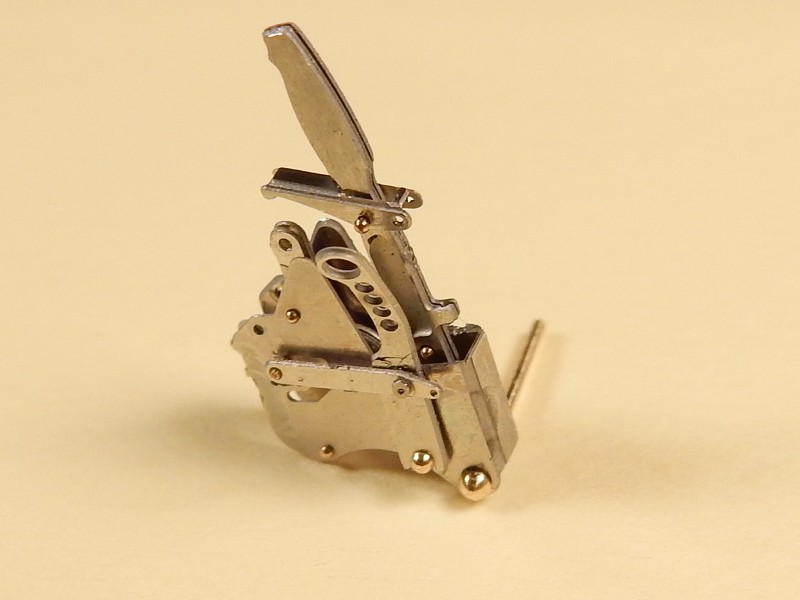 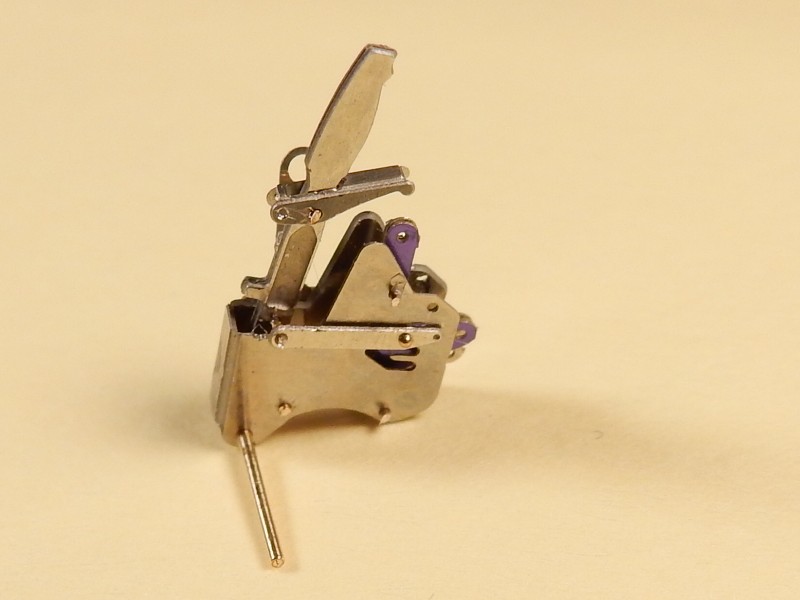 and just to give you an idea of the size of this thing: 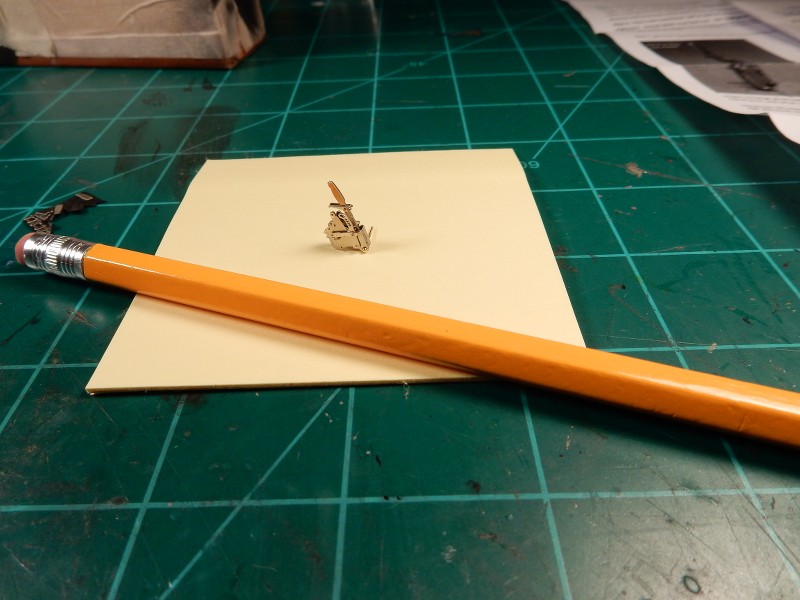 |
|
malcox477
Loyal Member
   Registered: May 21, 2019 16:19:37 GMT -7
Posts: 1,039
|
Post by malcox477 on Oct 20, 2020 0:35:35 GMT -7
That's an absolutely awesome aftermarket part, i haven't put it together yet, but will do that on a future build for sure, yours turns out amazing
|
|
|
|
Post by mustang1989 on Oct 21, 2020 10:23:37 GMT -7
That's an absolutely awesome aftermarket part, i haven't put it together yet, but will do that on a future build for sure, yours turns out amazing This thing does yield premium results that's for sure but man......patience....is KEY!!!! |
|
|
|
Post by mustang1989 on Oct 22, 2020 13:26:27 GMT -7
Here's where the interior stands now....all 115 pieces of it. 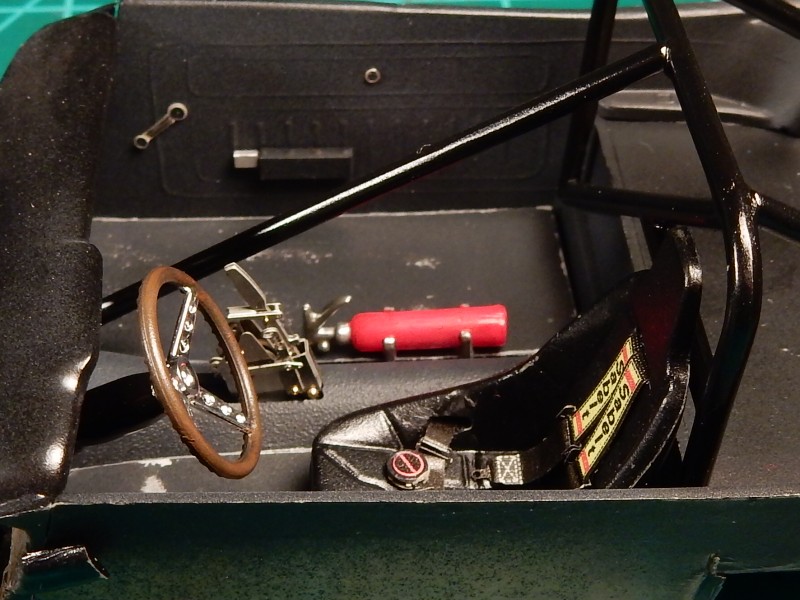 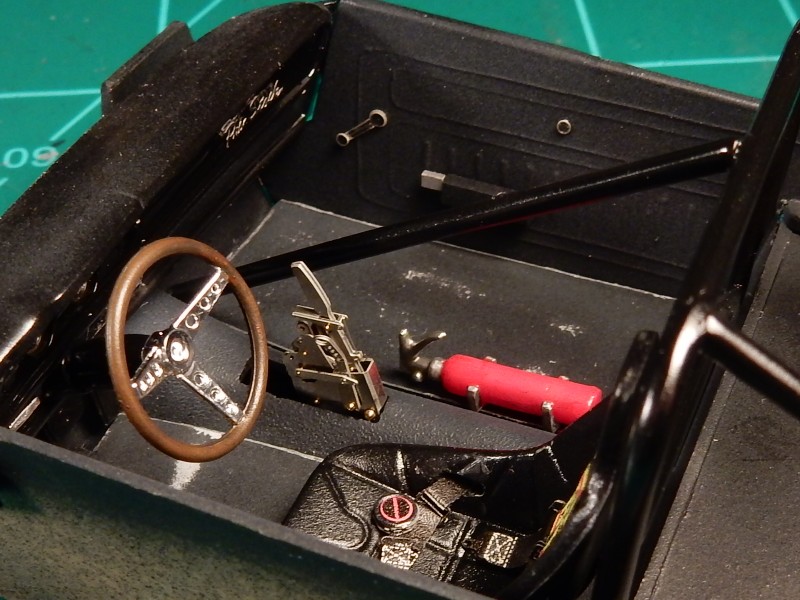 |
|
malcox477
Loyal Member
   Registered: May 21, 2019 16:19:37 GMT -7
Posts: 1,039
|
Post by malcox477 on Oct 23, 2020 5:08:40 GMT -7
Looks beautifull man, but if i whould be you, i add some electrical tape strips on top of the stinguisher tha me those brake looks like they are holding in place, plus a stinguisher decal, i think that will make it more realistic, looking forward to see more of this project man
|
|
|
|
Post by mustang1989 on Oct 23, 2020 8:06:23 GMT -7
Looks beautifull man, but if i whould be you, i add some electrical tape strips on top of the stinguisher tha me those brake looks like they are holding in place, plus a stinguisher decal, i think that will make it more realistic, looking forward to see more of this project man Thanks potna!! I'm actually still looking for a fire extinguisher decal in my spares. Will be looking into that electrical tape on the extinquisher for straps as well. |
|
malcox477
Loyal Member
   Registered: May 21, 2019 16:19:37 GMT -7
Posts: 1,039
|
Post by malcox477 on Oct 24, 2020 22:15:07 GMT -7
Looks beautifull man, but if i whould be you, i add some electrical tape strips on top of the stinguisher tha me those brake looks like they are holding in place, plus a stinguisher decal, i think that will make it more realistic, looking forward to see more of this project man Thanks potna!! I'm actually still looking for a fire extinguisher decal in my spares. Will be looking into that electrical tape on the extinquisher for straps as well. Sounds good, if you want send me a PM so i can send you some of those decals, i still have a bunch from slixx decals, they are high quality and i love them |
|
|
|
Post by mustang1989 on Oct 26, 2020 19:24:41 GMT -7
Thanks Marcos!!! I finally got her standing on her own. Rear tires will be going in a smidgen to give her the proper look but this is going to be the ride height. All this time I had to find a way to lock the front suspension ride height in and I finally was able to do this by drilling small holes in the front of the frame and installing locating pins. Worked like a charm: 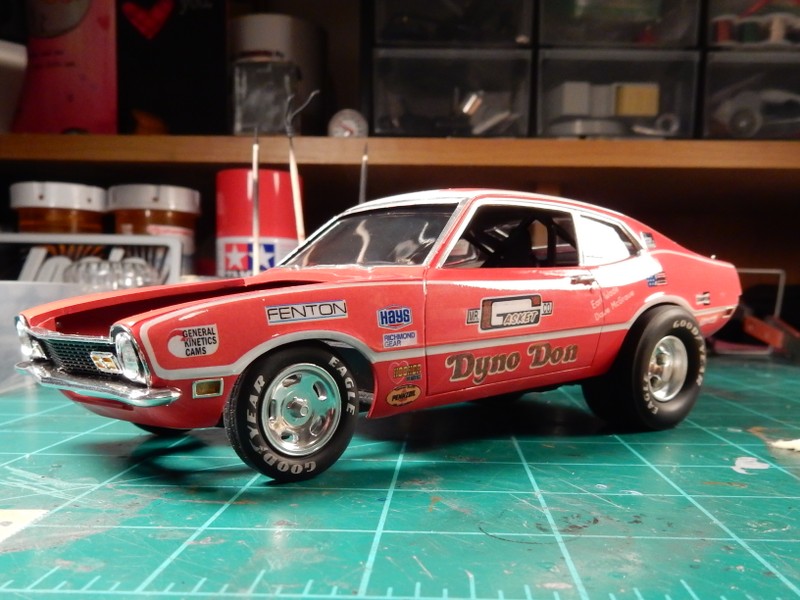 I worked a lot on the firewall this morning by modifying to work with the Mustang shock towers. I'll post progress of this on the next update. Meanwhile I also cut out the battery box/ pedestal on the R/H shock tower panel. Battery is located in the rear of the car so no battery box was needed here. Plus I needed all the room I could get with that big ass 427 in that engine bay. Before....  and after.... 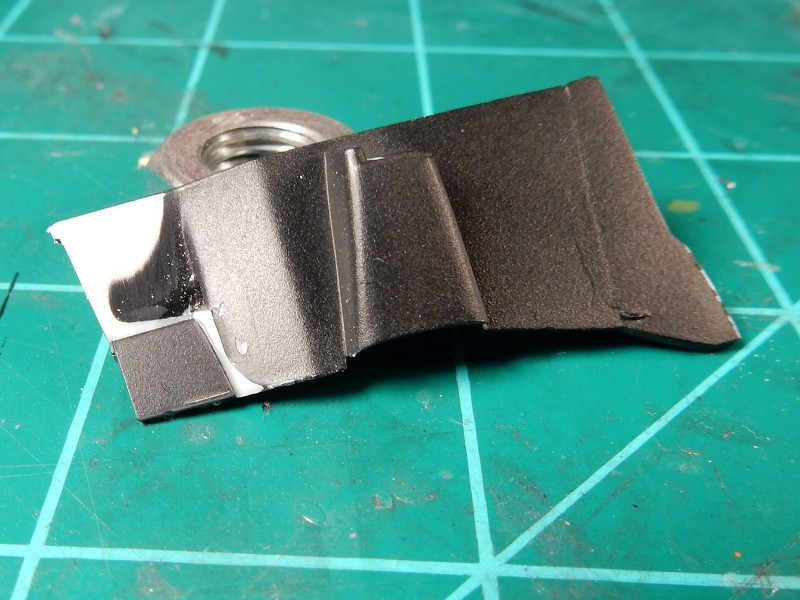 |
|
malcox477
Loyal Member
   Registered: May 21, 2019 16:19:37 GMT -7
Posts: 1,039
|
Post by malcox477 on Oct 27, 2020 20:54:42 GMT -7
You're welcome Joe, looking real good, love the stands now, and sometimes make the front suspensions look right is a real challenge, i like it a lot...
|
|
|
|
Post by Grandpabeast on Nov 9, 2020 14:11:57 GMT -7
Man that shifter looks like it would actually work !! this is looking great
|
|
|
|
Post by mustang1989 on Nov 10, 2020 14:21:53 GMT -7
You're welcome Joe, looking real good, love the stands now, and sometimes make the front suspensions look right is a real challenge, i like it a lot... Thanks Marcos!! |
|
|
|
Post by mustang1989 on Nov 10, 2020 14:30:00 GMT -7
Man that shifter looks like it would actually work !! this is looking great 'Preciate that Dave!! Ok......I'm finally back in action on this one. Of everything on this build that I've encountered and overcome it is this part here that has flabbergasted me the most. I had tried just about every idea in the book to get the inner fenderwells to look right and "work". Then....seemingly out of no where came this idea. Aluminum cans. I simply cut a section of soda can and shaped it to the plastic inner fenderwell and made a few adjustments. I have to move the shock tower just a shade to the rear of the engine bay to make this work so here's the plan moving forward. First off, I didn't have a Diet Coke can but I did have a Sprite offering. 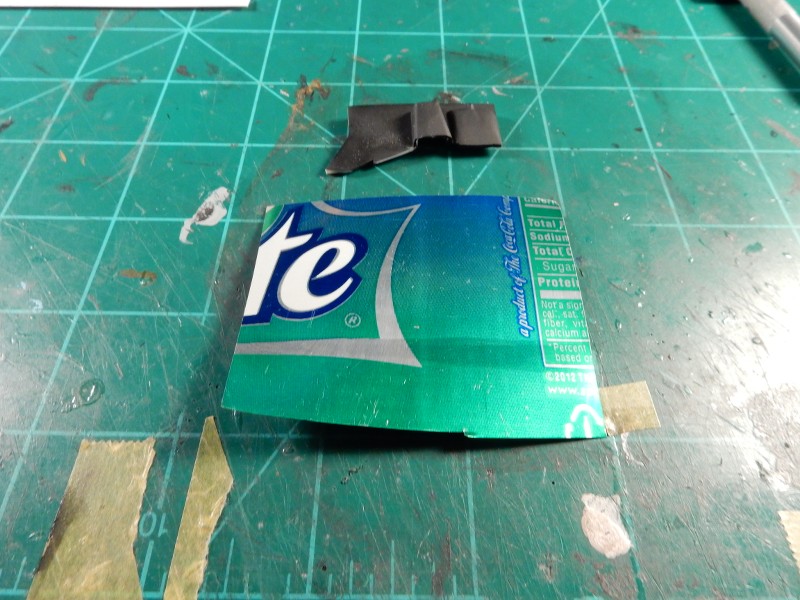 aaaaaaaaaaaaaaaaaand Presto!!! I've still gotta play around with cutting and trimming here and there to get it all to fit just right but you get the idea. Now I can cut the shock tower from the plastic piece and adhere it to the aluminum part in the correct place and I also get rid of that windshield washer bag that shouldn't be there. BONUS!! 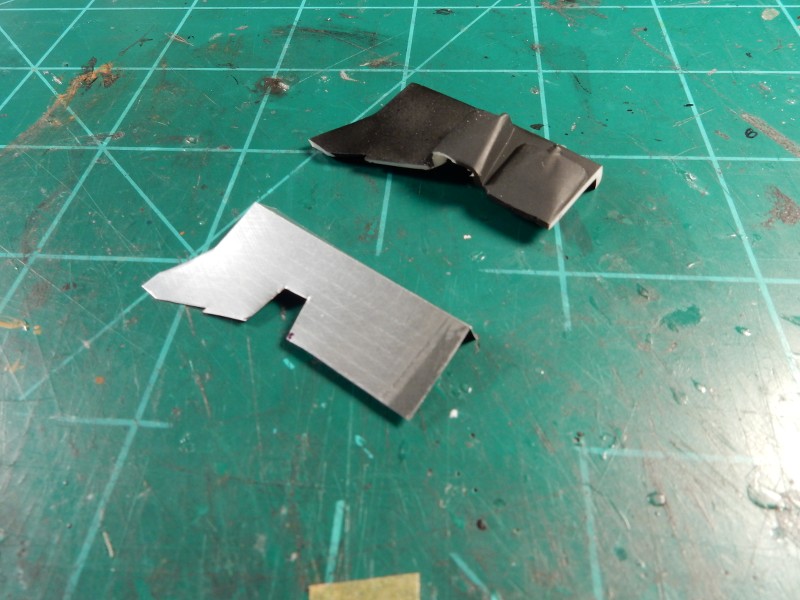 |
|
malcox477
Loyal Member
   Registered: May 21, 2019 16:19:37 GMT -7
Posts: 1,039
|
Post by malcox477 on Nov 10, 2020 21:33:19 GMT -7
NO DIET COKE, maaaaan, you need to put some stuff in the right order LOL, awesome work on the inner fender my friend
|
|
|
|
Post by mustang1989 on Nov 16, 2020 10:22:17 GMT -7
NO DIET COKE, maaaaan, you need to put some stuff in the right order LOL, awesome work on the inner fender my friend Thanks Marcos. lololol Sorry for the long absence again fellas. Even though I haven't been too active on forums I have indeed been at the bench. One weeks worth of fitting and scrapping 3....or is it 4?? fabricated inner fenderwells now and I've finally got it. I got the idea to put the base engine in the bay and it changed the whole complexion of things......ALOT. With the engine in place I get to see what's gonna work....and what aint. So with all that stuff being said I had to approach this with a whole new mindset and put an inner fender well in place with no V cut outs for the shock tower for added rigidity once fitted into place. Then I cut the shock tower from the original inner fenderwell and thinned it down enough to clear the rocker covers. This....is gonna work. After more than 6 hours at the bench enduring trial and error...I think I've got it.... Modified shock tower just in front of the radiator core support area. 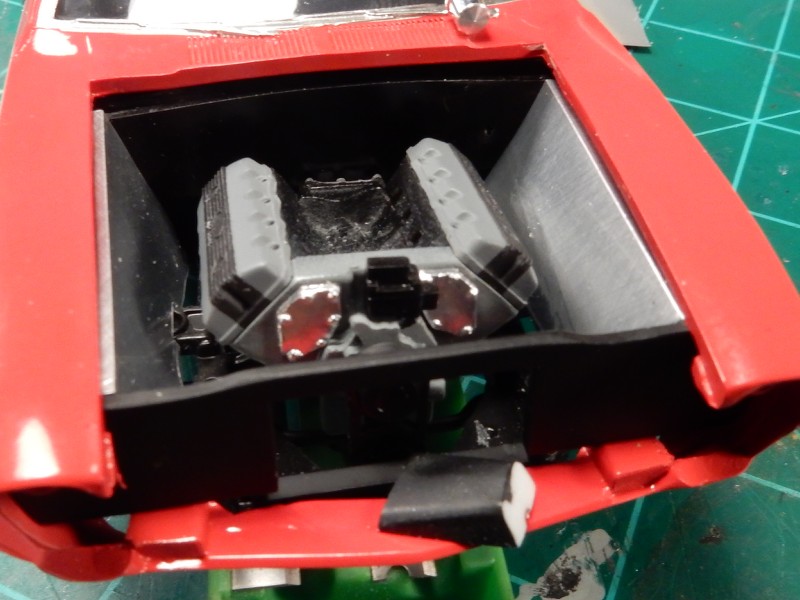 |
|
malcox477
Loyal Member
   Registered: May 21, 2019 16:19:37 GMT -7
Posts: 1,039
|
Post by malcox477 on Nov 17, 2020 1:41:08 GMT -7
Well Joe, i think that came out better then i thought, awesome work bro, looks like it belongs to that car, about the shock towers, i think now looks more clean in the area without the shock towers, looking forward for more updates...
|
|
|
|
Post by mustang1989 on Nov 17, 2020 19:16:41 GMT -7
Well Joe, i think that came out better then i thought, awesome work bro, looks like it belongs to that car, about the shock towers, i think now looks more clean in the area without the shock towers, looking forward for more updates... Thanks Marcos!! Progress is movin' right along on this one finally. Managed to thin the radiator out so the engine would fit nicely in the engine bay and re-apply the radiator cooling fins to the back of it after thinning. I also test fit the modified headers in place. Looks like this is going to work out very well as they fit great and exit in just the right place. 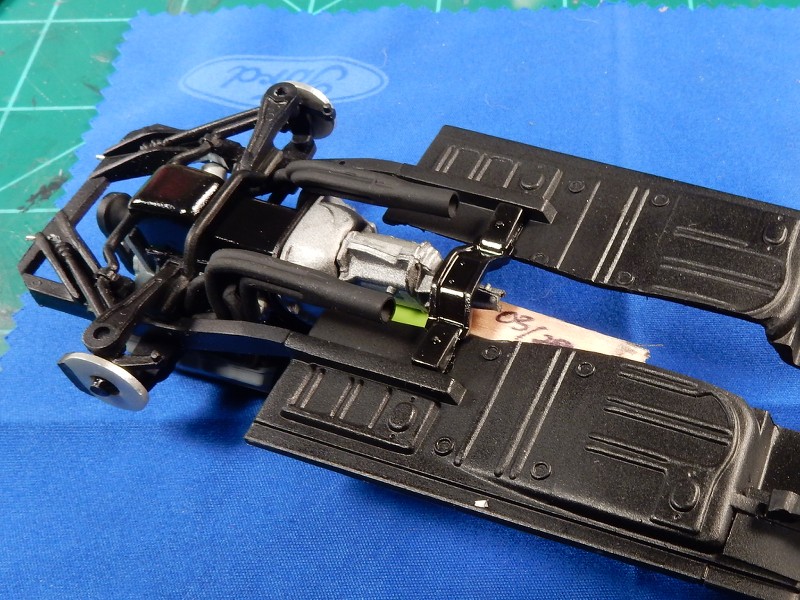 |
|
|
|
Post by mustang1989 on Nov 21, 2020 9:35:20 GMT -7
I managed to get the engine installed and the headers painted and attached. Added a small amount of blueing to the end of the exhaust outlets. Not much.....just enough for effect. I also painted and installed the driveshaft. About all that's left here is to fabricate some steering linkage and the bottom side will be done save for some scratch built wheelie bars. 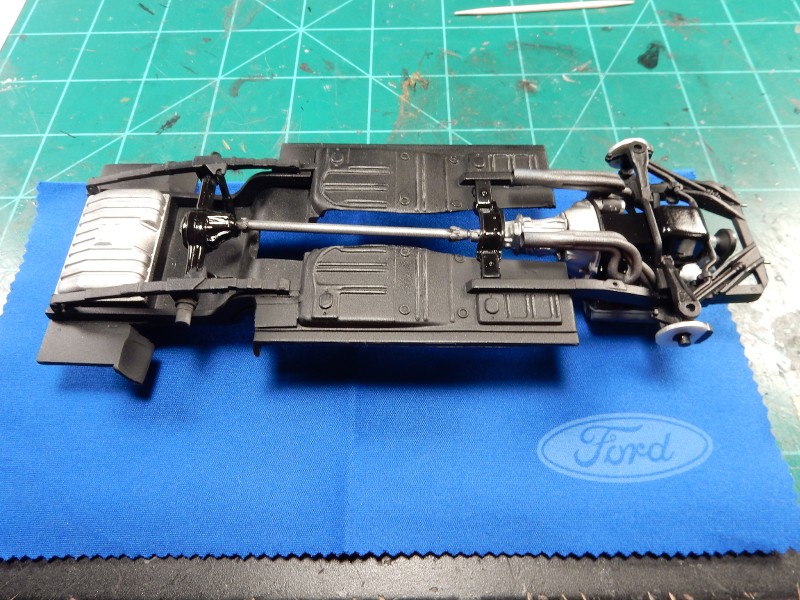 |
|
malcox477
Loyal Member
   Registered: May 21, 2019 16:19:37 GMT -7
Posts: 1,039
|
Post by malcox477 on Nov 21, 2020 21:35:27 GMT -7
More and more, looks great man, looking forward to see more updates
|
|
|
|
Post by mustang1989 on Dec 2, 2020 9:40:51 GMT -7
More and more, looks great man, looking forward to see more updates Thanks Marcos!! Well gang.....I'm back at it. At this point there was still some tweeking left to do with the spark plug wire "boots" in the way of shortening them. I chucked up several of these pins that I have in the drill and ground the ends against a file to reduce the diameter of the pin heads. 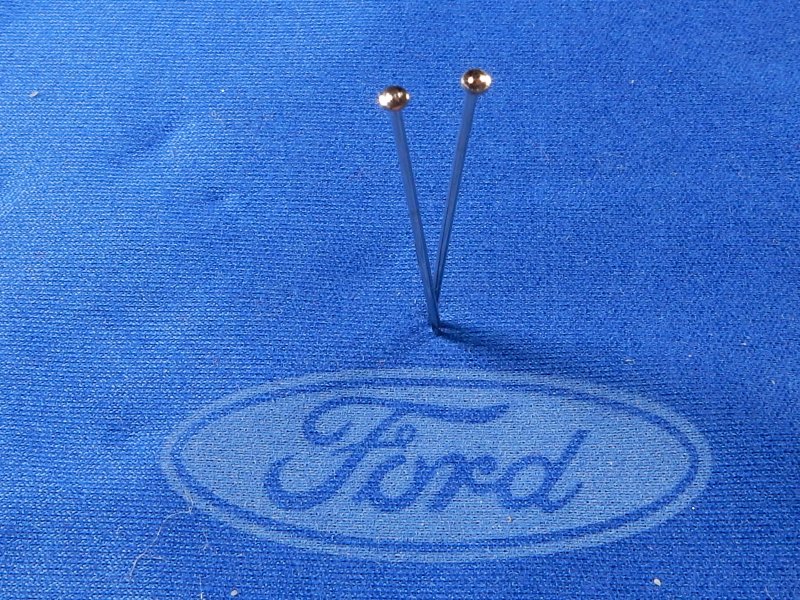 Then I cut all of them down to the same length: 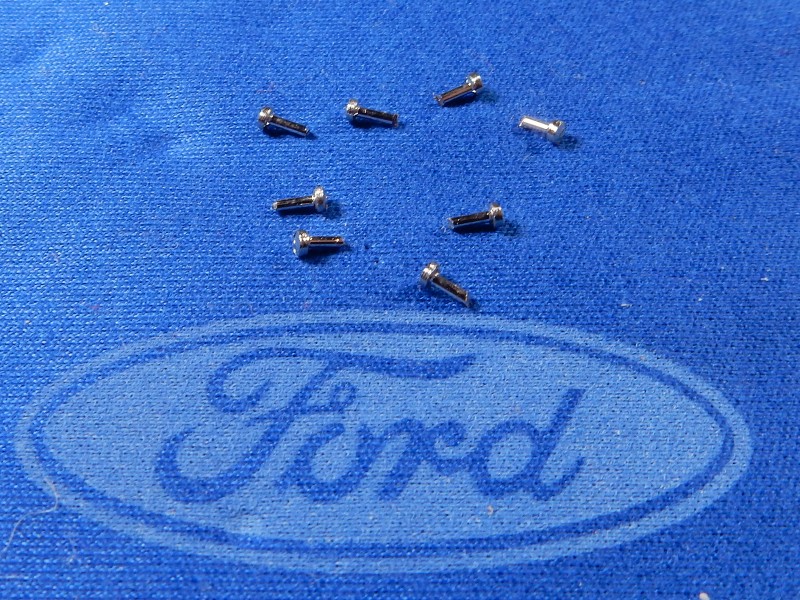 And here the plug wire boots test fitted into place. At this point they still needed shortened and painted black to be fully prepped for the wire install. (Part of what's been stalling this is waiting on the correct color of ignition wires to arrive in the mail which happened yesterday so forward we go) ... 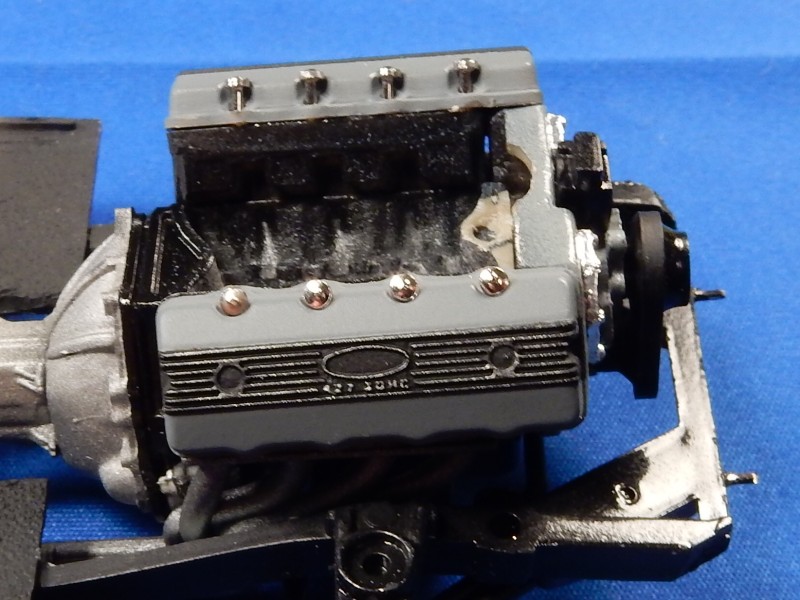 Here's with the ignition wires formed and installed. This is NOT what I was opting for because these wires should be red but the "spark plug wire" that I got sent was the scale size of a battery cable so I went for orange.  Here in this pic I just didn't like how the ignition transformer on the engine looked and it wasn't "correct" for the build so I removed it and went with a regular coil. I also dirtied up the ignition wires as well. 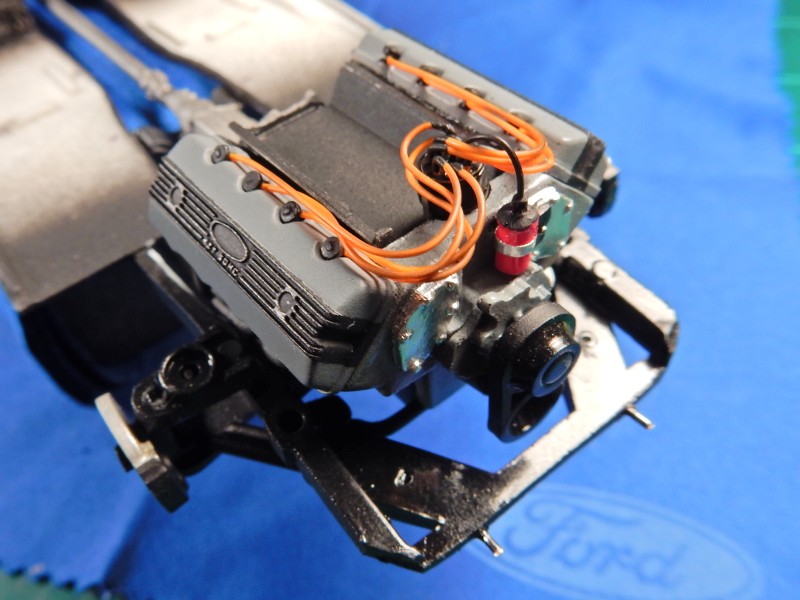 |
|
malcox477
Loyal Member
   Registered: May 21, 2019 16:19:37 GMT -7
Posts: 1,039
|
Post by malcox477 on Dec 2, 2020 21:20:26 GMT -7
Awesome idea with those pins Joe, that's something i can try one day for sure
|
|
|
|
Post by mustang1989 on Dec 3, 2020 14:22:46 GMT -7
Awesome idea with those pins Joe, that's something i can try one day for sure Thanks Marcos!! Been working on the fuel induction now. I started out with the intake runners and plenum. Shot with the unpainted carburetors from Futureattraction: 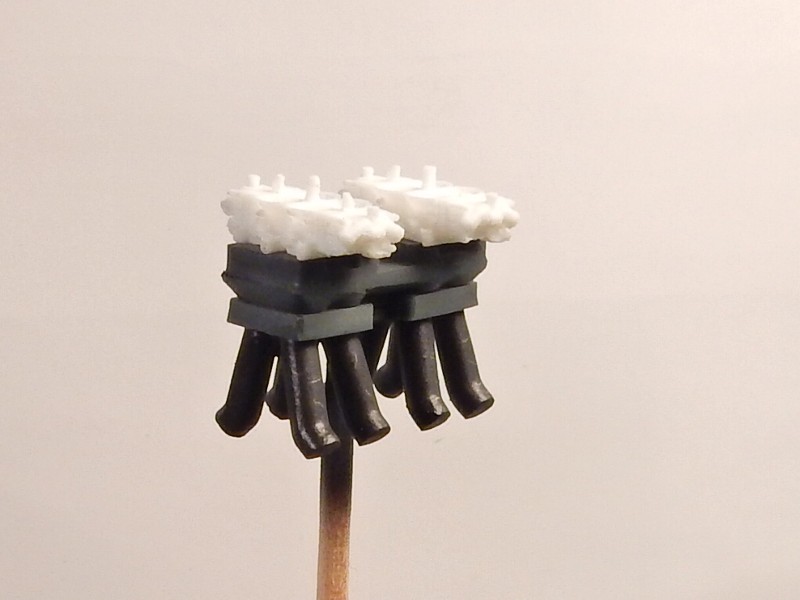 Then I shot a coat of Tamiya X-31 Titanium Gold on 'em, filled in the throttle bores with some flat black and assembled them 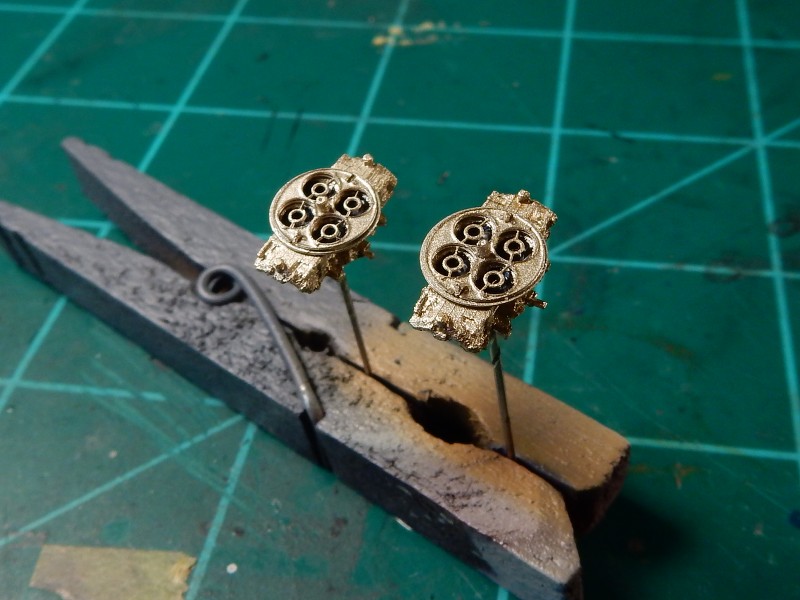 Then came a dark brown acrylic wash, allowed to dry and followed up with a dry brushing of ground up black pastel to flatten it all out and add some "age" to them. I took a comparative pic of both carbs. One on the left is with the wash and pastel treatment and the one on the right is without it. 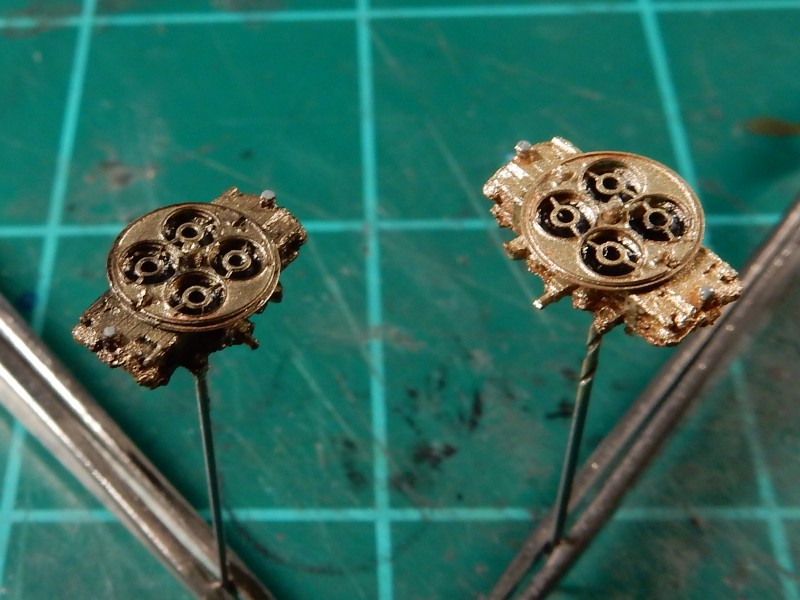 And with both carburetors painted and "weathered". Now.....it's time to add the details.  Once the fuel lines and the throttle levers got added I installed them both on top of the intake and test fit the whole assembly to the top of the manifold. The engine takes on a whole new appearance with everything now together.  |
|
|
|
Post by mustang1989 on Dec 4, 2020 7:59:14 GMT -7
Throttle linkage is around 90% complete. Still gotta put the lever from the firewall, throttle quadrant and the lever up to the carb linkage. 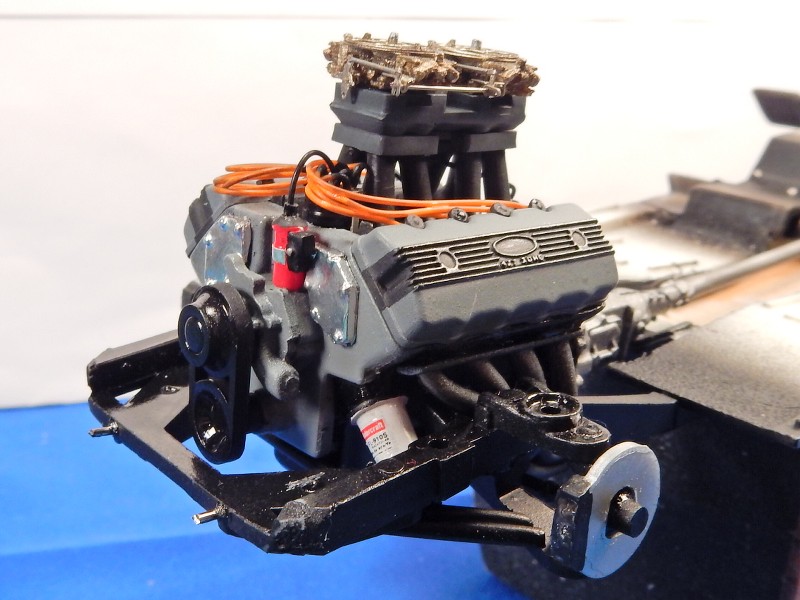 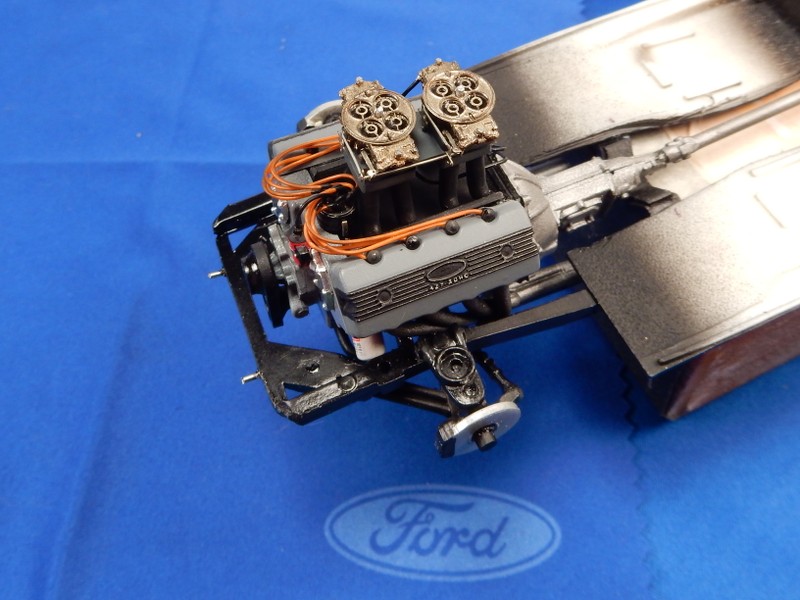 |
|
malcox477
Loyal Member
   Registered: May 21, 2019 16:19:37 GMT -7
Posts: 1,039
|
Post by malcox477 on Dec 6, 2020 0:22:05 GMT -7
Awesome scratch build work Joe
|
|
|
|
Post by mustang1989 on Dec 7, 2020 19:49:10 GMT -7
Awesome scratch build work Joe Thanks Marcos!! |
|
|
|
Post by mustang1989 on Dec 9, 2020 19:53:49 GMT -7
So far it looks like everything is going to work out. This is EXACTLY the look I was going for. Just gotta get the inner fender/ shock tower assemblies installed and then tweak that engine up just a tad in the back to make it look a little more normal and then we're headed homeward with this build. On the home stretch now. 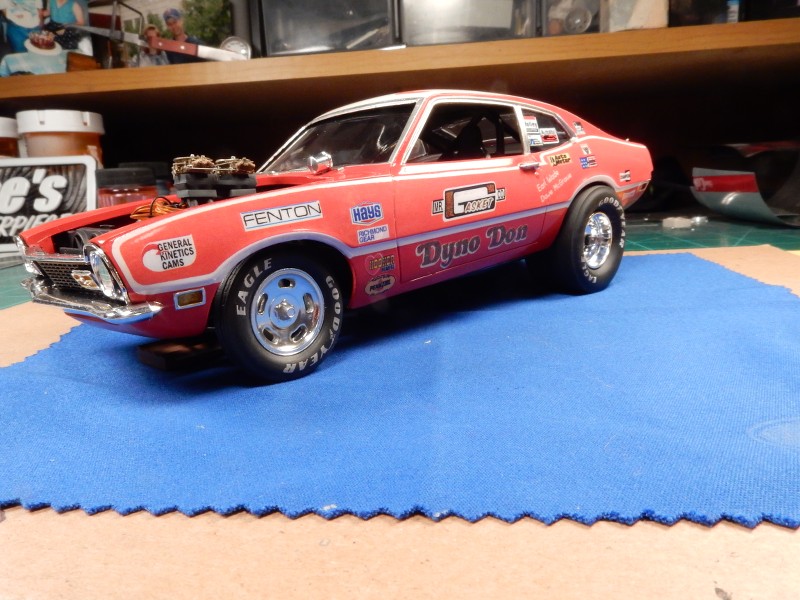 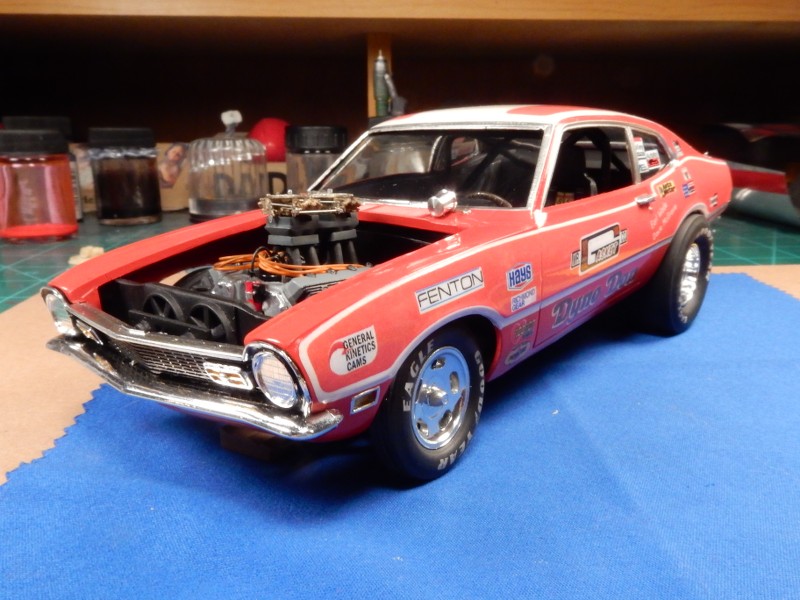 By the way. A big thanks goes out to Marcos for supplying me with a fire extinguisher decal to round out the interior with. You da man. 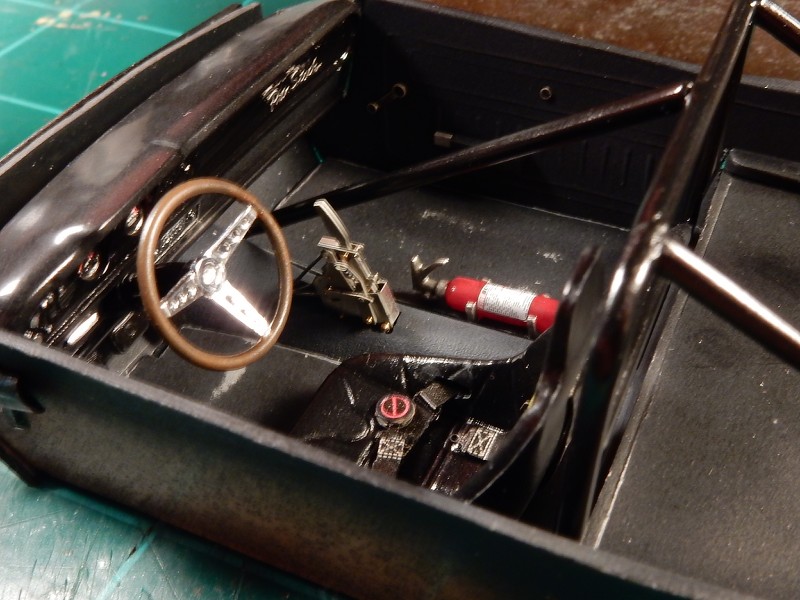 |
|
|
|
Post by mustang1989 on Dec 16, 2020 15:18:45 GMT -7
Just a little closer today but has taken alot of work to get this far. I had to redo the throttle linkage twice at the intake due to weird angles I had with the linkage set up. Got it all straightened out now. Also added a PE radiator cap for a little extra detail. I'm back to having to work with the hood just a tad to get it to close fully but it shouldn't be too big of a problem.  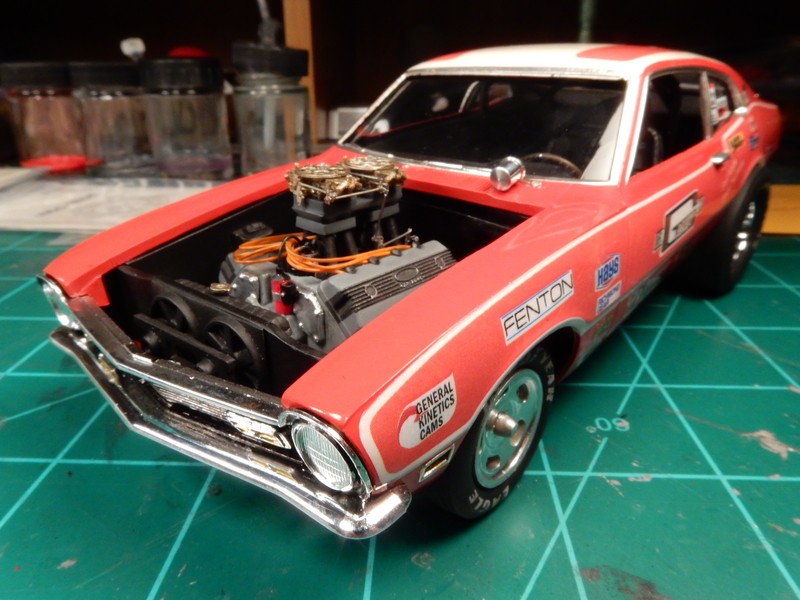 |
|
|
|
Post by mustang1989 on Dec 20, 2020 5:44:48 GMT -7
This puppy is now in the Finished Projects Section folks. Thank you guys for all the supportive and encouraging comments along the way. It's been a ride for sure over the past year.
|
|