|
|
Post by mustang1989 on Feb 25, 2020 11:38:39 GMT -7
I haven't done a race car in I don't know how long but I've had this Jo-Han Maverick in my stash for a couple of years and wanted to build it but didn't know what theme I was going with until I saw Don Nicholson's ride. I knew right away that I HAD to build it....and so.....I'll give this my best shot. The kit (I bought this kit a couple of years back for $50......you don't want to know what it goes for these days....WOW!!) 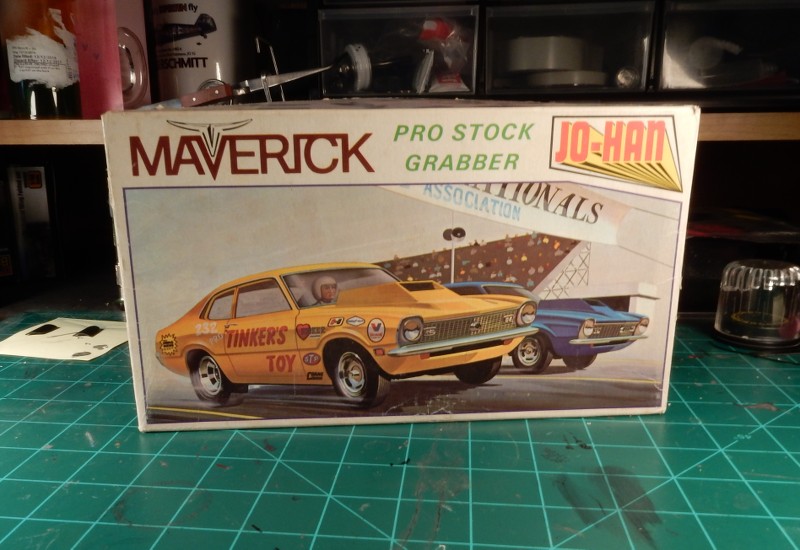 The Subject is Dyno Don's Restored Version of his Maverick: 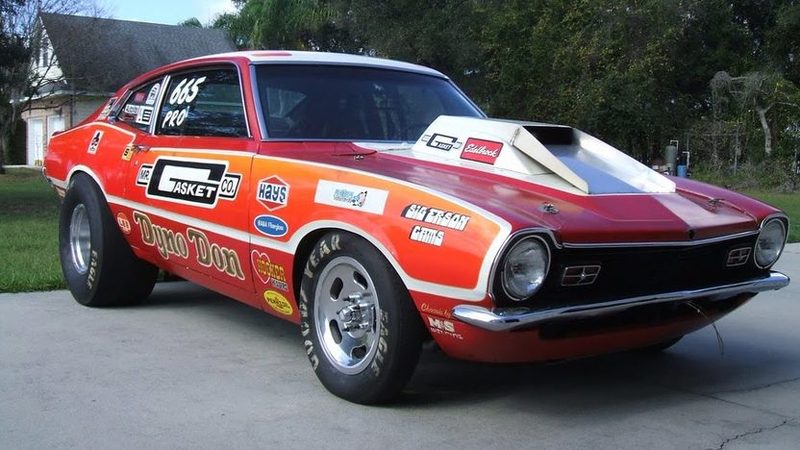 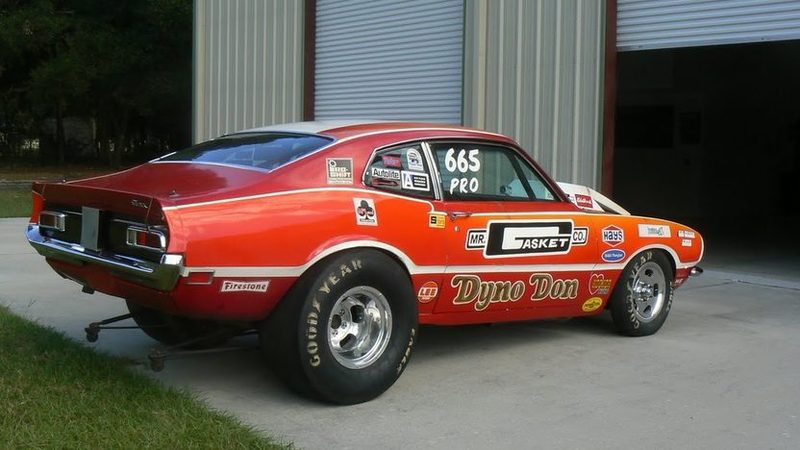 |
|
|
|
Post by mustang1989 on Feb 26, 2020 14:20:40 GMT -7
The chassis has undergone extensive modifications. Initially I was headed in a direction with the rear suspension that just wasn't looking right but have since made some changes. First off the front subframe area was shortened by 5/16 of an inch which looked ok but I had to acquire another Mustang kit in order to cut the rear frame rails from it to use in bringing both frame rails further inside to allow those rear slicks to further UNDER the car like the reference shot. Before;  and after repositioning the rear frame rails inwards towards the center of the chassis: 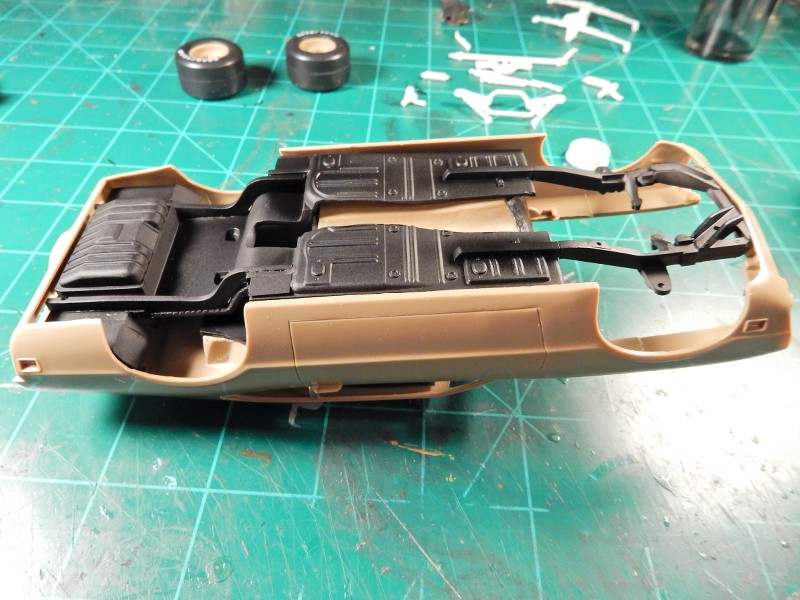 Before the chassis mods the tires that I originally were going to use were the correct width but not the correct height. Anyways they were just hanging out there waaaay too far as in this photo: 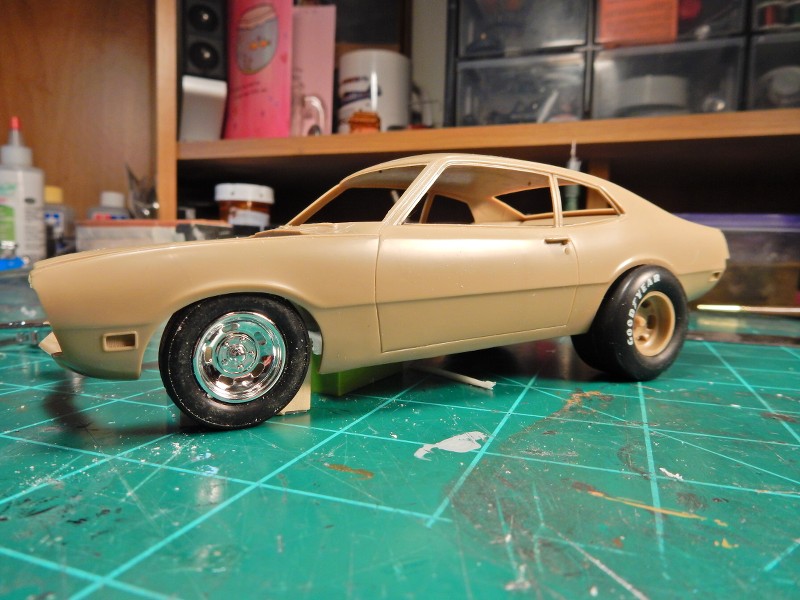 This will be alot better. Gotta get the ride height correct for the rear as well as in the front but that shouldn't be much of a problem. I've also got some better wheels inbound which should help this build out ALOT. 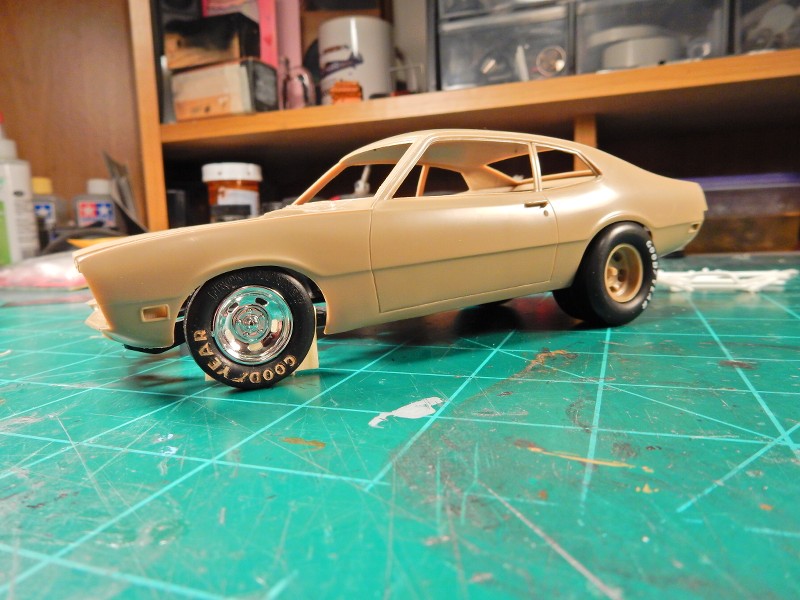 |
|
|
|
Post by Grandpabeast on Mar 2, 2020 7:34:38 GMT -7
Looking good !!!
|
|
|
|
Post by mustang1989 on Mar 26, 2020 6:15:26 GMT -7
Thanks Dave! I've been haggling over the tires for the last couple of days and after conversing with Ted Bowe from Ted's Modeling Marketplace back and forth through emails, going through photo shots and doing ALOT of measuring and head scratching I've come up with a new set of slicks that I'm going to use for this thing. Additionally I was concerned with how the front ride height was going to be but once I test fitted everything into place...…….it pretty much fell into place. I might go just a tad lower in the front but I'm pretty happy that I don't have to do much here as this has been quite the gaggle in the way of mods on this car. This is the way this car is going to look now and it seems like it's a lot closer to the reference photos that I have of this car. Now I've just gotta score a Goodyear decal sheet to put the scripts onto the tires. Reference shot:  Updated wheels and stance to reflect the reference shot above: 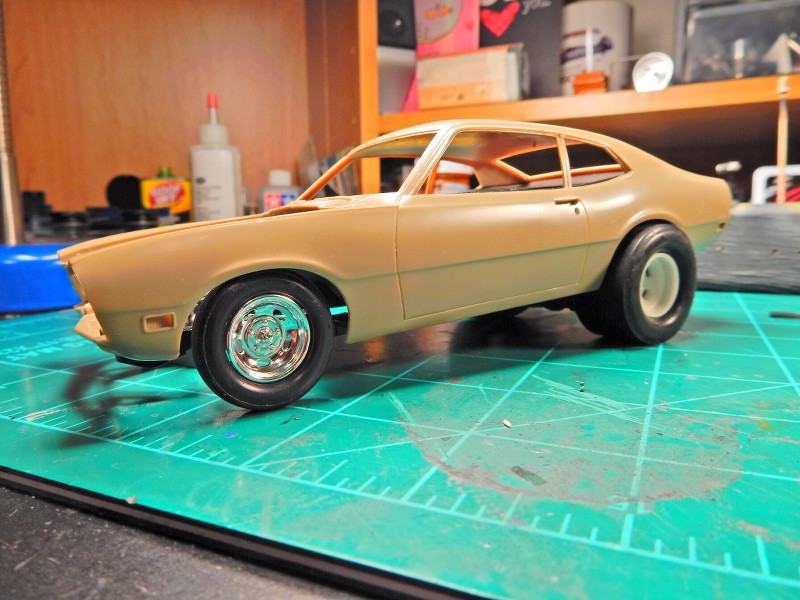 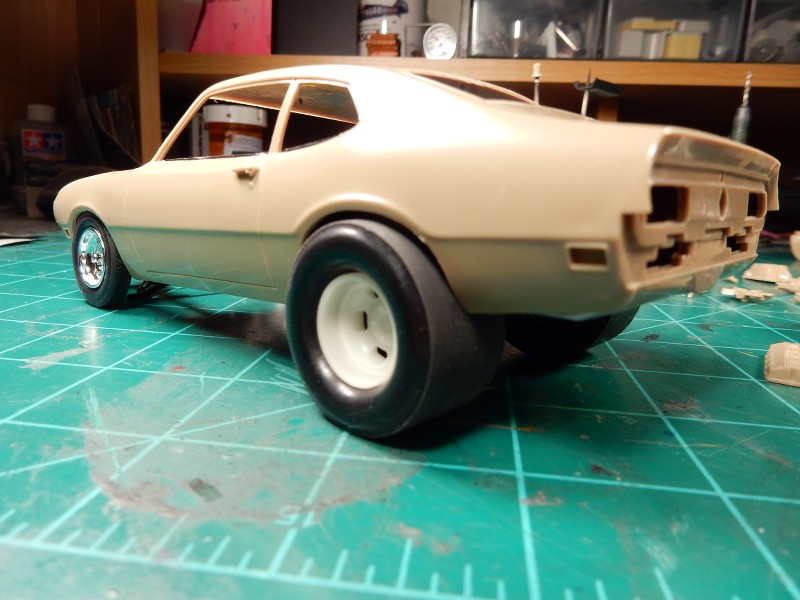 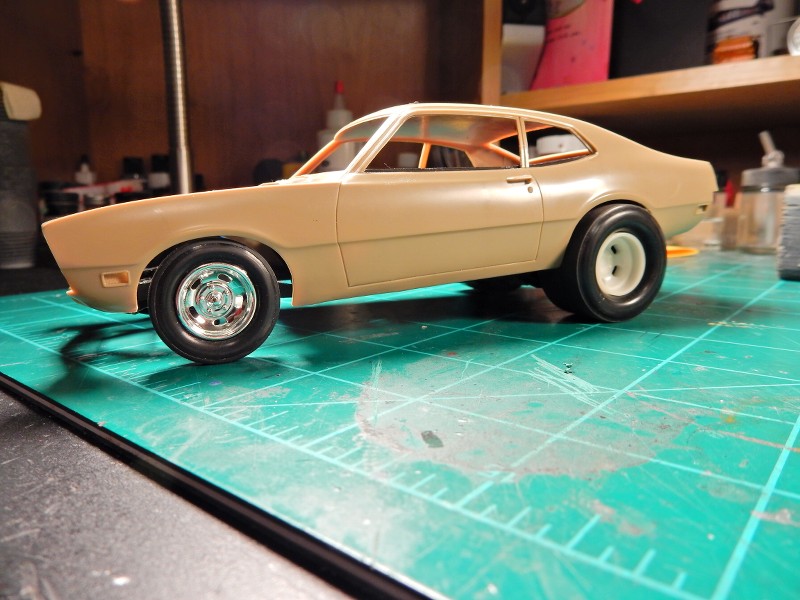 This is a FAAAAAAAAAAAAR cry from where I had it with the original wheels and tires:  |
|
|
|
Post by Grandpabeast on Apr 1, 2020 14:42:07 GMT -7
It’s looking good , love the stance
|
|
|
|
Post by mustang1989 on Apr 2, 2020 11:33:29 GMT -7
Thanks Dave! Ok gang....I managed to get the wheels coated in Molotow and the tires all decaled and completed. I didn't use the front wheels with the Molotow on them in the following pictures because this stuff has a minimum cure out of 48 hours. The rears I could handle somewhat because of the dish in the wheels but here's where we're at right now with the wheels/ tires. 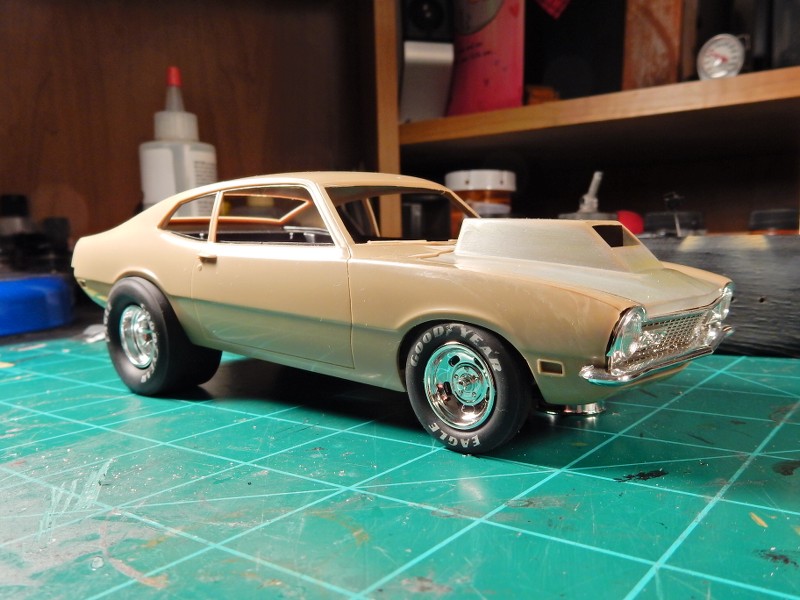 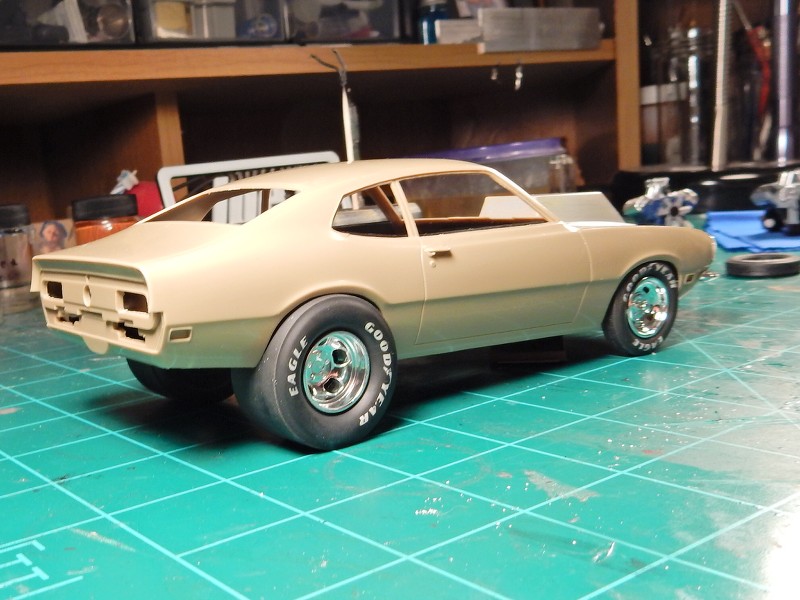 and then I found my headers that are going to give me the perfect clearance. I just cut the flanges off of them and modified the header extensions on the Jo-Han headers to match up with the headers and we're all set. Another major hurdle of this build overcome. 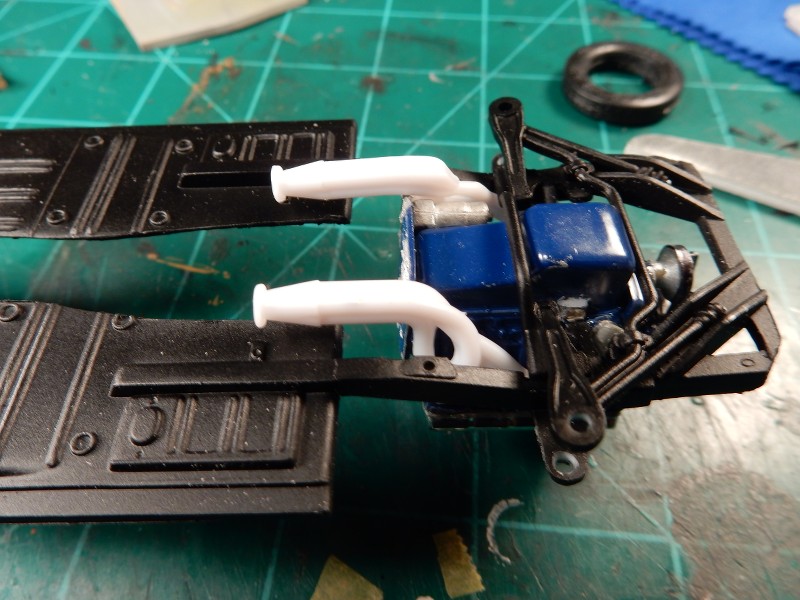 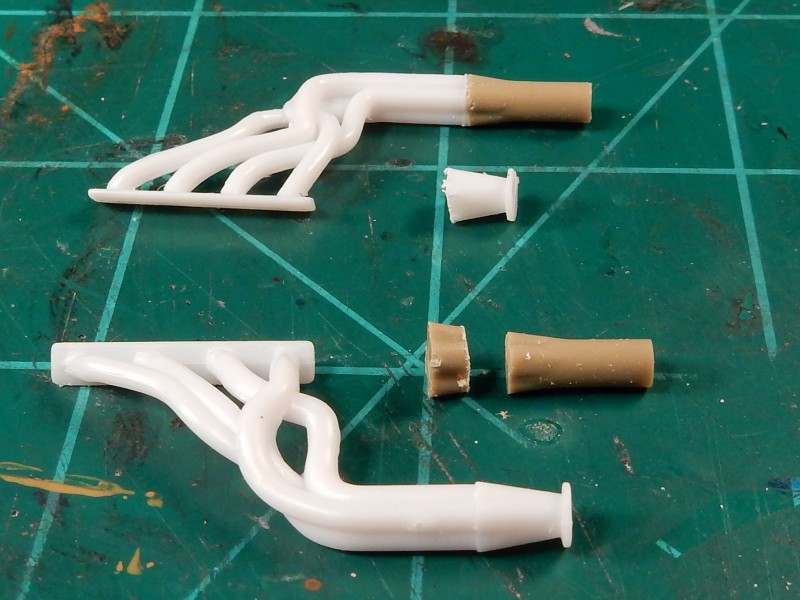 |
|
|
|
Post by mustang1989 on Jul 7, 2020 14:00:44 GMT -7
There's been a WHOLE lot goin' on with this build in the past few months so I'll catch you all up slowly with this one. I didn't like the interior much on this kit. For one....I cannot STAND molded in foot pedals and I don't care for the ejector pin marks in all four corners of the flooring either. And they are like in painfully obvious and highly visible places. It's not "correct" but I had to modify the rear of the interior to move those slicks further inboard so they don't protrude outside of the rear fenders all crazy looking. I also had to modify the rear of the chassis alot (which I am still working on) for the same reason. Secondly, this kit is severely lacking in detail so I'm hoping to improve on that as time goes along here. A shot showing the OOB molded in pedals and flooring. 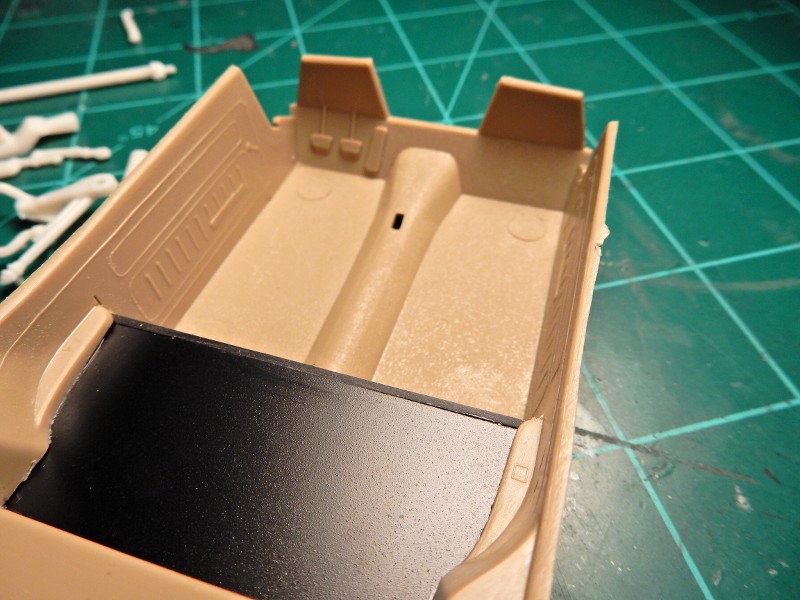 another shot showing the interior mods a little clearer:(as well as those nasty ejector pin marks):  We start the mod process by sawing off the foot board/ lower firewall area of the interior:  and then after the new Evergreen floor and lower firewall area were cut to fit and moved into place. There....much better. 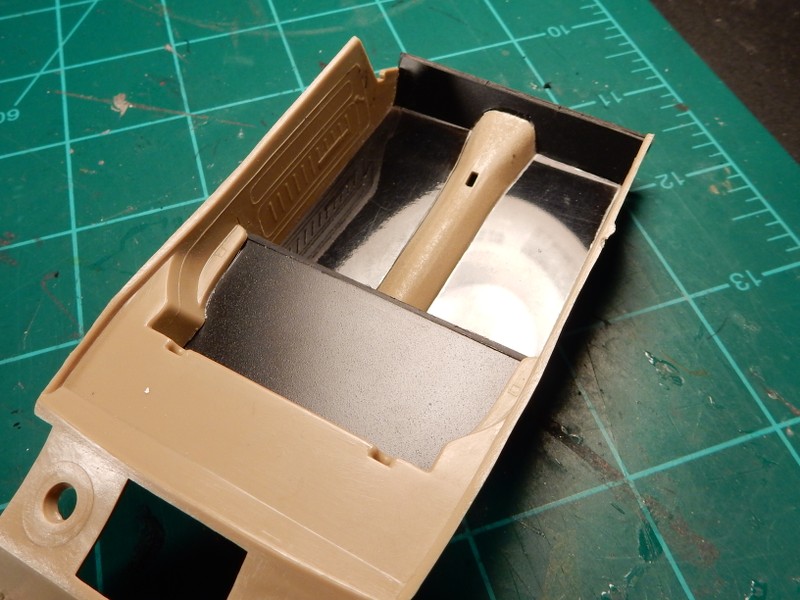 |
|
|
|
Post by Grandpabeast on Jul 8, 2020 14:50:26 GMT -7
Looking good! Can’t wait to see more !
|
|
|
|
Post by mustang1989 on Aug 18, 2020 16:16:18 GMT -7
Time to bust out with some progress on this one again.... Another thing that this kit is totally lacking in is the proper engine bay. I turned to the 67 Mustang kit for this since it's a fairly close match. 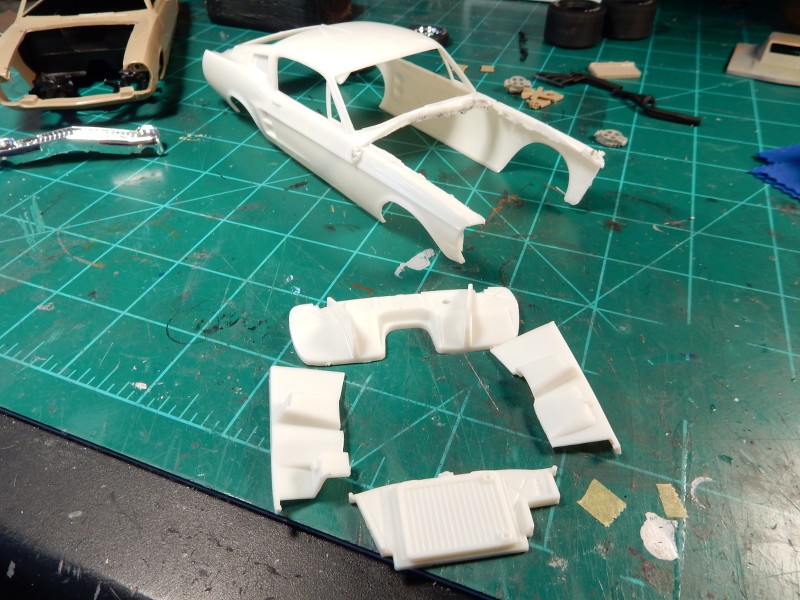 On the right is an OOB engine bay in my other Maverick. After some mods and some trimming I've got the initial fit obtained. It's workable and looks like it should do the trick after some more fancy footwork. 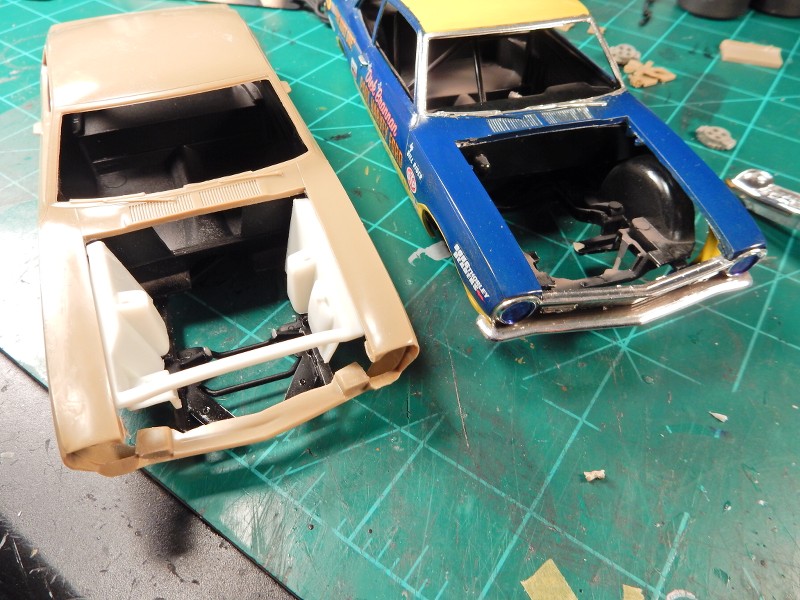 |
|
|
|
Post by Grandpabeast on Aug 19, 2020 10:56:25 GMT -7
Looking good ! My stuff has been boxed up for over a month , I’ll be so happy when this move is done and I can get back to my bench !!!
|
|
|
|
Post by mustang1989 on Aug 19, 2020 13:31:06 GMT -7
Looking good ! My stuff has been boxed up for over a month , I’ll be so happy when this move is done and I can get back to my bench !!! Thanks Dave! Man I hear ya. Moving totally blows!!! |
|
|
|
Post by mustang1989 on Aug 19, 2020 18:53:22 GMT -7
Sometimes I wonder if I've entered into the CRS phase of life (Can't Remember Sh#@!). Looks like I did a repetitive couple of posts without double checking myself. No matter I guess....the duplicate posts have already been edited out earlier today. Man.....work must be getting to me a little harder than I thought.  Onward with the REAL progress. I've been hard at work on this bad boy and have been trying to hit the bench a little harder. Here she is in the primer stage:  and after I let that all dry out I hit it with color (Tamiya Pure Red dispensed from the can and shot through the AB) the next day. Didn't have to do ANY sanding to the primer coat. 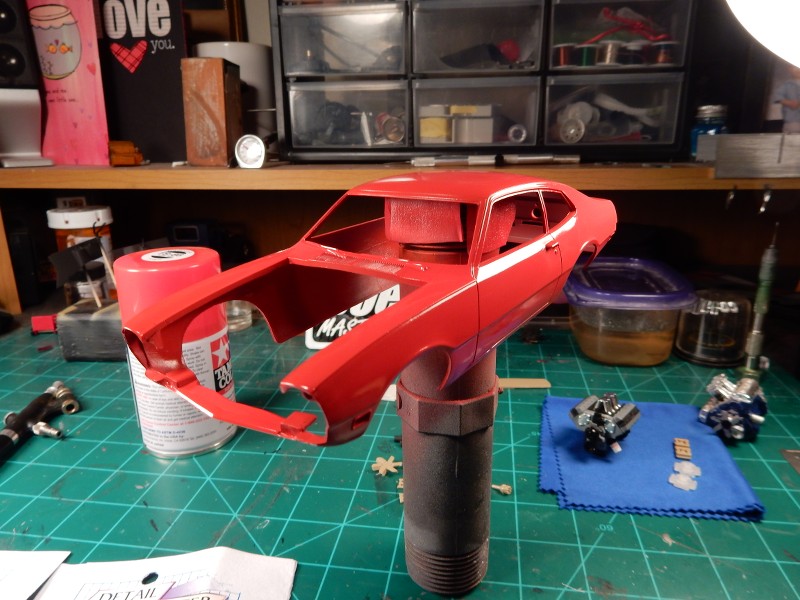 A couple of mock ups once the color coat had dried....couldn't help myself but to do this but have to admit that Mavericks look a little out of the ordinary in red:  Was able to tuck the rear tires a little further inward as well. Still gotta raise the front of the car a smidgen and bring those front tires outward a little. I'll get there......  |
|
|
|
Post by Grandpabeast on Aug 20, 2020 12:54:39 GMT -7
That looks great! I know your going for Dyno Don accuracy but I really like the ride height right there. Either way its going to look great !!
|
|
malcox477
Loyal Member
   Registered: May 21, 2019 16:19:37 GMT -7
Posts: 1,039
|
Post by malcox477 on Aug 30, 2020 22:13:45 GMT -7
I'm in love with this project, now i want to get a Maverick kit to build something crazy like that, looking forward to see more updates bro
|
|
|
|
Post by mustang1989 on Sept 3, 2020 19:07:18 GMT -7
Thanks fellas!! Decals on the right hand side. Now......I've gotta go back and paint the roof. Yikes!!! Missed that one. 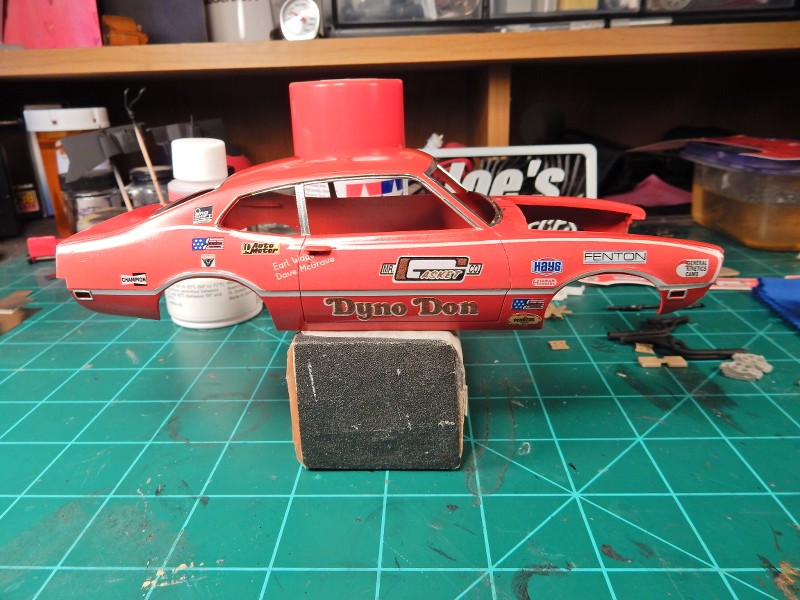 |
|
malcox477
Loyal Member
   Registered: May 21, 2019 16:19:37 GMT -7
Posts: 1,039
|
Post by malcox477 on Sept 4, 2020 3:21:44 GMT -7
Looking real good man
|
|
|
|
Post by mustang1989 on Sept 6, 2020 10:27:24 GMT -7
Thanks Mike! Man.....I really goofed not looking at my references well enough beforehand. I've been pondering over the course of the last few days how to best approach that white roof and I think I've got it figured out now. In any case I trudged ahead with some decals. Here's where we're at now with the 3rd Mock Up; 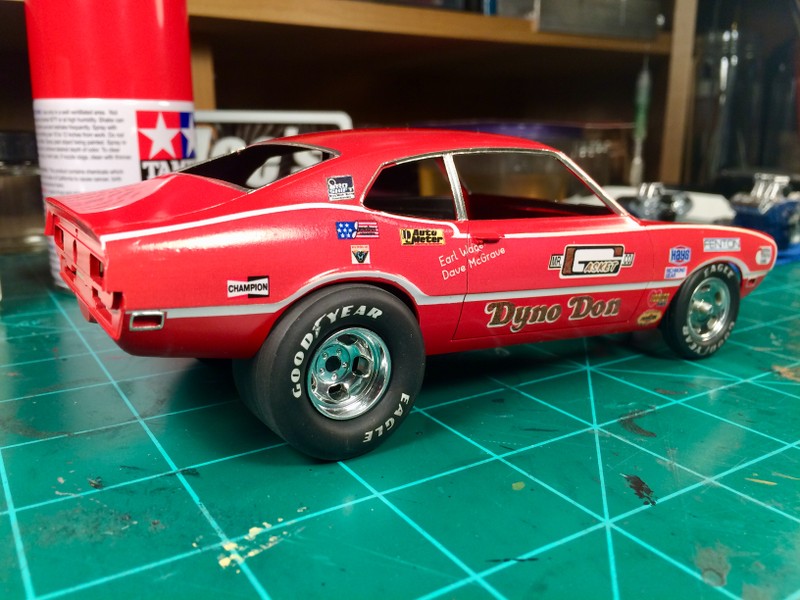 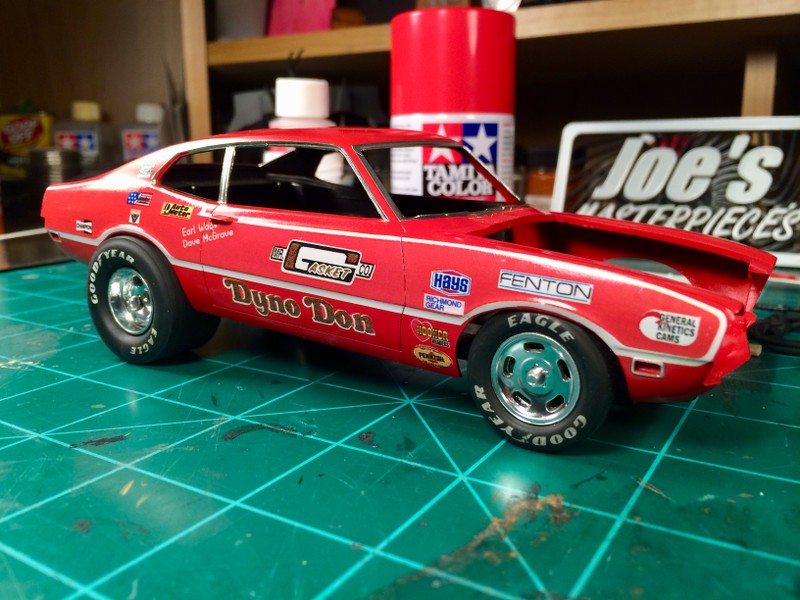 |
|
|
|
Post by sharp on Sept 6, 2020 14:52:55 GMT -7
Looks great Joe!!
|
|
malcox477
Loyal Member
   Registered: May 21, 2019 16:19:37 GMT -7
Posts: 1,039
|
Post by malcox477 on Sept 7, 2020 20:28:39 GMT -7
Looking real good bro, i love it...
|
|
|
|
Post by mustang1989 on Sept 9, 2020 10:01:25 GMT -7
Thanks Mike and malcox! Ok gang....the first of the corrections has been accomplished. Where I cut the decals to fit what I thought was a little bit better and turned out being too much above the wheel openings has now been corrected. I've gotta touch up the interior headlining a little bit now but that's small stuff. The more I looked at this the more it bugged me. Before...paying close attention to the white area above the wheel openings...  And after the corrections....Next up....painting the roof white. 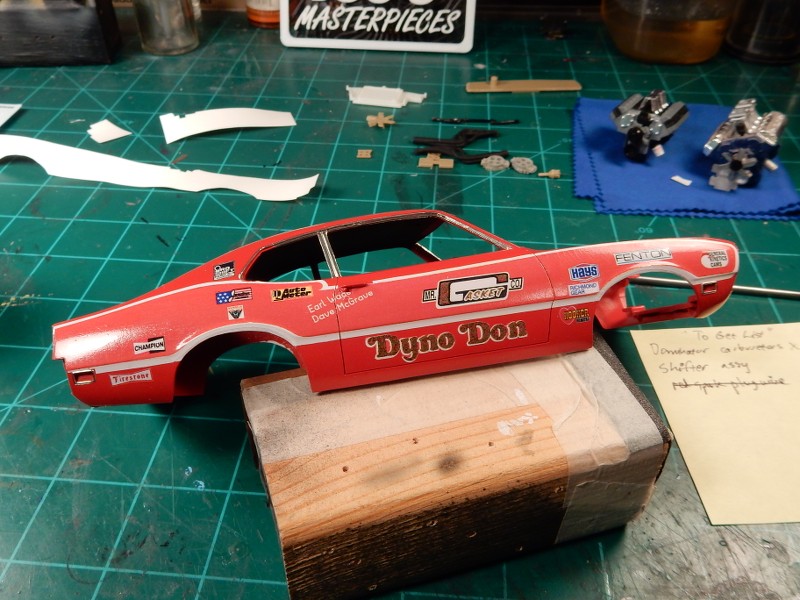 |
|
|
|
Post by Grandpabeast on Sept 11, 2020 16:54:47 GMT -7
Looking great as always
|
|
|
|
Post by sharp on Sept 11, 2020 17:26:47 GMT -7
This is looking great Joe!!
|
|
|
|
Post by mustang1989 on Sept 19, 2020 4:47:27 GMT -7
Thanks fellas! I'll post an update a little later on today.
|
|
|
|
Post by mustang1989 on Oct 1, 2020 13:00:26 GMT -7
....well probably not on the update the same day but hey.......I'm not too far off.  Ok fellas!! I managed to mask off and paint the roof white without destroying the rest of the paint/ decal work that I've done. It aint perfect in regards to "correctness" but I got it close enough for me to be able to live with. I've also applied the gloss coat over everything... 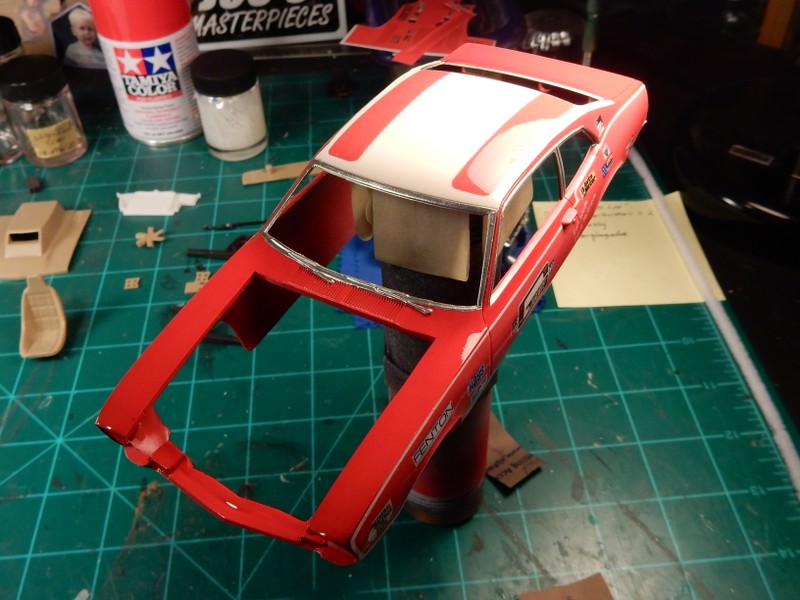 |
|
malcox477
Loyal Member
   Registered: May 21, 2019 16:19:37 GMT -7
Posts: 1,039
|
Post by malcox477 on Oct 1, 2020 22:45:28 GMT -7
Looks amazing man, love it..
|
|
|
|
Post by mustang1989 on Oct 3, 2020 4:43:26 GMT -7
Looks amazing man, love it.. Thanks Malcox! Working on the rest of the interior now. I didn't like the OOB door panels ………………..at ALL. First off , the OOB armrest and inside door latch handle were barely visible. No "Maverick" trim bezel was present at the top of the trim panel either. Being a car than only sees the track....it's not SUPPOSED to have a window crank handle either....BUT...it was molded in and I decided to install a PE handle and knob from the spares bin. The armrest was made out of spare resin parts block retainers that I had, the door latch handles were made out of square bits of PE that I bent and glued into place and the trim bezel was from extra window crank knobs that I had in stock. Interior in the foreground is OOB with the one I'm using in the back ground..... 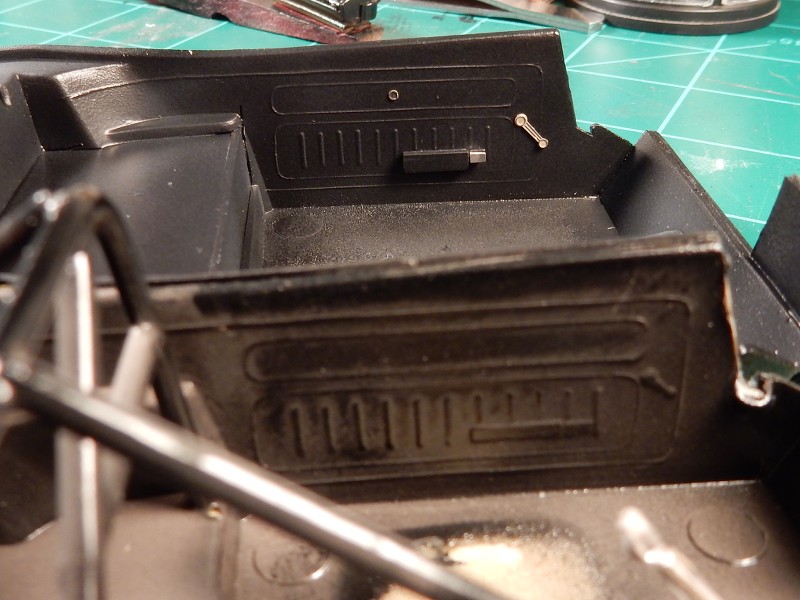 |
|
malcox477
Loyal Member
   Registered: May 21, 2019 16:19:37 GMT -7
Posts: 1,039
|
Post by malcox477 on Oct 5, 2020 3:42:10 GMT -7
Nice details man
|
|
|
|
Post by Grandpabeast on Oct 5, 2020 12:14:12 GMT -7
sweet !!!!!!
|
|
|
|
Post by mustang1989 on Oct 18, 2020 6:01:36 GMT -7
Thanks Marcos!! This is one of the longest auto projects I've ever taken on. |
|
|
|
Post by mustang1989 on Oct 18, 2020 6:01:50 GMT -7
|
|