Deleted
Registered: Nov 23, 2024 21:31:04 GMT -7
Posts: 0
|
Post by Deleted on Feb 20, 2018 19:18:39 GMT -7
OK, so now that I've put the Honda on the shelf, time to start... er... REstart [again] my 1980 Jeep CJ-7. I bought my Jeep in April 1995 for $1400 and had a blast making it into a mini-monster toy. 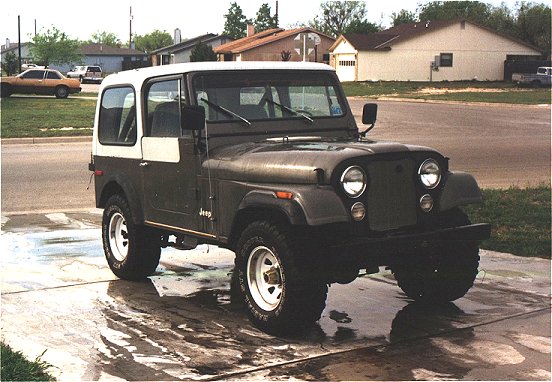 Grew up a bit with a lift kit: 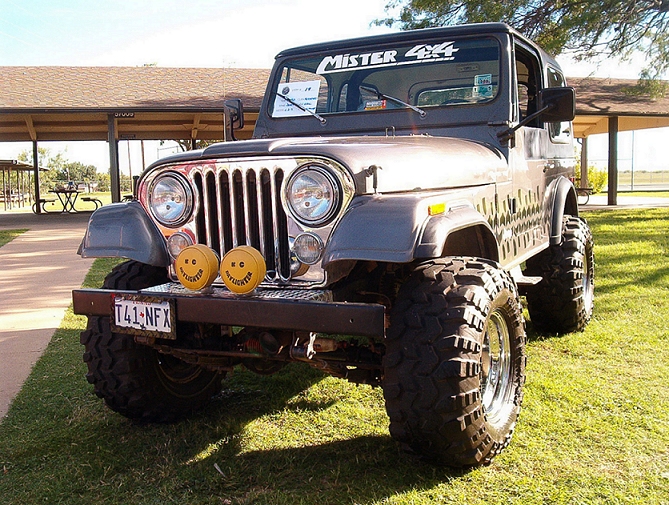 Out on the trails - it's a LOT steeper than it looks: 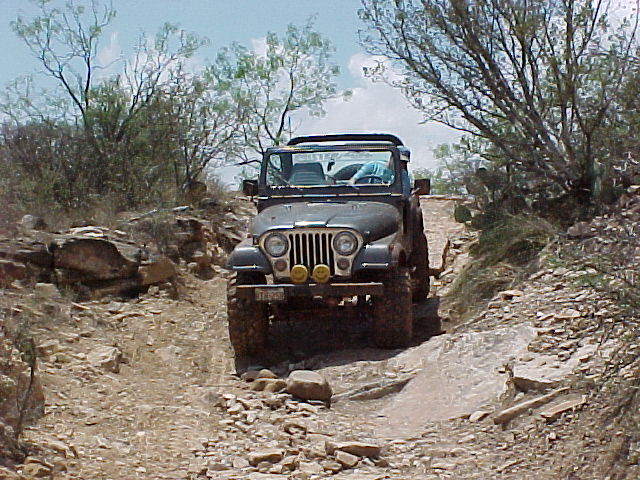 And finally added some custom body armor (all made by me) before I started in on my '71 Mach 1: 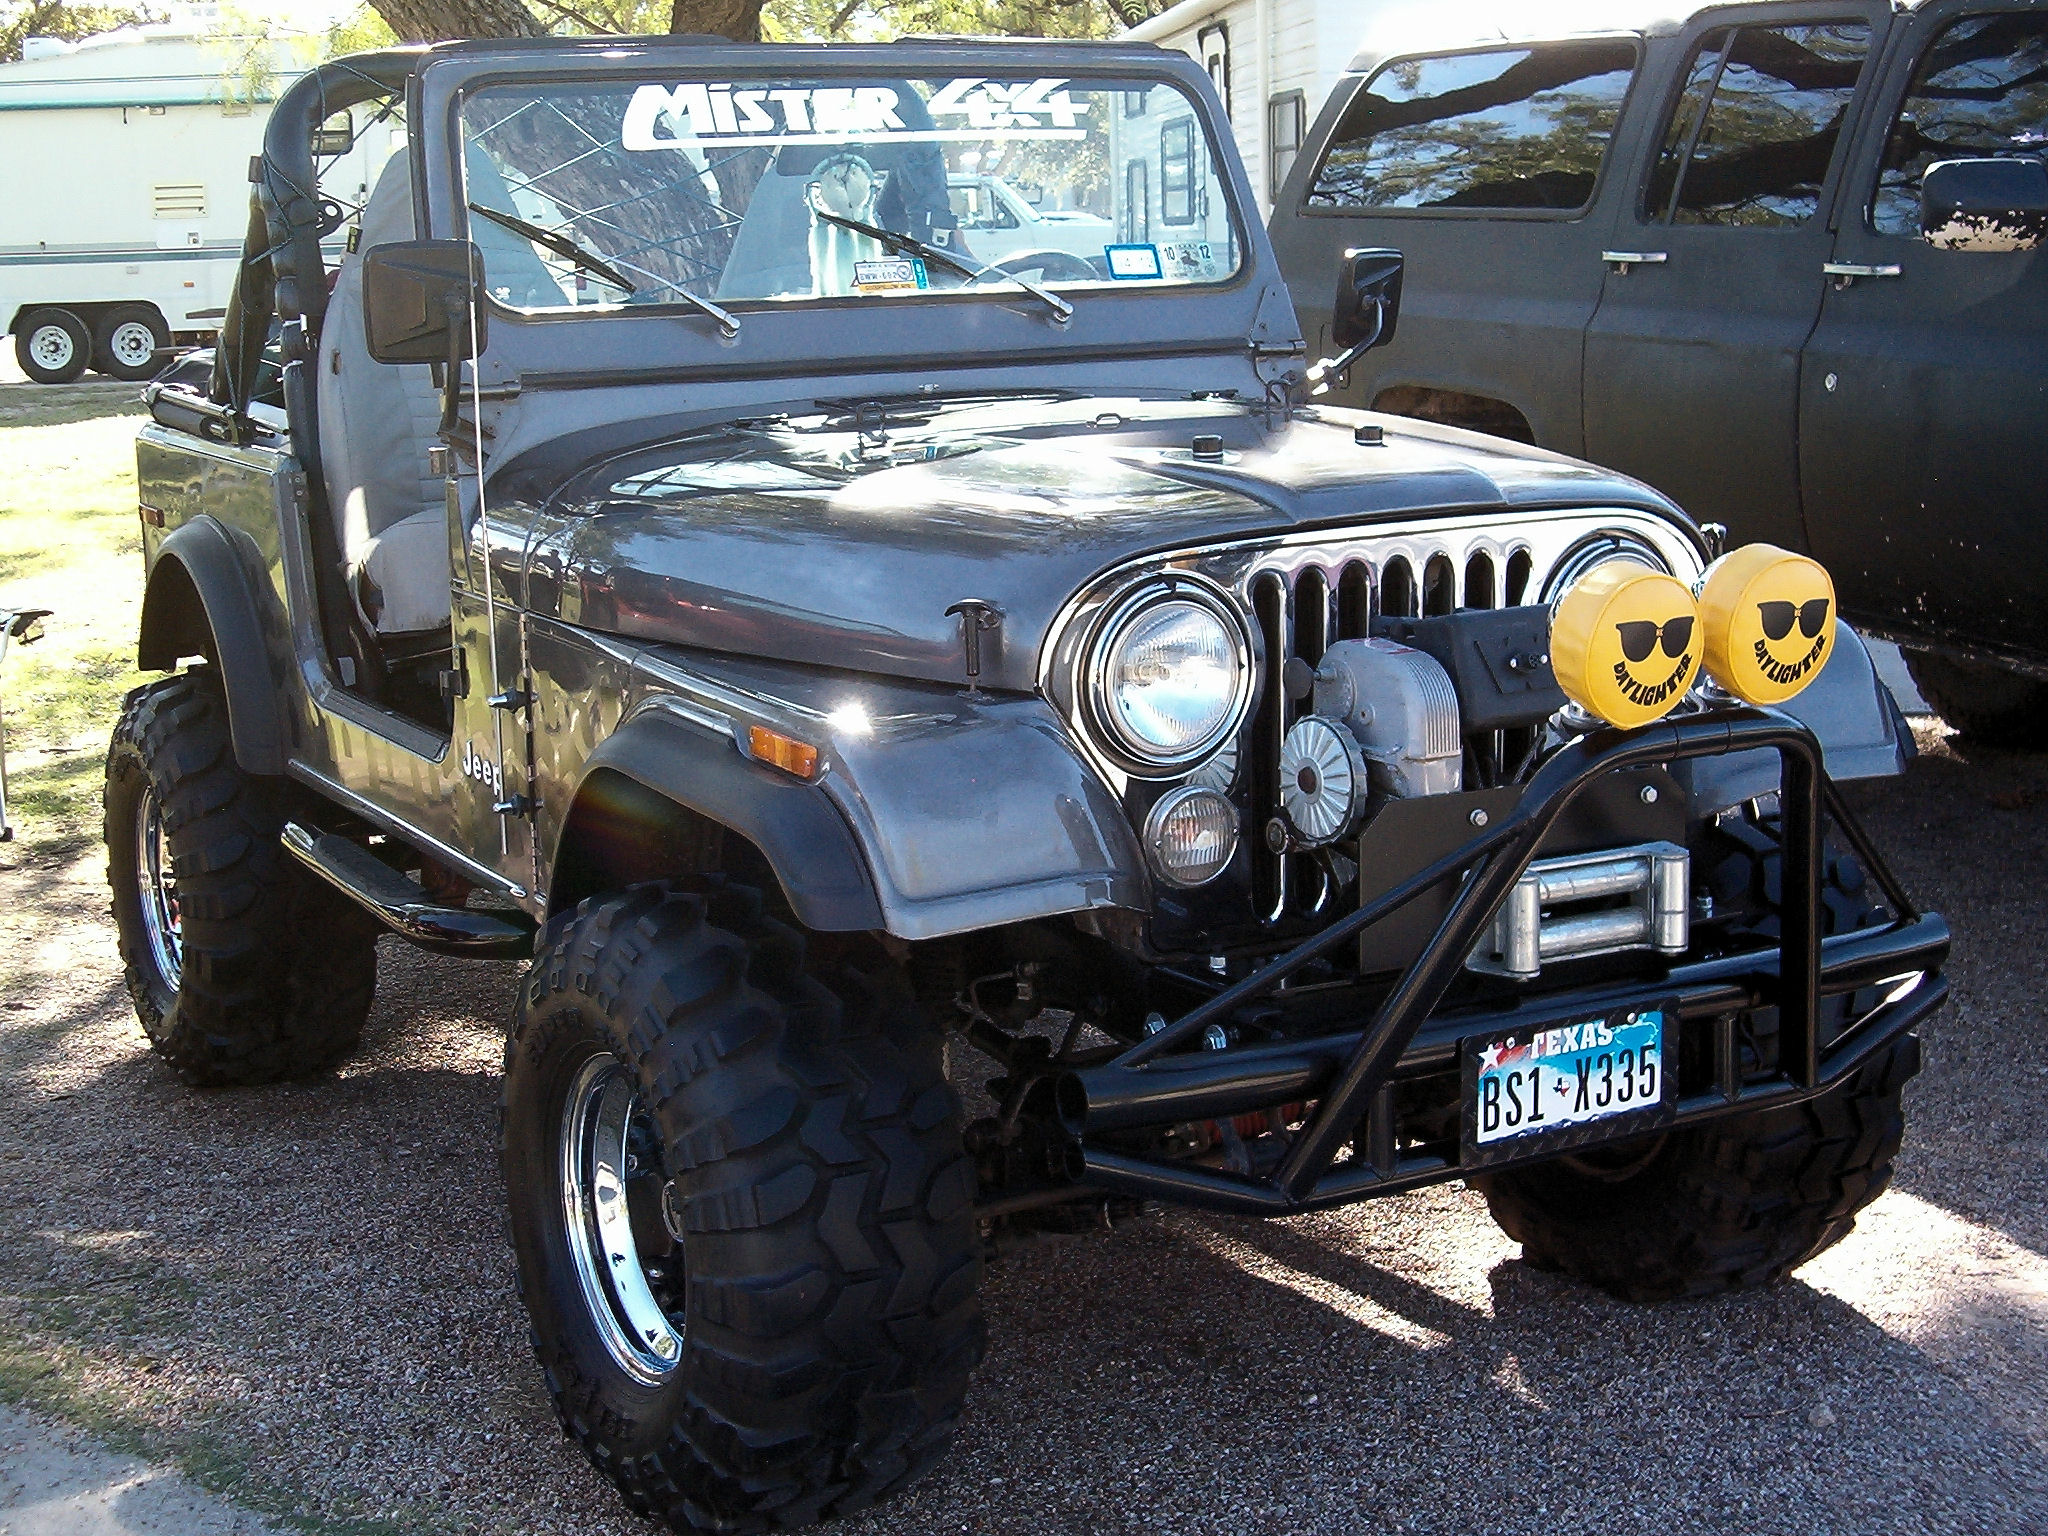 Back in the '90s shortly after I got the 1:1 Jeep, I started a Monogram 2'N'1 Jeep CJ-7 kit. I only had an idea of what I wanted the Jeep to look like at that point, so here's what I came up with: 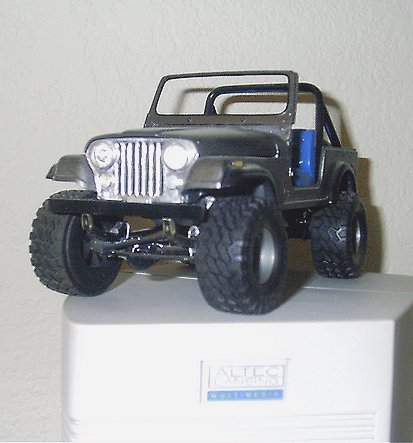 And one with a Dodge Challenger Pro Street I'd built while visiting my BIL a few years earlier: 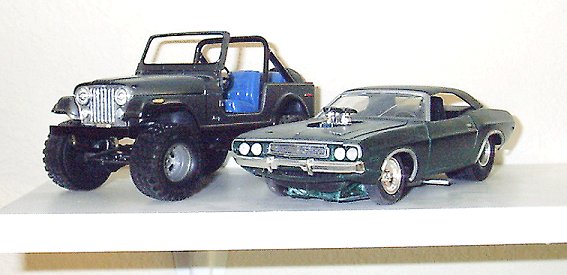 Which brings us to now: 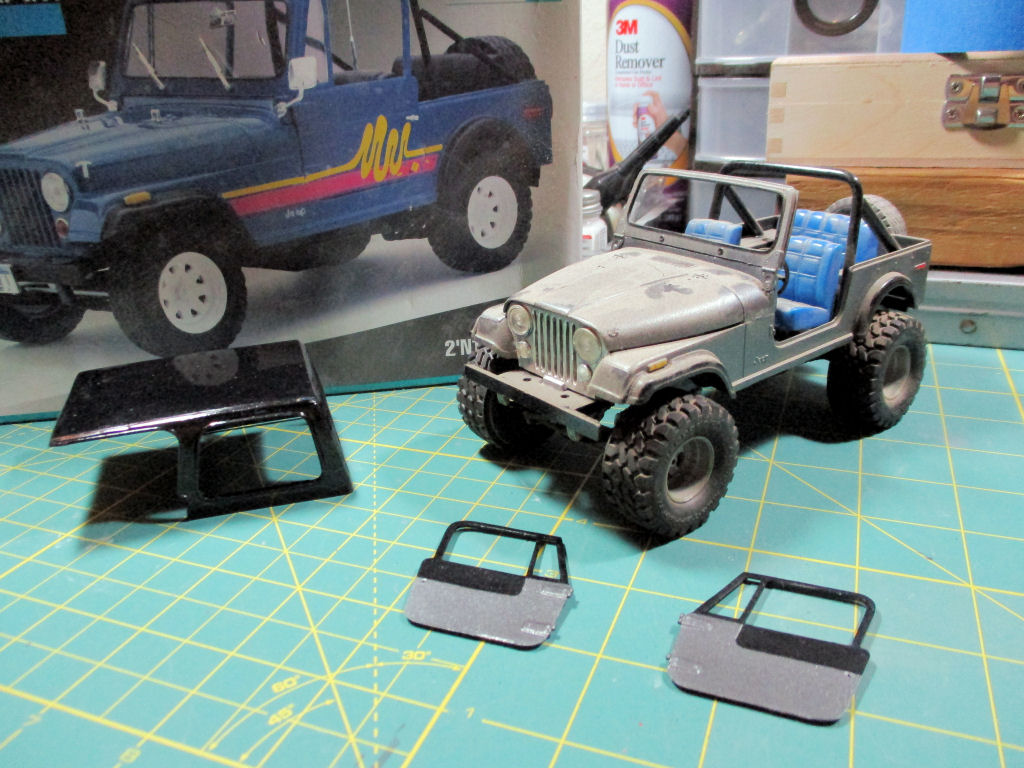 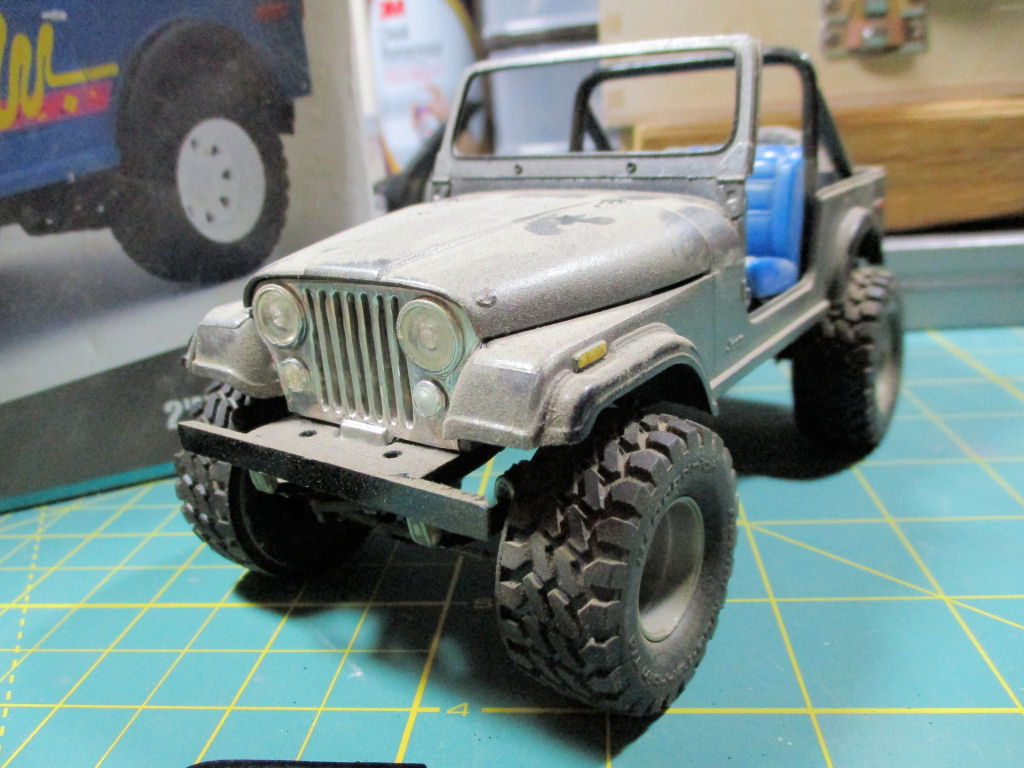 So, first up is to clean all the dust from sitting on that speaker for so long, then take out and update the seats, swap the wheels for some Super Swampers & correct wheels I swiped from an Aoshima Toyota Hi-Lux 4x4 kit, and build all the cool things I'd made for the 1:1, along with finishing up the rest of the little parts I hadn't installed yet. Should be fun! * BTW - "Mister 4x4" is the name of an Off Road shop in SLC, UT where I'd bought a bunch of stuff for my 4x4s over the years, and I wound up with my e-mail address because of that windshield sticker back in 1996 - just kinda stuck with me over the years. |
|
Deleted
Registered: Nov 23, 2024 21:31:04 GMT -7
Posts: 0
|
Post by Deleted on Feb 21, 2018 19:28:18 GMT -7
And we're off! I carefully took the Jeep apart (that 20-yr. old glue never stood a chance and some of the joints had already popped anyway), swiped the wheels from the Aoshima kit, and found some seats from the spare parts stash that actually match the high-back seats with Bestop seat covers... got everything dusted off and cleaned up. I tried searching for a 6-cylinder engine in the stash, but could only find a 4-banger, so I guess I'll just leave the 304 V8 in the chassis (even though it's painted the wrong color - I don't plan on displaying it with the hood up, anyway). AND, I found an actual Warn 8274 winch in the kit as well - SCORE! 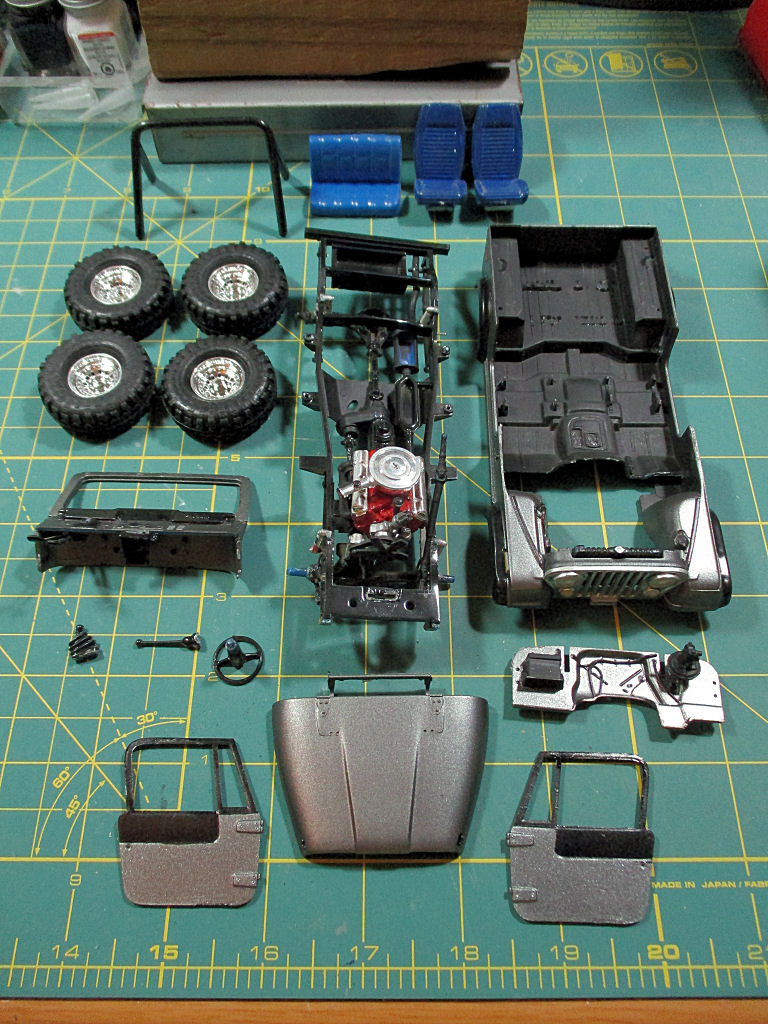 Tomorrow, I have brass band rehearsal for an upcoming gig, so I'll get back to it on Friday. |
|
|
|
Post by stevet on Feb 21, 2018 22:52:36 GMT -7
I'm also working on a used Daisy Duke Jeep, Can't wait to see more...  |
|
Deleted
Registered: Nov 23, 2024 21:31:04 GMT -7
Posts: 0
|
Post by Deleted on Feb 25, 2018 13:01:27 GMT -7
Lots of work done yesterday. I got the seats swapped out, cleaned up, and painted (found the 'correct' back seat in one of my Desert Rat CJ-7 kits). Also touched up some details on the dash, firewall, and the frame. Since the axles were 'narrowtrac' axles (as original to my Jeep as well, which I've swapped in 'widetrac' axles on the 1:1), and the Aoshima wheels mount with pins, rather than pegs & caps like the original wheels and axles have, I made some axle tube extensions (sleeves of a sort) out of sprue with small holes for the wheel pins, and larger holes for the axle-side pegs. That also took care of the 'narrowtrac' vs. 'widetrac' dilemma. Wheels are just tossed on for the pic - still gotta make the drums & discs to mount up with the wheels 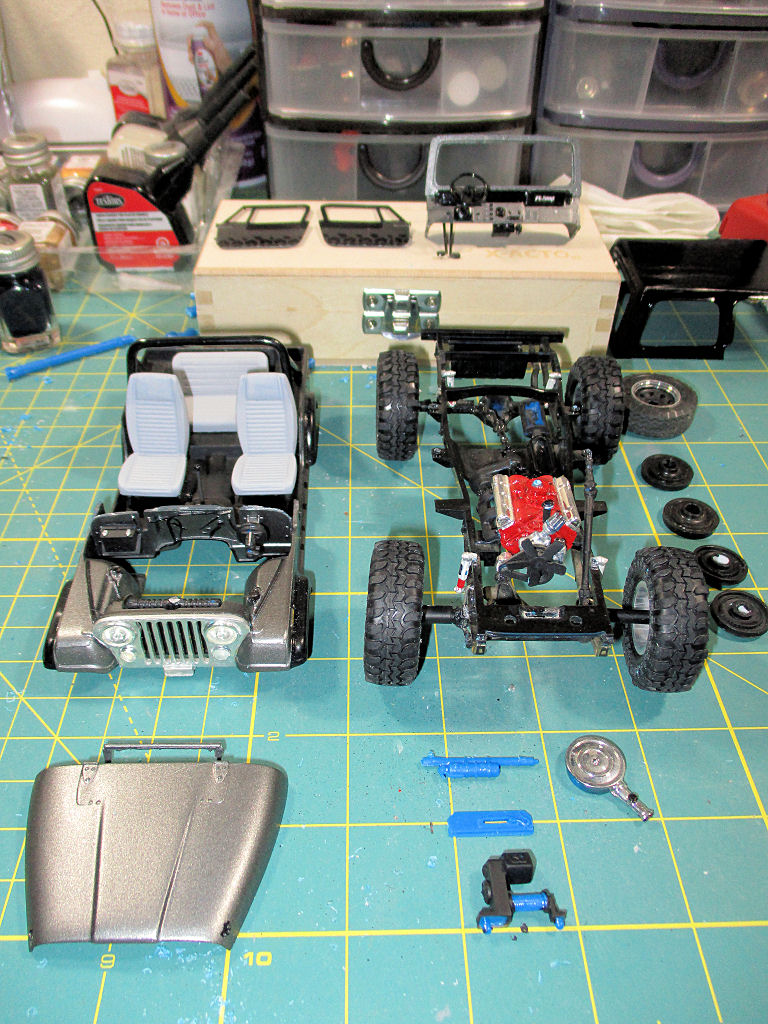 Still gotta paint the winch mount & fairlead, finish the winch, and figure out how to get the fire extinguisher on the roll bar. 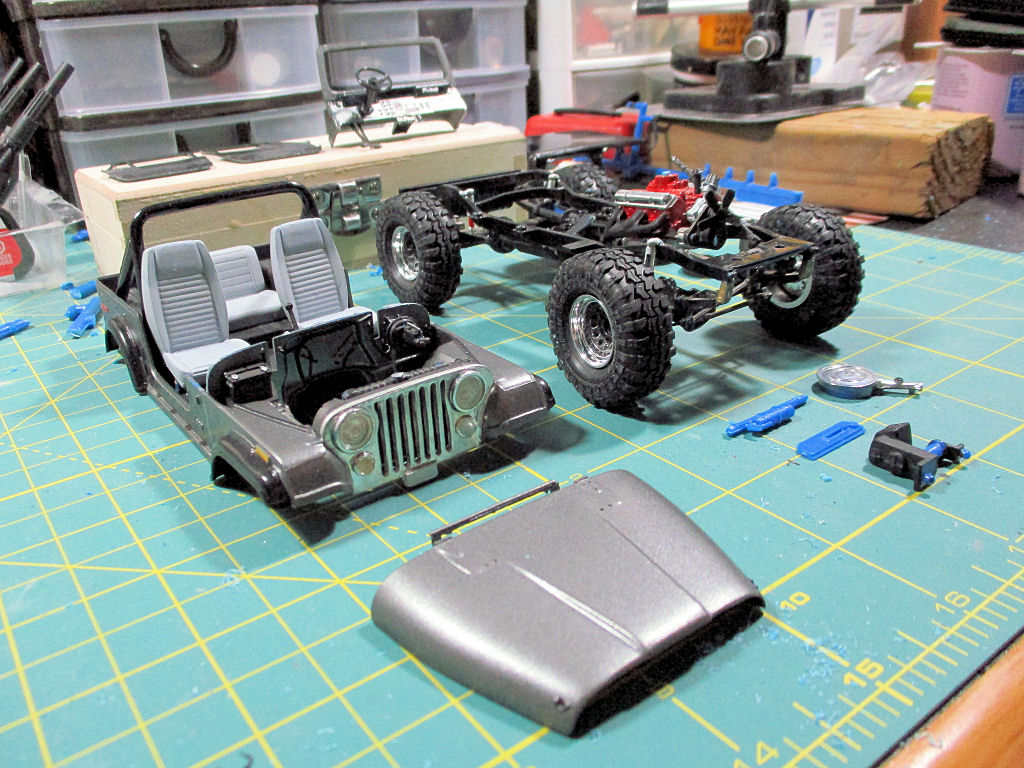 And finally, I freehanded the SuperSwamper tread pattern I'd masked and sprayed on 1:1 to hide my 'mesquite pin-stripes' from wheelin' out in the sticks over the years. 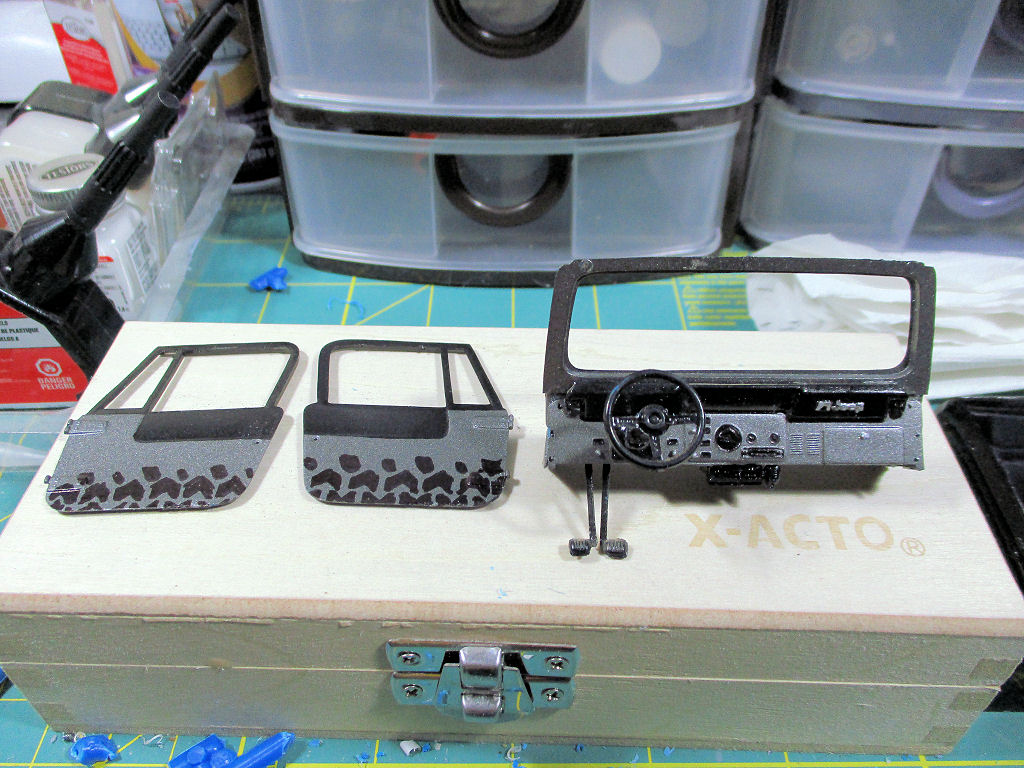 Got some more work to do today. Hopefully get the engine plumbed and wired [maybe] and get it together. Then, I'll need to work out the windshield (and the all-important Mister 4x4 decal) along with the front & rear bumpers and nerf bars. |
|
Deleted
Registered: Nov 23, 2024 21:31:04 GMT -7
Posts: 0
|
Post by Deleted on Feb 25, 2018 18:37:20 GMT -7
Movin' right along. I didn't get as much done as I wanted today, but that's OK - it's not a race. I started out trying to wire up and plumb the engine, and only managed battery cables and heater hoses... and even that was only after getting the body back on the frame. Finished painting and installing the winch. and got the wheels on. 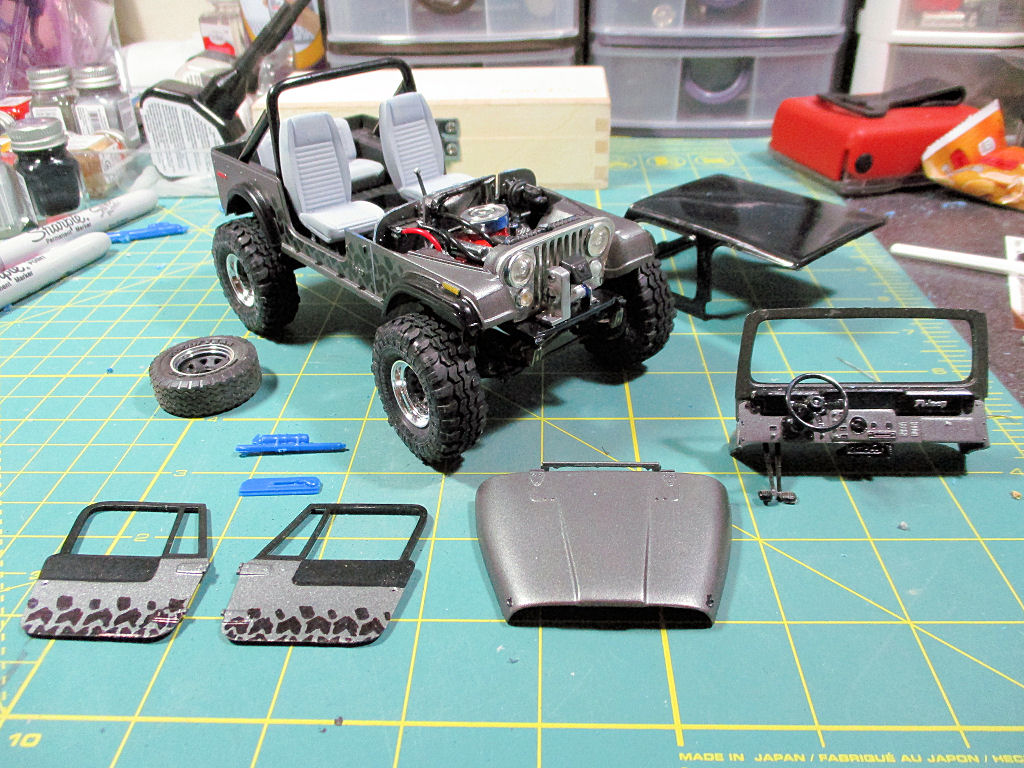 Wow - those battery cables are almost as big as the heater hoses! (Oh well - this is my first time going that deep - I'll use something smaller next time) 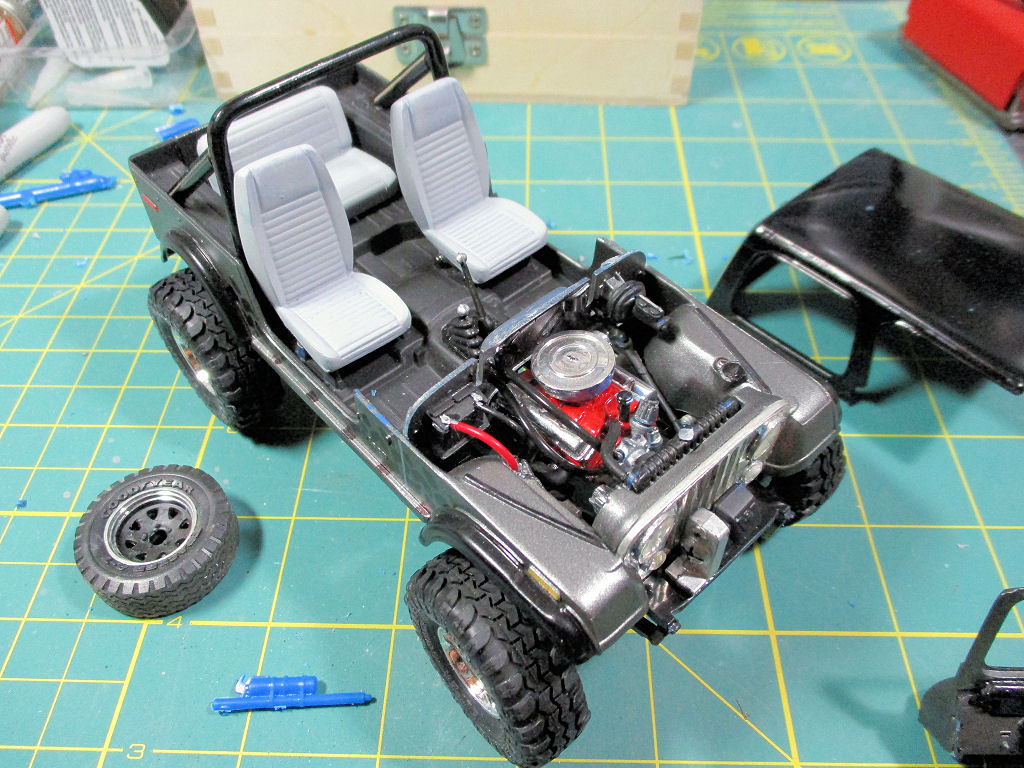 The free hand Swamper stripe actually turned out pretty OK - I'm happy with it, anyway! 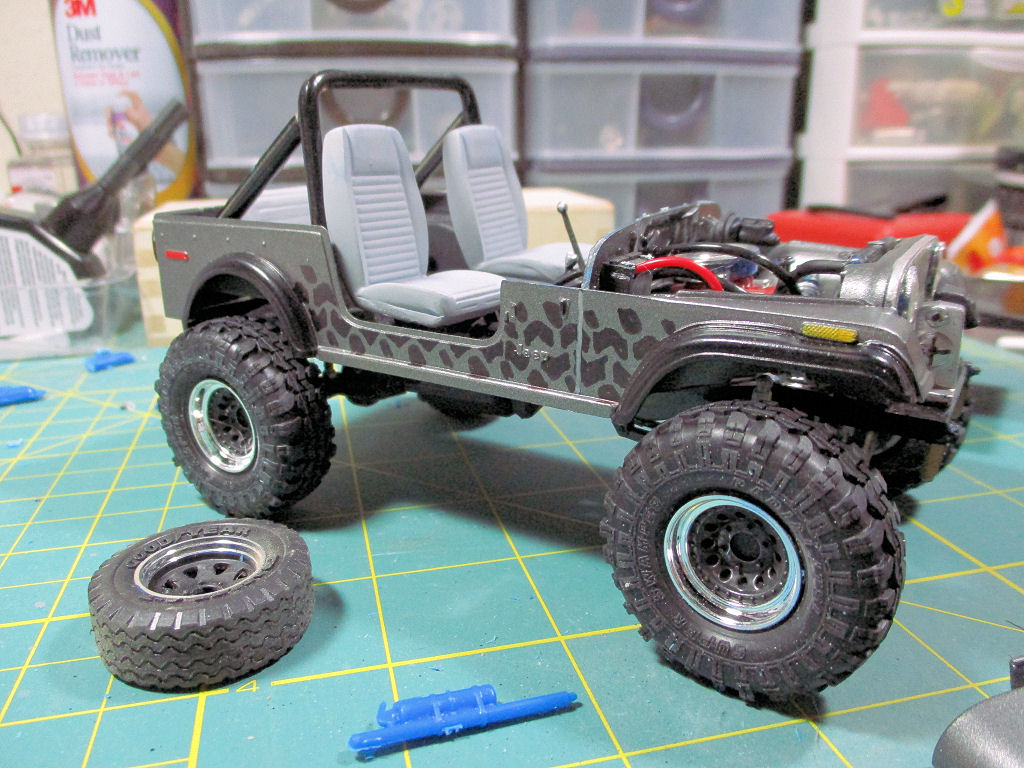 My only complaint with the Aoshima tires is that they're more like a 38.5", rather than a 33" as are the ones on my full size (if I had 38.5's on the 1:1, it wouldn't fit in the garage - oh well, still looks cool). Still need to do all the scratch-building (front & rear bumpers, nerf bars, center console, wheel well speakers, and a 'bed webb' cargo net I spread out over the roll bar - thought it looked cool or something). Also need to come up with a windshield with the 'Mister 4x4' decal (wow... that's gonna be a challenge). Stay tuned. |
|
Deleted
Registered: Nov 23, 2024 21:31:04 GMT -7
Posts: 0
|
Post by Deleted on Mar 11, 2018 16:58:53 GMT -7
So I've been a little busy this past week with various things, but got some time to Photoshop some decals and scratch-build the front & rear goodies I built for the 1:1. I built this tire rack after I replaced the mangled corners, since the full-size tire was too much for the factory rack. 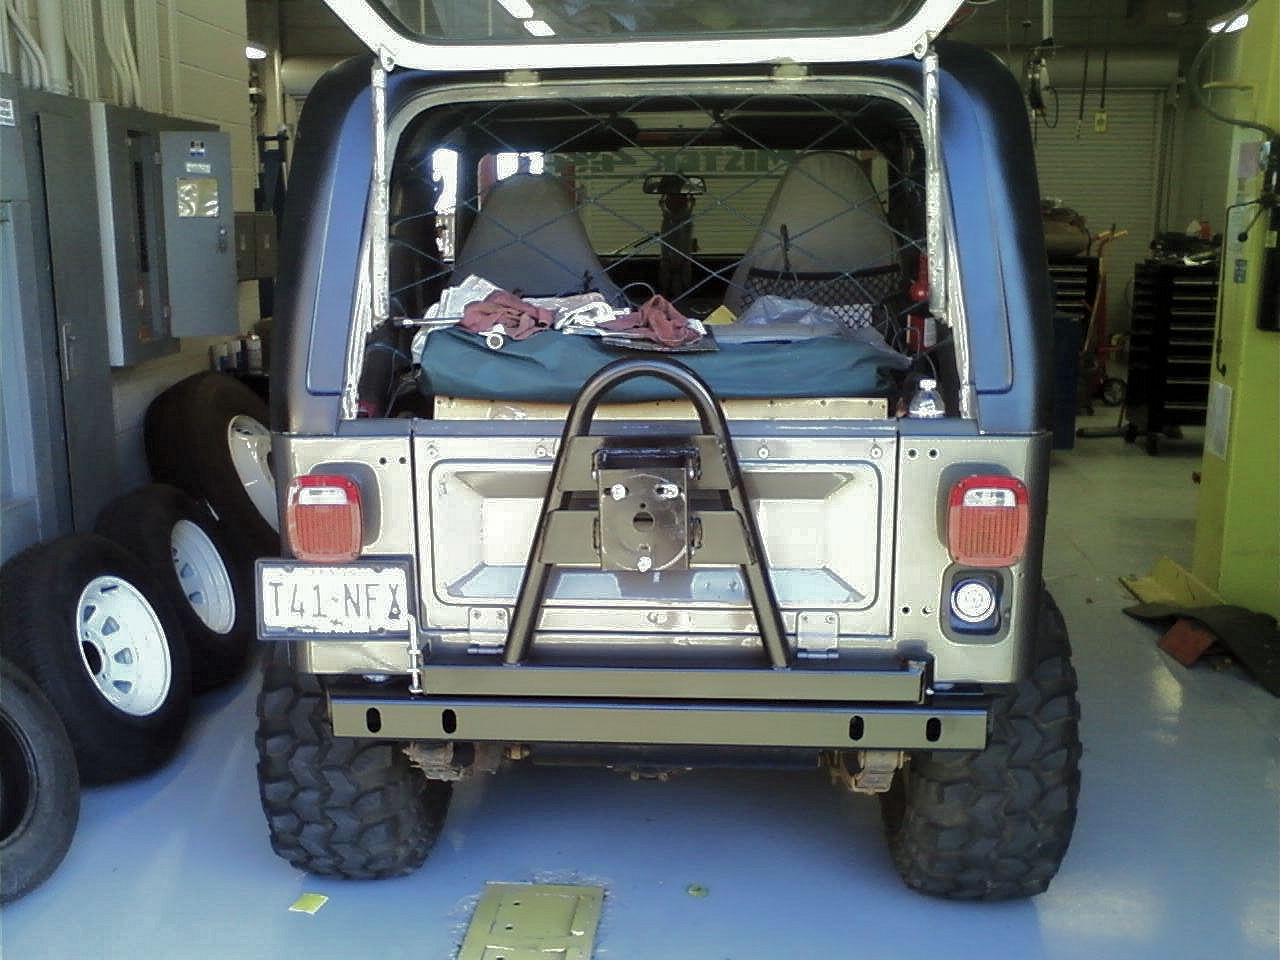 And here's how we came out on the little one: 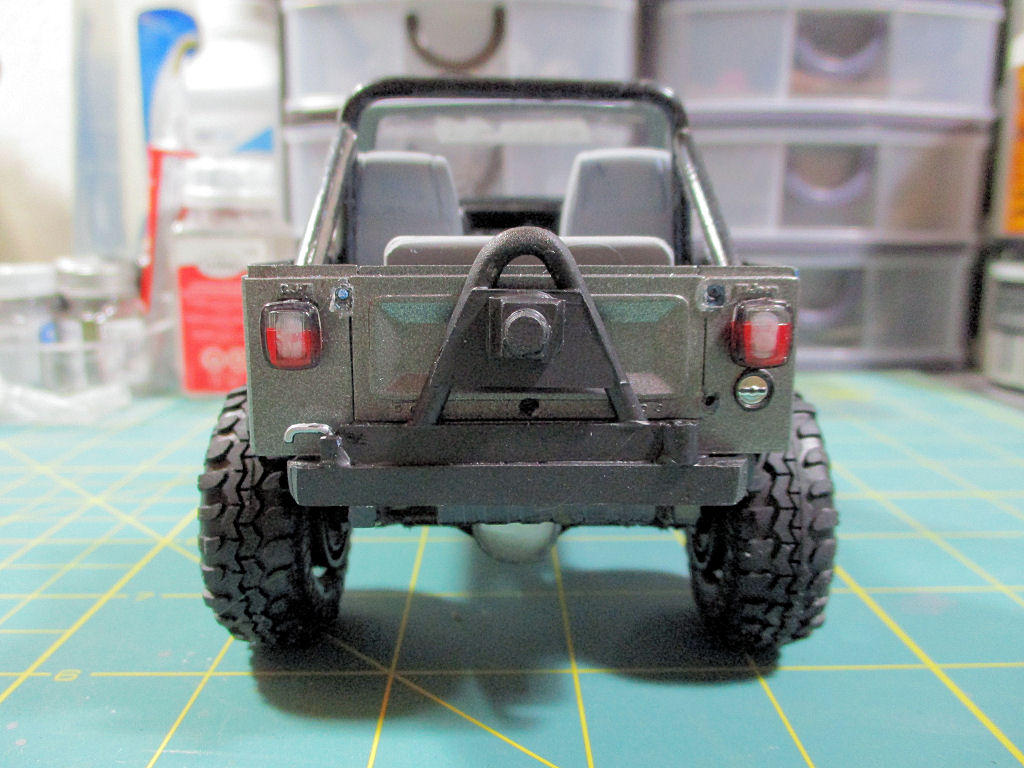 For fun, I tossed on the hard top (not even straight, either - grrrr): 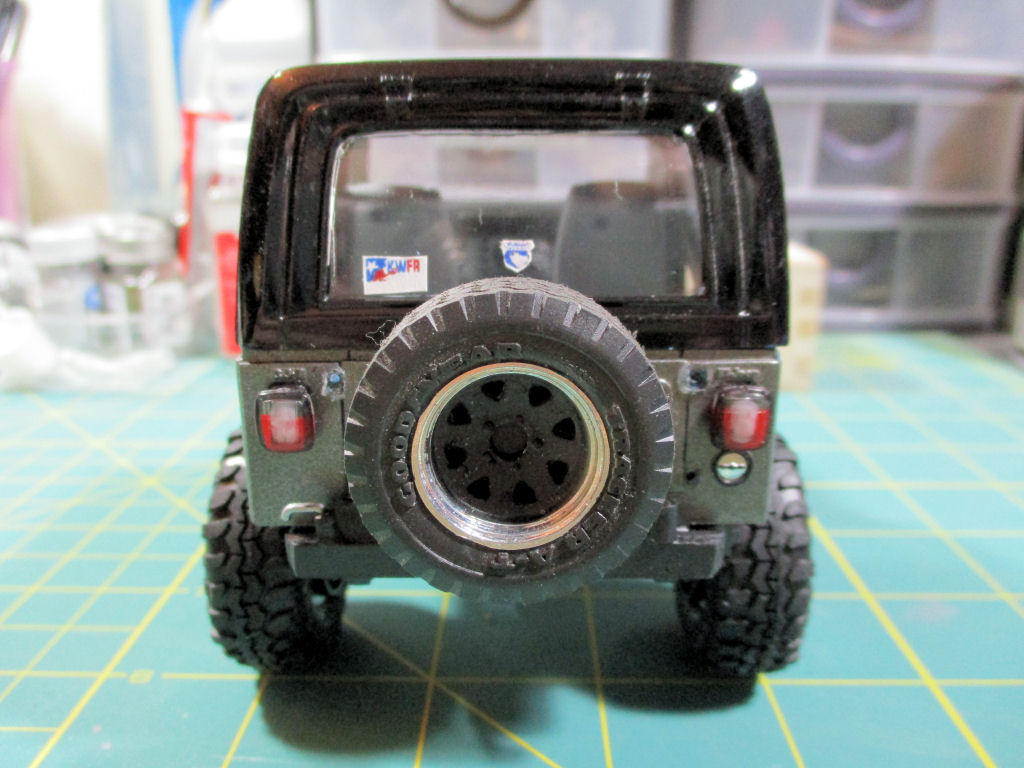 Kind of came out pretty much how it's supposed to, eh: 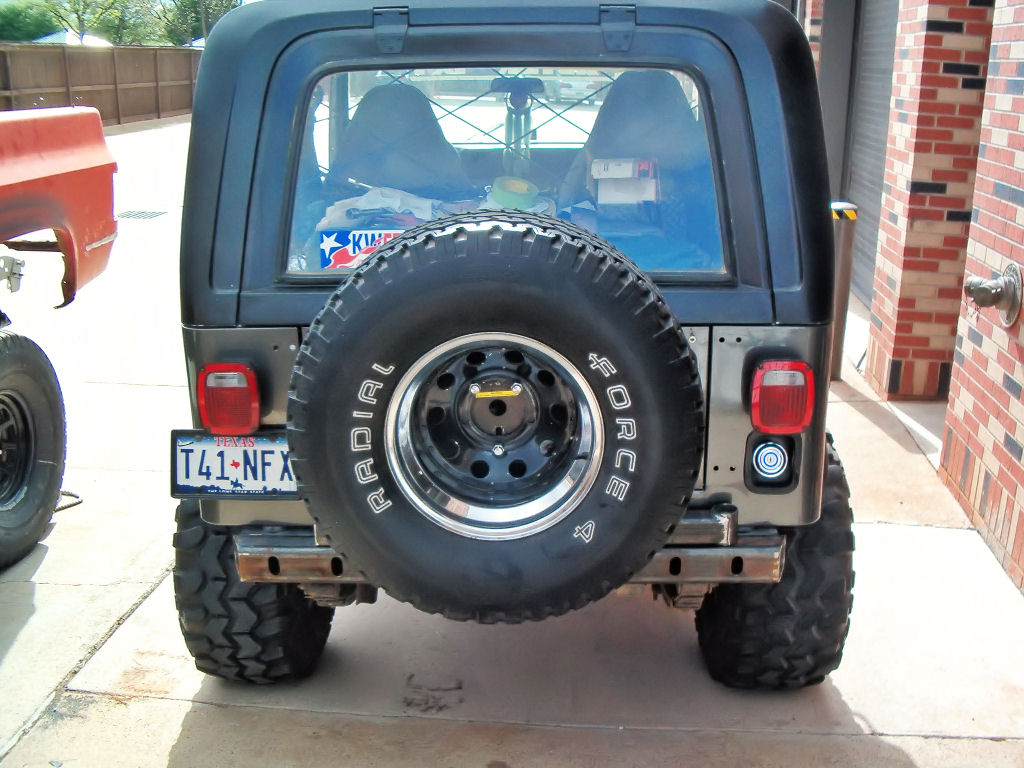 And now, we have the front bumper and winch all mounted up: 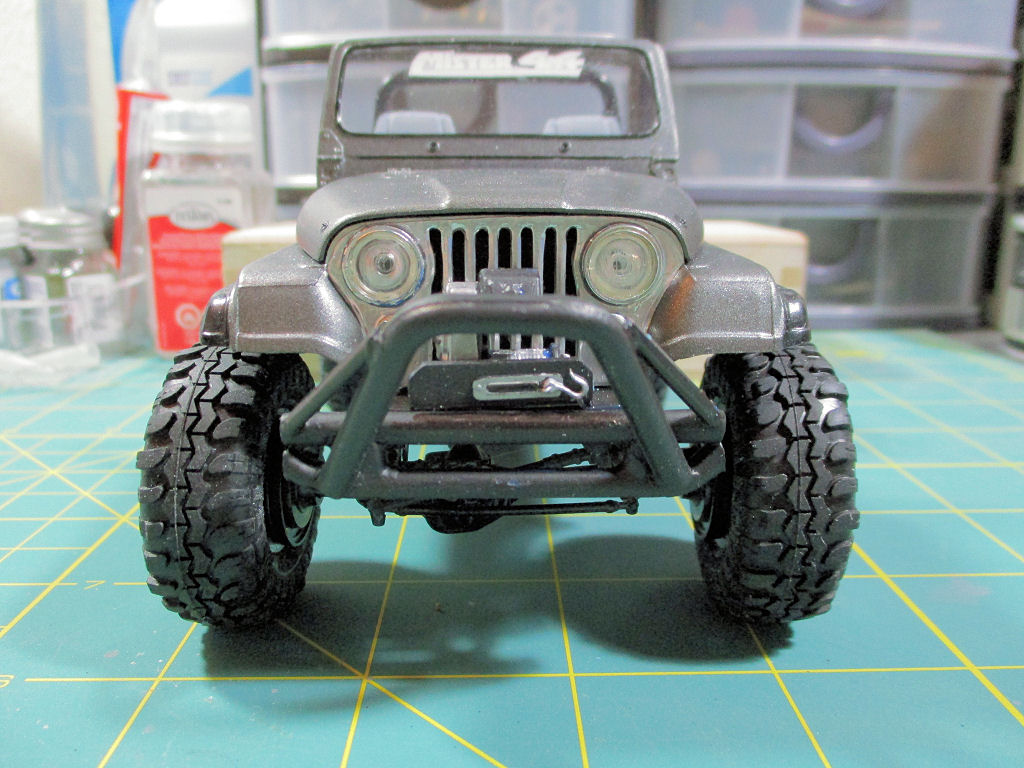 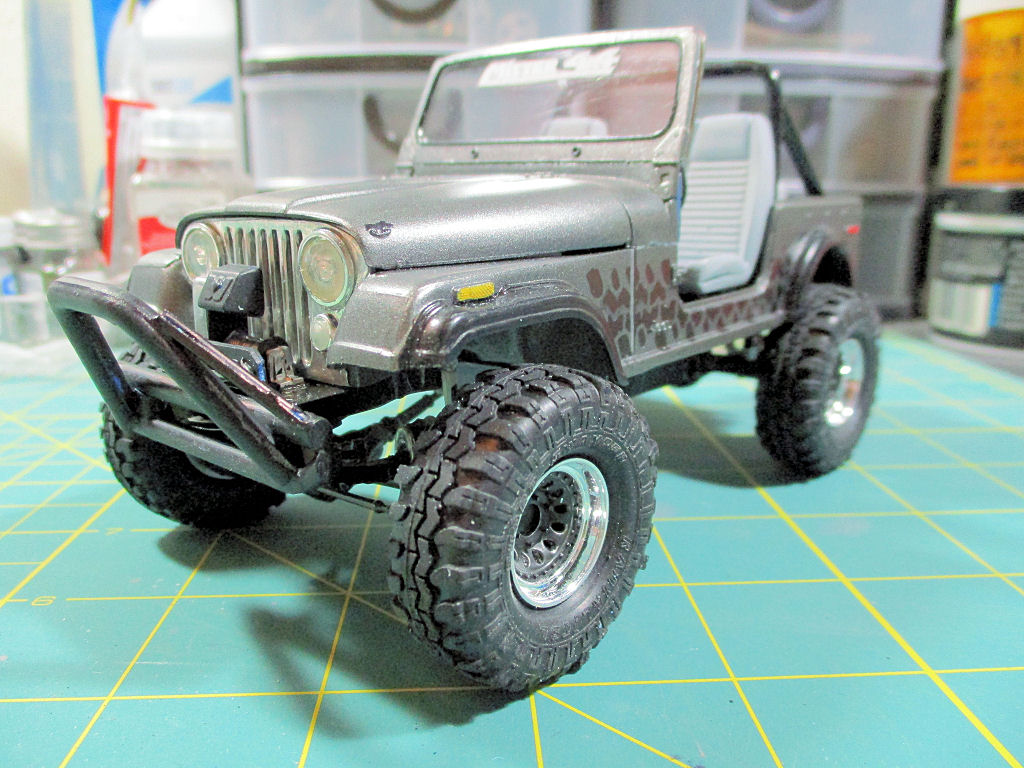 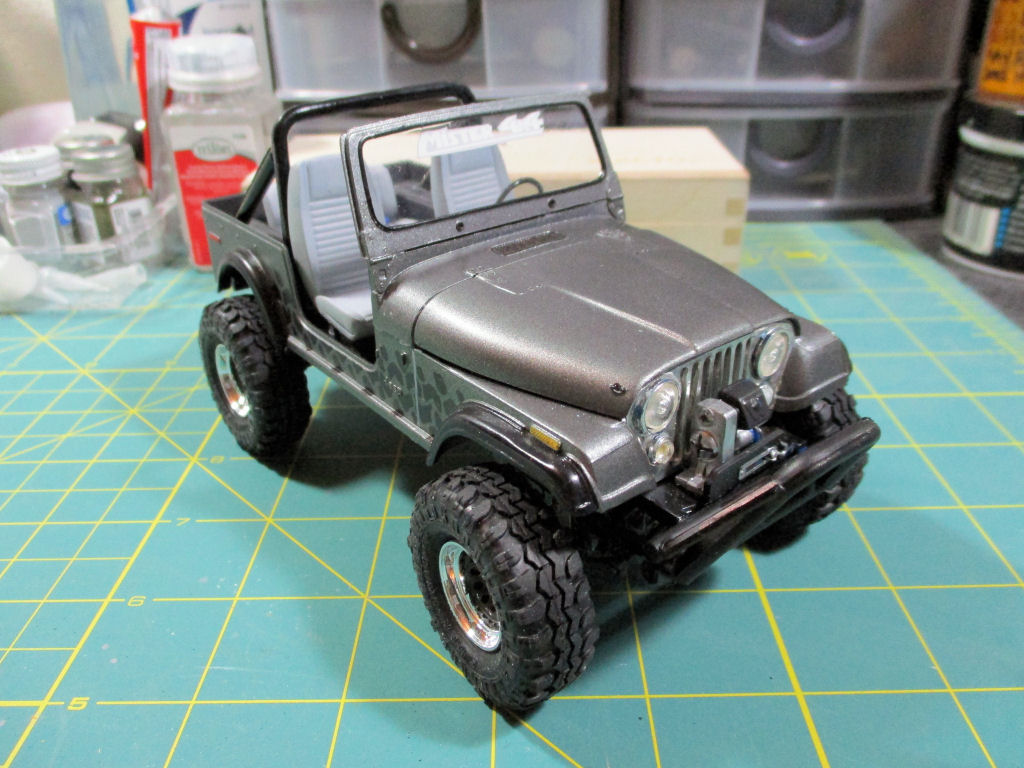 Pretty close - not 100% sure I'll keep that bumper - the sprue was too thick apparently, and I cut the main tubes a little short. I guess I'll see what it looks like with the lights mounted up. So, it's getting pretty close: 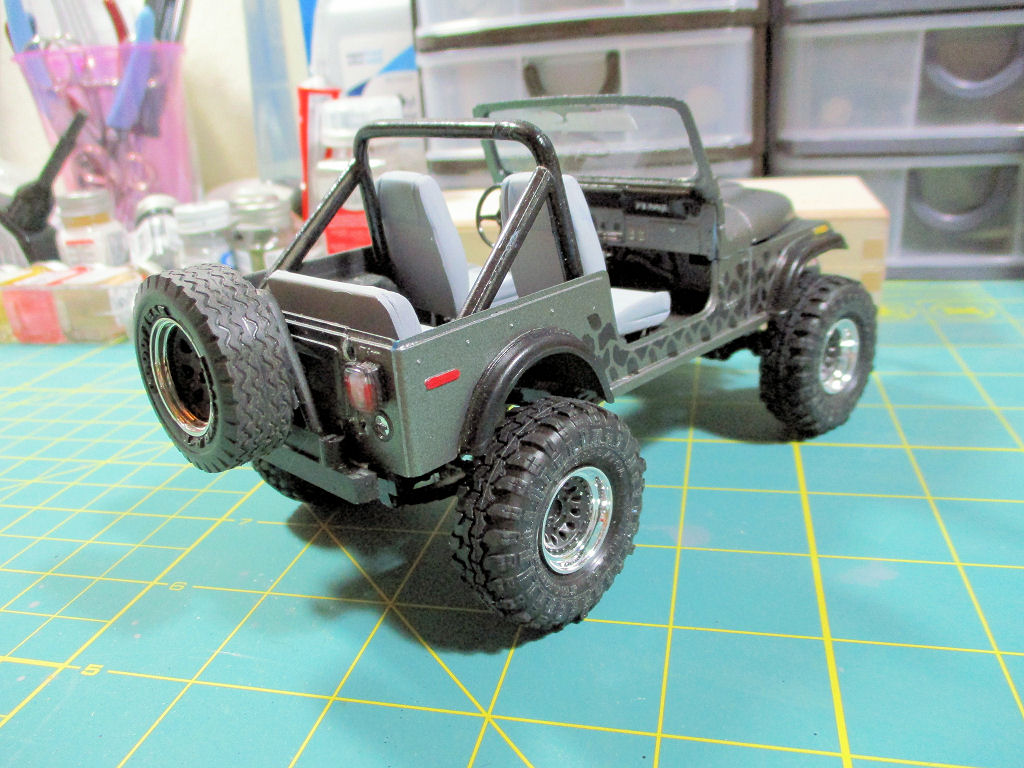 Still need to touch up some things (those taillights, for one), make the nerf bars, cargo net, and my camp chairs in the back, and toss on the little tiny pieces (such as the hood loops, tie downs, wipers, license plates, mirrors, antennas, etc.). It might be time to face the facts, though: I think I might be better at building full-size stuff, than trying to make miniatures of it.  |
|
Deleted
Registered: Nov 23, 2024 21:31:04 GMT -7
Posts: 0
|
Post by Deleted on Mar 19, 2018 18:07:42 GMT -7
So I got a few more things done this weekend. I pulled the seats so I could have better access to the roll bar to make the Bed Webb (cargo net) I put on to keep all the stuff from flying out on the freeway, and also to scratch-build a center console (even with cup holders). Also added the fire extinguisher on the roll bar, and got the license plates mounted, along with the windshield bumpers, wipers, and hood clamps. Oh yeah, scratched up a soft-top as well (which is usually folded up in the cover, since I never drive it in the rain, let alone much at all anymore). 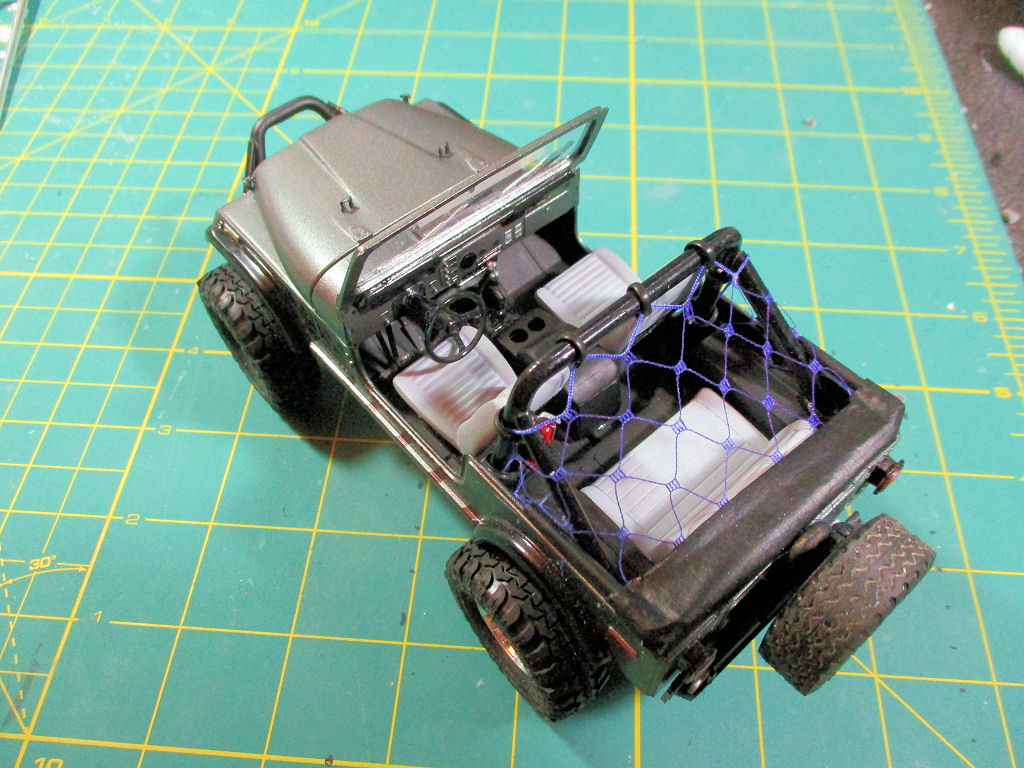 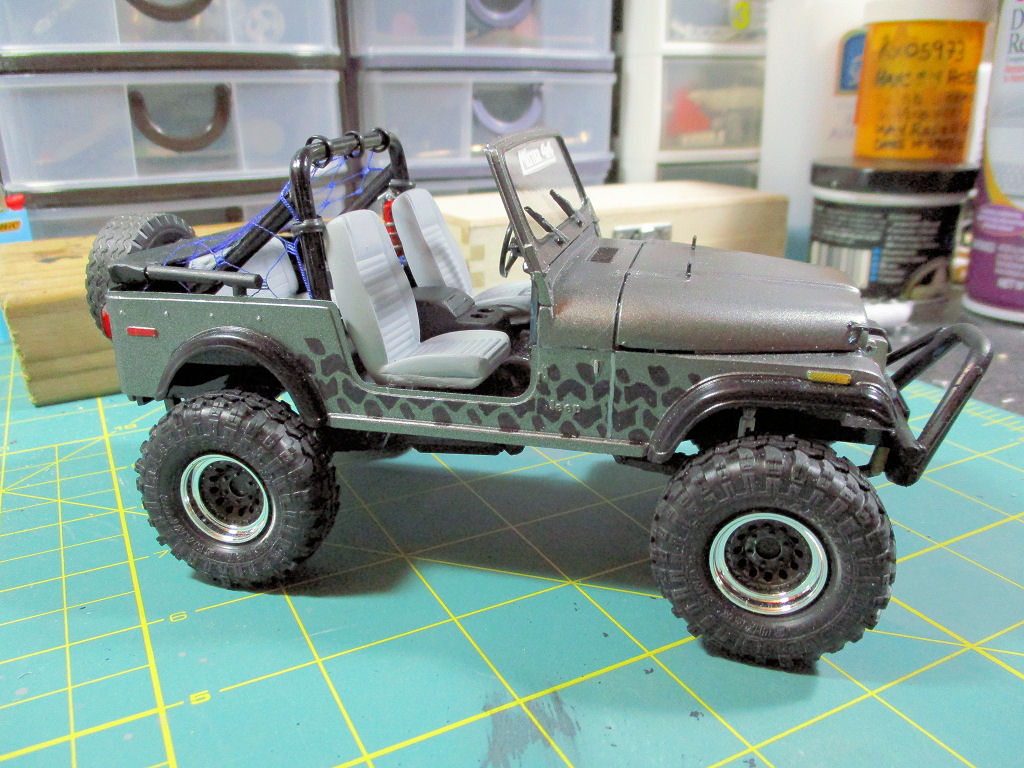 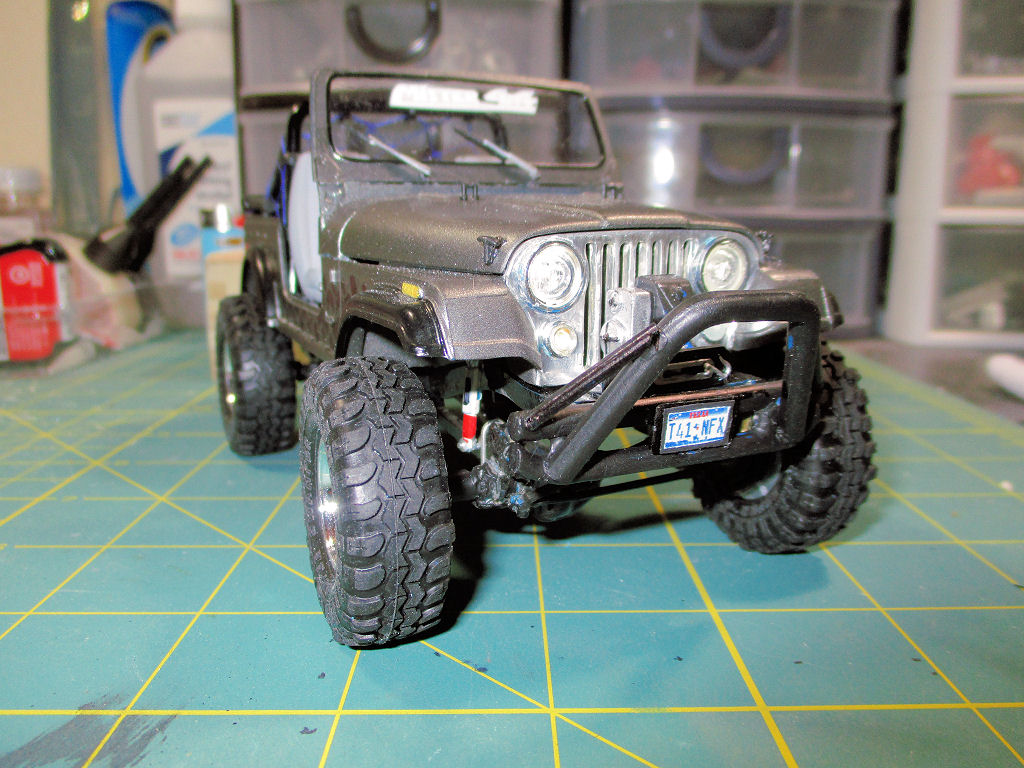 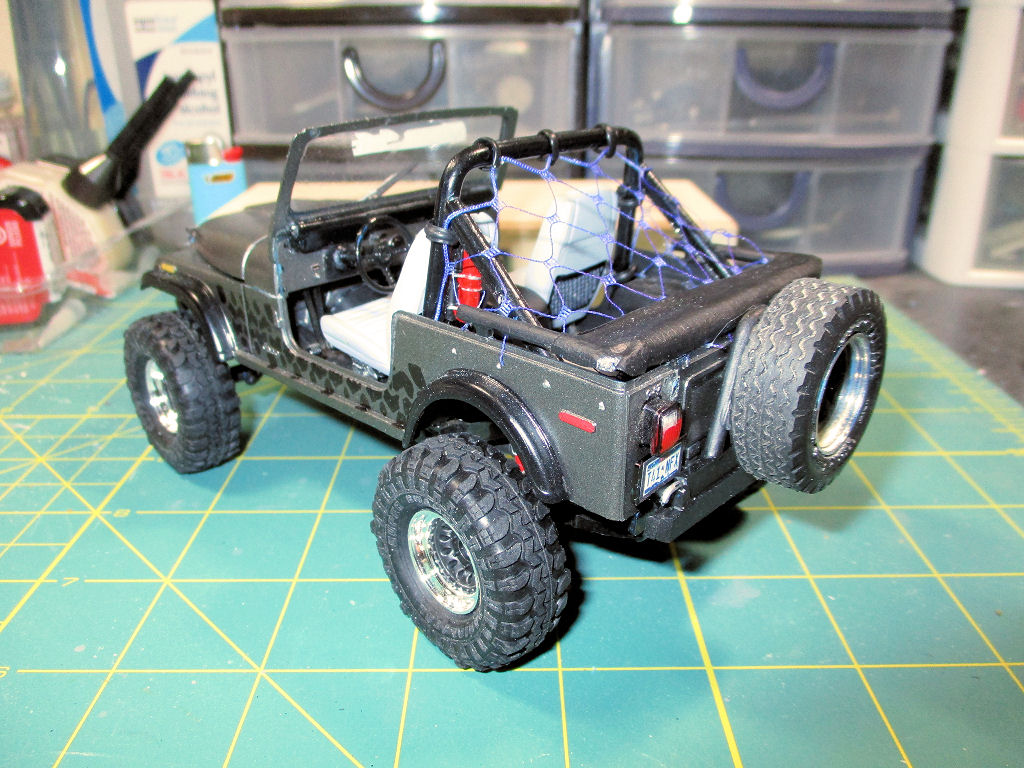 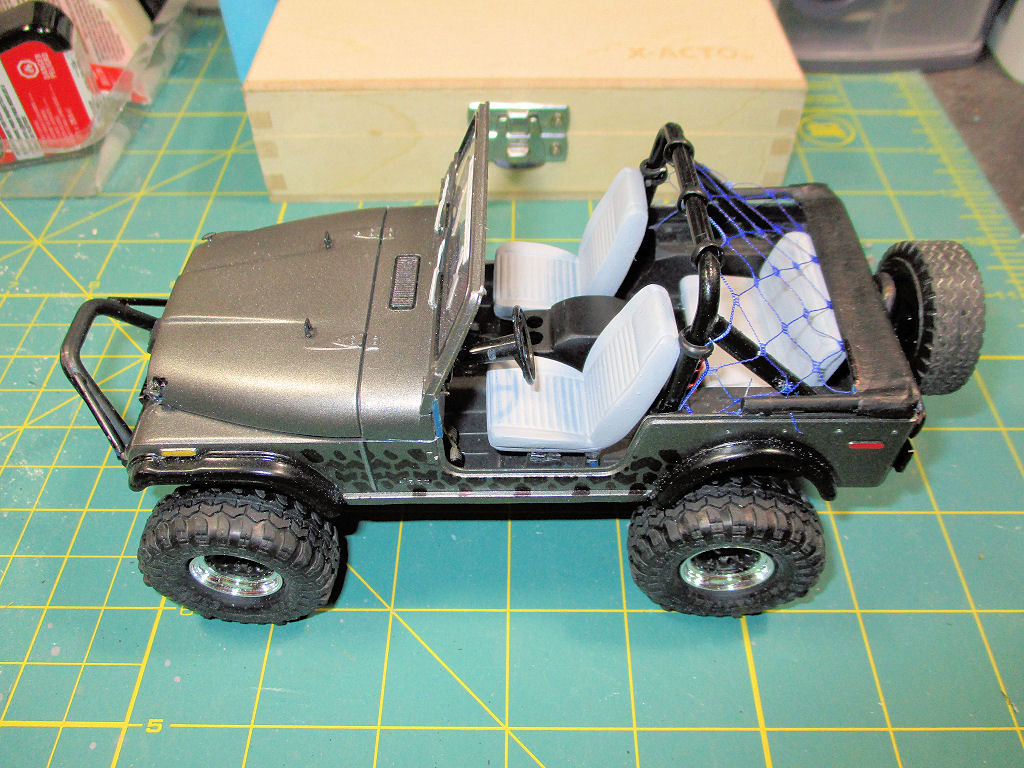 So all that's left:
mirrors
nerf bars (the paint was still drying when I took the pics)
off road lights on the push bar
sun visors
rear view mirror
antennas
Skyjacker steering stabilizer
I'm still working with the camera to get some better pics. I must've taken about 20 and these were the best. In case anybody's wondering, the cargo net is a bridal mesh veil, that was on clearance at Michael's. I colored it with a blue Sharpie. |
|
Deleted
Registered: Nov 23, 2024 21:31:04 GMT -7
Posts: 0
|
Post by Deleted on Mar 25, 2018 17:58:30 GMT -7
OK - so get the fork ready to stab, I'm calling this one done. Today, I made the sunvisors, off road lights, some hubs (Superwinch blue caps), an antenna, and a steering stabilizer (that's still drying since glossy paint takes way longer than flat). Also, got the side mirrors, rear view mirror, and everything else stuck on. I'm pretty happy how it all turned out - a few things could've gone better, but I'm not going to sweat it considering the direction it was going when I pulled it apart and rebooted things. I think the only things missing found on the full size are the rear speakers, Taz rubber floor mats, and the wiring for the winch & lights, otherwise it's pretty much all there. I had this idea of making the covers using some masking tape - glad I went the other way and just cut some pieces of a hot glue stick instead 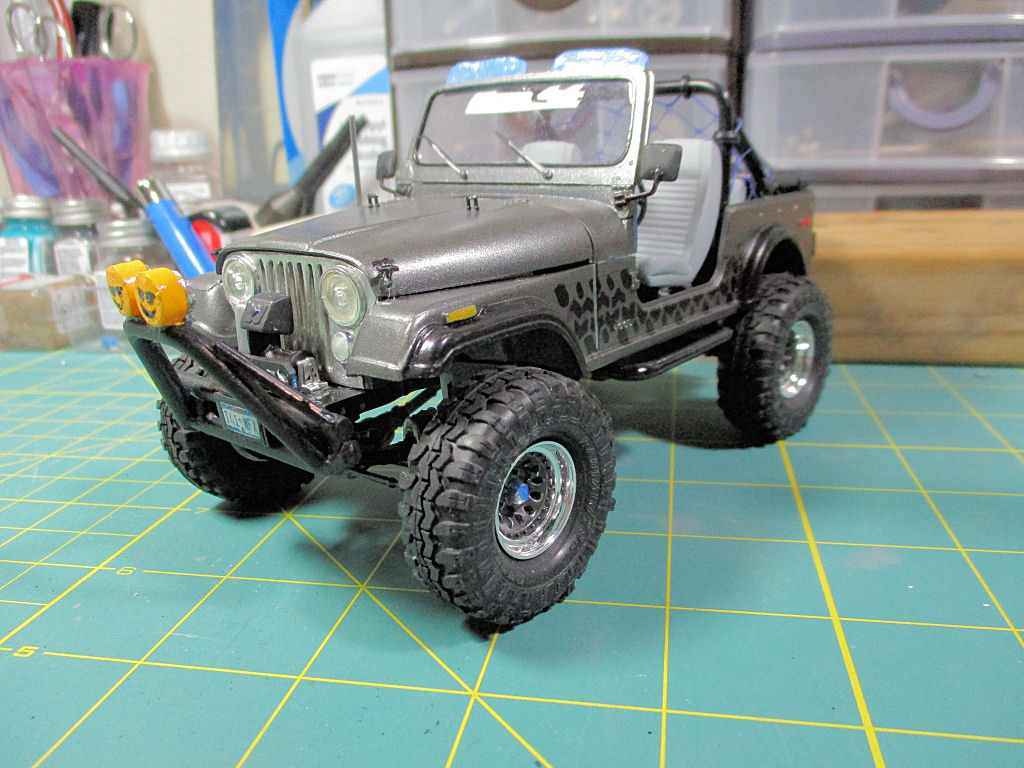 I still love how the center console and cargo net came out. Pretty much dead on! 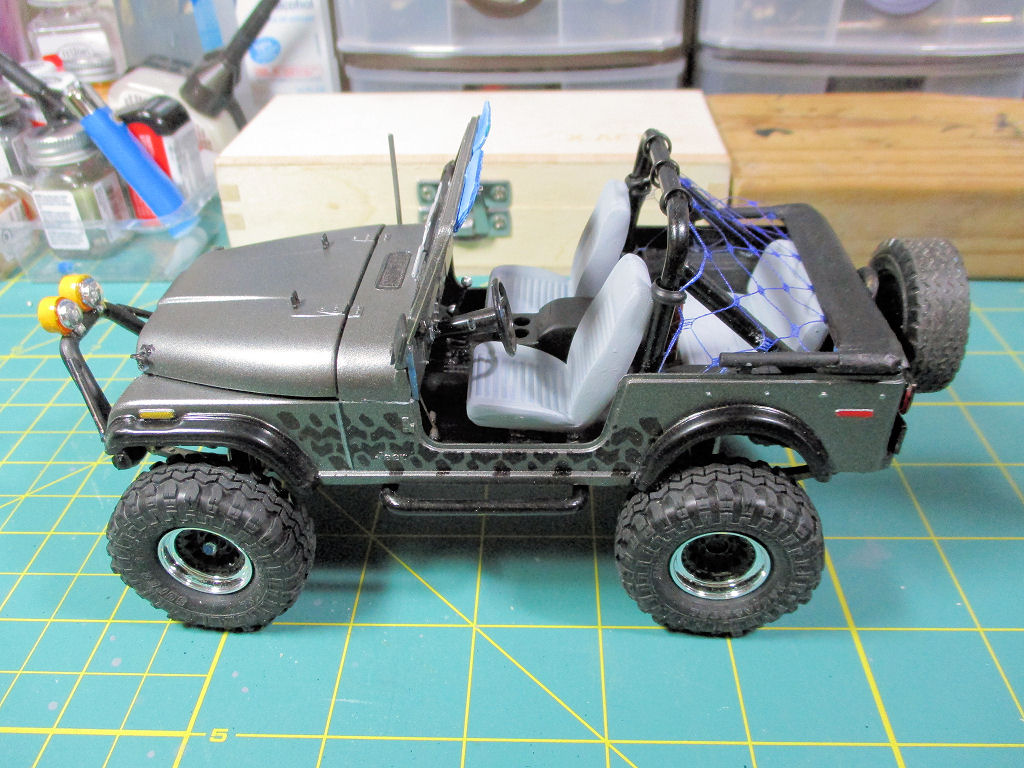 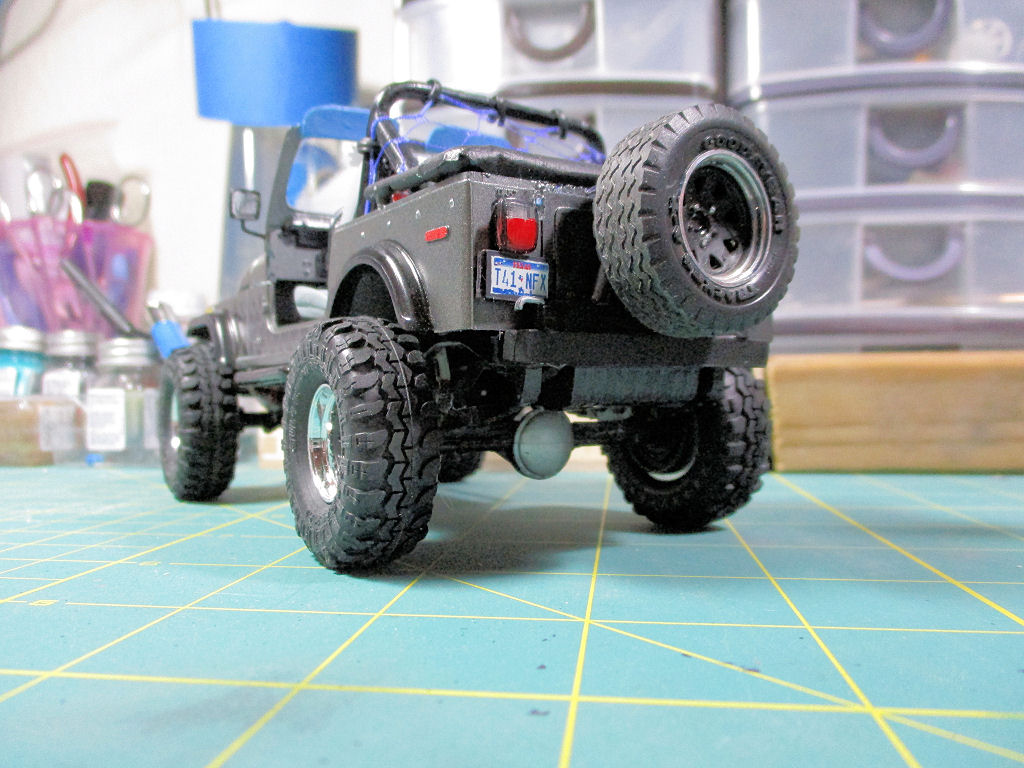 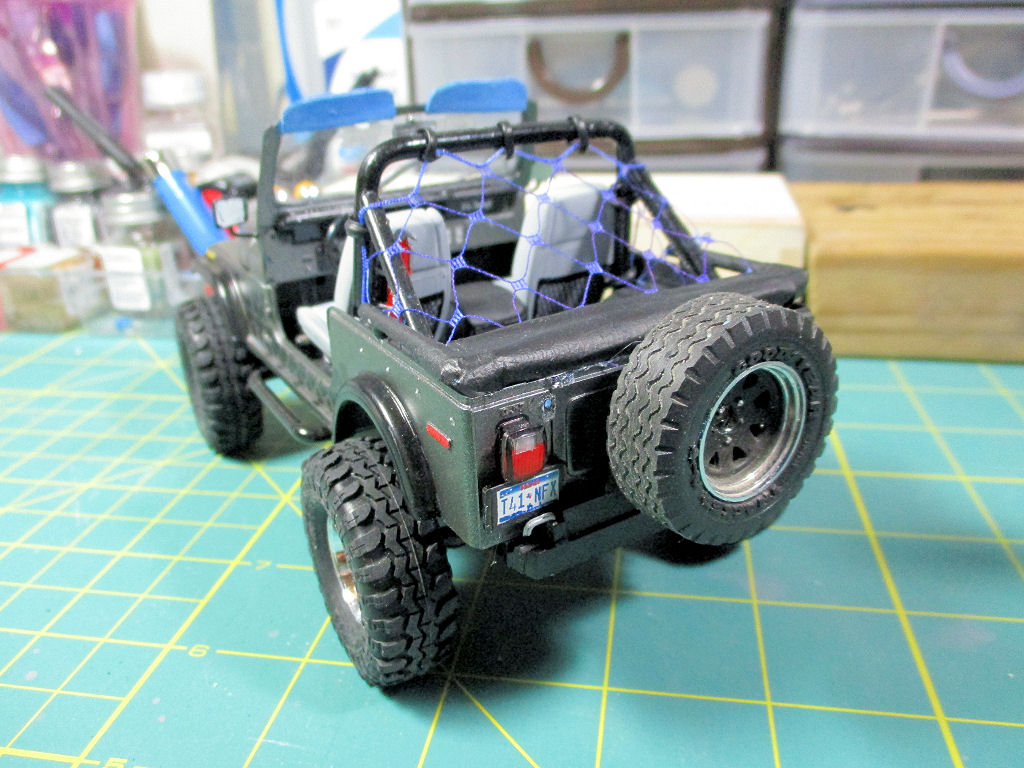 The sun visors are blue because that's the original color of the interior - haven't changed 'em out yet. I'm lovin' the soft top, too. 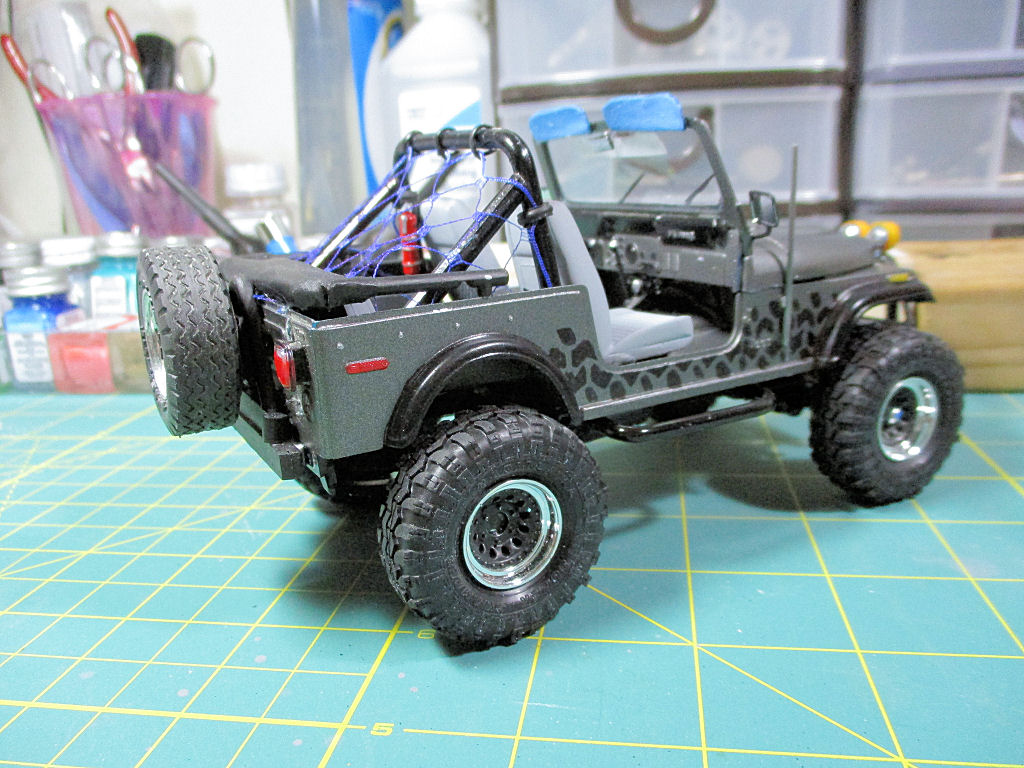 That antenna is a tad thick, but it's the only paper clip I could find - the skinny plastic one shattered as I was pulling it from the sprue. 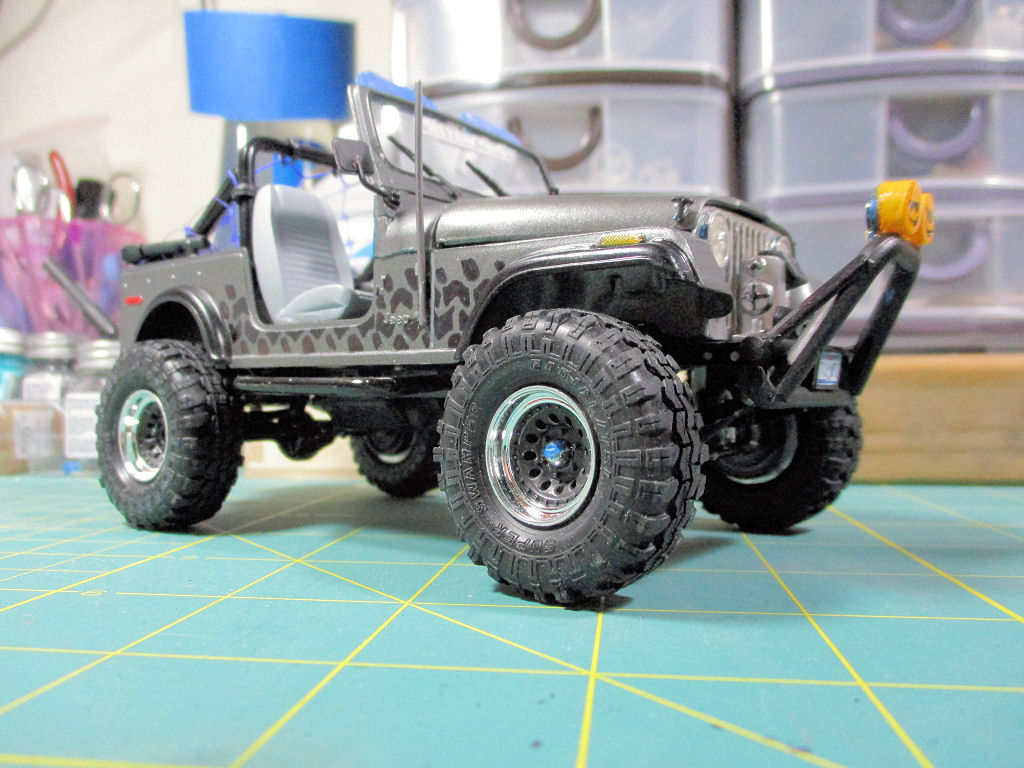 The off road light covers look like they have some bug splats on 'em (which the real ones do as well)  Tires are still a little too big, but dang that stance looks cool! 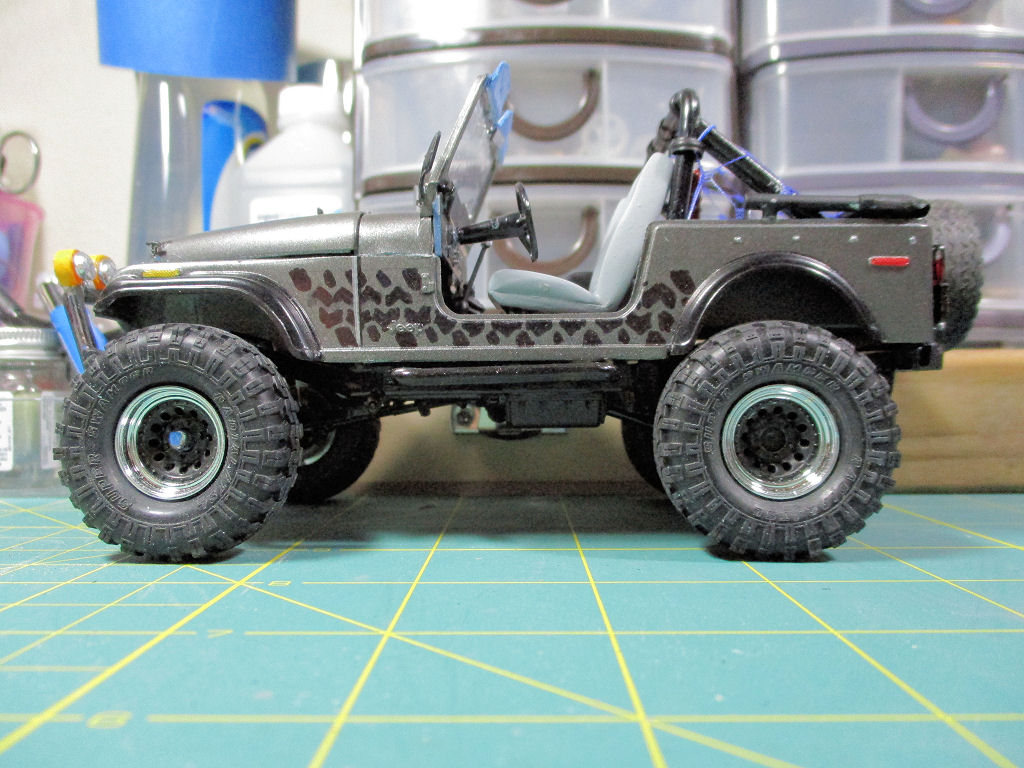 I'm not sure which kit to start next, but I'm leaning toward revisiting my '82 Mustang, since the one I built back in '89 looks like such a horrible replica of the real car compared to how this one came out. Not to mention, I actually scored the correct year model ('79-'82 vs. '83-'84), found the correct wheels, and have some good reference pics. After that, I might have to try something other than a car (I have some cool sci-fi kits and am kind of itching to see how that goes). Thanks for sticking with me! |
|
|
|
Post by midnightprowler on Mar 26, 2018 2:08:43 GMT -7
Well done.
|
|
Deleted
Registered: Nov 23, 2024 21:31:04 GMT -7
Posts: 0
|
Post by Deleted on Mar 26, 2018 10:43:44 GMT -7
Thanks!
|
|