|
|
Post by mustang1989 on May 23, 2017 14:54:15 GMT -7
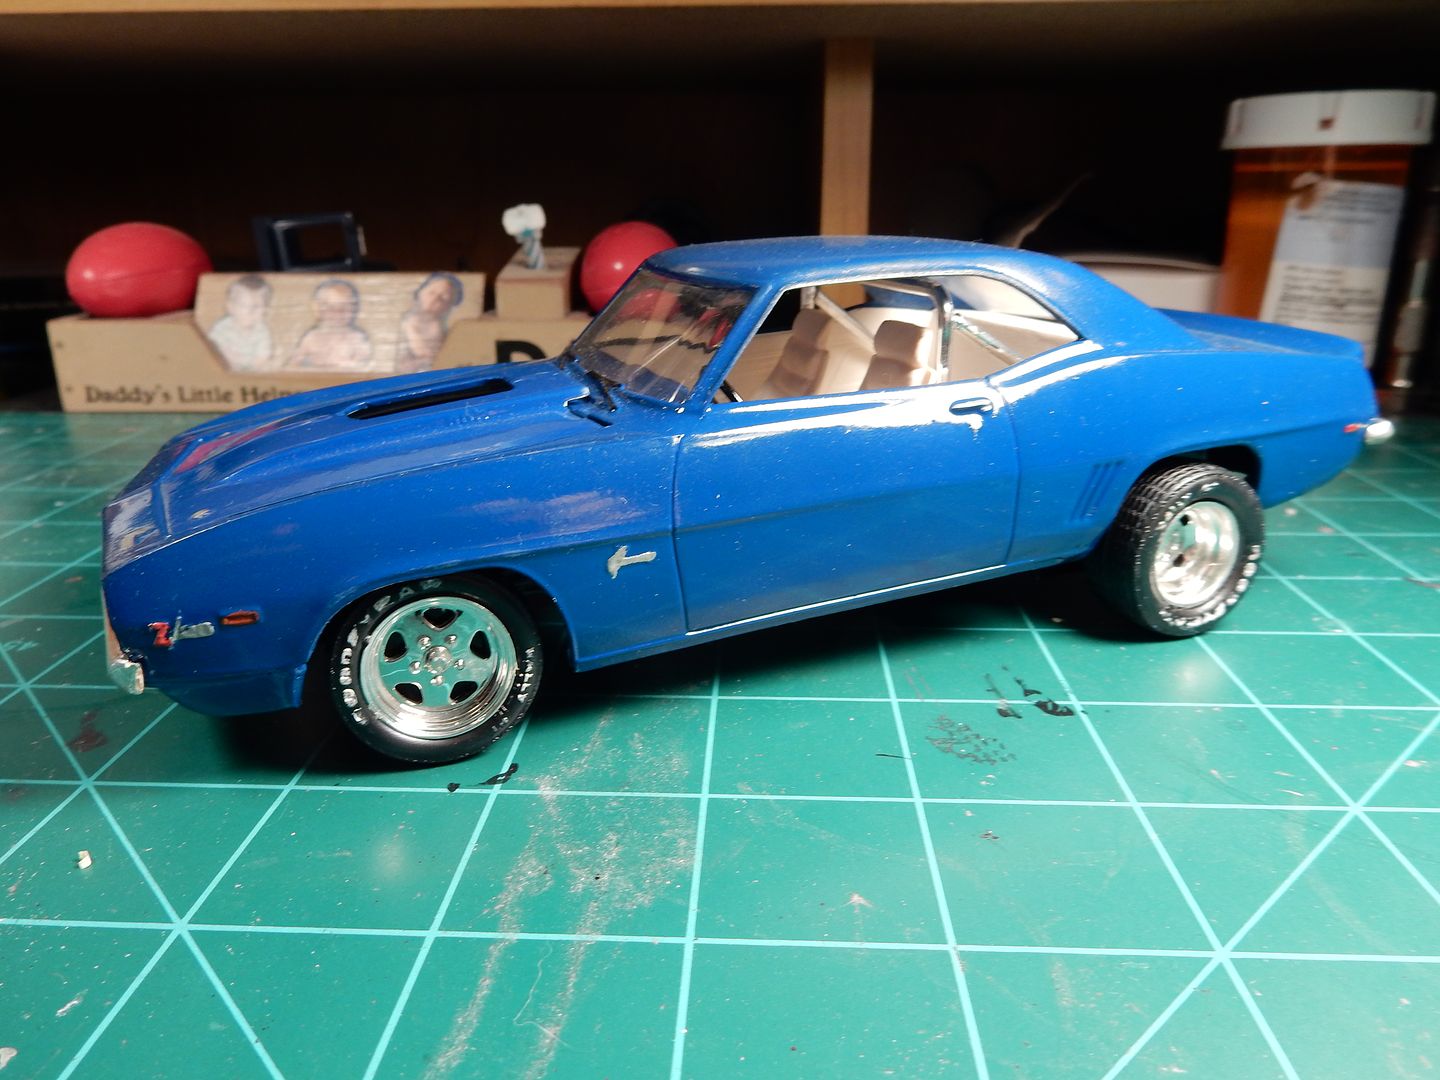
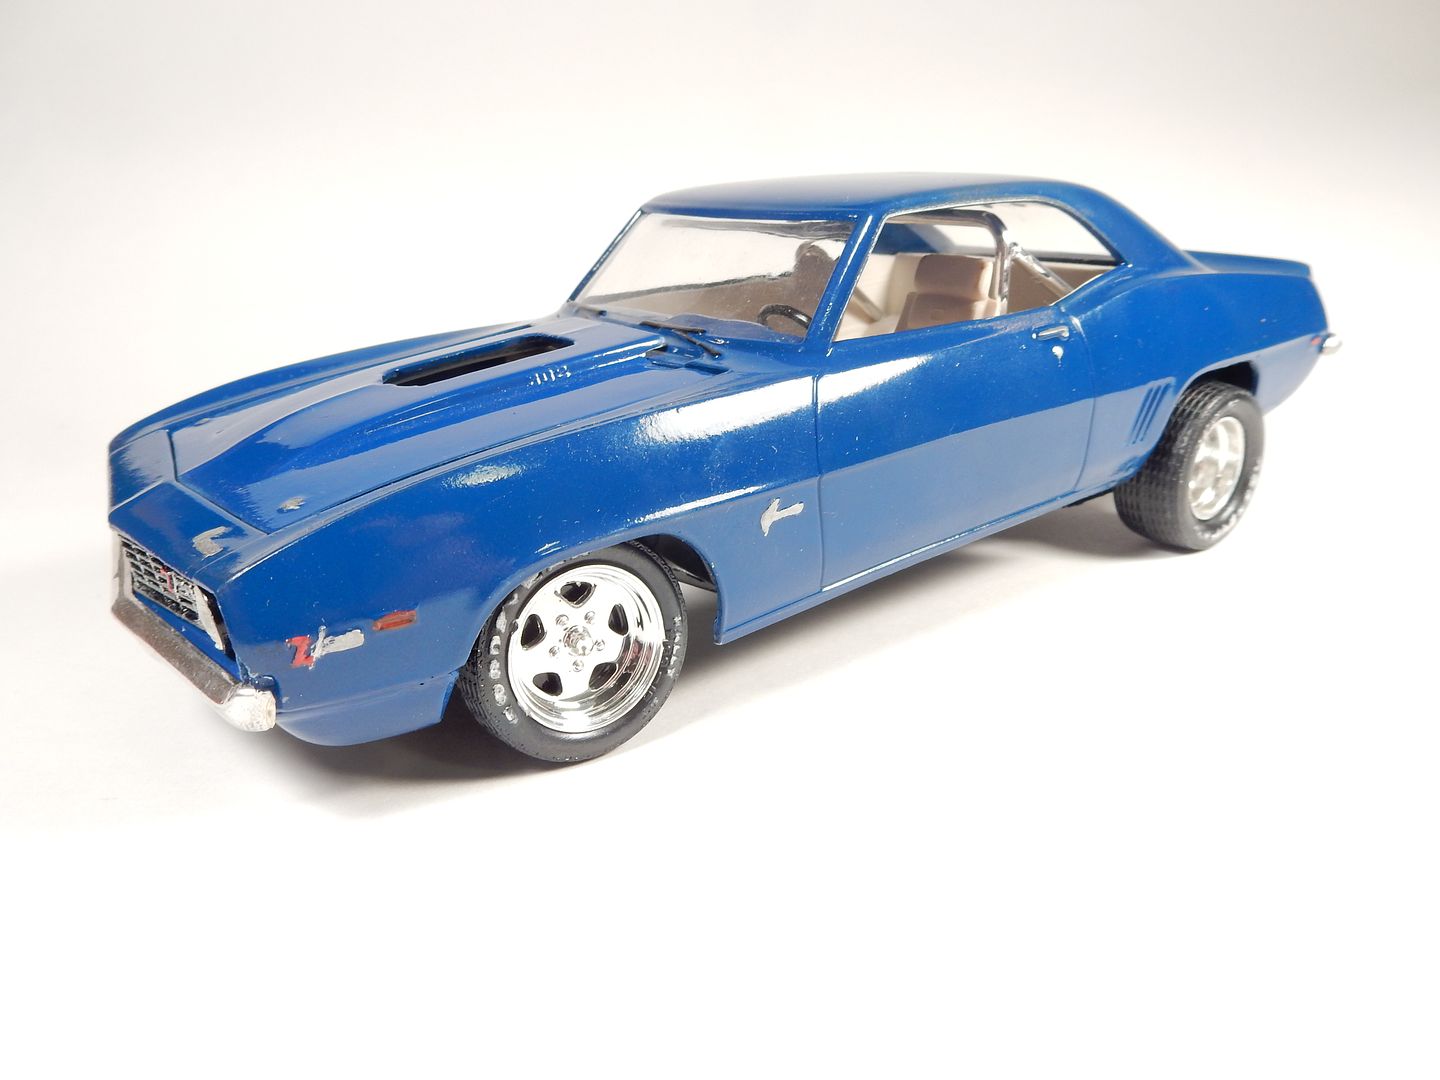
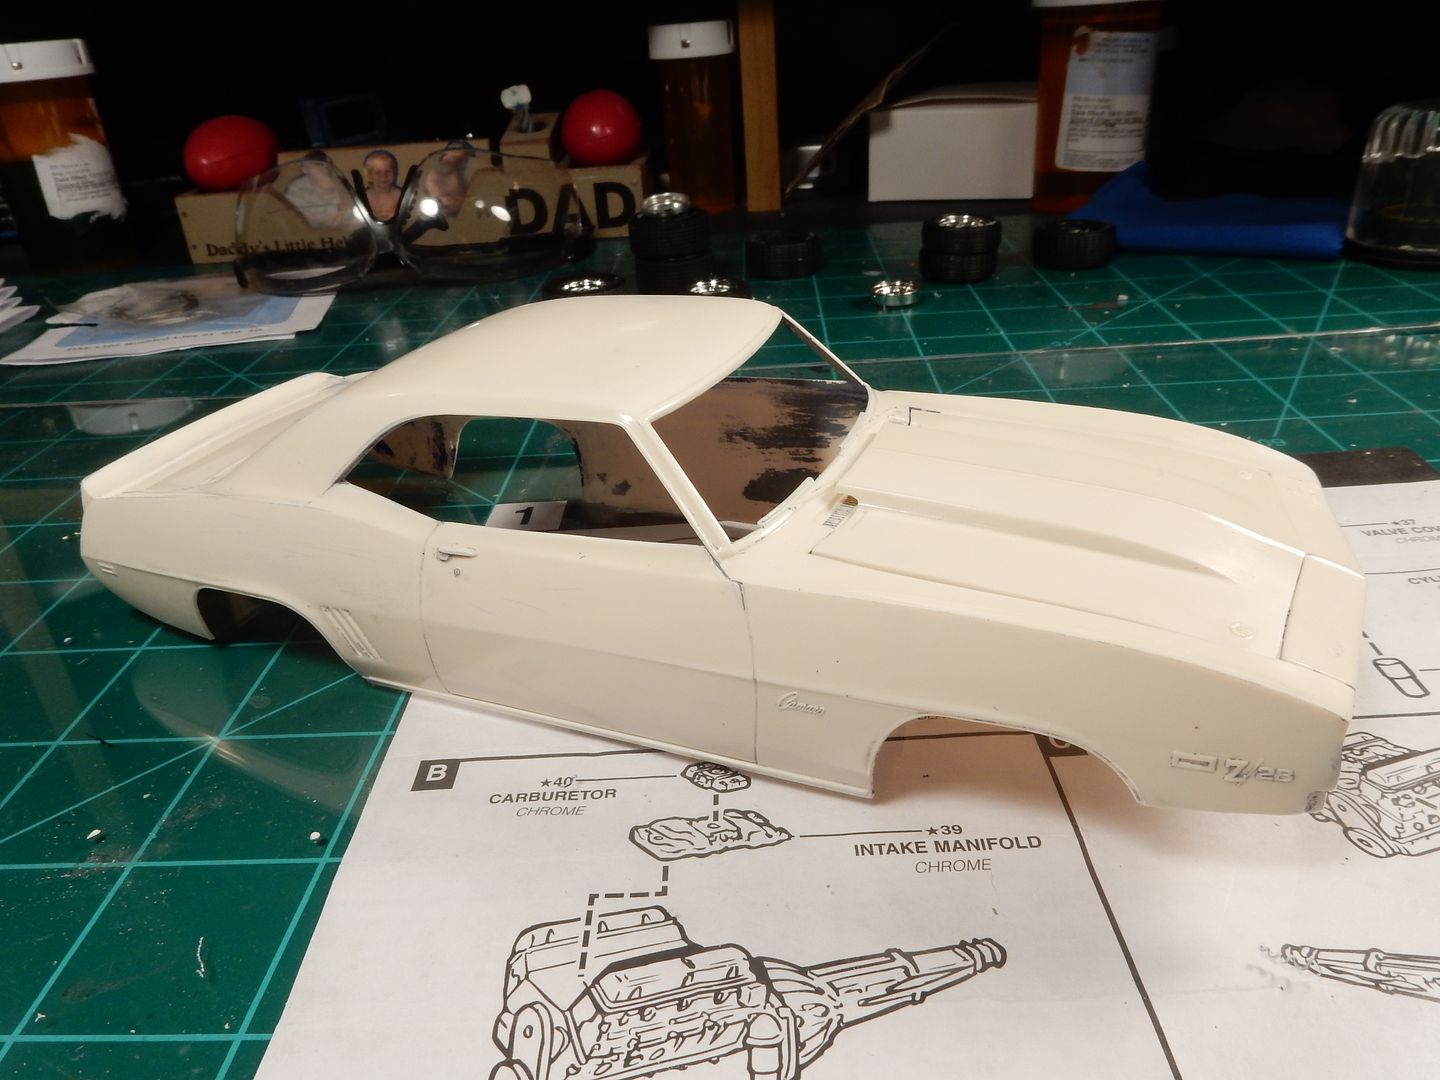
Presented here for rebuild is my 35 year old Monogram 1969 Camaro Z-28 which many of you will know the boxing of this kit back in the late 70’s/ early 80’s:

I’m going to go through this thing I don’t even know how deep I’ll go with it so I aint even going to say that this’ll be a mild rebuild. Anything I touch can’t be done in timely manner it seems like but I’m going to TRY to keep as many original parts as I can in this restoration/ upgrade. There’ll be some definite changes in regards to the interior as well as the exterior. I’ll be changing up the wheel and tire combo and will stay within the boundaries of a street machine using street tires with some Cragar SS wheels and a mildly upgraded Chevrolet 396 with a single four barrel carburetor to top things off.
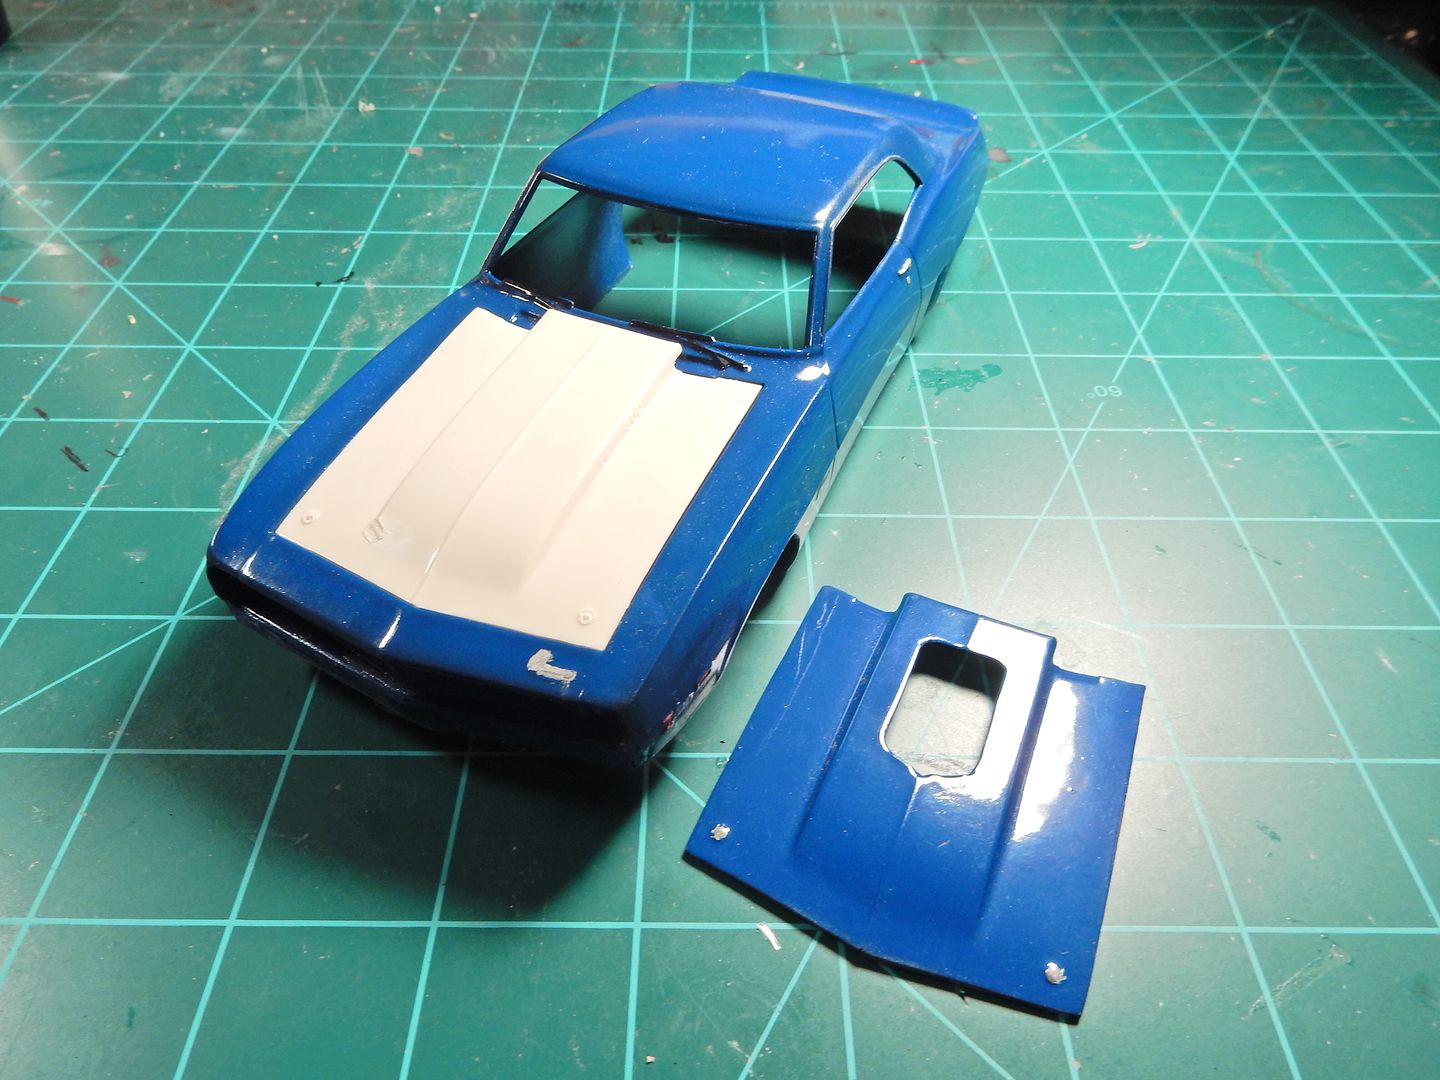
Here’s a picture of what we’re going to start with as it sat on my bench this morning:
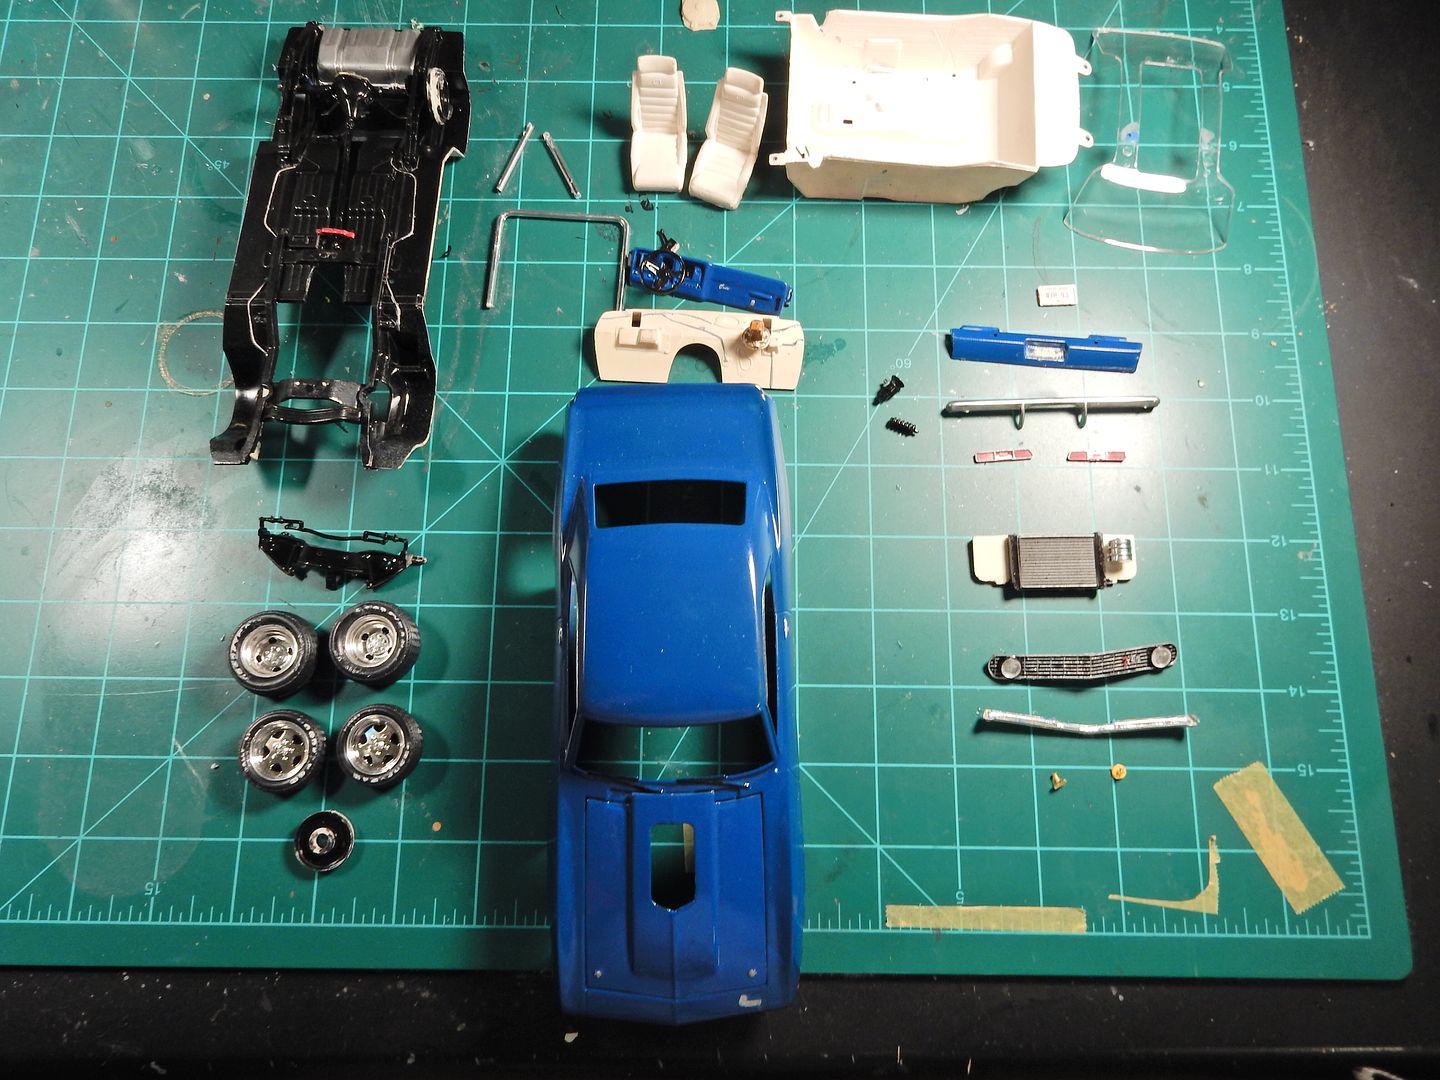
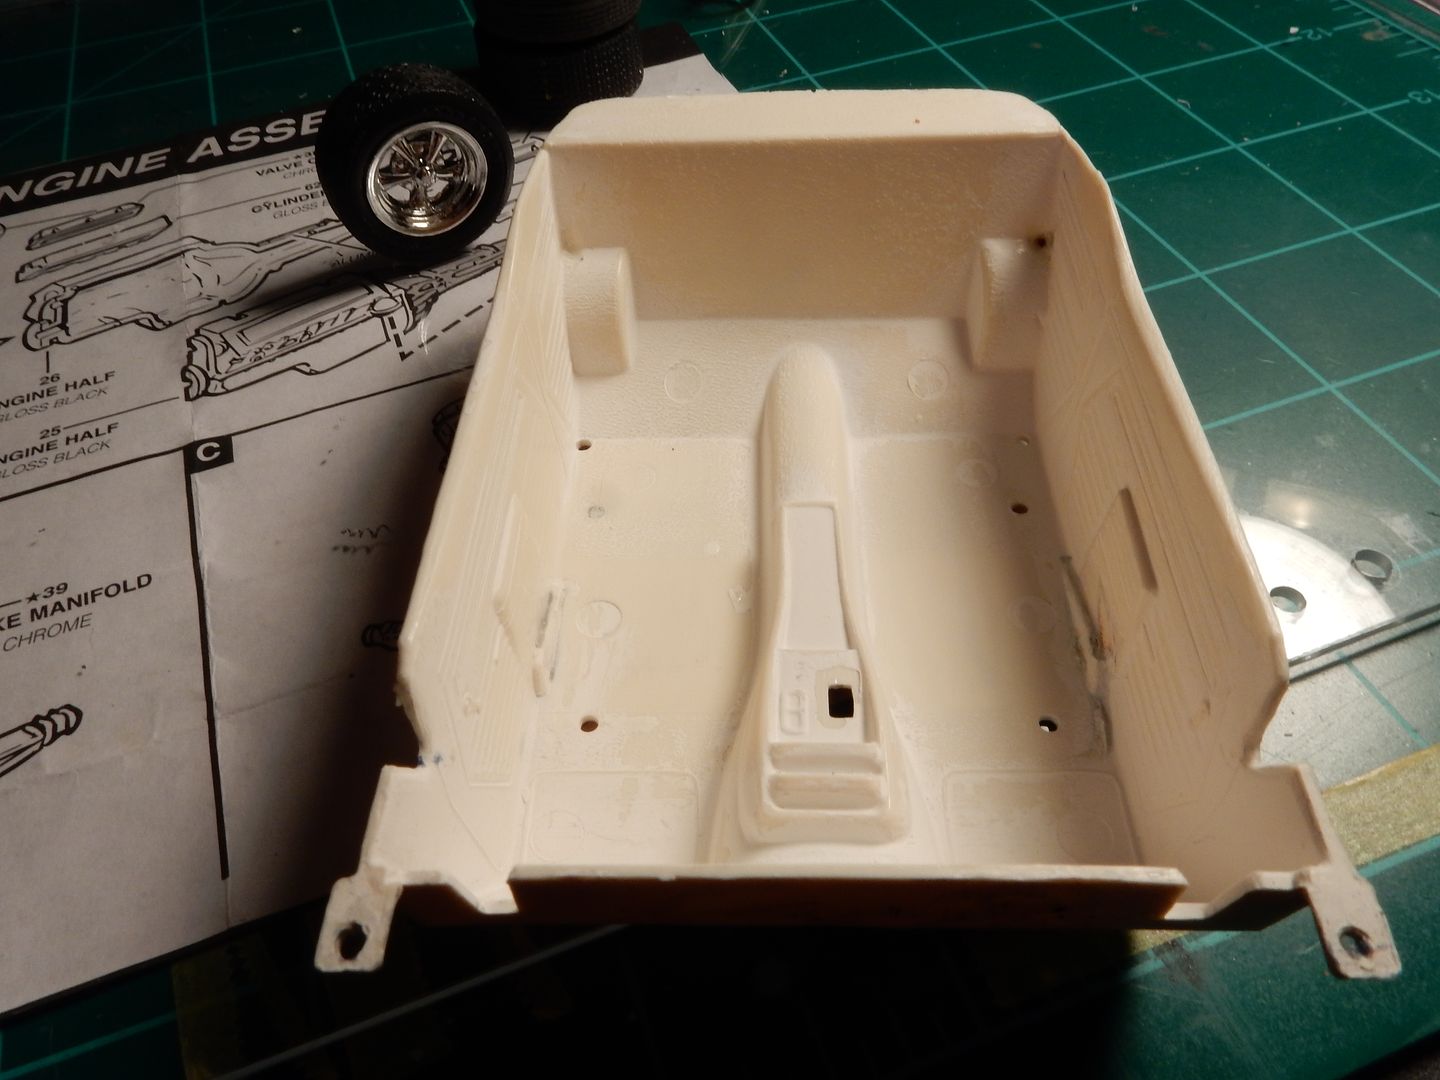
The options were wide open as there hasn’t been anything in the engine compartment in 30 years now:

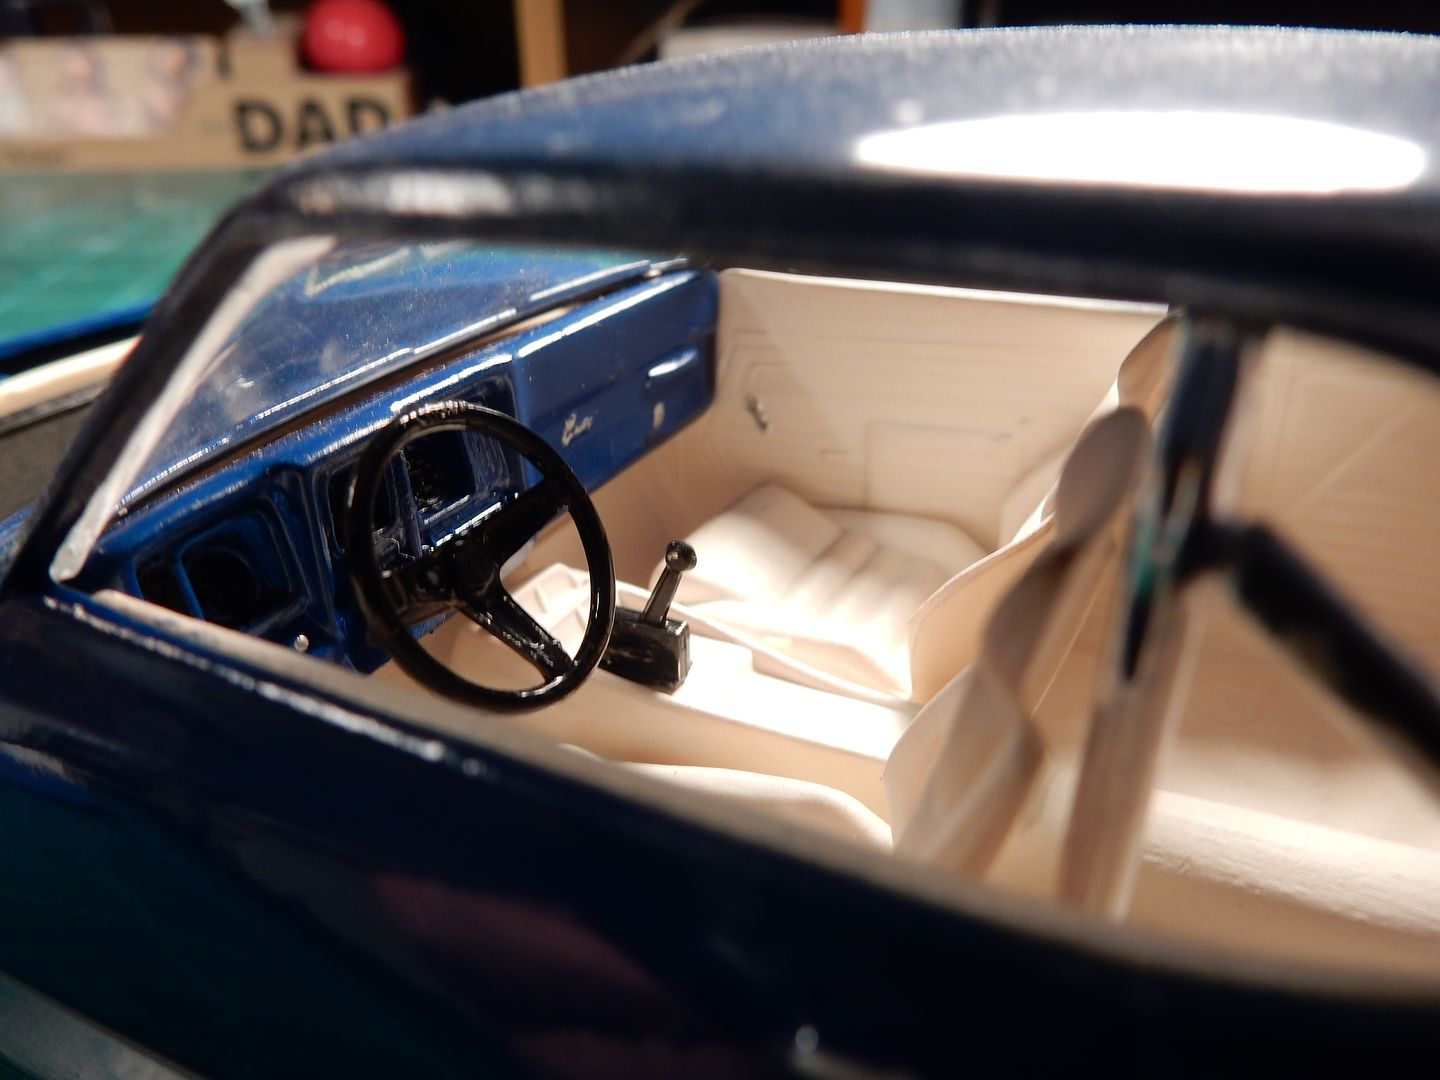
A picture of the interior:
Now apart on the bench:
To start with I have managed to come up with another hood thanks to a friend on the forums:
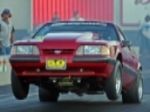
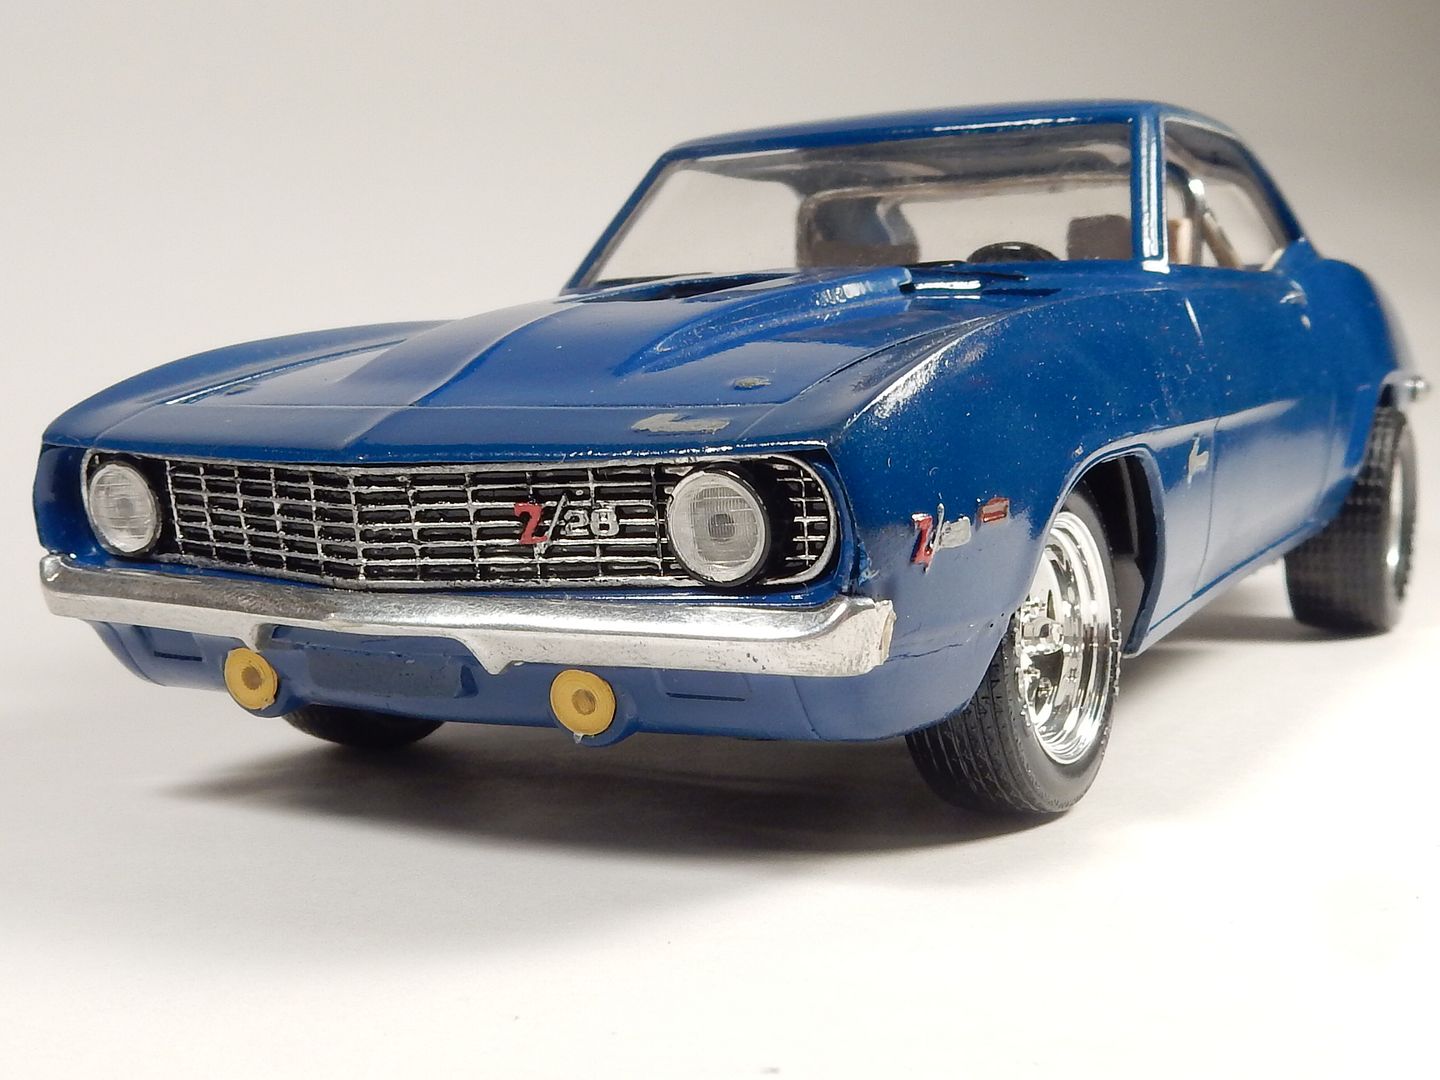
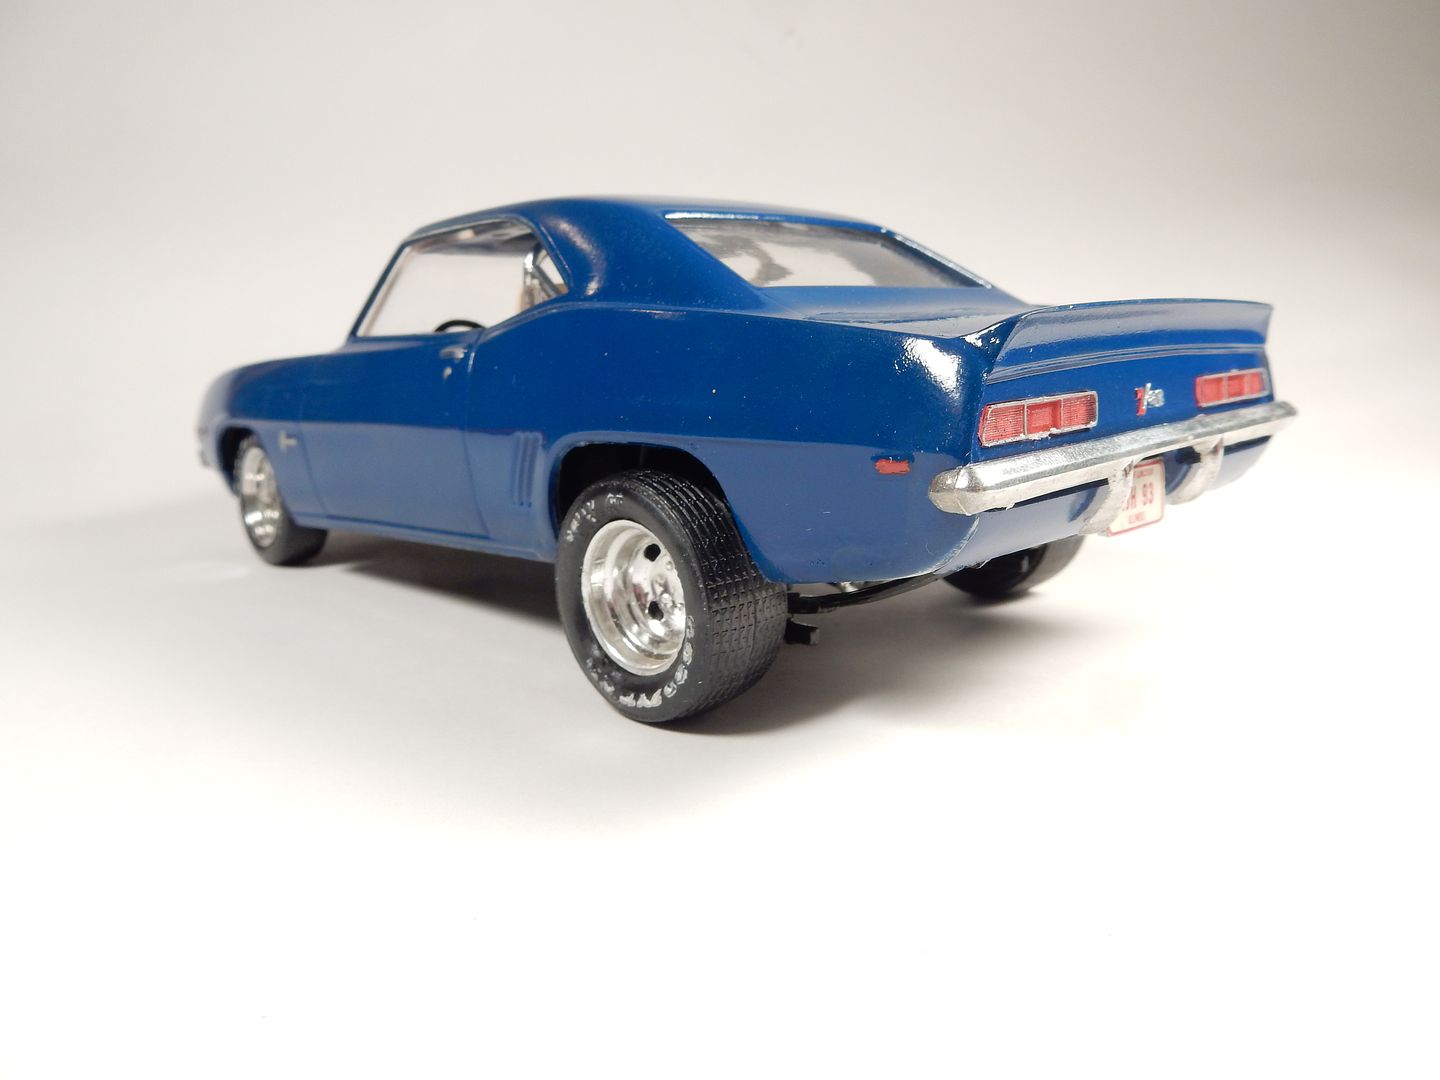
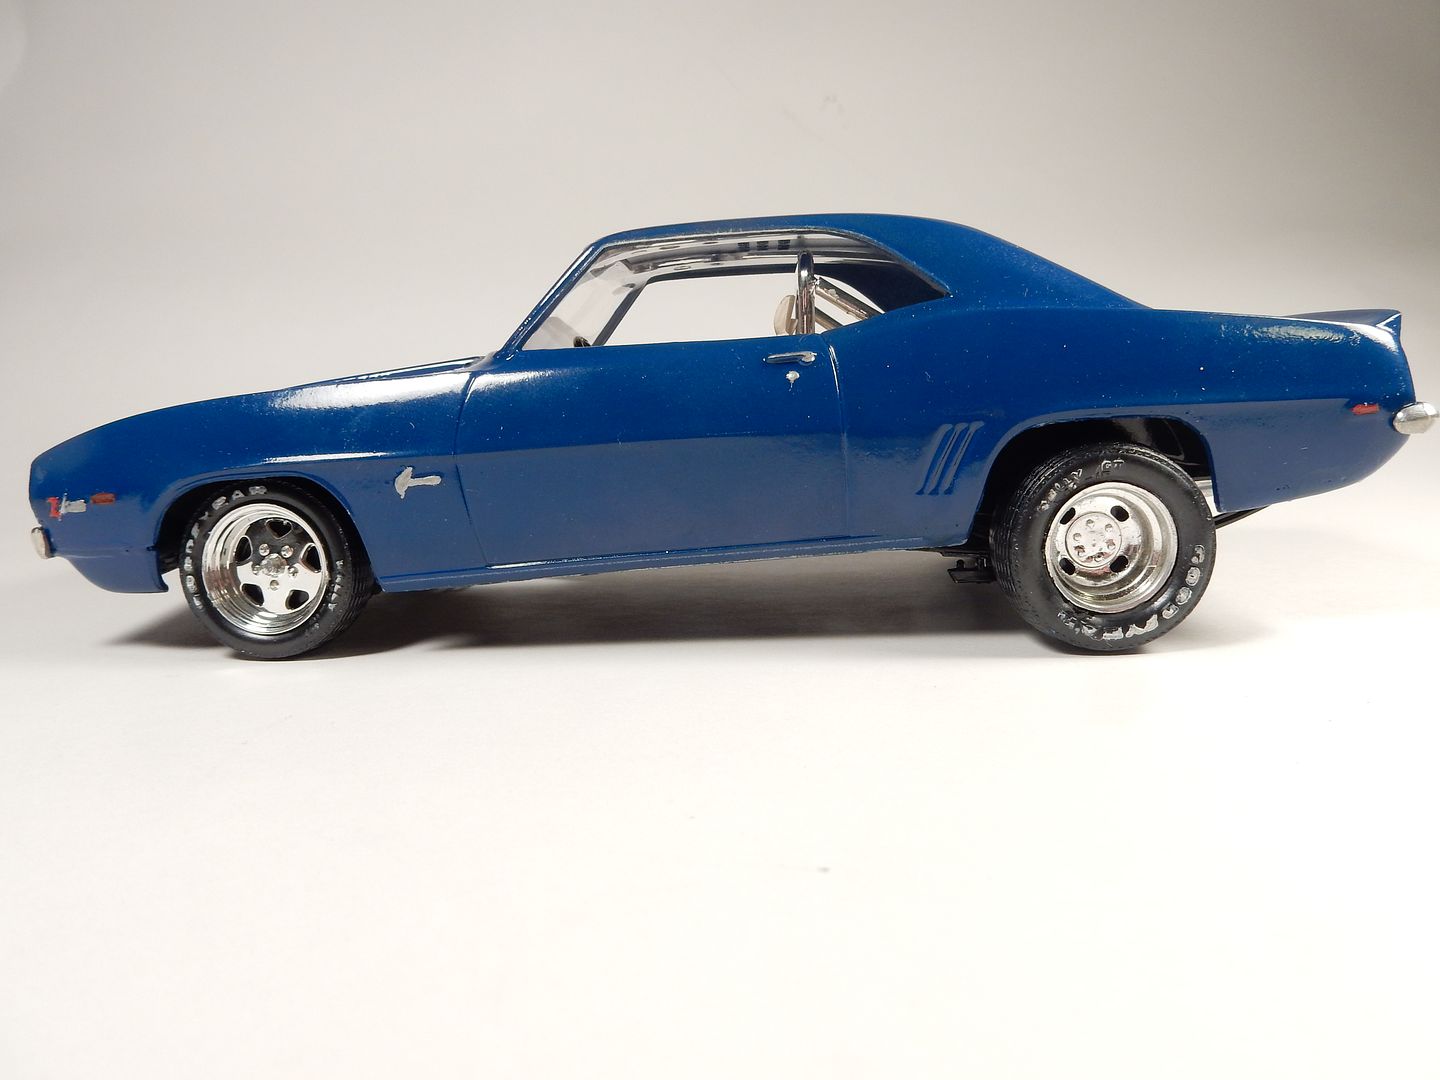
And a few glamour shots I took as it was when I built it way back when (the rear wheels were added around 3-4 years later) :
|
|
|
|
Post by sharp on May 23, 2017 20:13:58 GMT -7
Looks like a cool project Joe,can't wait to see what you do!
|
|
|
|
Post by Grandpabeast on May 24, 2017 2:48:07 GMT -7
Yes, I'm digging the rebuild ! I had several of that kit back in the day. I really wish I had all those kits from my youth
|
|
|
|
Post by mustang1989 on May 24, 2017 3:27:39 GMT -7
Yes, I'm digging the rebuild ! I had several of that kit back in the day. I really wish I had all those kits from my youth Thanks fellas. I'm fortunate to have 5 builds remaining from childhood. I had a slew of 'em back in 04 but over the last few moves they didn't hold up very well. I didn't take care of them very well back then either. The ones I have now are either in a display case or tucked away in new boxings of the kits slated for rebuild.
I only had this kit here but know there are several more offerings of it available. Honestly these are terrible kits and if it weren't for the fact that this one here was the one that started it all for automotive modeling for me I wouldn't be doing it but hey, I thought I'd do the ol gal some justice. 
|
|
|
|
Post by mustang1989 on May 25, 2017 1:34:26 GMT -7
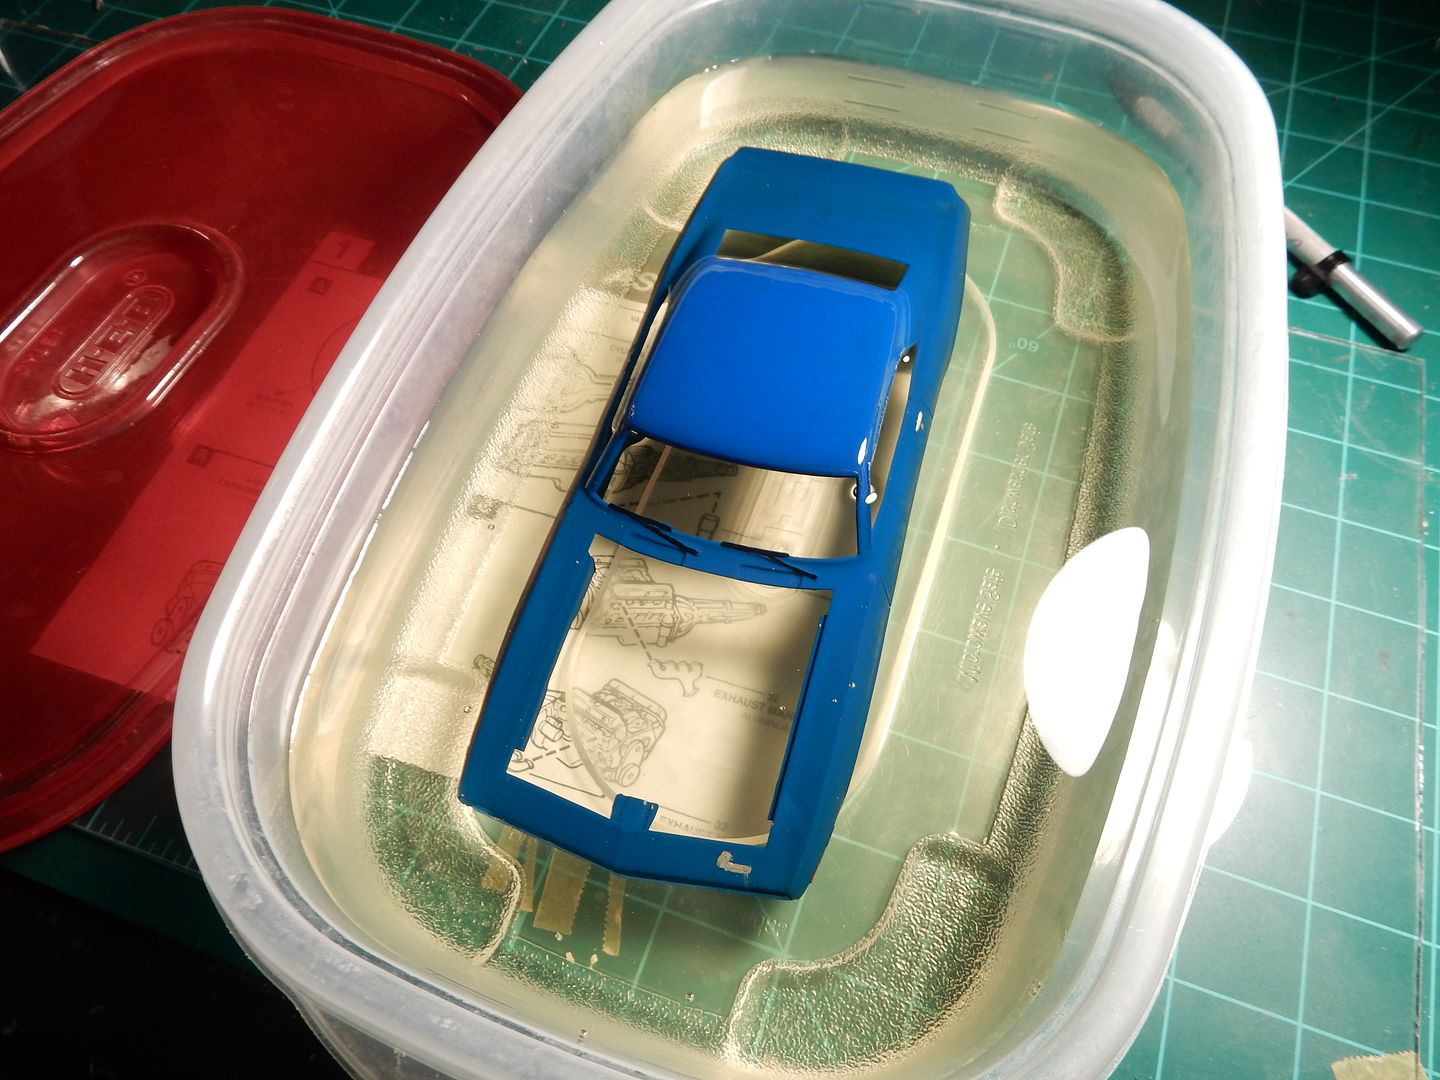
Say good bye to the paint fellas. The body in a bath of Dot 3 Brake Fluid:
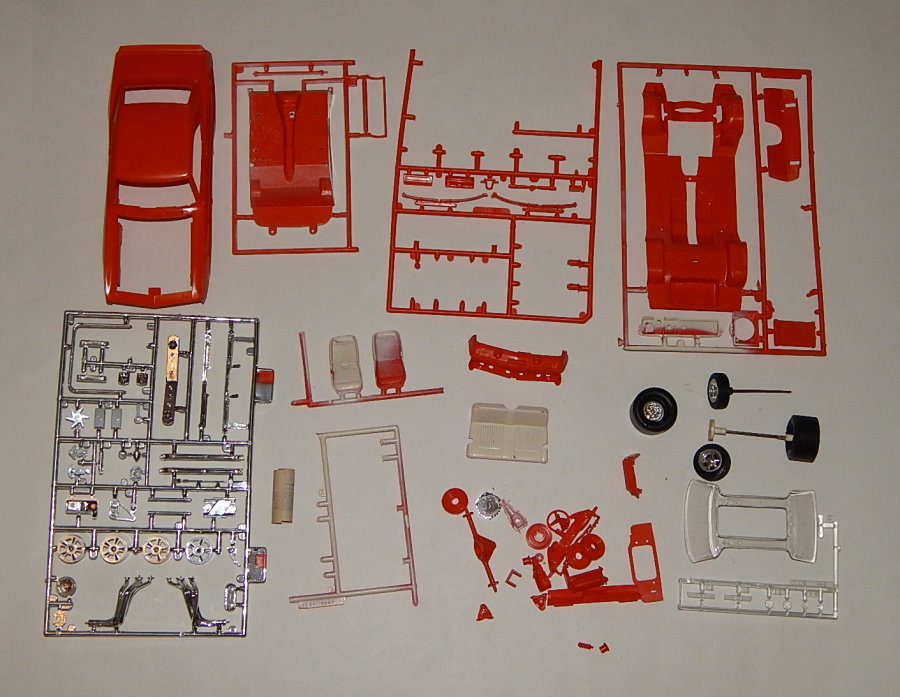
I'll be using a lot of parts from this cool PE fret that I acquired:
along with an extra parts kit:

Lotsa parts to draw from :
|
|
tubbs
Loyal Member
 Registered: Jul 24, 2013 5:02:43 GMT -7
Posts: 1,017
|
Post by tubbs on May 25, 2017 5:55:09 GMT -7
nice. your gonna do a great job, love the photo etched stuff too. a little hard to work with (you need a lot of patience with that stuff). look forward to what you do with it.
|
|
|
|
Post by sharp on May 25, 2017 21:35:22 GMT -7
Say good bye to the paint fellas. The body in a bath of Dot 3 Brake Fluid:
I'll be using a lot of parts from this cool PE fret that I acquired:
along with an extra parts kit:
Lotsa parts to draw from :
Hey Joe,I never used brake fluid for stripping does it work fast? |
|
|
|
Post by mustang1989 on May 26, 2017 2:19:52 GMT -7
It works fairly quick Mike. I'll usually leave the parts in it overnight though. I did run into a gallon of Purple Power for free not too long ago so I'll be trying that stuff out next time I need to strip something and come up with a comparison.
|
|
|
|
Post by mustang1989 on May 30, 2017 14:08:09 GMT -7
Here's after stripping the body of paint which turned out pretty good and still needs some cleaning up. I ended up clipping one of the rear tail light openings at the bottom and knocked the thin strip at the bottom of the opening out so I'll have to work some fancy foot work to get that back in line but it shouldn't be all that bad.
This is the very best that Monogram could do in the late 70's and throughout the early 80's I guess. It's not very accurate but it's what I've got ................so we'll deal with that.
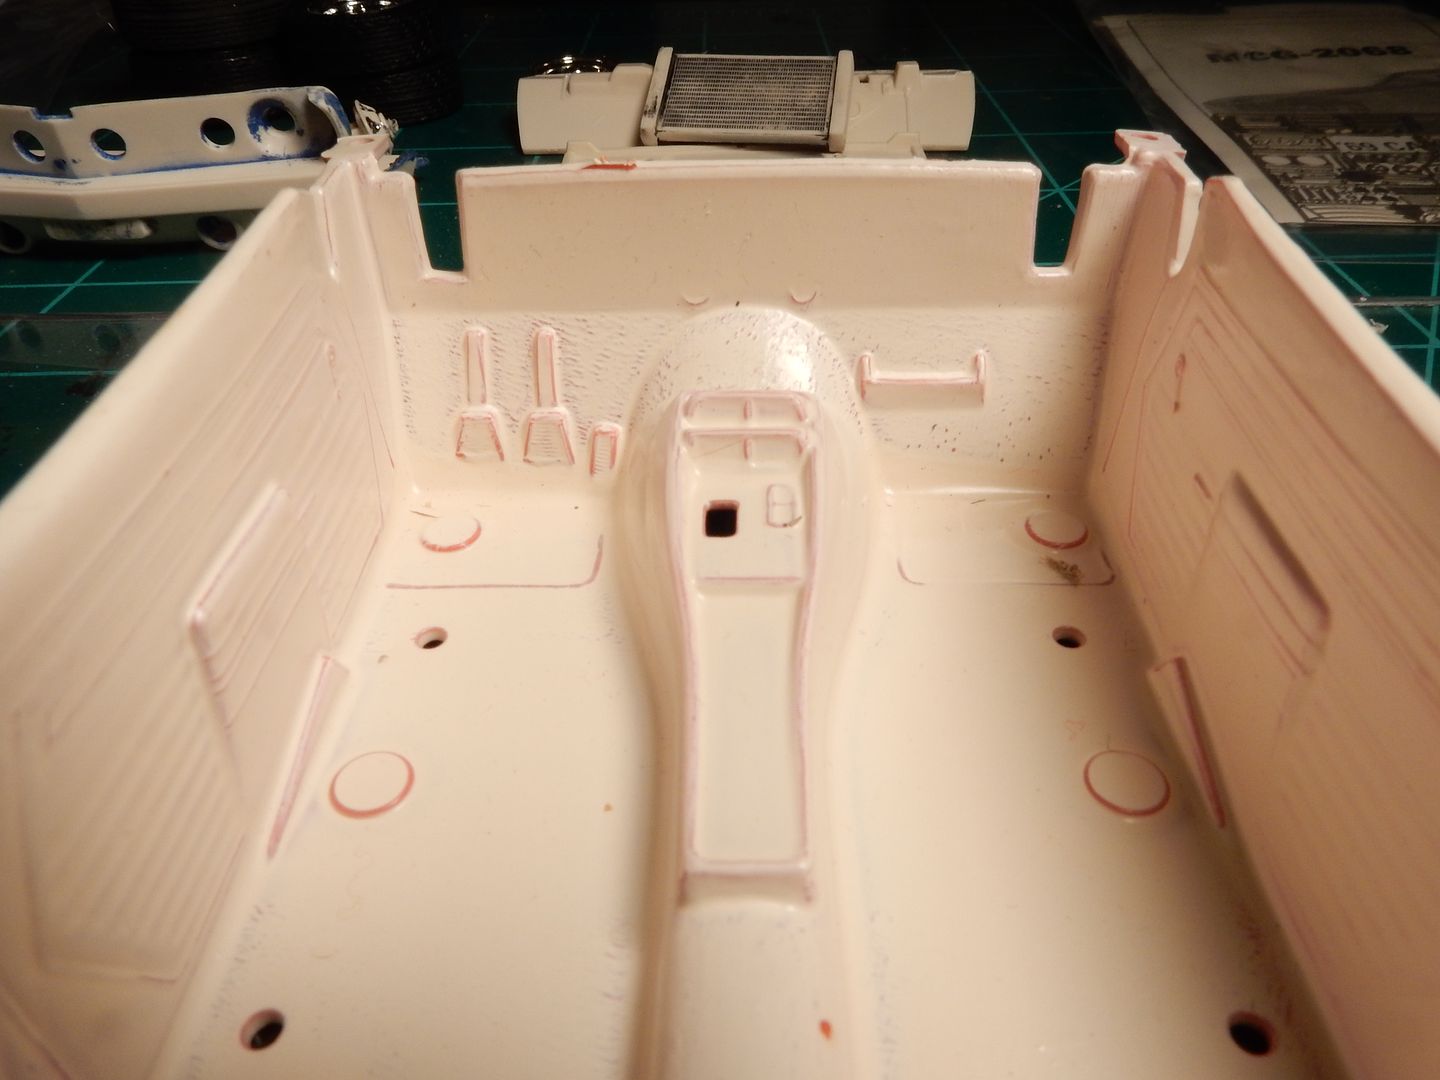
It's not going to be perfect but I'm shooting for the best I can do with this interior bucket to transform it into something that somewhat resembles this....minus the wood grain of course.

|
|
|
|
Post by mustang1989 on May 31, 2017 10:54:41 GMT -7
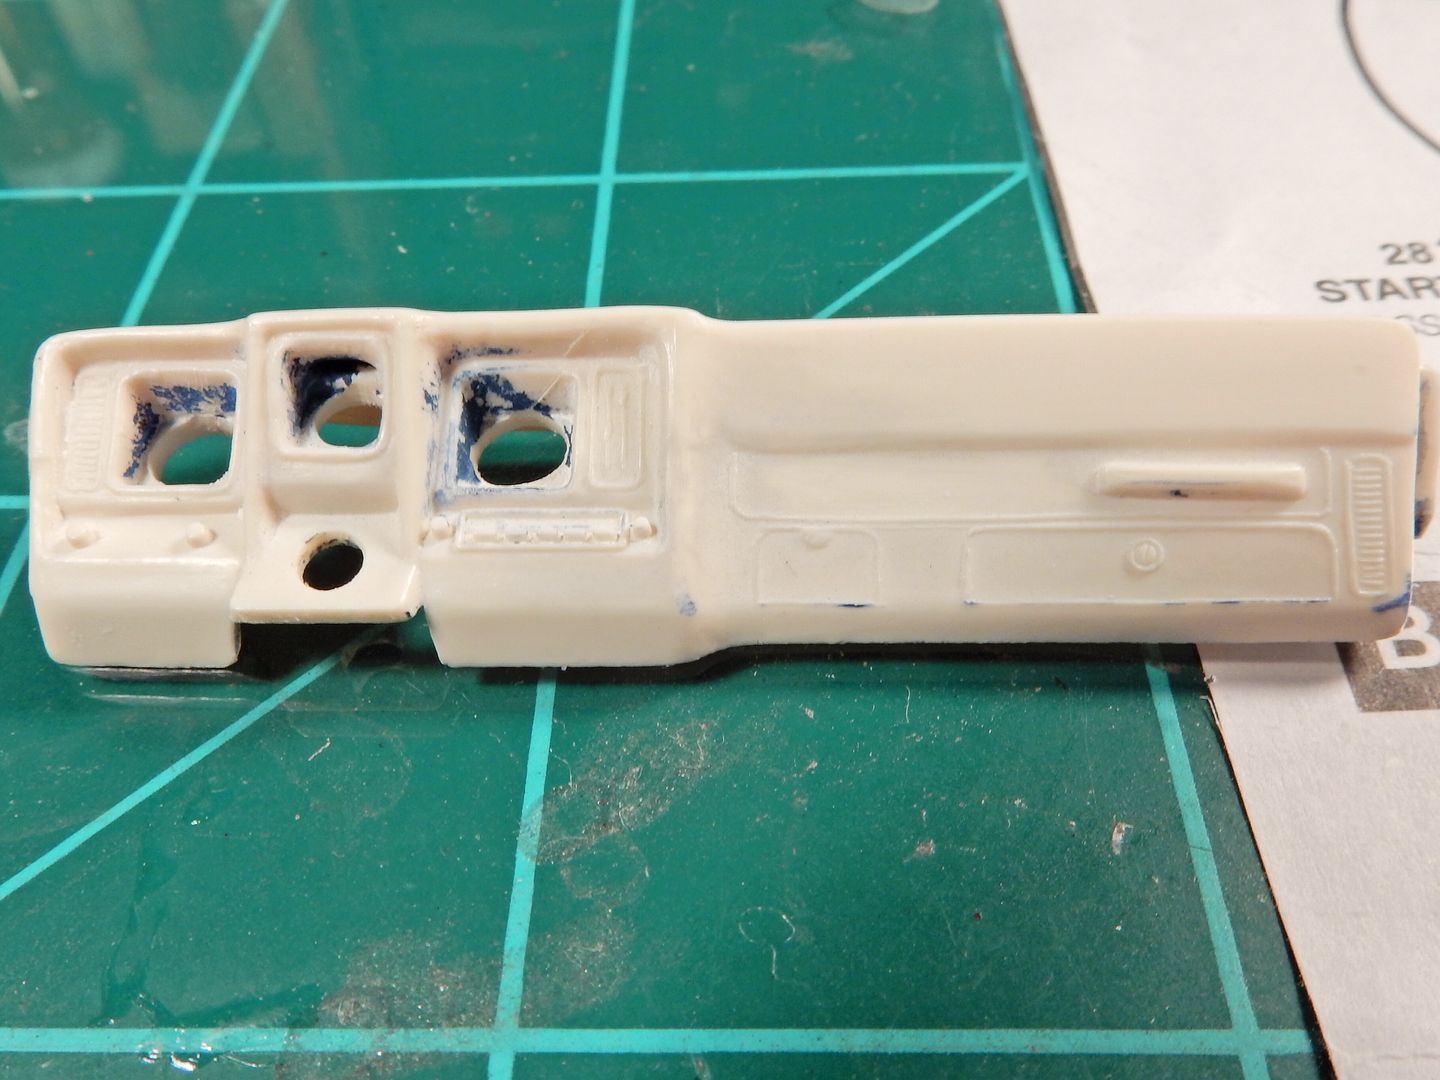
I've been working on this thing but there are a lot of corrections to make. First off the PE bezels are NOT going to work with this dash ....................BUT I've got a different plan. Here's what we started with, the OOB 35 year old dash
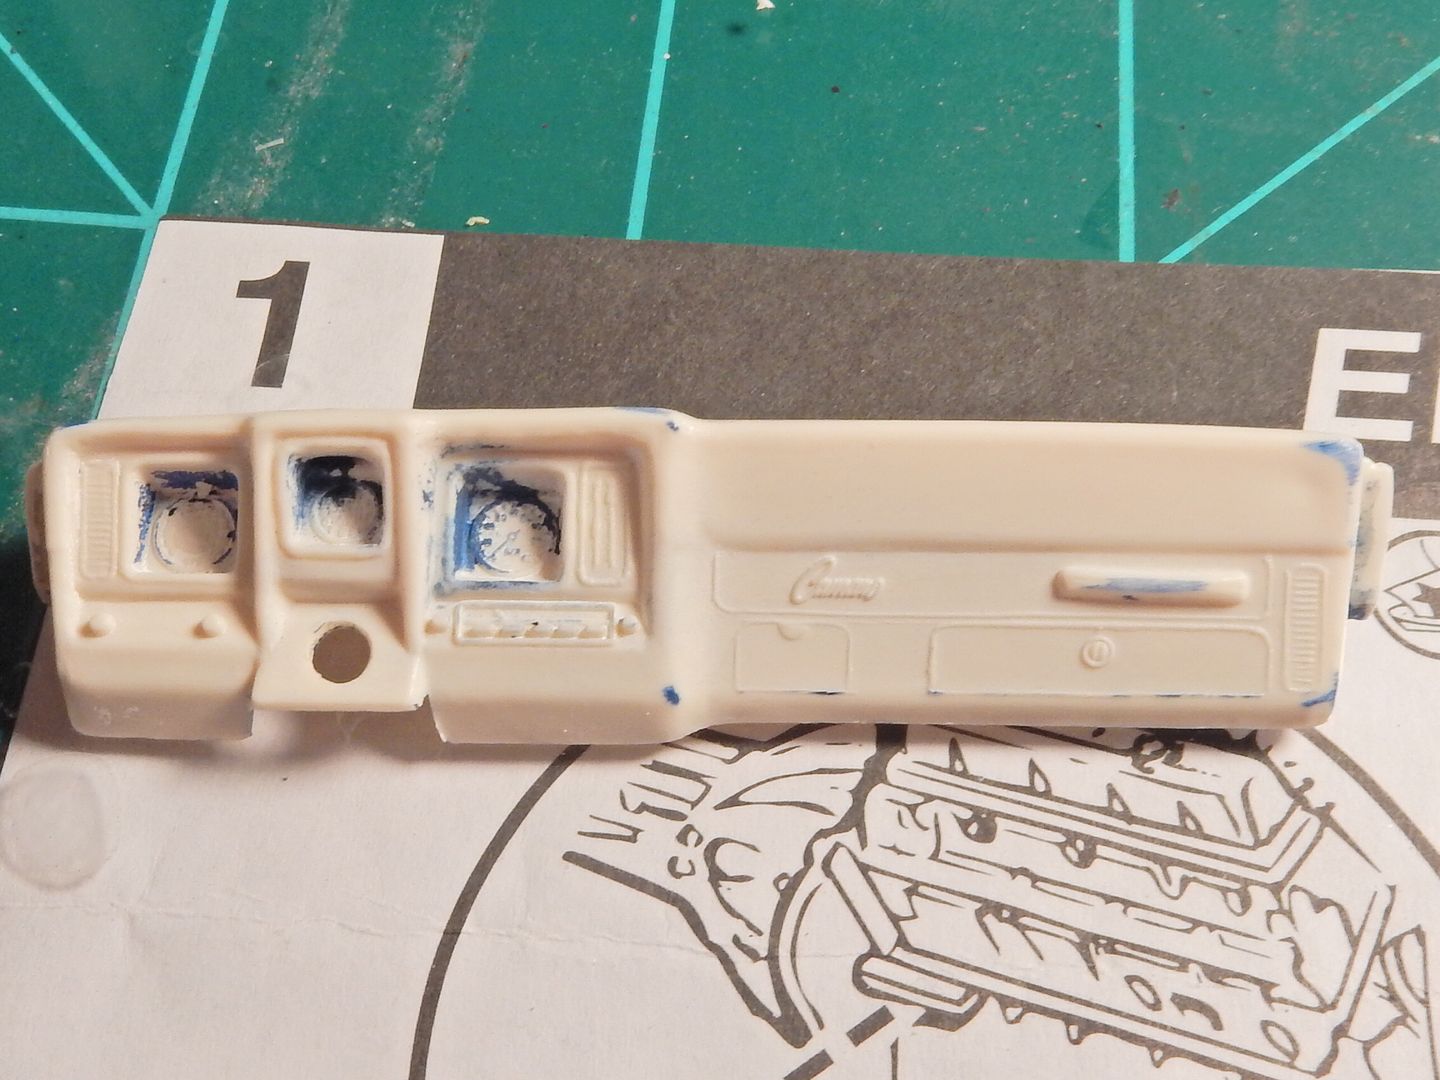
I drilled out the IP gauges and sanded down the back of them for the scale thickness factor and sanded the Camaro emblem off as well as cleaned up a bunch of flash and sinkholes that I found not only on top of the dash but the face of it as well. I also sanded that Camaro script from the dash.
Painting and details on the way soon....
|
|
|
|
Post by mustang1989 on Jun 2, 2017 6:32:41 GMT -7
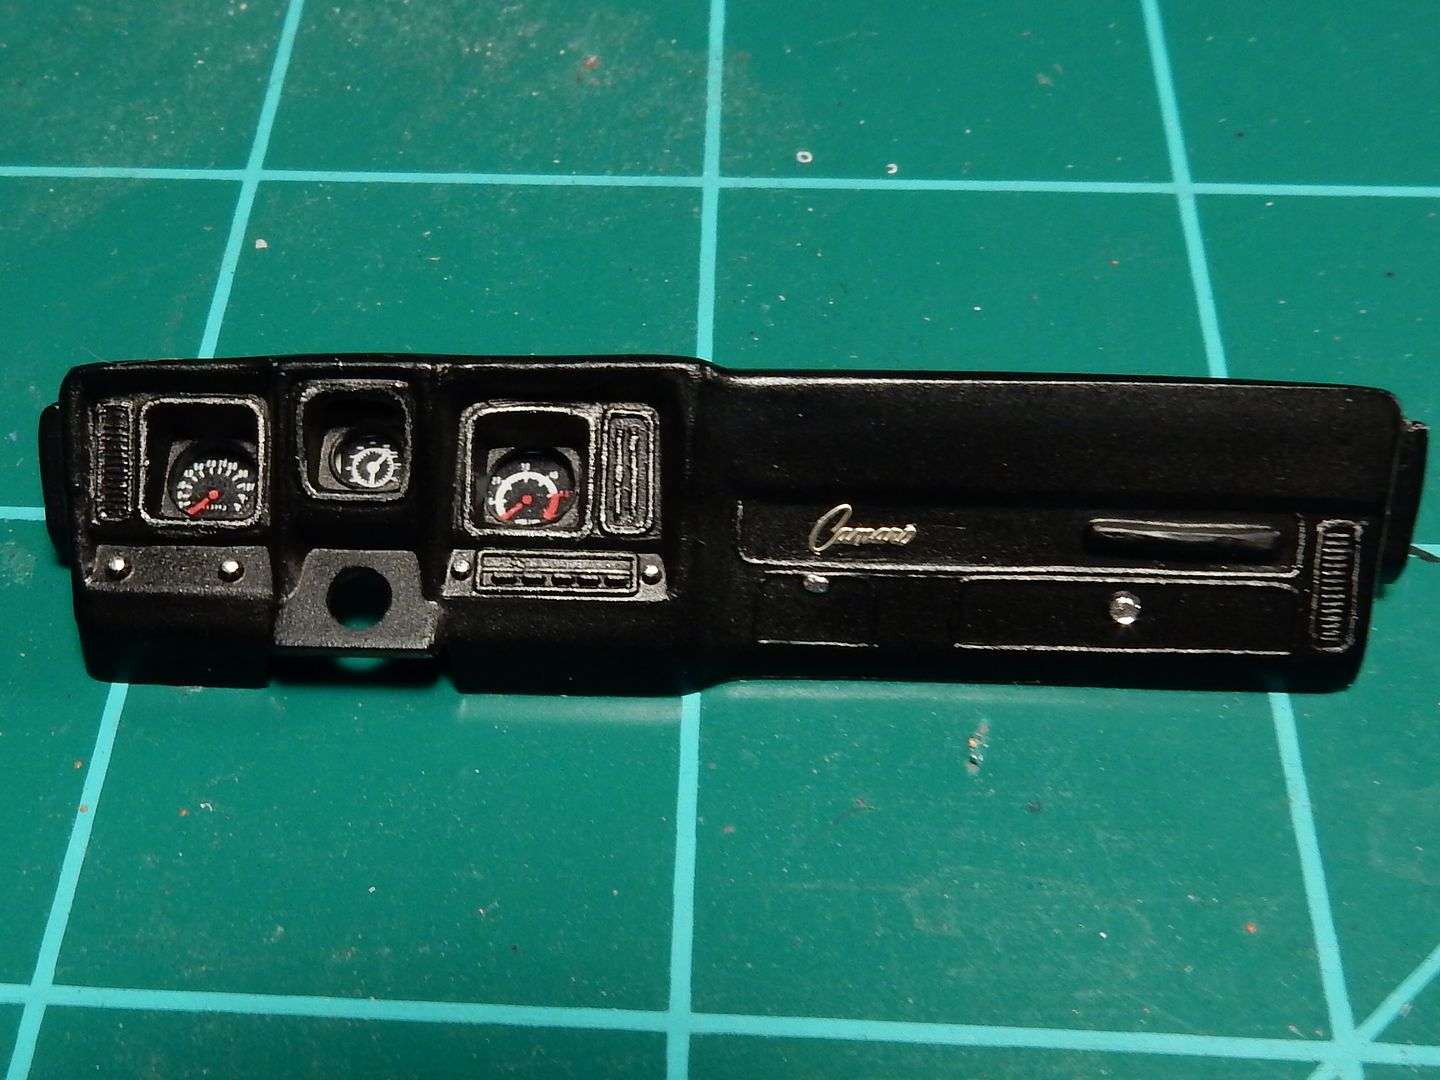
Dash is complete. I got the film instruments and the "Camaro" script from the PE set. All dash trim was brought out with a silver lead pencil. While it's not the best dash you'll ever see, it's a far cry from what it was.
|
|
|
|
Post by mustang1989 on Jun 11, 2017 15:55:50 GMT -7
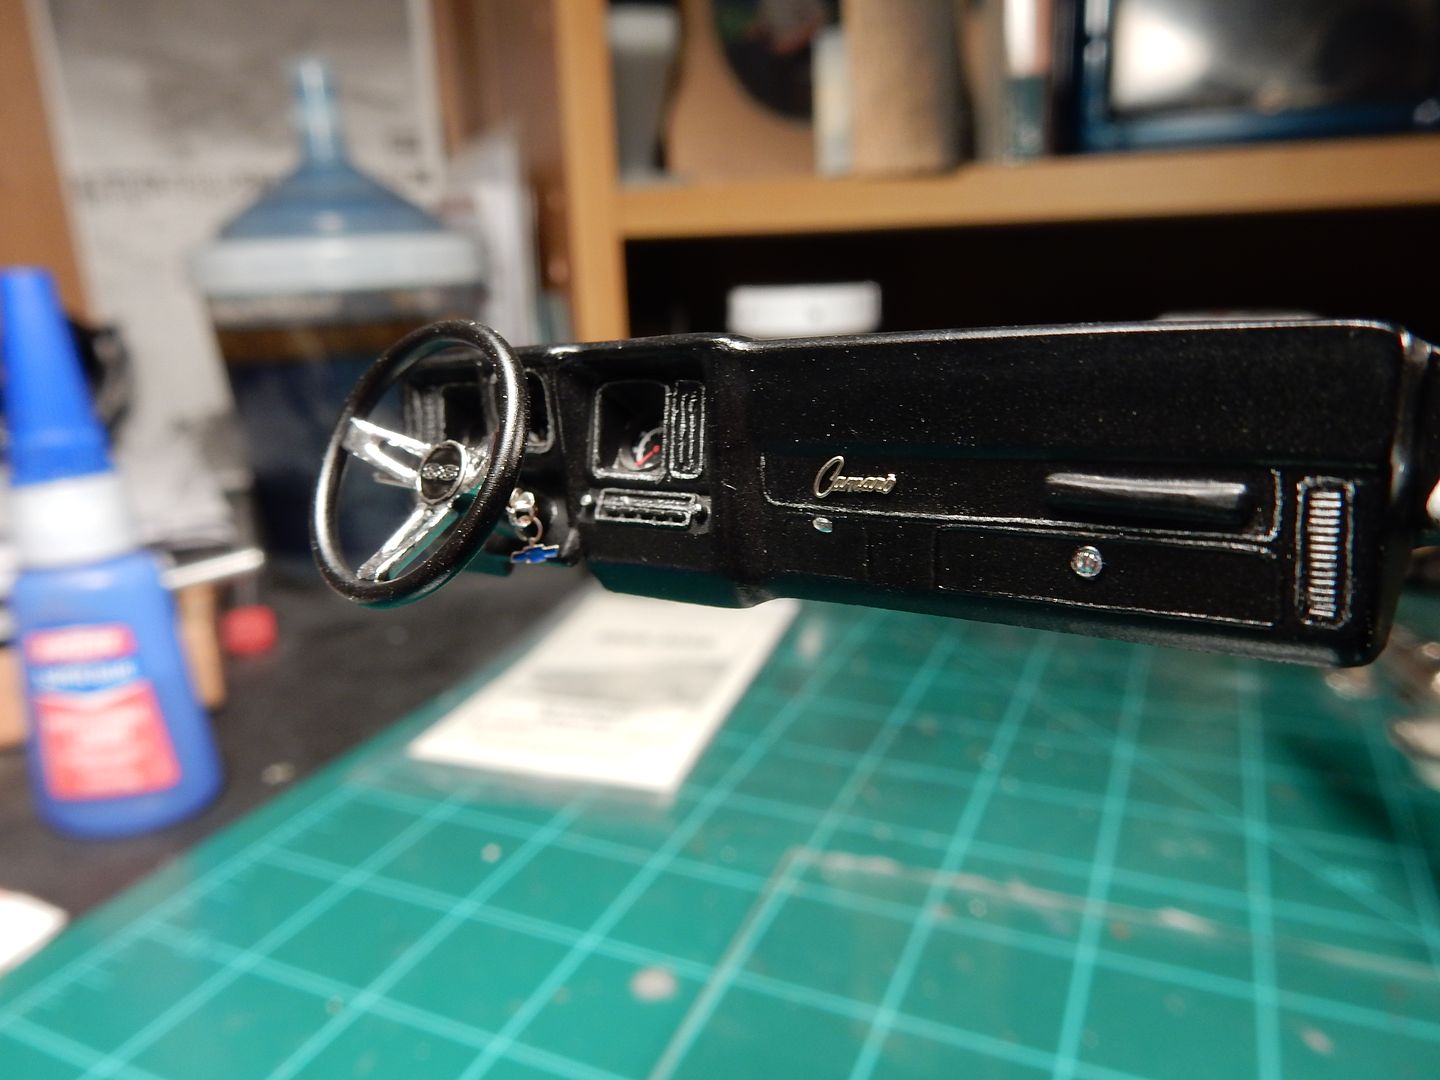
I worked on the steering column along with the dash for the better part of 3 days. First off I took the OOB steering wheel and cut out the spoke holes and shaved off the horn pad. I then drilled two holes in the column. One on the right for the ignition switch, key and key chain and the one on the left for a turn signal lever. I painted the steering wheel spokes with the newly acquired chrome pen that I just got in the mail and installed a PE "SS" horn pad. I then took a PE key along with a PE ignition switch bezel and a PE key chain with a "Bowtie" on it , made a scratch built key ring and put it all together and installed it into the column. The turn signal lever is made from a .019" needle I had in the spares box and I'll be painting a black knob on the end of it tomorrow morning. Any ways here it all is. I'll show the before picture (which I knew I should have taken a more clear "before" picture of the dash beforehand but this is all I've got) and then the improvement pics:
Before:
After:


|
|
Deleted
Registered: May 19, 2024 8:38:50 GMT -7
Posts: 0
|
Post by Deleted on Jun 13, 2017 10:04:32 GMT -7
Looking good so far!  Had that original kit back in the day! |
|
|
|
Post by mustang1989 on Jun 13, 2017 16:25:32 GMT -7
Thanks Johnny! I've managed to score two parts kits for decent prices to help out with this rebuild.
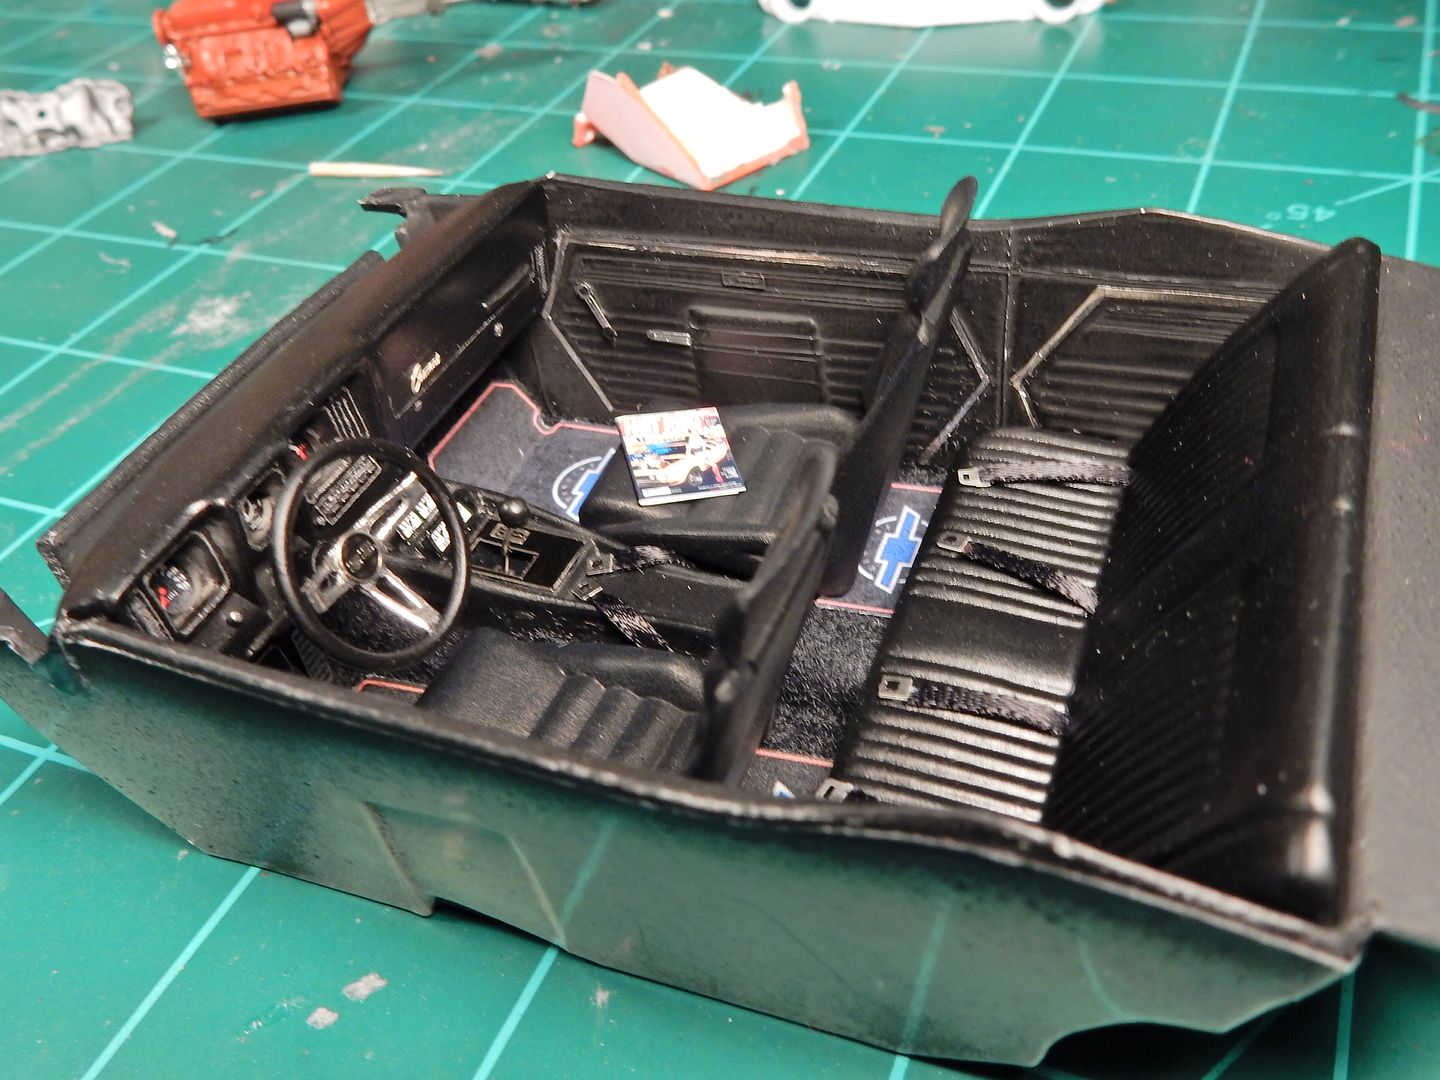
Here we are with the dash in place, carpet / flocking put down everywhere except where the seats go and floor mats down. Folks I'm doing the very best I can with what I have here so there was just no hope of getting the floor mat on the drivers side to go under the pedals unless I wanted to cut that area of the floor pan out and graph in a "blank" piece of styrene and drop the pedals down from the back side of the dash. That's more work than I wanted to do so I cut the floor mat just short of the pedals and did most of my fancy foot work with the pedals themselves to try to make up the shortcoming. I've got the shifter plate along with the shift pattern insert on the plate installed on the center console in this pic and will be adding the PE gauge bezels and gauges as well as the shifter lever soon to round out that console.
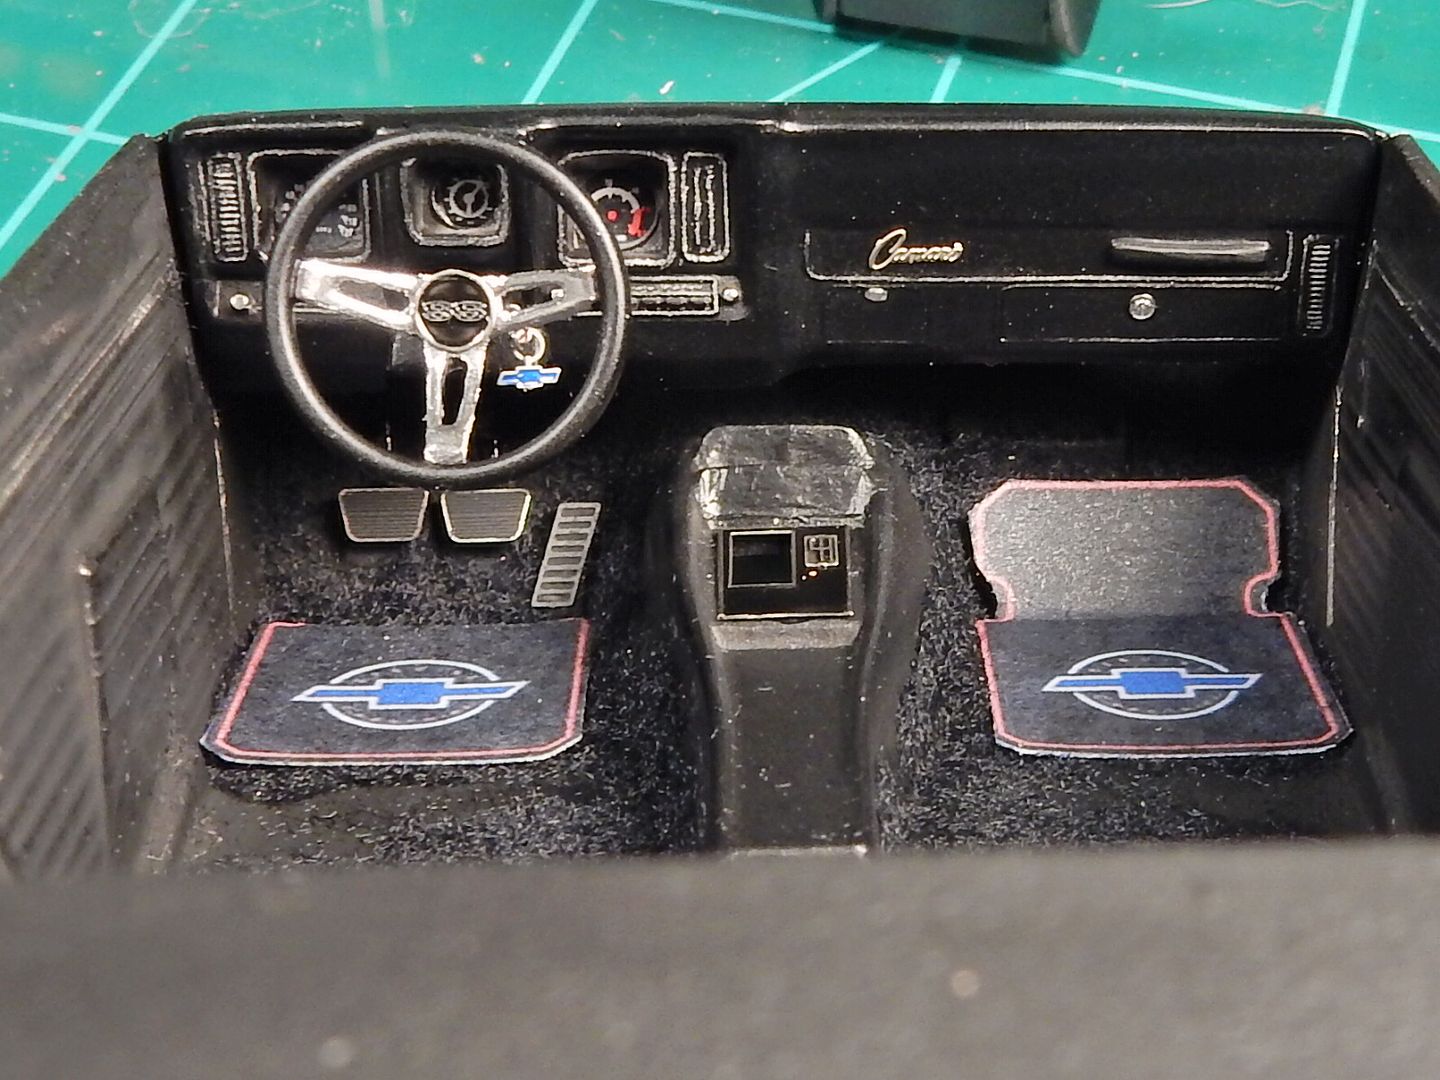
More progress coming in order to cover up all the basicness of this interior as well as to improve some of what's already there in regards to what I've done with it so far. |
|
Deleted
Registered: May 19, 2024 8:38:50 GMT -7
Posts: 0
|
Post by Deleted on Jun 13, 2017 16:40:49 GMT -7
My best builds seem to be some old kit that I try and save! |
|
|
|
Post by Grandpabeast on Jun 13, 2017 17:24:25 GMT -7
I feel the same . I enjoy make something from nothing. This build is looking great
|
|
|
|
Post by sharp on Jun 13, 2017 18:18:34 GMT -7
This is looking great bud,the dash detail looks awesome Joe
|
|
|
|
Post by mustang1989 on Jun 15, 2017 10:01:09 GMT -7
Thanks fellas.
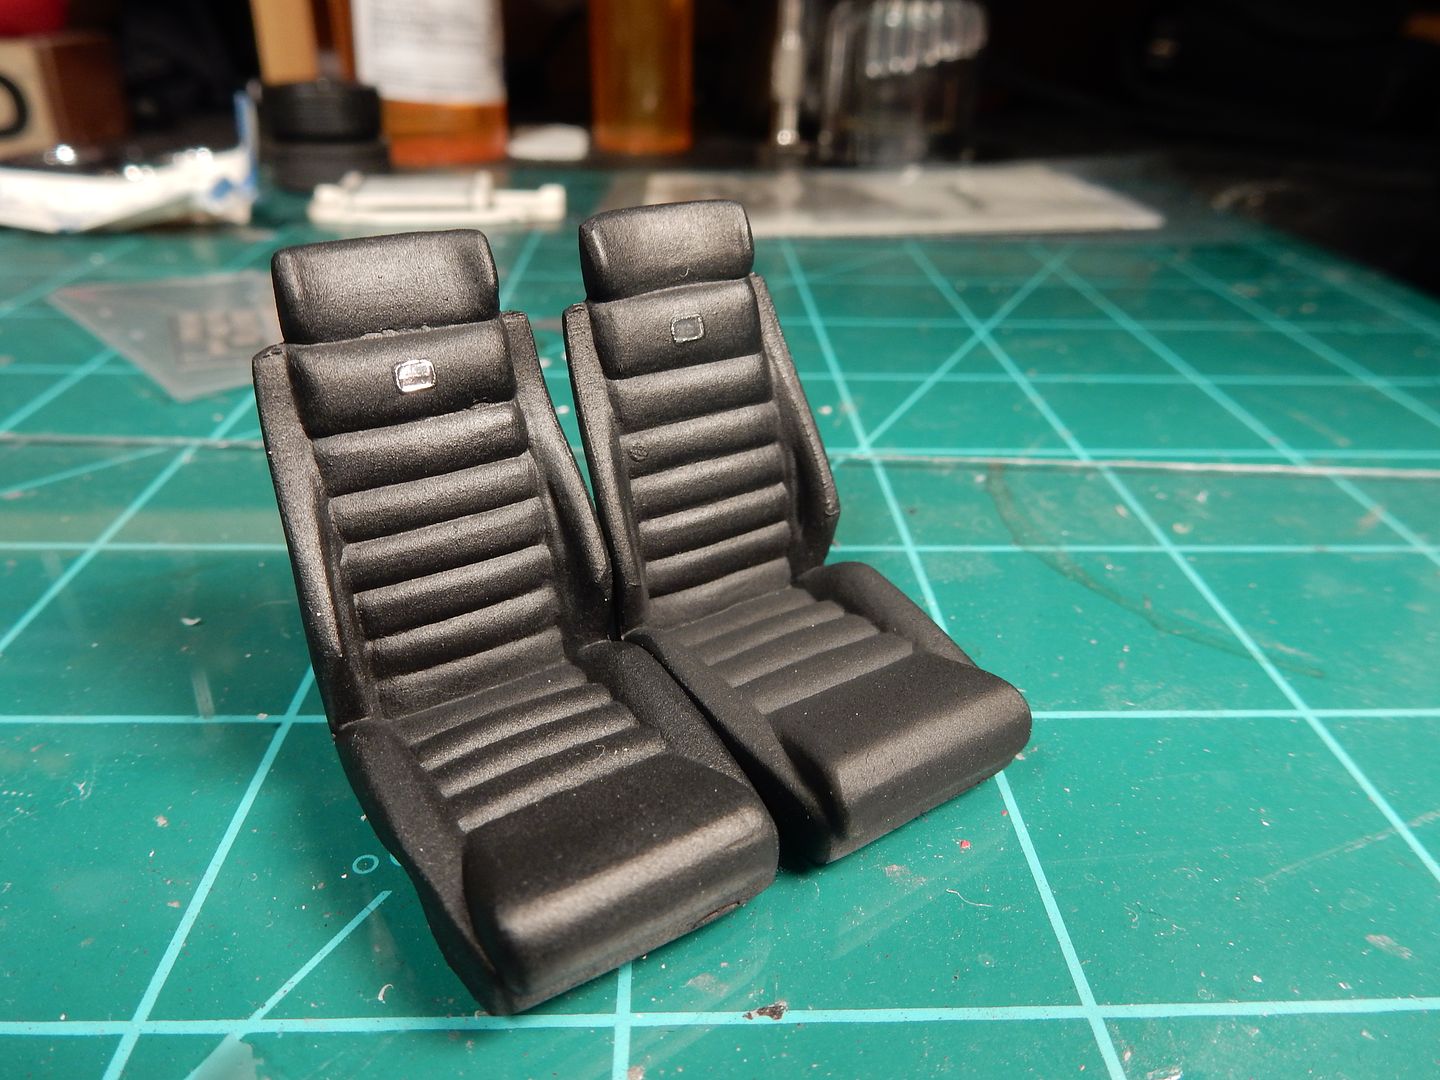
The two front seats with the chrome emblem picked out with that chrome pen. To tell you the truth I can't remember where I got these so many years ago when I first built this car but they look one helluva lot better than what came in the kit!
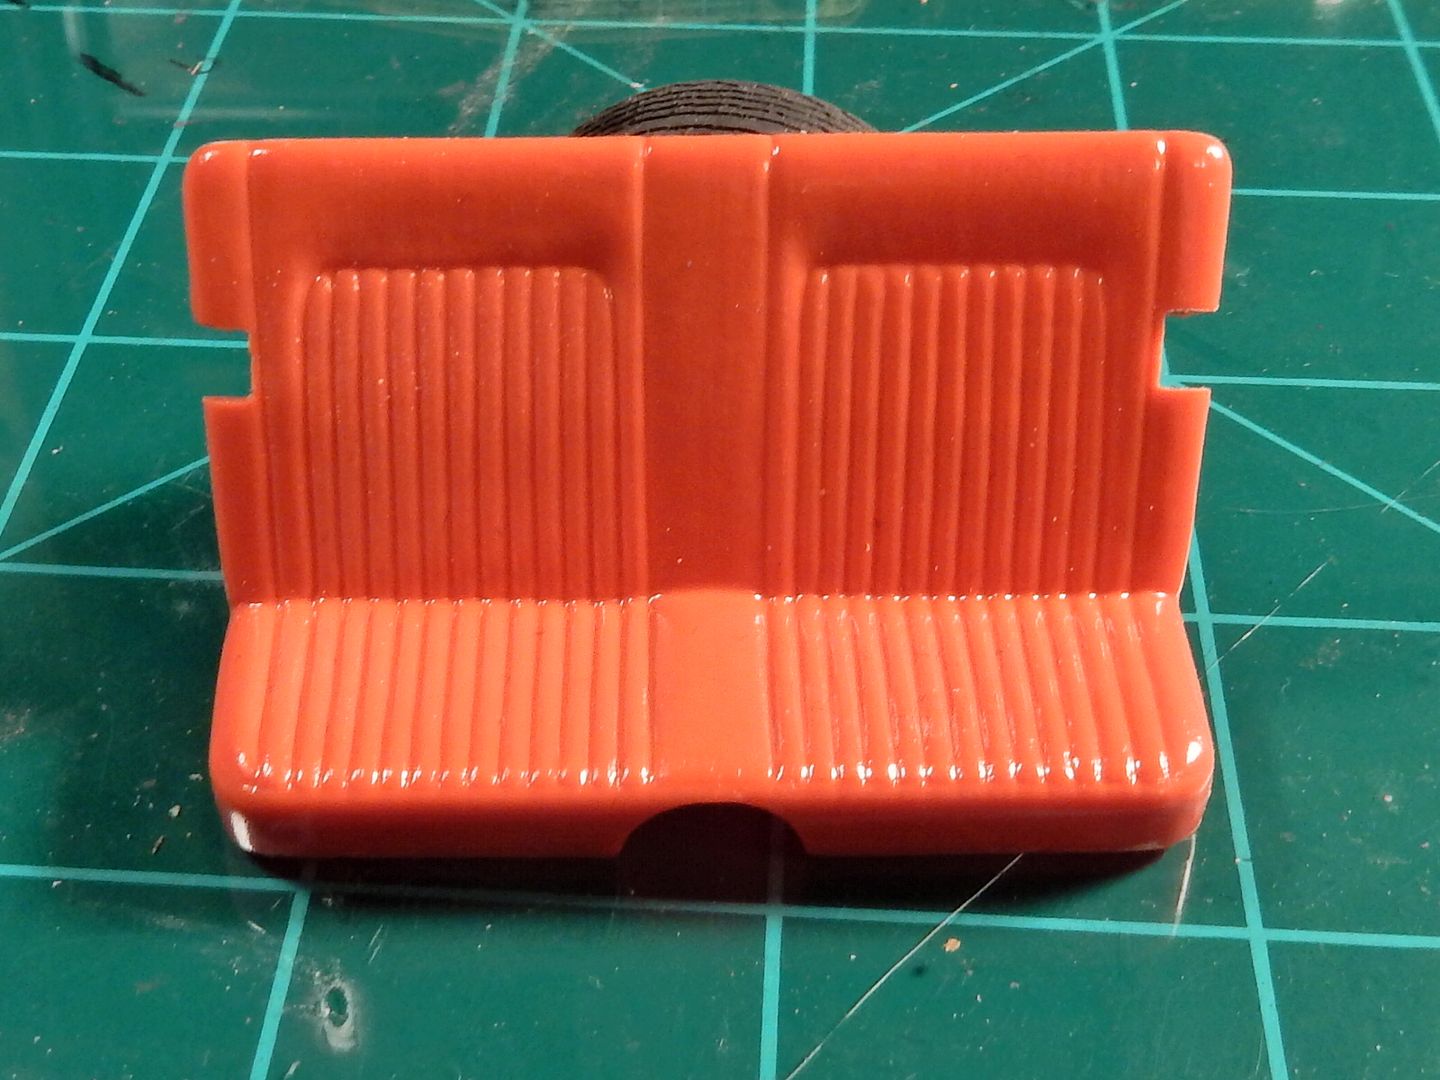
and the back seat that I robbed from the spare kit since my original Camaro build did NOT have a back seat at all in it. Yeah ....the roll bars are going bye bye for the revamp and I'll be installing this seat along with seat belts for the front and rear seats. I'll also be filling in those openings for the roll bar with some sheet styrene.
|
|
|
|
Post by mustang1989 on Jun 19, 2017 7:26:59 GMT -7
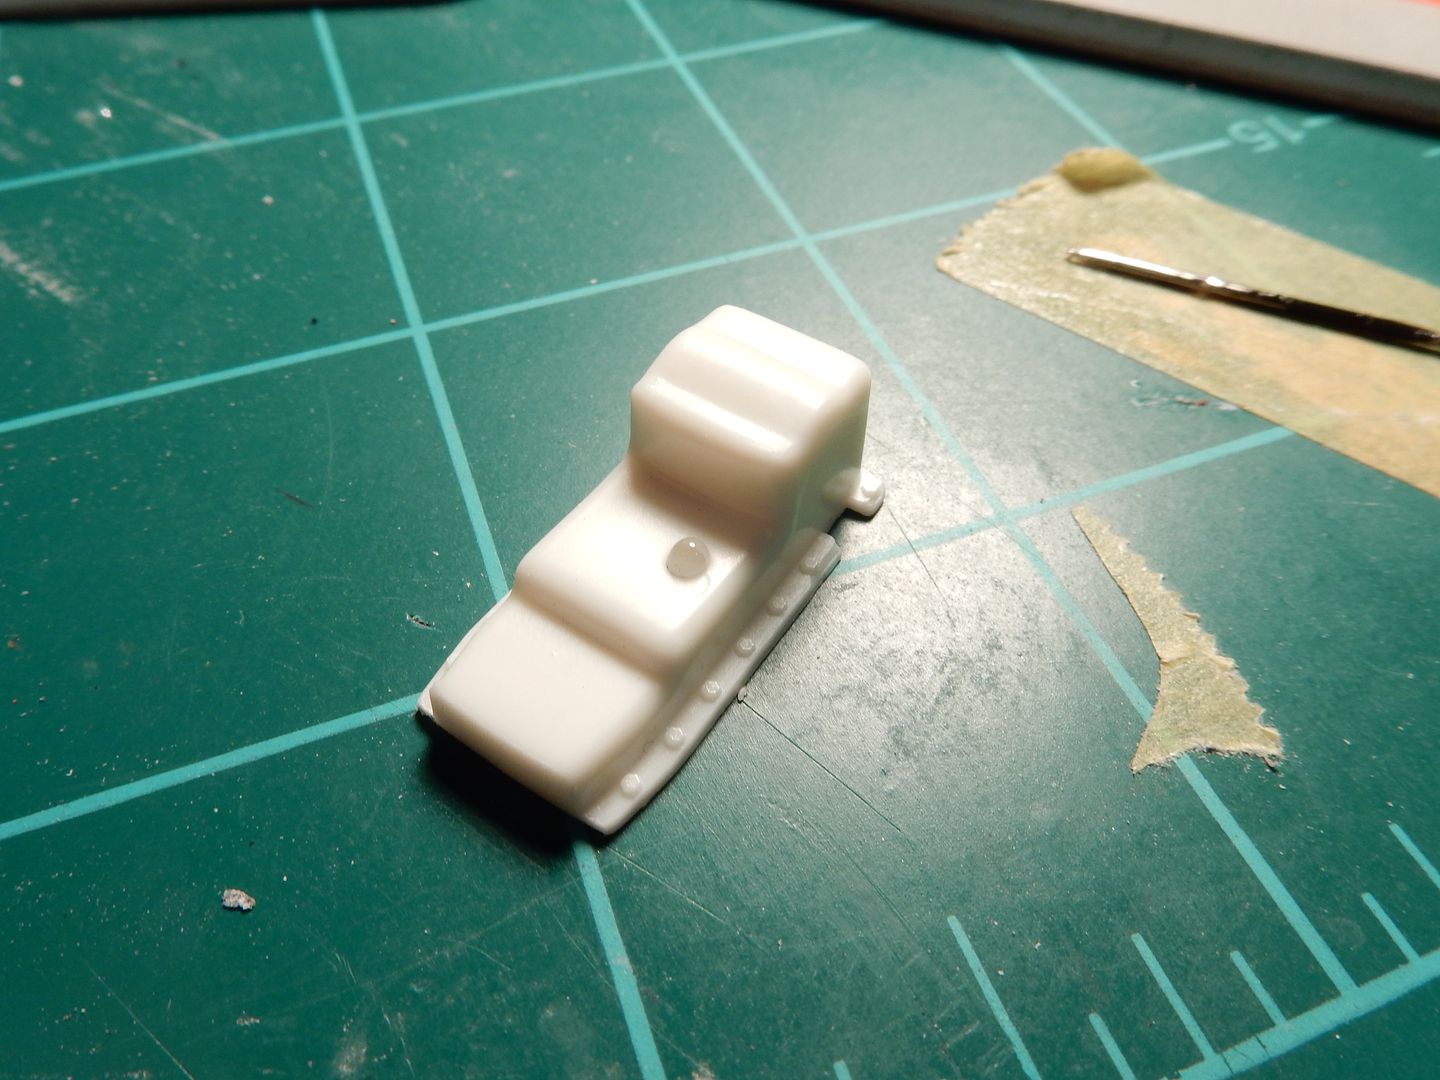
Here it is after filling in those cut outs in the rear seat with some Evergreen sheet styrene and filling and sanding everything smooth. Additionally, I made some small cut outs where the seat back and seat bottom meet for seat belts which are now installed with the PE seat buckles. Man I guess I need to fill the center "dot" in on those buckles. I'll also be working on the front seat finishes to match the rear seat. No biggie on that though.

|
|
|
|
Post by Grandpabeast on Jul 3, 2017 23:50:03 GMT -7
Looks awesome! You may have to change your name once you get this done ! LOL
|
|
|
|
Post by mustang1989 on Jul 5, 2017 13:08:43 GMT -7
Looks awesome! You may have to change your name once you get this done ! LOL Thanks GPB. LOL! I may have to at that. lol
Well guys, the floor mats came in the mail yesterday and I went right to work finishing the interior. All I have left at this point are the door lock rods/ knobs at each door but that'll be one of the last things to take care of with this model. I will, however, go ahead and drill the holes in the door panel. Here it is with floor mats at all four seating positions , the front seat belts installed and a Hot Rod magazine to round it all out.
|
|
|
|
Post by sharp on Jul 5, 2017 14:08:42 GMT -7
That's a great looking interior,nice work Joe.
|
|
|
|
Post by Grandpabeast on Jul 5, 2017 14:11:01 GMT -7
awesome !!
|
|
|
|
Post by mustang1989 on Jul 5, 2017 19:19:34 GMT -7
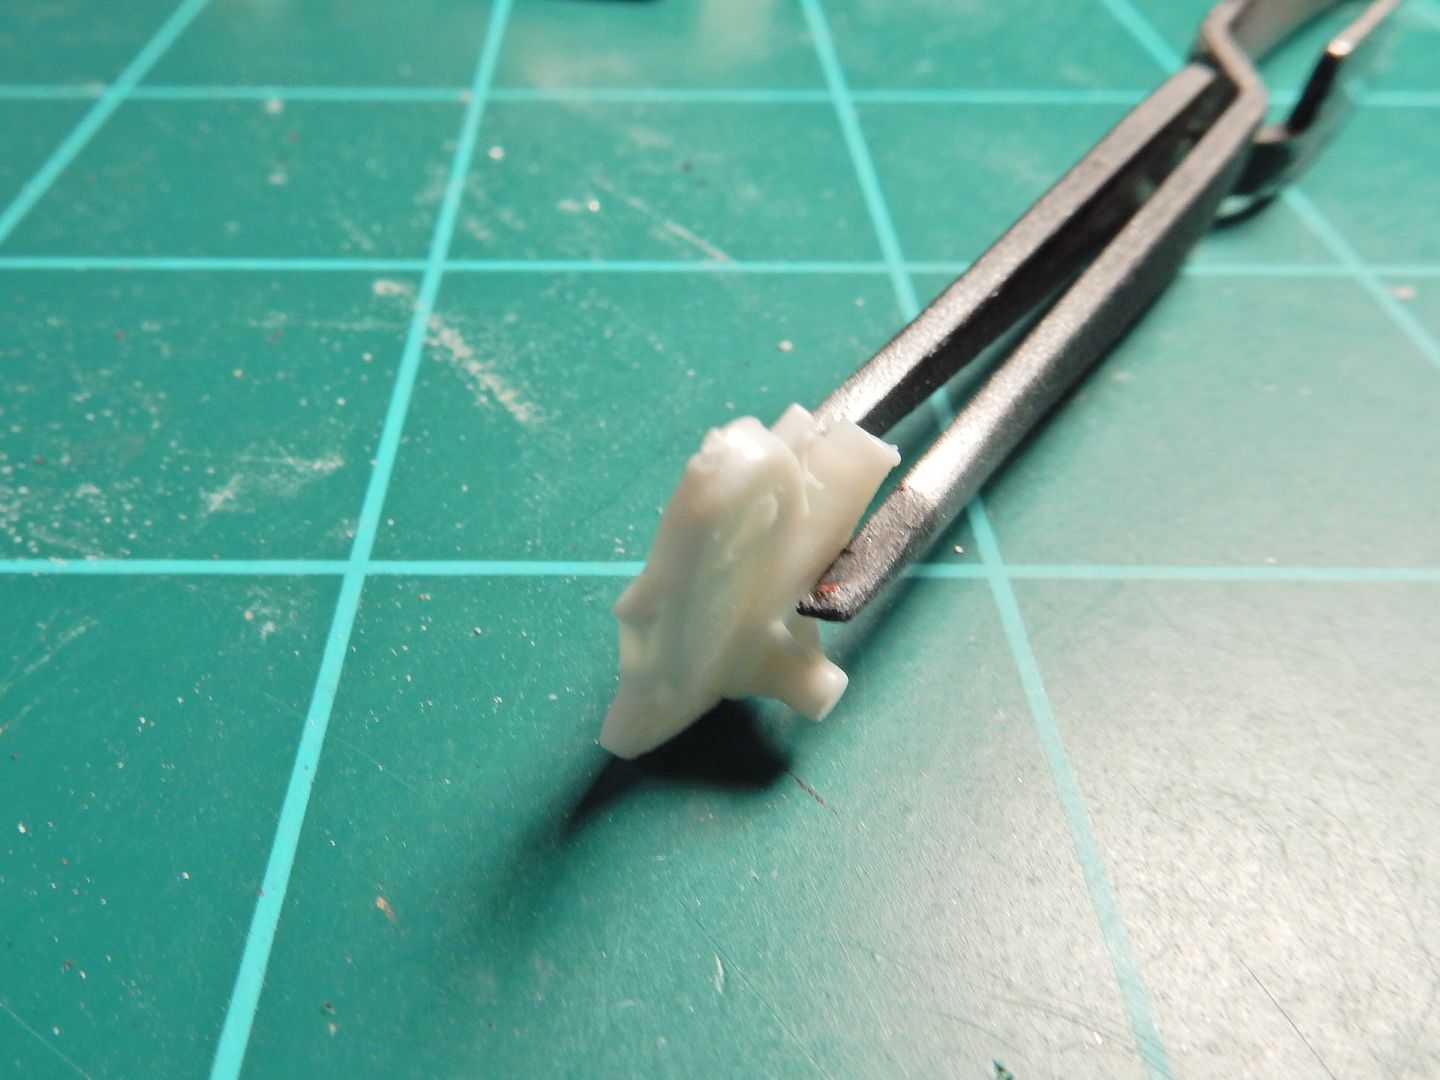
Now for my favorite part of ANY automotive (well ..........aircraft too) build. I started on the engine and it wasn't long till I had some blues to contend with. First off this thing had a nasty mount hole in the oil pan for the AMT Chevelle that it was supposed to go in so I had to fill that in with super glue, sand flush and smooth out:
Then I had the sprue attachment points to contend with which always seem to show up in the most unwanted places like at the ends of cylinder heads, smack dab in the middle of the transmissions.........on the bottom nonetheless and places like this timing cover. This stuff bugs me so I got rid of that from the timing cover and the rest of the attachment points on the engine pieces:
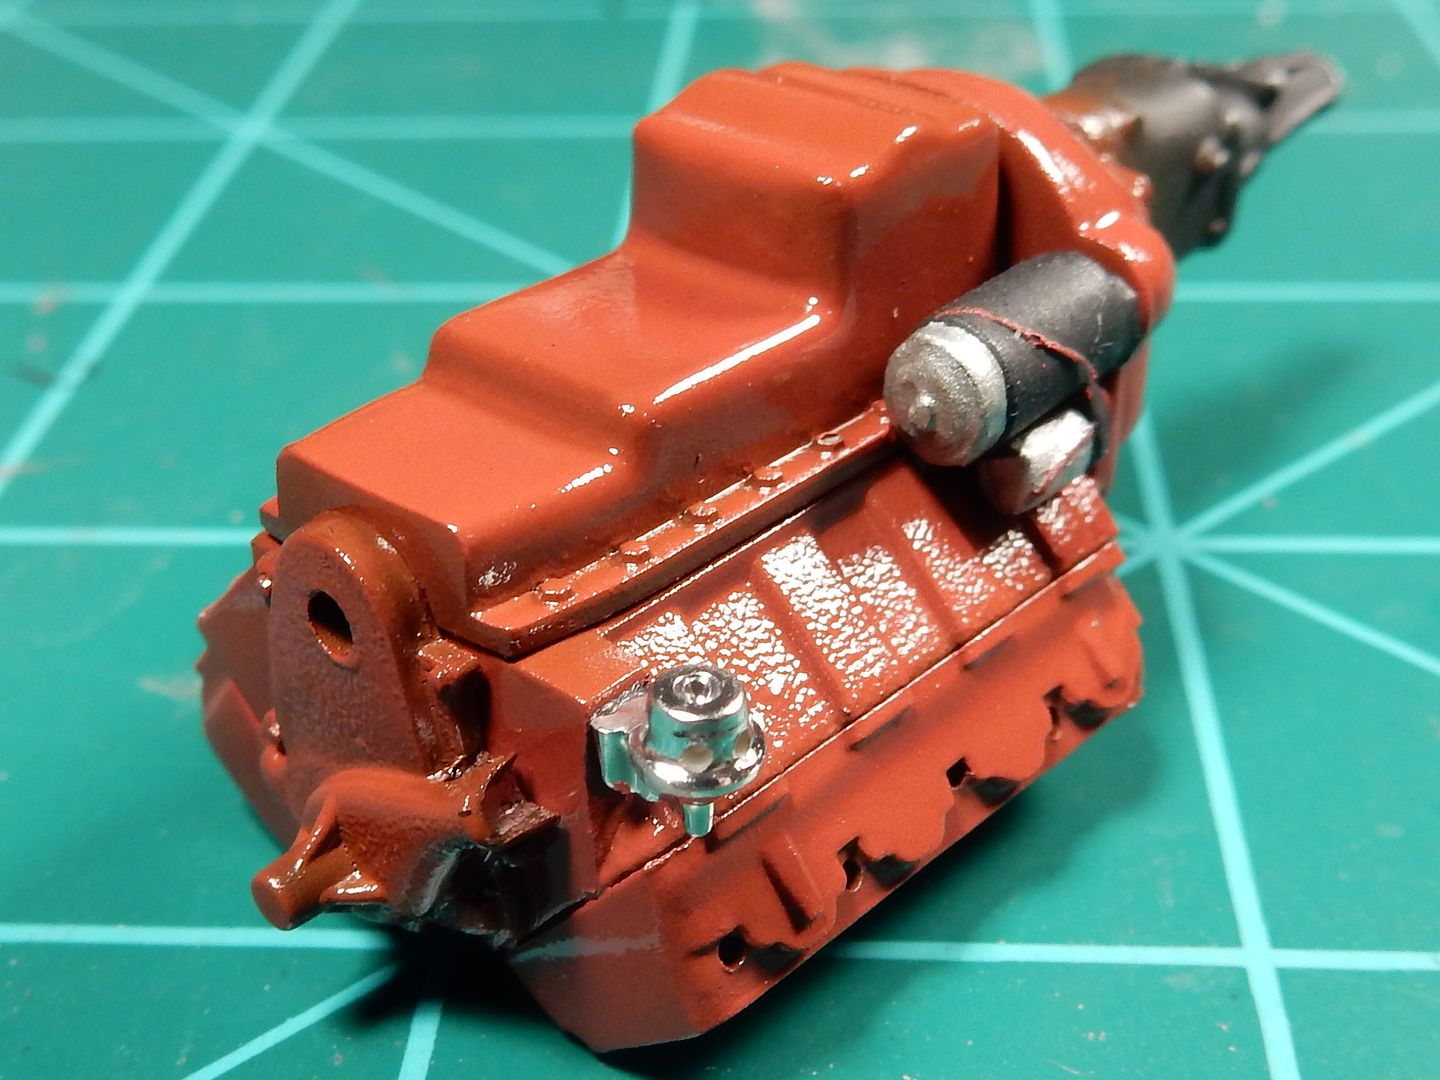
I also got this cool decal sheet with a bunch of oil filter decals on it. Nice touch for the bottom end as well as the PE oil pan drain plug. I toned the engine paint down and brought out the molded in detail with an airbrushed coat of Tamiya Smoke.
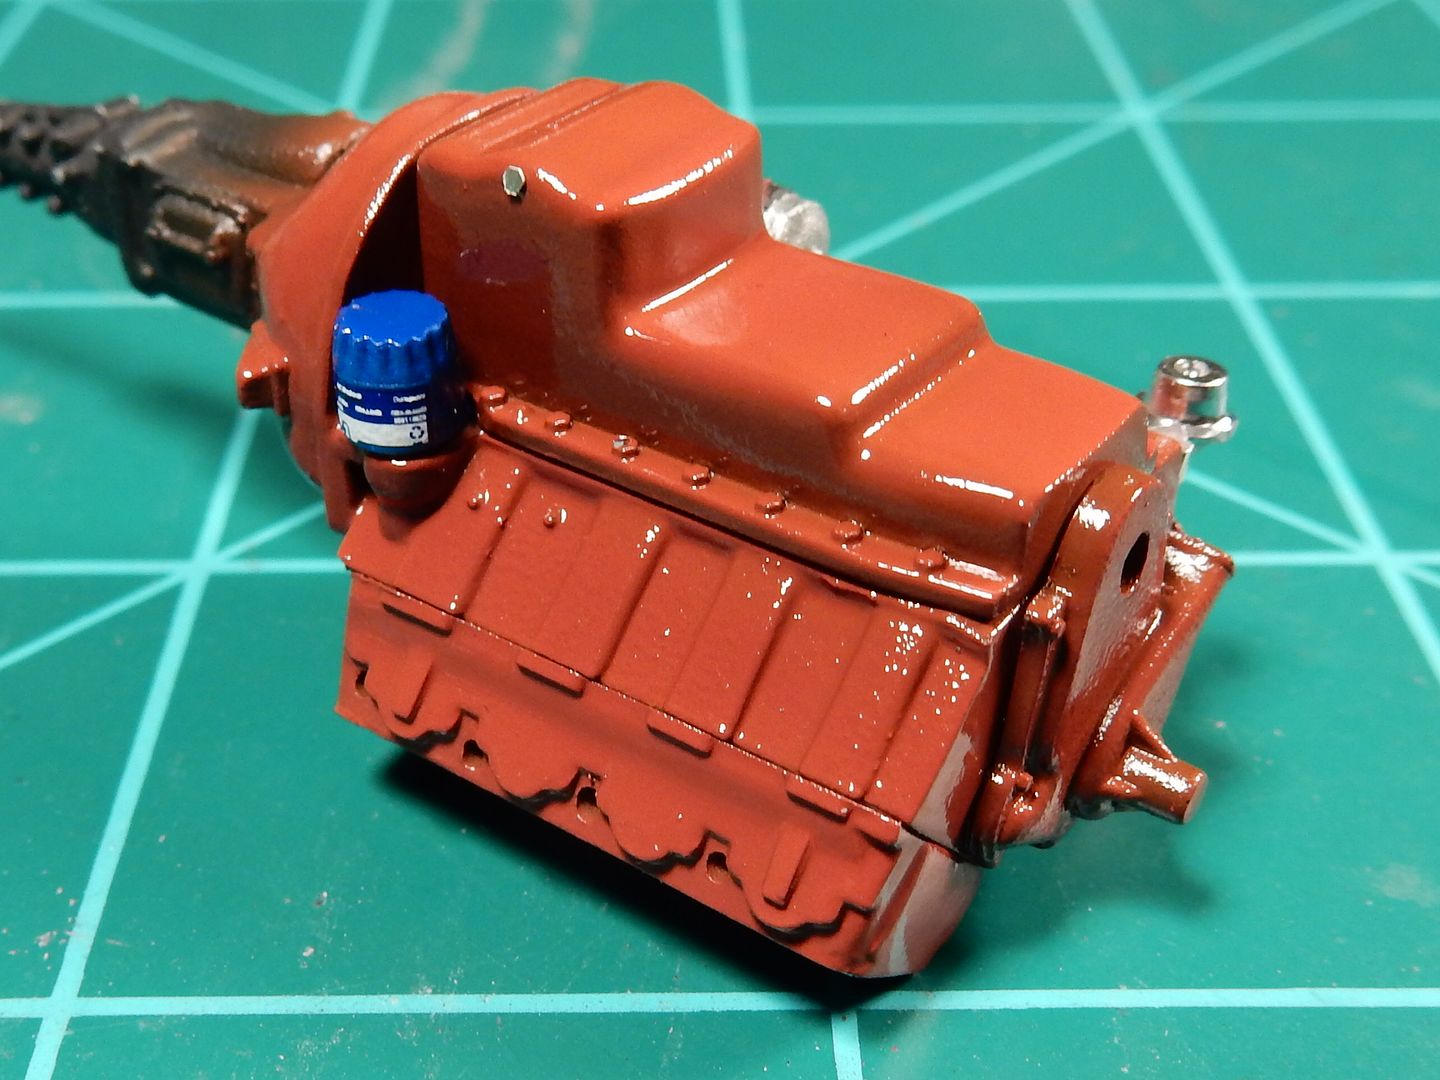
Fuel pump and starter motor installed:
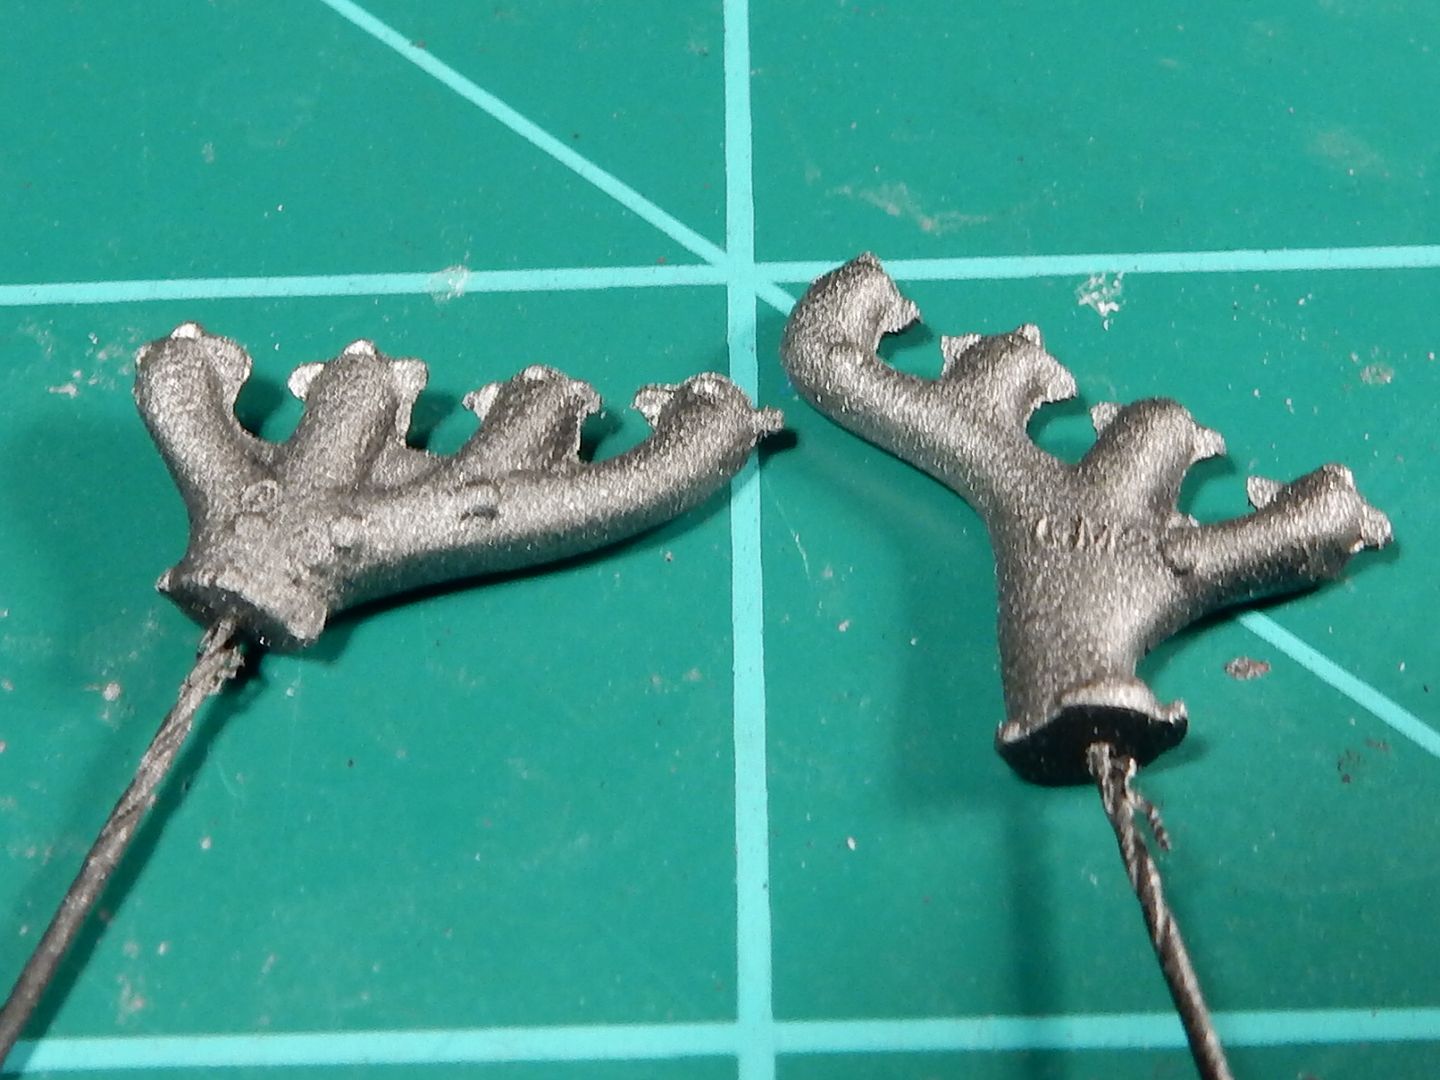
I tried something new with the exhaust manifolds. I primed them in flat black and shot a very light coat of Alclad II Polished Aluminum on them to give them a true iron look. I was happy with the results but the pictures don't seem to capture the dark steel/ iron look that they actually are. Believe me, they aint this flashy:
|
|
|
|
Post by mustang1989 on Jul 6, 2017 14:32:16 GMT -7
After a botched attempt at the first coat of paint and having to restrip and reprime it I've got COLOR!!! I ended up applying another coat of primer and smoothed all the imperfections out (a couple of freekin' dog hairs and some dust particles) and dispensed the paint into a paint jar and shot it through my airbrush. I had ALOT better results this time around fellas, however this paint does not play well with the air brush. Even after thinning the crap out of it I had difficulty in getting a uniform spray pattern to come out. I can't complaint too much as I'll be able to make this work out good in the end. These pics were taken after the results from my Badger 200. After these I decided to break out the much simpler Badger 350 and had a lot better luck with the pattern and a more consistent coat. I'm really going to be very happy with this color on this car is all I've gotta say: 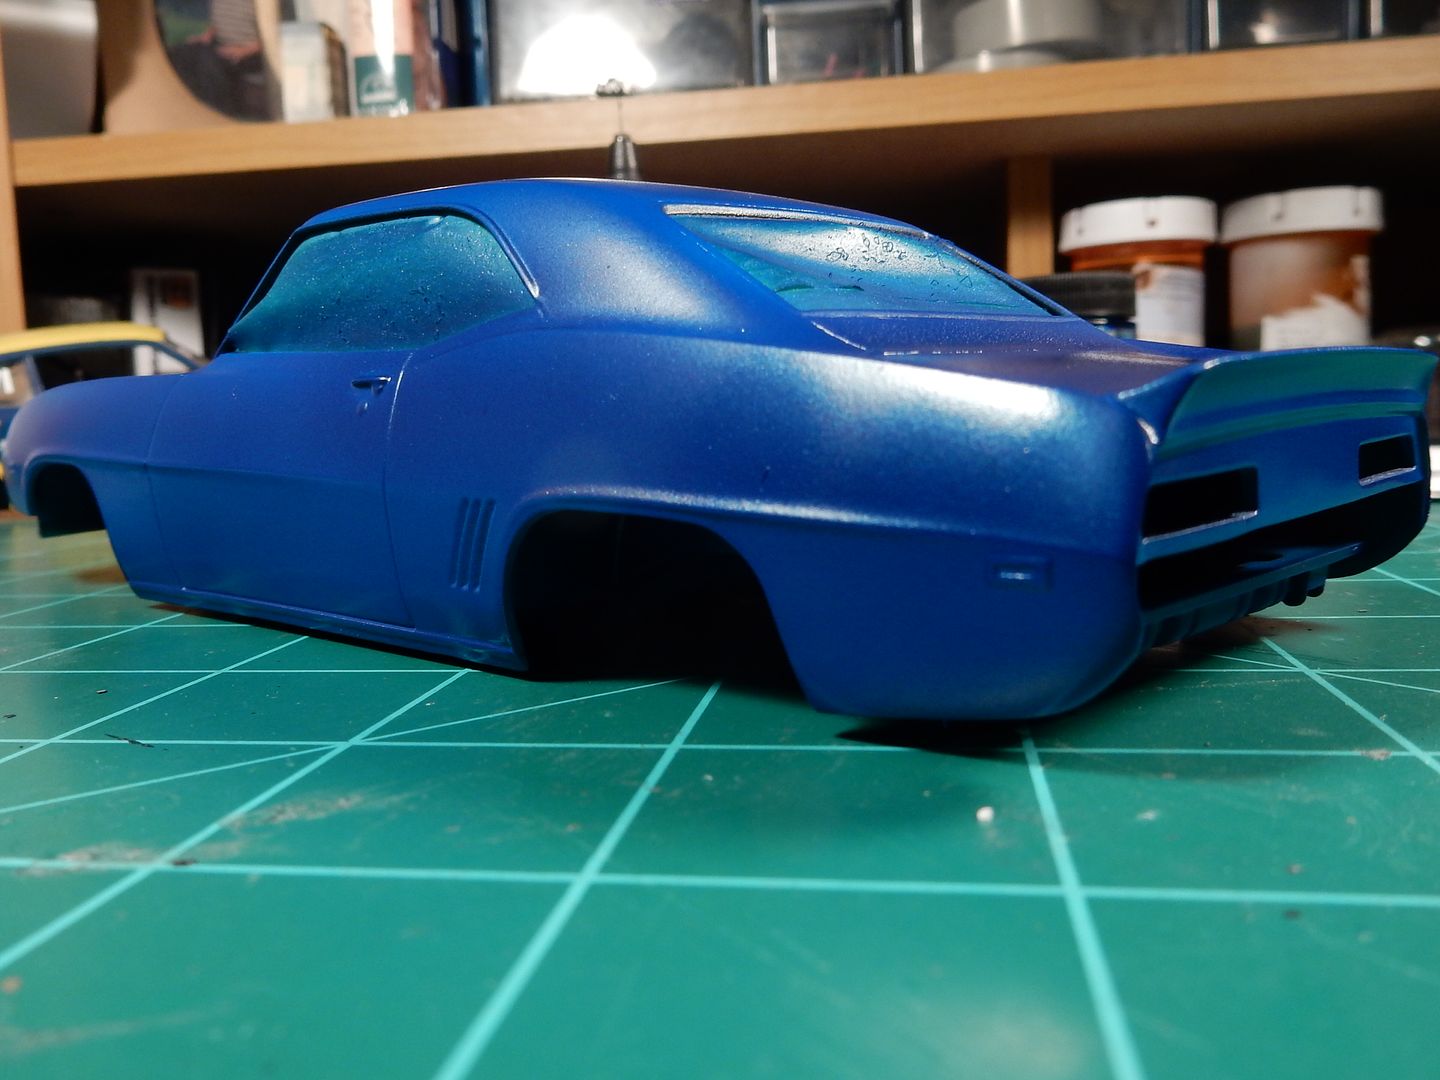 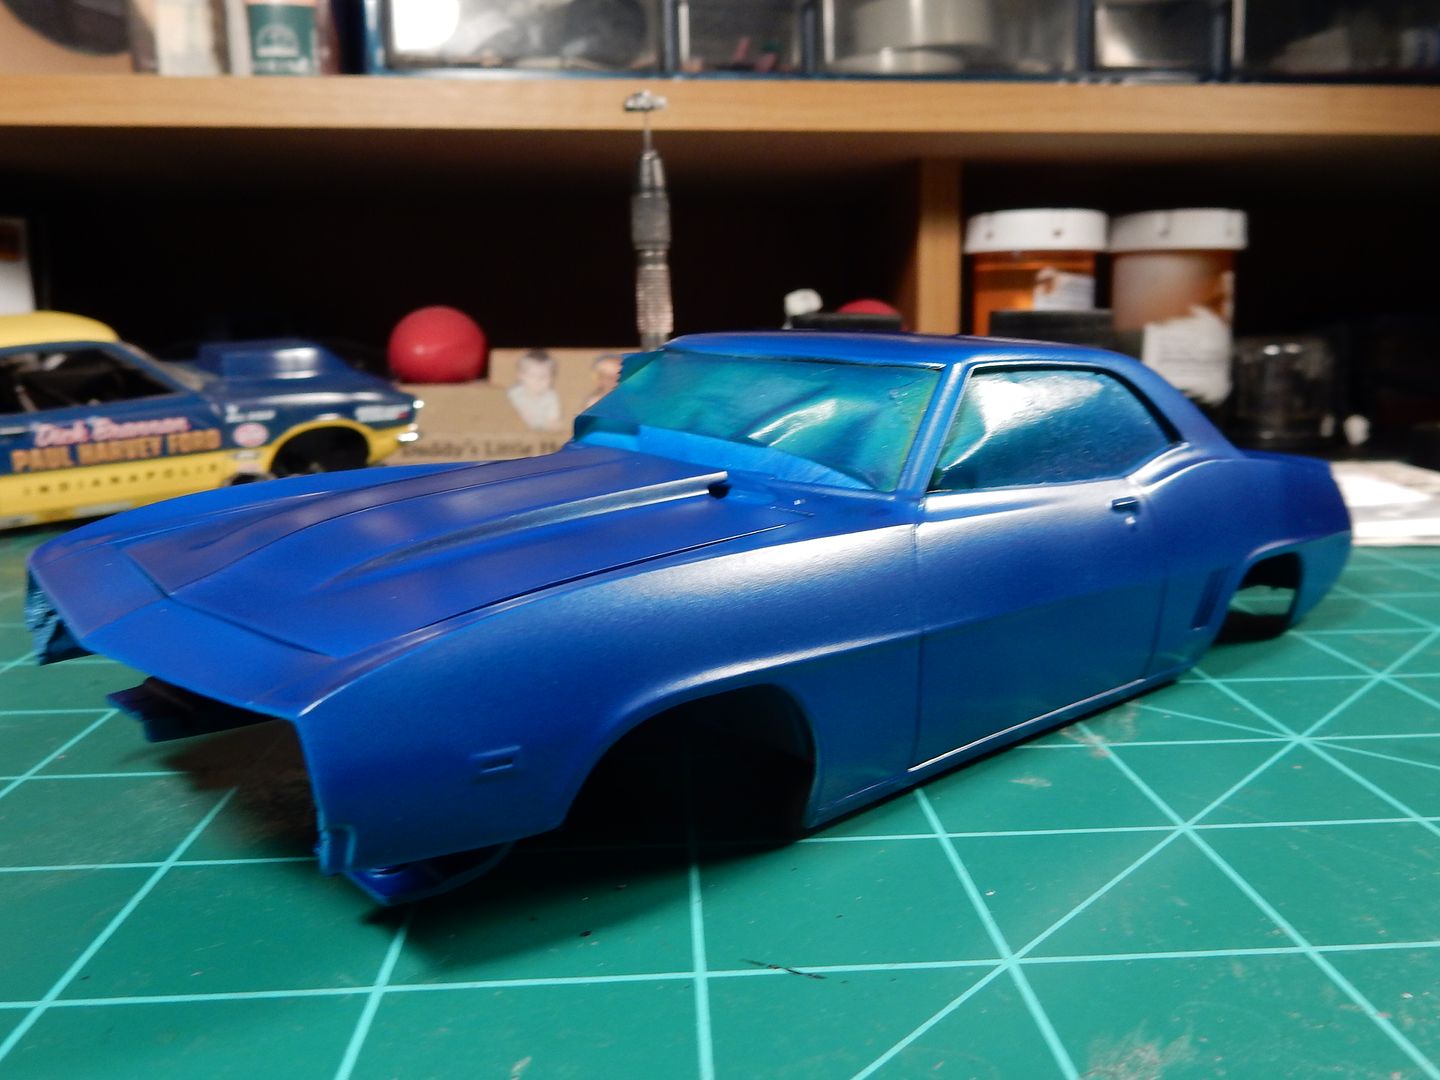 Engine is still coming along. Resin Holley test fitted onto the motor complete with throttle shaft and throttle lever. 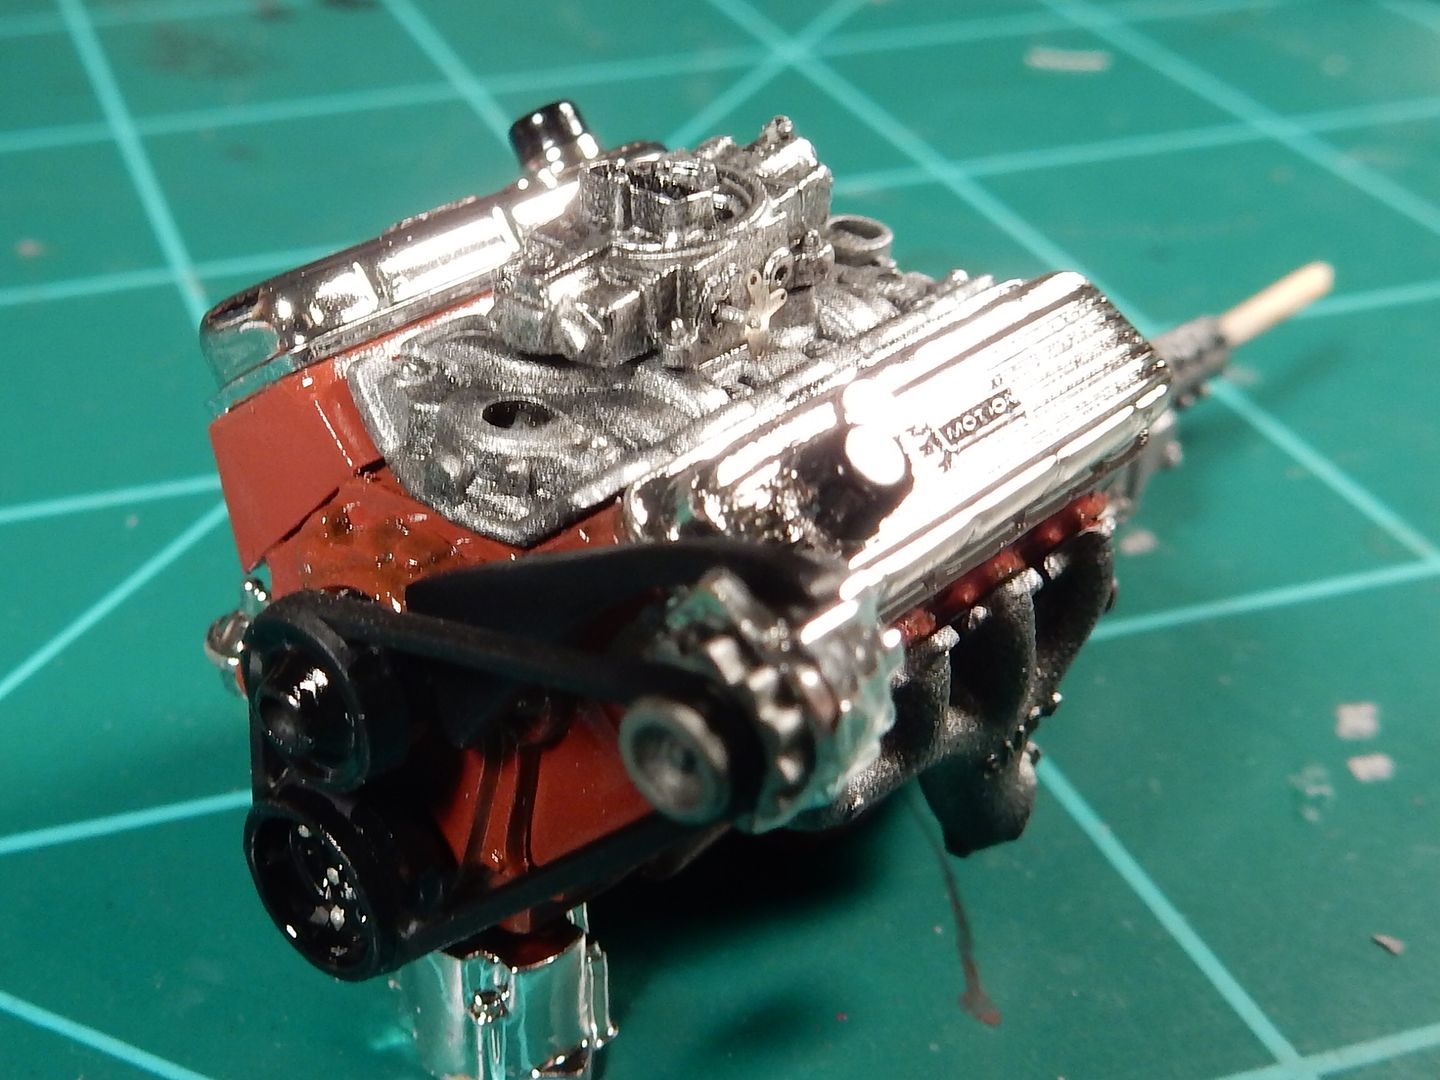 |
|
|
|
Post by mustang1989 on Jul 10, 2017 13:00:11 GMT -7
I've managed to get the carburetor on with the fuel lines and fuel filter as well as the ignition system all taken care of. Looking back I wish I would've included the barrel nut for the fuel line to fuel pump connection but it's installed now so there's no going back now. I'll be coming up with a throttle return spring and bracket soon. 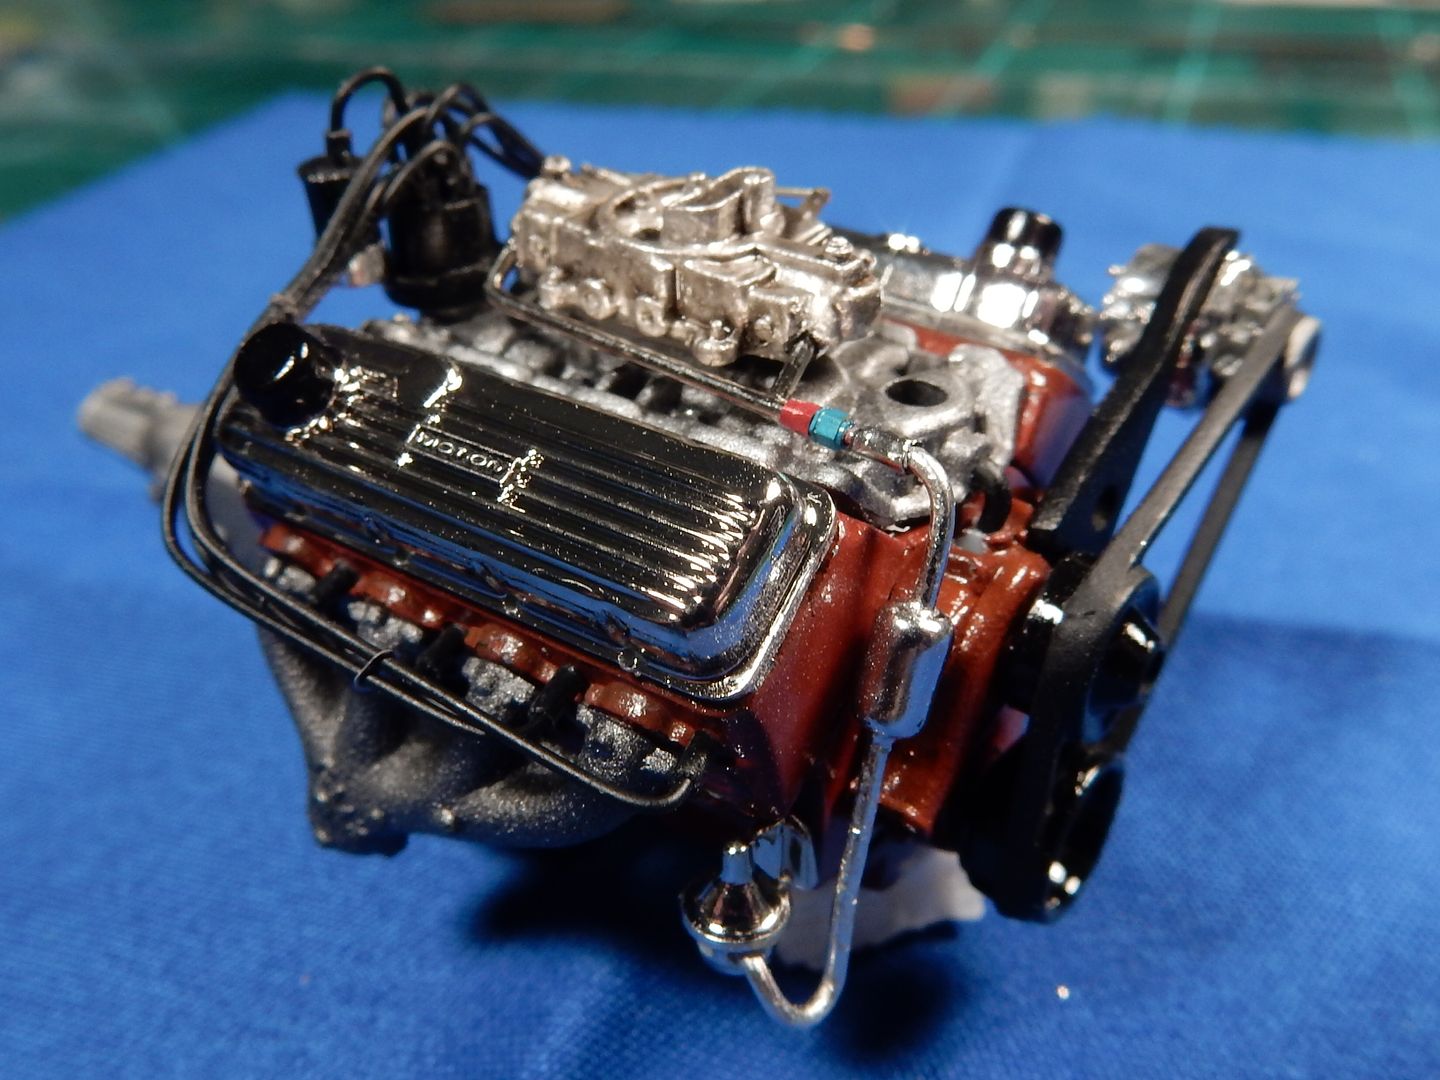 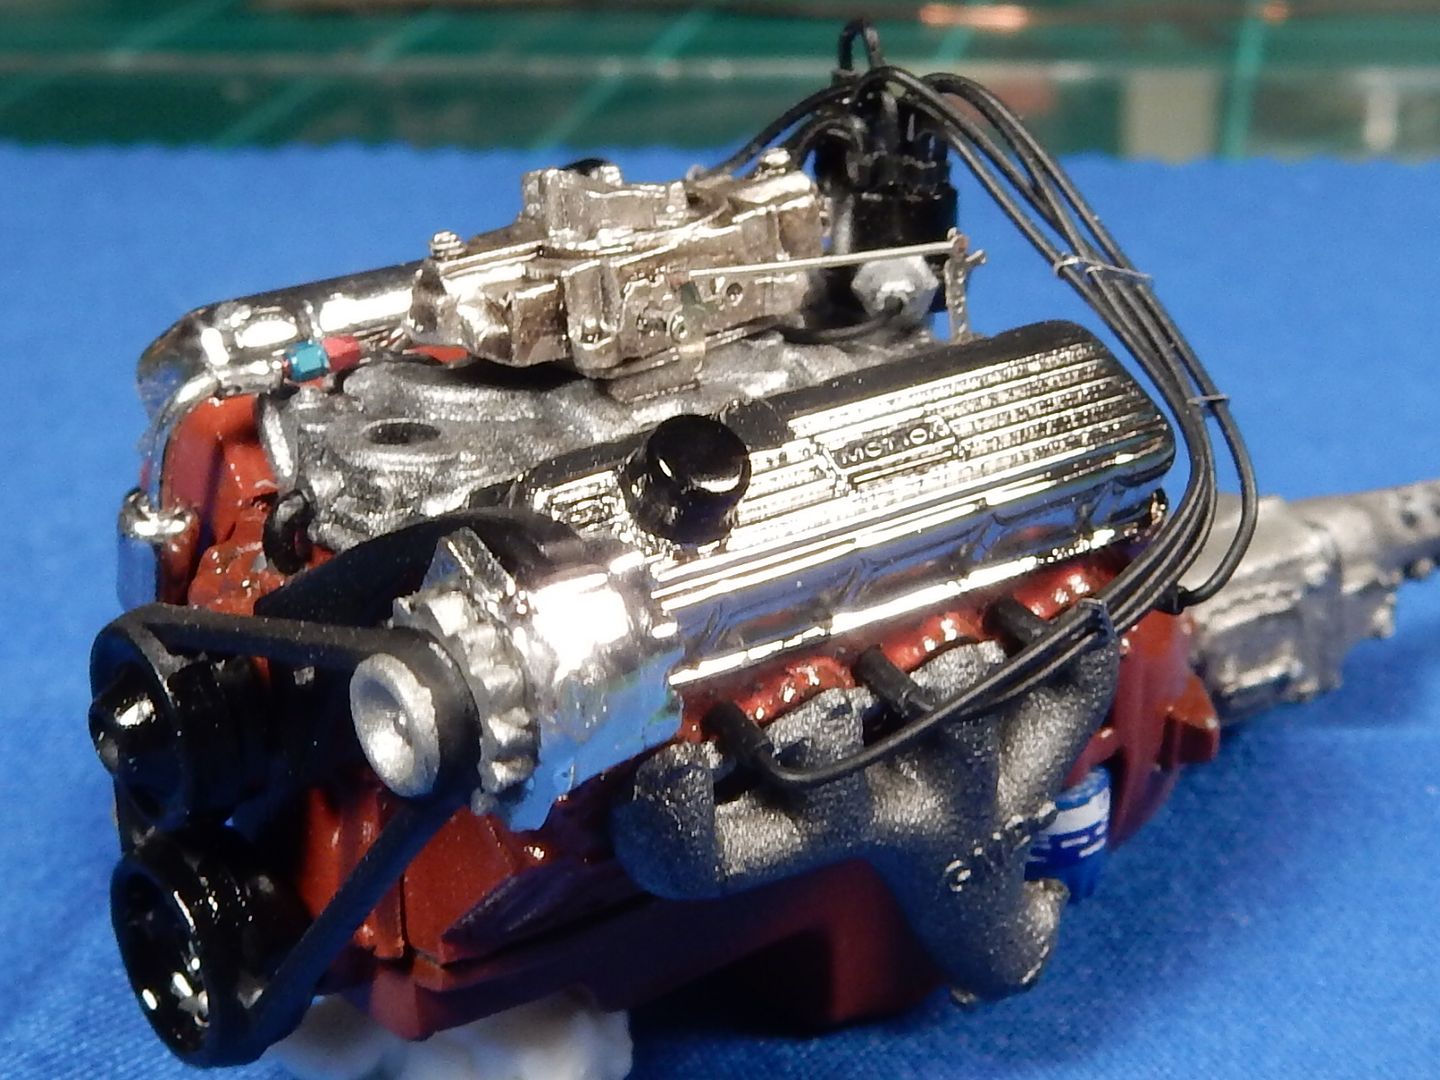 |
|
|
|
Post by poet on Jul 10, 2017 17:37:01 GMT -7
Excellent detail! I love the rough finish on the cast exhaust manifolds!
|
|
|
|
Post by mustang1989 on Jul 11, 2017 18:04:11 GMT -7
Thanks Dennis. I have had a blast on this engine build.
|
|
|
|
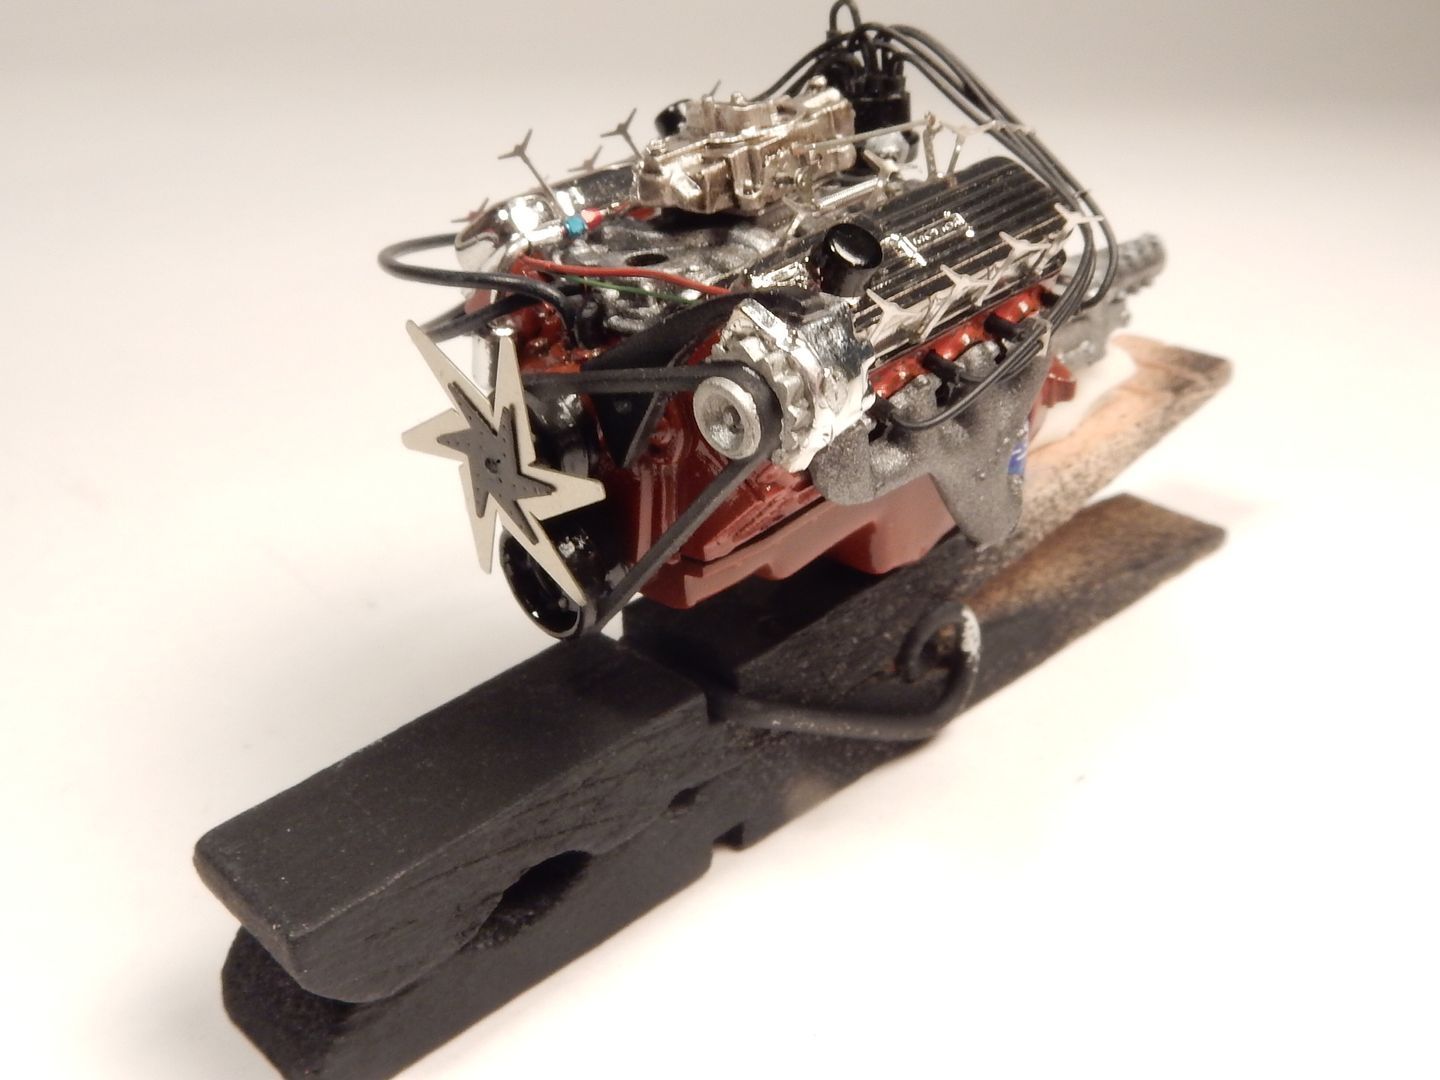
Post by mustang1989 on Jul 12, 2017 12:36:11 GMT -7
Ok folks. I believe that the 396 is done enough to where I'm going to put it in the chassis and get started on the exhaust system. I temporarily installed the center section of the fan on the front of the front just for picture taking purposes and will remove it so I can use it on the backside of the other fan I have for a future build. N E ways..............here she is:
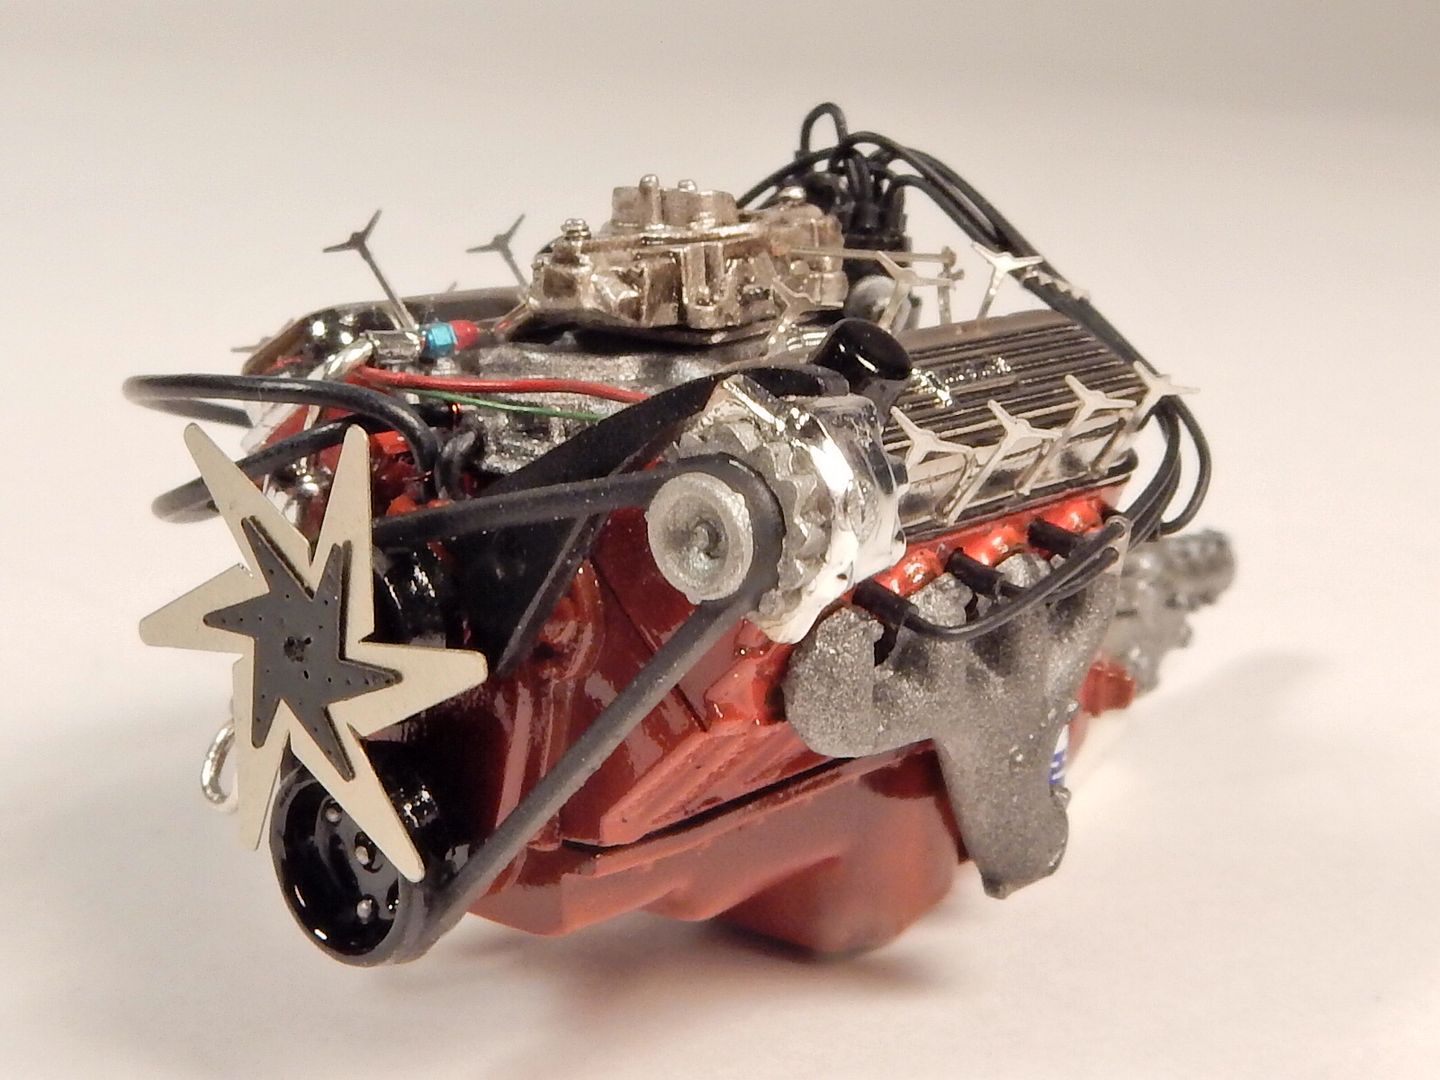
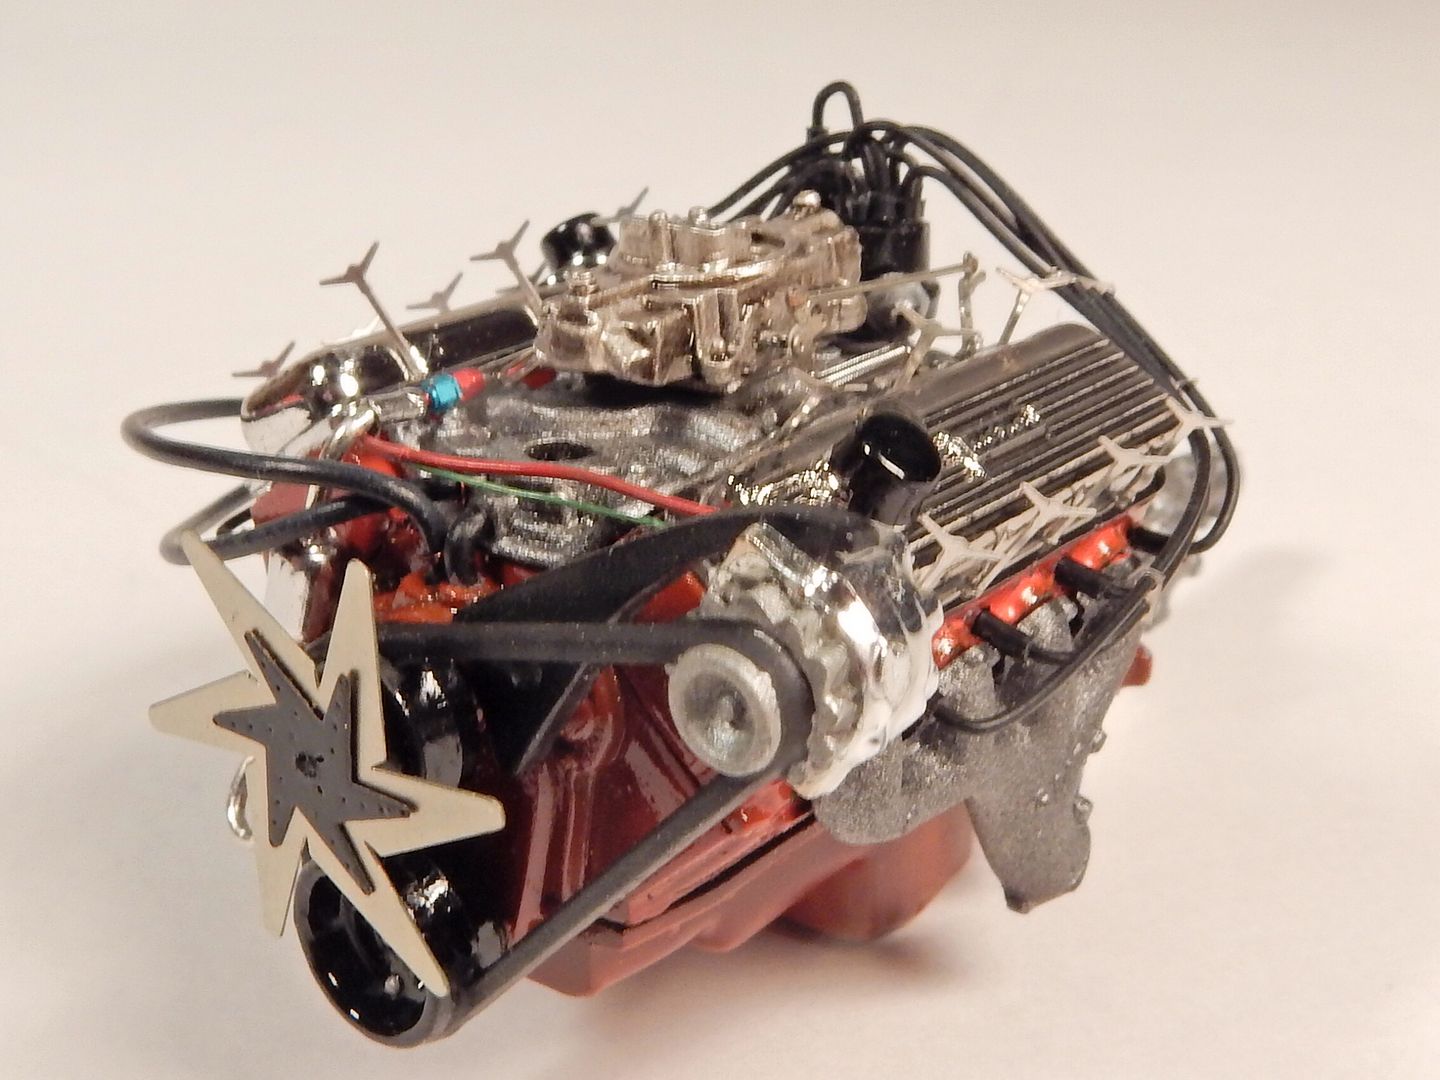
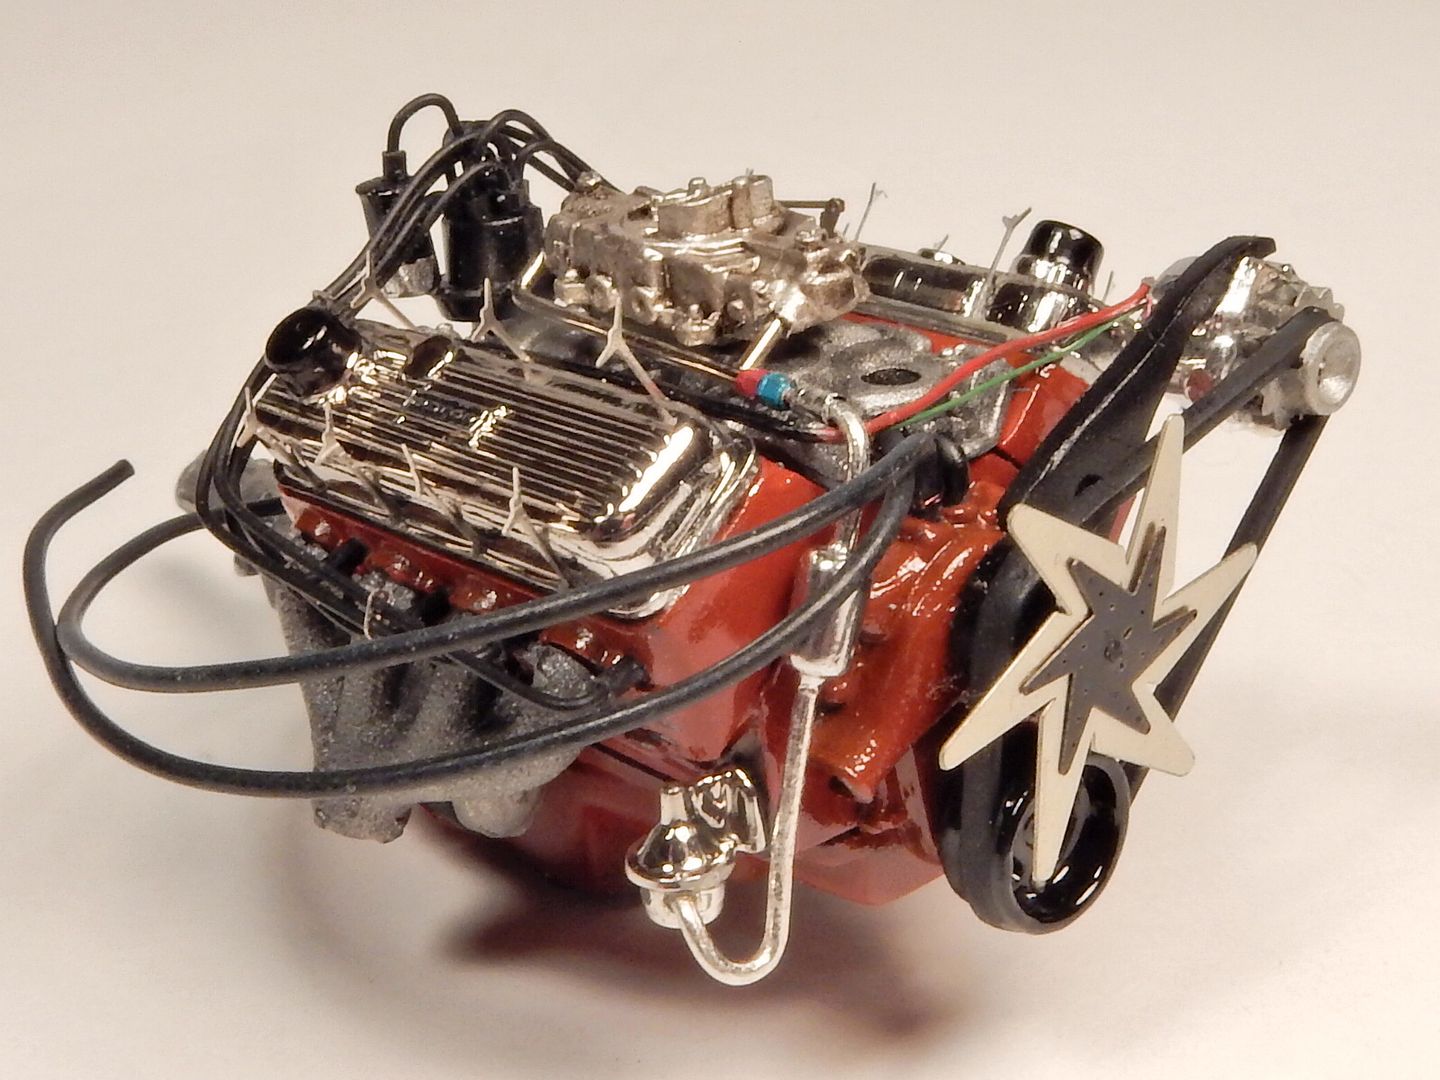
And this one I throw in for all my friends at work. They always tell me that I have a giant clothespin hanging out in my garage
|
|
|
|
Post by Grandpabeast on Jul 12, 2017 18:32:51 GMT -7
Blown away , that's some great detail! Looks awesome
|
|