|
|
Post by Big D on Sept 28, 2016 16:39:54 GMT -7
I'm building this kit to help me get back in the groove. This car was built and raced the year I was born. This is one of the Revival kits that isn't all metal. It's both plastic and metal. I like the all metal kits better but I think I can make this work. 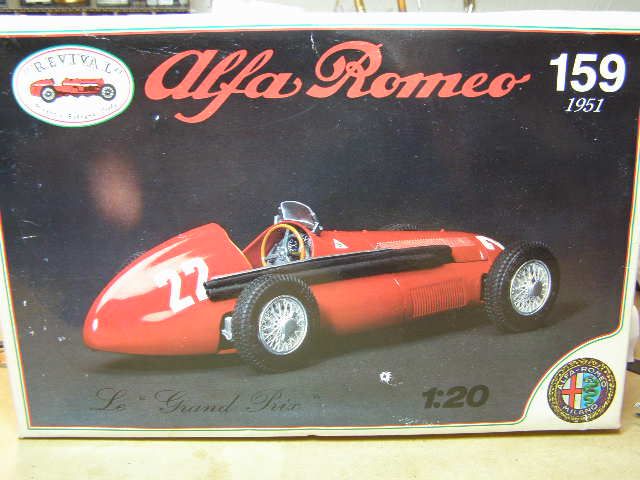 This is wheels, tires and various other parts. Some parts I am going to paint on the sprues as they don't need much cleaning up first. 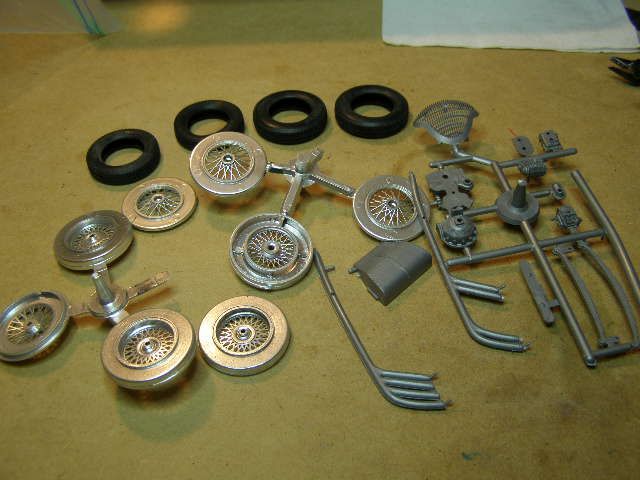 This is the body and other parts. The little packages hold screws, pins and axles and springs. 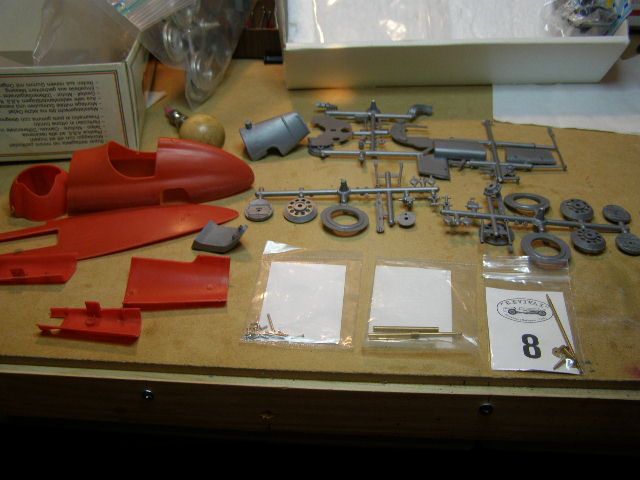 These are the metal parts. Frame, engine and axles. Since I have the entire collection of Revival kit save one, I have been buying extra engines from the factory in Italy to display beside the finished model as I really like the way these engines build up. Almost a kit in themselves. 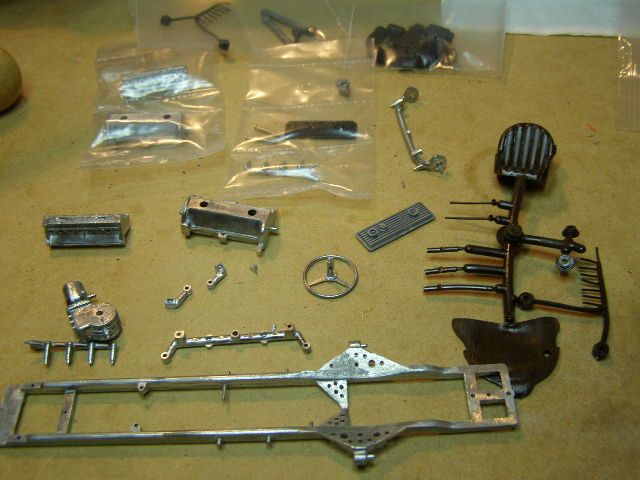 This is what the flash looks like on the body parts that I have to take off. Everybody is familiar with this. Before and after shot.  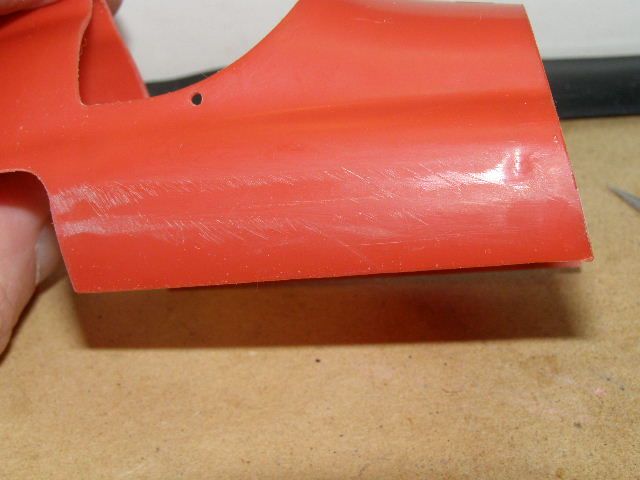 Mold lines like this are on all metal parts and have to be removed. You see these kits for sale but very few built ones. I have read in other forums where guys complain that these kits are too hard and a PIA because you have to work on them. There are tricks to everything that make it easier and I'm all for easier. I know all about using sandpaper. You have to sand your butt off working on knives and I don't like it so I found other ways when I could. Most builders sand this metal but I don't. I use diamond files for the flash and mold lines and they whip it right off. They come in course and fine grits so you can still leave a smooth finish. This metal is always covered with a patina that has to come off for the primer and paint to stick. Again everybody sands it off. I use a Dremel tool with a wire brush it shines up the metal in no time. I love Dremel tools. I'll probably start painting tomorrow and be back with more.  |
|
|
|
Post by CoyoteCrunch on Sept 28, 2016 18:03:42 GMT -7
Alright!! Big D is back to the bench!!!! This is gonna be awesome for sure!!!
popcorn-and-drink-smiley-emoticon popcorn-and-drink-smiley-emoticon popcorn-and-drink-smiley-emoticon
|
|
|
|
Post by stitchdup on Sept 29, 2016 0:28:55 GMT -7
I'm definetaly watching this, from the days when crash safety was being thrown out of the car, and brandy/gin/wine was an in race refreshment
|
|
|
|
Post by Big D on Sept 30, 2016 15:54:47 GMT -7
I don't particularly like fire engine red so I used Krylon Burgundy and I like it. I just finished painting this today so I still have to rub it out and clear coat it but I'm pleased with it. I have to detail the rest of the parts so they will be hand painted. I'll start on the engines next. I am doing two of them. One in the car and one for display. 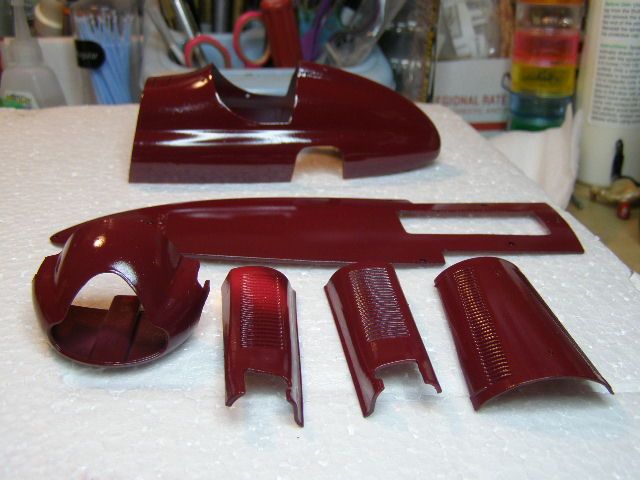 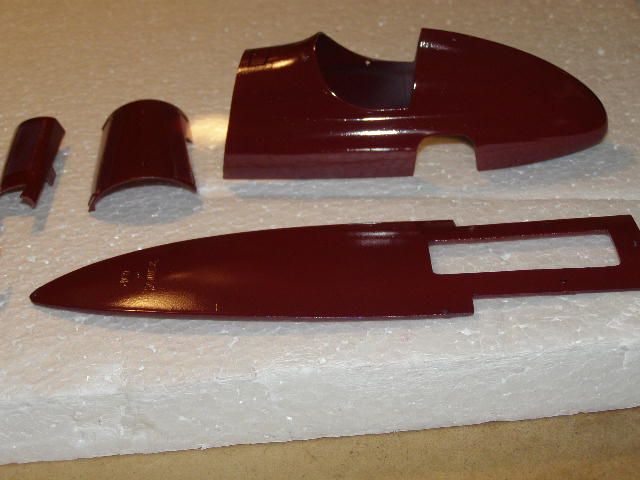 |
|
|
|
Post by stitchdup on Sept 30, 2016 16:03:22 GMT -7
|
|
|
|
Post by CoyoteCrunch on Sept 30, 2016 18:13:26 GMT -7
cool page Les - great research.
I like the burgundy better as well - awesome choice D
popcorn-and-drink-smiley-emoticon popcorn-and-drink-smiley-emoticon
|
|
|
|
Post by Big D on Sept 30, 2016 19:14:54 GMT -7
Very Interesting article Les. I look at Goodwood Revival videos on YouTube a lot. Thanks for posting it. |
|
|
|
Post by Big D on Sept 30, 2016 19:20:53 GMT -7
cool page Les - great research. I like the burgundy better as well - awesome choice D popcorn-and-drink-smiley-emoticon popcorn-and-drink-smiley-emoticon Dark reds are one of my favorite colors anyway. I'm partial to dark versions of most colors. I'm just glad I'm able to get something done and stay with it. I quit doing contests because the way my health is I'm not always sure I'll be able to finish a build and I hate to start and not be able to finish and I don't think it's fair to the other members. |
|
Deleted
Registered: Nov 27, 2024 15:18:31 GMT -7
Posts: 0
|
Post by Deleted on Oct 4, 2016 0:51:25 GMT -7
That's a great color D, enjoy the build mate..
|
|
|
|
Post by Big D on Oct 10, 2016 11:57:55 GMT -7
Finally got one engine finished. This one was a bugger to get detailed and together. Second engine should go together better now that I know what to look for. The finish is very close to the 1:1 engine. Colors are Dark Red, Chrome Silver, Brass, Copper, Met. Blue, Gunmetal Metallizer and Burnt Iron. Finished all over with Tamiya Smoke wash. These are the parts before I started. 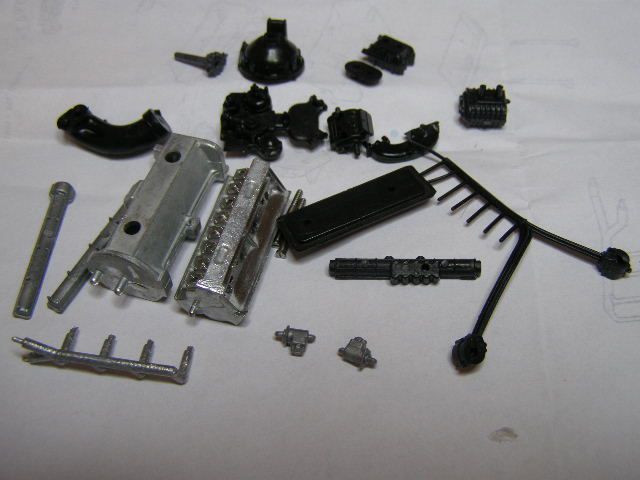 This is the exhaust side. This car has twin exhaust running the full length of the left side.  This is a shot of the front. 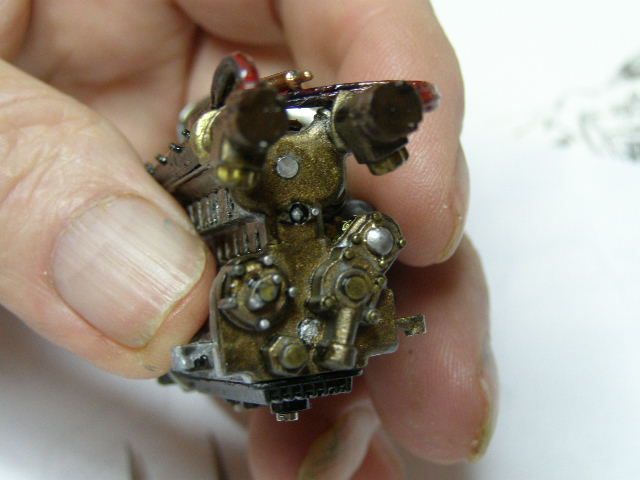 Right side with brass gears for the pumps, also the small supercharger setup. The tube at the top will connect to a porthole in the firewall and to the outside for air. 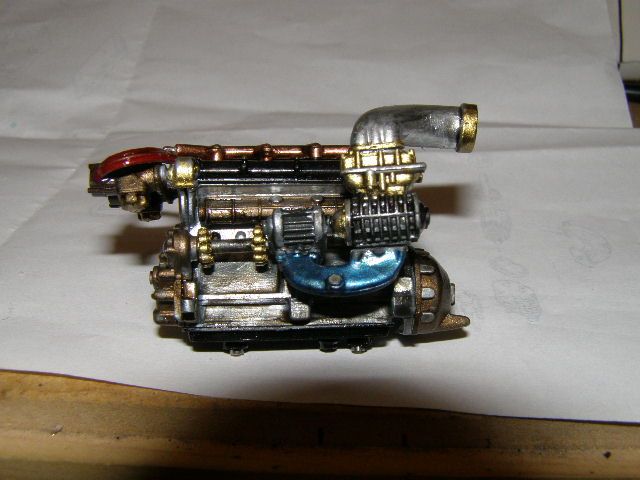 Here's the copper coolant pipe and a little of the wiring. Two hoses run from the pipe to the radiator. Had to drill out little holes for the wiring in the metal head and poke the wires in them and I don't think I drilled them deep enough because they were a bugger get in and I had enough together I couldn't do it over. I'll do it different an the next one. Thanks for looking. 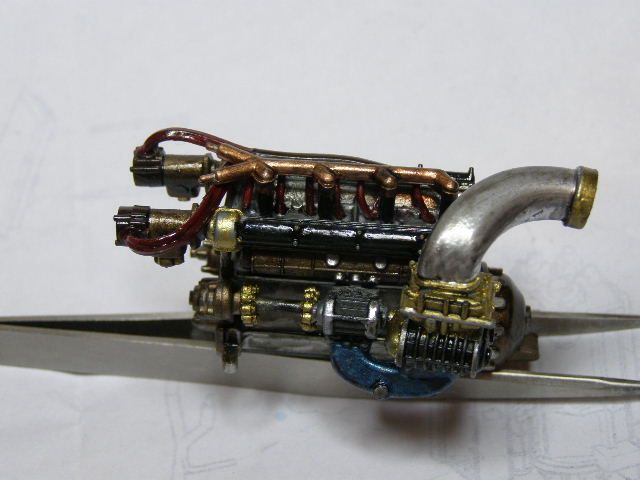 |
|
|
|
Post by CoyoteCrunch on Oct 10, 2016 12:19:55 GMT -7
Shazam - ClaBam!! This looks tastier then eggs in a pan!!
Awesome motor Dennis - your motors are always the best man!!!!
|
|
Deleted
Registered: Nov 27, 2024 15:18:31 GMT -7
Posts: 0
|
Post by Deleted on Oct 10, 2016 14:22:57 GMT -7
SUPERB DETAILING mate, that looks way cool. I can't wait to see the rest of the build now.. popcorn-and-drink-smiley-emoticon impatient-smiley-emoticon  |
|
|
|
Post by Big D on Oct 10, 2016 15:10:33 GMT -7
Thank you Dale & Tom. I'm looking forward to building the rest of the car and I'm glad of that. It feels good to be back in the groove enjoying building again. I know these type cars aren't everybody's cup of tea but I sure enjoying building them.
|
|
Deleted
Registered: Nov 27, 2024 15:18:31 GMT -7
Posts: 0
|
Post by Deleted on Oct 10, 2016 18:40:19 GMT -7
Thank you Dale & Tom. I'm looking forward to building the rest of the car and I'm glad of that. It feels good to be back in the groove enjoying building again. I know these type cars aren't everybody's cup of tea but I sure enjoying building them. That last part is the most important buddy!! ENJOY BUILDING THEM! smileyCA9464IN_zpsd9ee499f |
|
|
|
Post by CoyoteCrunch on Oct 11, 2016 5:19:26 GMT -7
Thank you Dale & Tom. I'm looking forward to building the rest of the car and I'm glad of that. It feels good to be back in the groove enjoying building again. I know these type cars aren't everybody's cup of tea but I sure enjoying building them. That last part is the most important buddy!! ENJOY BUILDING THEM! smileyCA9464IN_zpsd9ee499f X 2 - AND, I like Tea!! |
|
|
|
Post by Big D on Oct 15, 2016 17:29:29 GMT -7
Front end and rear end are done and installed on the frame. Brake lines front and rear, also pedals. shifter and driveshaft. Front and rear springs. Had to take off the supercharger assembly to install the engine. I installed them prematurely. You have to follow the instructions on these kits closely and in order and I know that, I guess the engine got me excited. Just shows what "mellowing with age" will do. Used to be the girlies now it's model car engines. Now on to the dash, firewall, gas tanks, supercharger etc. It's surprising to me the detail in these kits in places where they will never be seen but I'm glad it's there. These kits aren't easy but the fit and finish is always very good. I never have to make big adjustments or anything. 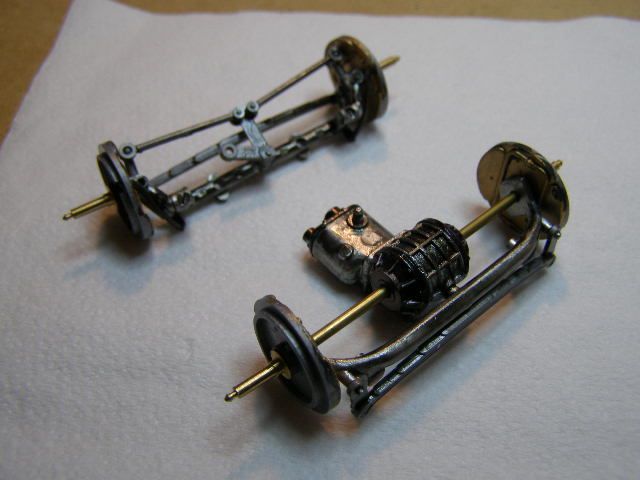 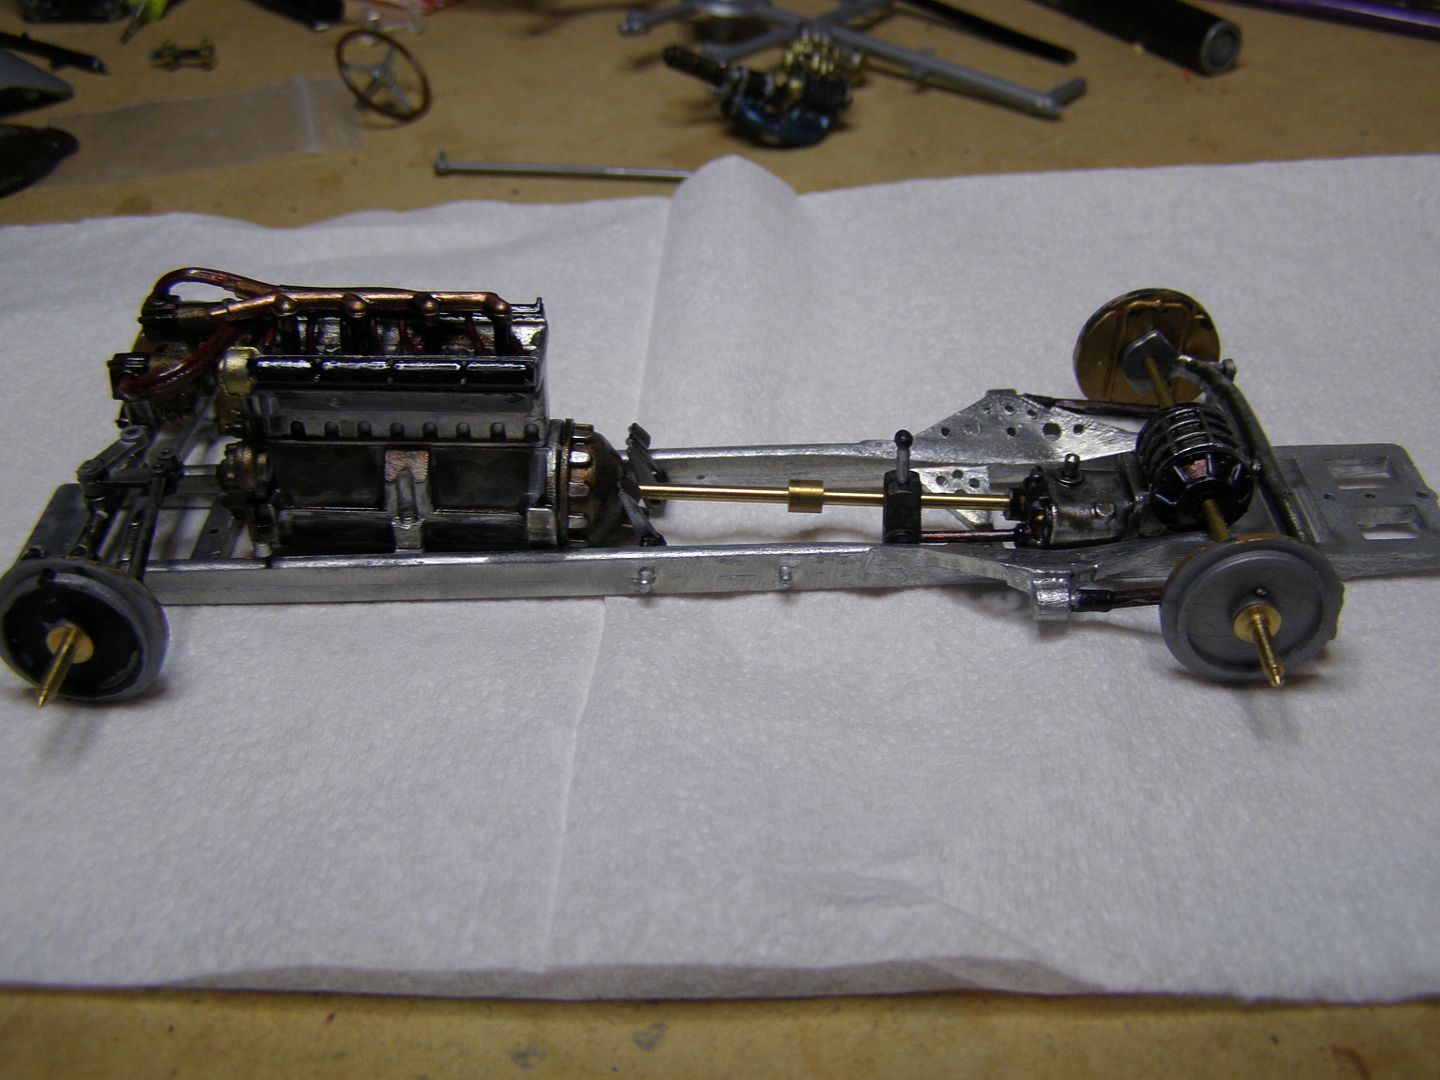 |
|
|
|
Post by stitchdup on Oct 15, 2016 17:41:52 GMT -7
Just like the girlies, cars have curves in all the right places. That's some really nice work, almost seems a shame to hide it with the body
|
|
Deleted
Registered: Nov 27, 2024 15:18:31 GMT -7
Posts: 0
|
Post by Deleted on Oct 15, 2016 22:56:52 GMT -7
Man, this is fine detailing at it's best mate, yes, it is a shame to cover it all up..
|
|
nyratrod
Senior Member
   Registered: Oct 29, 2014 10:05:30 GMT -7
Posts: 543
|
Post by nyratrod on Oct 16, 2016 8:32:01 GMT -7
Super lookin' build so far.
|
|
|
|
Post by Big D on Oct 24, 2016 15:19:59 GMT -7
Finally able to post more progress pictures. I discovered when I was test fitting the firewall and nose piece that I did indeed get too excited building the engine. I shouldn't have completed it so soon and I installed it on top of the frame and it was supposed to install from the underneath. Since it was complete I couldn't install it from the underneath unless I tore it down so I built the second engine and installed it in the car and the first engine is the display engine now. Finished and installed brakes and wheels, firewall and dash, side tanks and rear bulkhead/tank, front and rear brake lines and completed the steering mechanism. I wasn't going to detail the rivets on the tanks since they would be covered up. Painted the tanks and set them aside and after a couple of days picked them up and detailed them anyway. Couple of shots of the two engines. 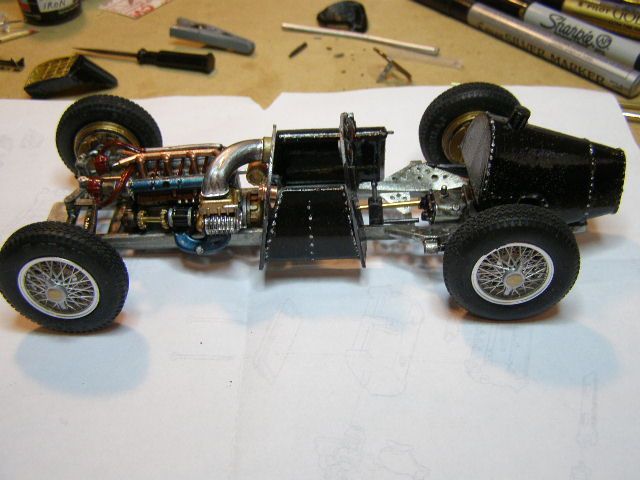 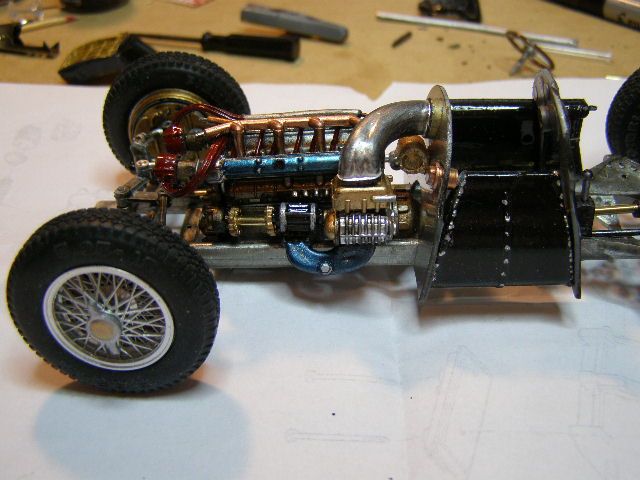 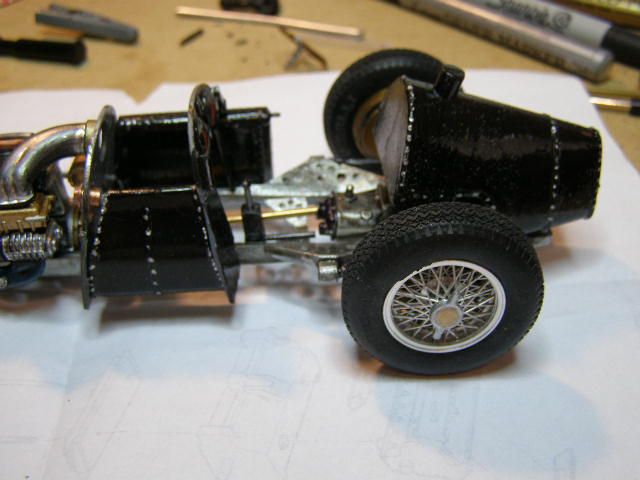 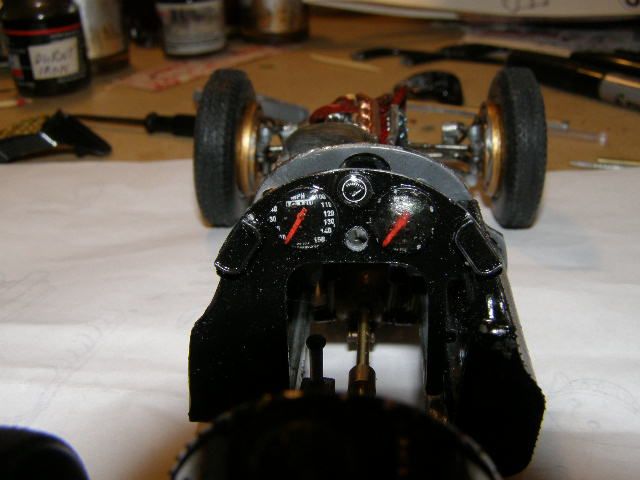   |
|
|
|
Post by CoyoteCrunch on Oct 24, 2016 17:33:00 GMT -7
jaw-dropping-smiley-emoticon jaw-dropping-smiley-emoticon cant-believe-my-eyes-smiley-emoticon two-thumbs-up-smiley-emoticon praising-the-lord-smiley-emoticon hand-clapping-smiley-emoticon big-drooling-smiley-emoticon
|
|
|
|
Post by Big D on Oct 26, 2016 9:09:37 GMT -7
This one is in the Finished section-Miscellaneous Thank you for looking at this.
|
|


