Deleted
Registered: Dec 4, 2024 12:39:30 GMT -7
Posts: 0
|
Post by Deleted on Jan 7, 2016 18:11:09 GMT -7
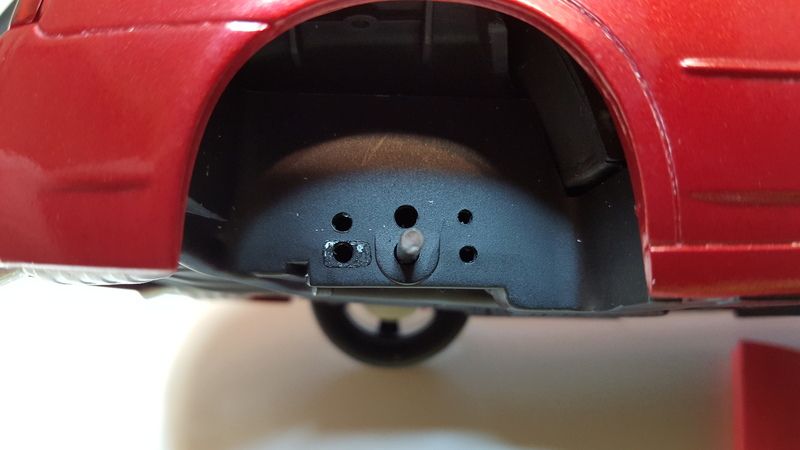
Been trying to finish up a charger that I've been working on forever....down to the last few peices. I want to lower the back of this car a little bit, its just sits too high for my liking. I tried using fine line tape over the old holes and made a template, which worked pretty well. but the first set of holes i made were too far too high, and slammed the body and on top of that, the wheels were not at the same level. So what im asking for are suggestions on how i can fill these holes solid, so that I can redrill a set of new holes in the middle and not have the filler collapse, and does anyone have any ideas on how i can transfer the location to the other side so they are even? The lower set of holes (the one with the Pin) are the original holes thanks for all the help guys!    |
|
|
|
Post by stitchdup on Jan 7, 2016 18:32:09 GMT -7
You could try stretching some left over sprue over a flame of some sort, to get the diameter you need, then just glue bits in the holes as flush as you can. To get the new holes in the same place on the other side cut a template from paper or card after you have the first side to your liking, and use it on the other side to mark it.
|
|
|
|
Post by stitchdup on Jan 7, 2016 18:35:44 GMT -7
Forgot to ask if the arches are the same on both sides? If not this method may not work
|
|
Deleted
Registered: Dec 4, 2024 12:39:30 GMT -7
Posts: 0
|
Post by Deleted on Jan 7, 2016 20:06:02 GMT -7
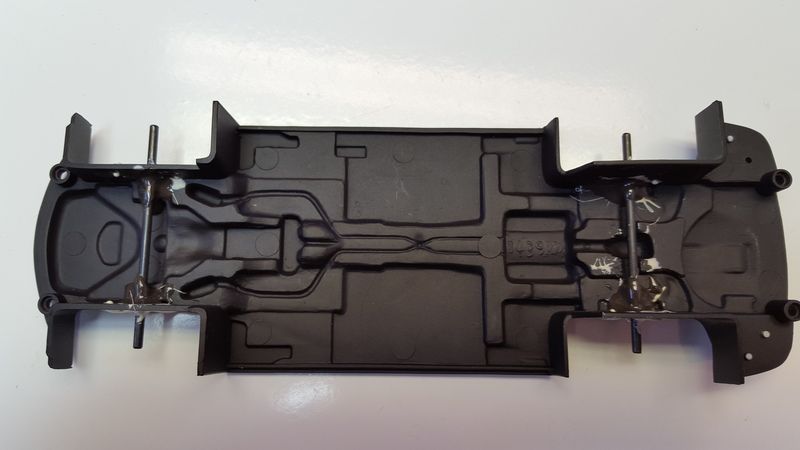
It's going to take some work but here is what I've done before. I used to do this on the 64 impala when I started building in my teens. Drill another hole in the middle yo join them all. Then I would put plenty of glue along the sides (red arrows). Then put the axle rod in, set the tires in place and let the body slam. Then use pennies or Popsicles sticks to get the car to the height you want. This should allow you to position it so it's even on both sides. Let the glue dry. Once it's in place go back and add more glue. Once the car is co plate, you won't really see the holes, because the brake discs cover them, but once the glue dries on the rod and it doesn't move, you can go back and add putty or globs of glue to cover it and sand and paint it black. It all depends on you.  |
|
Deleted
Registered: Dec 4, 2024 12:39:30 GMT -7
Posts: 0
|
Post by Deleted on Jan 8, 2016 6:37:01 GMT -7
It's going to take some work but here is what I've done before. I used to do this on the 64 impala when I started building in my teens. Drill another hole in the middle yo join them all. Then I would put plenty of glue along the sides (red arrows). Then put the axle rod in, set the tires in place and let the body slam. Then use pennies or Popsicles sticks to get the car to the height you want. This should allow you to position it so it's even on both sides. Let the glue dry. Once it's in place go back and add more glue. Once the car is co plate, you won't really see the holes, because the brake discs cover them, but once the glue dries on the rod and it doesn't move, you can go back and add putty or globs of glue to cover it and sand and paint it black. It all depends on you.  I like this plan, but I have to have the discs on when I do this, because the wheel is used to center through the disc and the pins also go into the body. I suppose I could do your suggestion first and the use the rod and the wheel as a guide to drill the holes for the disc. Not sure how I'm gonna mark the holes though, with all that it's gonna be tight. |
|
|
|
Post by stitchdup on Jan 8, 2016 7:23:57 GMT -7
To mark the holes just use the drill bit in your fingers. A couple of turns should be enough to mark it
|
|
|
|
Post by jbailey on Jan 8, 2016 7:53:25 GMT -7
To make the pin holes for the brake rotors, just get your axles position set first then apply some paint to the pins on the rotor and put them where they need to go. Once you pull them back off you'll have two paint dots of where to drill. Or what I would do is, position the axles and cut the pins off the rotors and just super glue them to the inner fender without the locator pins.
|
|
Deleted
Registered: Dec 4, 2024 12:39:30 GMT -7
Posts: 0
|
Post by Deleted on Jan 8, 2016 8:48:03 GMT -7
All great ideas, I'll have to try it tonight. I will post some updates as I go, thanks everyone!
|
|
Deleted
Registered: Dec 4, 2024 12:39:30 GMT -7
Posts: 0
|
Post by Deleted on Jan 8, 2016 18:42:19 GMT -7
|
|
|
|
Post by stitchdup on Jan 8, 2016 19:00:22 GMT -7
Looks good, I dont know the drying time for the putty but 24hrs should be enough
|
|
Deleted
Registered: Dec 4, 2024 12:39:30 GMT -7
Posts: 0
|
Post by Deleted on Jan 8, 2016 20:55:40 GMT -7
There you go. Just as planned. When kits have chassis like this, it's easy to drop them lower to the ground following this method. Great job.
and no idea on the putty.
|
|
Deleted
Registered: Dec 4, 2024 12:39:30 GMT -7
Posts: 0
|
Post by Deleted on Jan 9, 2016 9:30:08 GMT -7
Im gonna have to run some errands before and i figured i would pick up some 2 part epoxy. Does anyone recommend anything that can be used in small quantities and have had good experiences with? or does it really matter?
|
|
Deleted
Registered: Dec 4, 2024 12:39:30 GMT -7
Posts: 0
|
Post by Deleted on Jan 10, 2016 13:24:05 GMT -7
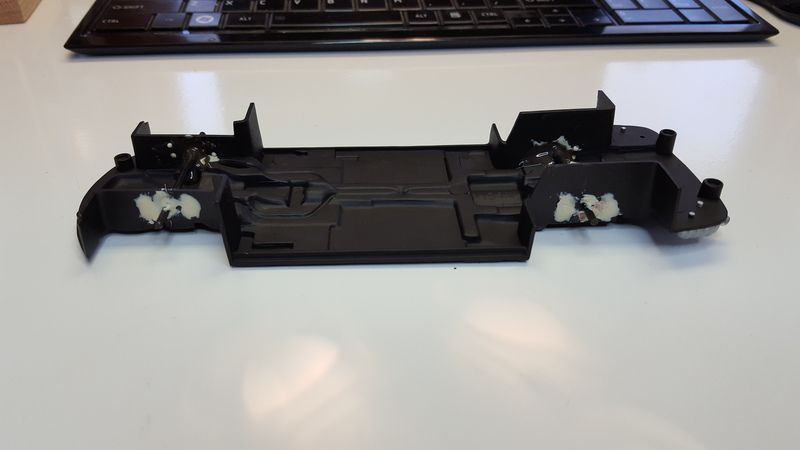
I got around to working on the chassis again today. the putty took forever to cure hard enough to keep everything in place but it worked pretty well. Unfortunately once I put the wheels and body back on to check things out, I found that the front was much lower then it should have been. I guess my placement of the sticks in the front was a poor choice. On top of that, becuase the front was out of whack, it also made one wheel taller then the other in the rear as well. That mean i had to start over. And that was ok. I felt better about doing it this time, I knew what to expect and had a better idea of how to go about getting it done. I ended up buying some JB Weld in the tubes and decided to use that instead this time. It had a 5min cure time so i could work on it again fairly quickly. I put the body on again, and everything appears to be where i want it. Now i just have to wait for another wheel to show up since i destroyed one trying to take the tire off =(   Ill get some complete pictures up when im done! Thanks for all the help! |
|
Deleted
Registered: Dec 4, 2024 12:39:30 GMT -7
Posts: 0
|
Post by Deleted on Jan 13, 2016 14:21:49 GMT -7
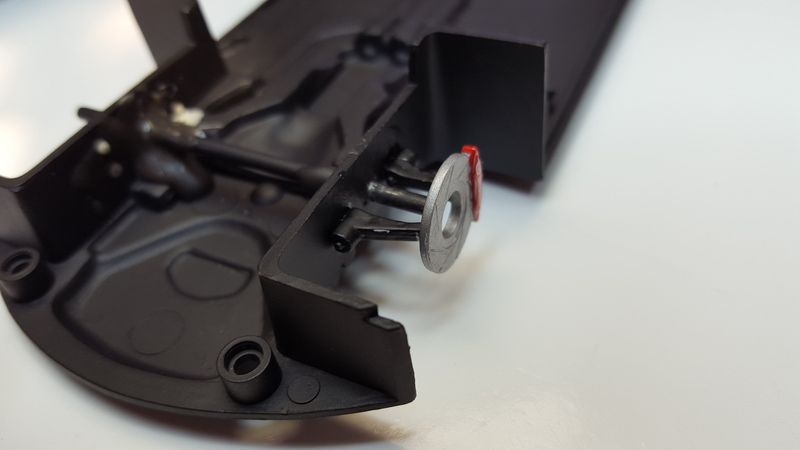
Im still waiting on the fourth wheel, but i managed to use the three i have left to get the brakes put on, I decided to use your ideas about just cutting off the pins on the brakes and gluing them on, surprisingly it didnt turn out too bad. The putty job is pretty bad, but you will never see it away. I have to put all my model in cases because it gets so dusty here.   |
|