Deleted
Registered: Nov 21, 2024 13:21:07 GMT -7
Posts: 0
|
Post by Deleted on Apr 27, 2014 14:28:19 GMT -7
GB,
I enlarged the pic and it looks like you said ( need to radius wheel opening)..Placement of the wheels looks great-dead center in front and rear ..Just need a radius job on rears..
Getting old , need to enlarge pics to see fine details and alignments LOL..
Tom
|
|
Deleted
Registered: Nov 21, 2024 13:21:07 GMT -7
Posts: 0
|
Post by Deleted on Apr 27, 2014 14:31:07 GMT -7
Oh buy the way -- use the big slicks and radius wheel wells for sure..Just my two cents anyway.
Tom
|
|
|
|
Post by Grandpabeast on Apr 28, 2014 12:57:58 GMT -7
yes, I think when I have the time I will radius the wheel wells and keep the big slicks .
|
|
Deleted
Registered: Nov 21, 2024 13:21:07 GMT -7
Posts: 0
|
Post by Deleted on Apr 28, 2014 13:10:22 GMT -7
Cool
|
|
Deleted
Registered: Nov 21, 2024 13:21:07 GMT -7
Posts: 0
|
Post by Deleted on Sept 7, 2014 0:35:26 GMT -7
Is the interior still left to do? I'm pretty good at detailing the interior
|
|
|
|
Post by Grandpabeast on Sept 7, 2014 4:58:19 GMT -7
Moparman I havent touched it. If you are interested , When I get moved and unpacked I can send you the pieces you will need. We are building this in a retro 60s style gasser and what you will do is photograph and explain all that you do and add it to this thread when completed you will send it back to me. Once done I will sell the car on ebay and the money will go towards buying kits for prizes.
|
|
Deleted
Registered: Nov 21, 2024 13:21:07 GMT -7
Posts: 0
|
Post by Deleted on Sept 7, 2014 7:12:37 GMT -7
How do I post pictures?
|
|
|
|
Post by Grandpabeast on Sept 7, 2014 13:33:26 GMT -7
there is a tutorial on posting pictures here or in the help thread . Or you could email them to me but you probably will want to do it your self
|
|
|
|
Post by sharp on Oct 2, 2014 16:50:23 GMT -7
That's a great way to shorten the wheelbase,got to try that..GREAT JOB!
|
|
|
|
Post by sharp on Oct 2, 2014 17:21:40 GMT -7
Great looking engine CM !! what size braided line did you use on the carbs?
|
|
|
|
Post by Grandpabeast on Jul 11, 2021 11:39:41 GMT -7
Ok, I found this laying around and decided to finish it. After radiusing the wheel wells , I set out to mud in the quarters. Good measuring and cutting will minimize your body work.  workbench 07-04-2021 014 workbench 07-04-2021 014 by David Keim, on Flickr  workbench 07-04-2021 015 workbench 07-04-2021 015 by David Keim, on Flickr Well that was setting up I mounted my rims and tires and started on a motor. Some of you will remember Custommuscle had built a motor for this but Im not sure where I put it. Its in a box but with so many moves I would have to go through every box I have to find it and now I dont have the time.  workbench 07-04-2021 010 workbench 07-04-2021 010 by David Keim, on Flickr 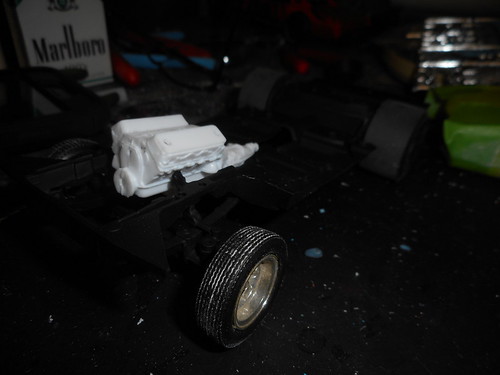 workbench 07-04-2021 011 workbench 07-04-2021 011 by David Keim, on Flickr 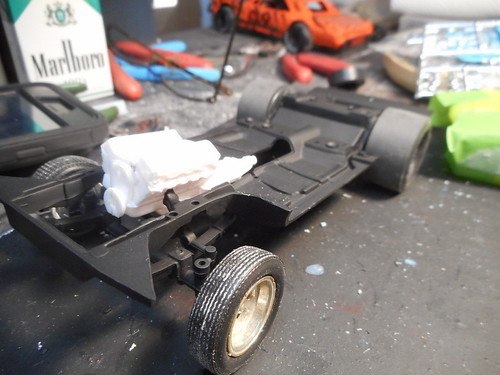 workbench 07-04-2021 012 workbench 07-04-2021 012 by David Keim, on Flickr  workbench 07-04-2021 013 workbench 07-04-2021 013 by David Keim, on Flickr When we last worked on this there was some concern how to deal with the interior tub. Well Ive picked up a few tricks since then and its one of the great things about having a huge junk yard. I took a second interior tub, cut out what I needed and placed it into the first tub.  workbench 07-04-2021 004 workbench 07-04-2021 004 by David Keim, on Flickr 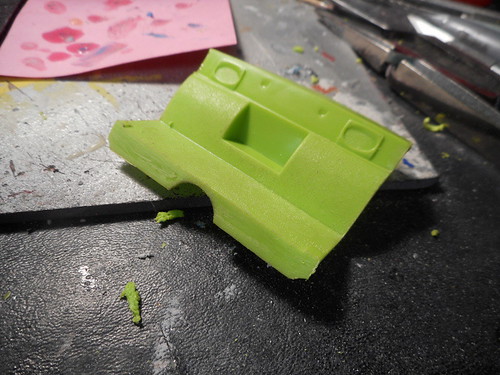 workbench 07-04-2021 005 workbench 07-04-2021 005 by David Keim, on Flickr  workbench 07-04-2021 006 workbench 07-04-2021 006 by David Keim, on Flickr  workbench 07-04-2021 007 workbench 07-04-2021 007 by David Keim, on Flickr  workbench 07-04-2021 008 workbench 07-04-2021 008 by David Keim, on Flickr  workbench 07-04-2021 009 workbench 07-04-2021 009 by David Keim, on Flickr Now remember Im doing a lot of cutting here. Be careful and dont be intimidated. I choose to use a dremal tool which you can get different size saw blades as well as sanding drums and other grinding bits. Its my number 1 tool and my best friend. So a little color and some details, this interior is looking good !!  workbench 07-04-2021 016 workbench 07-04-2021 016 by David Keim, on Flickr 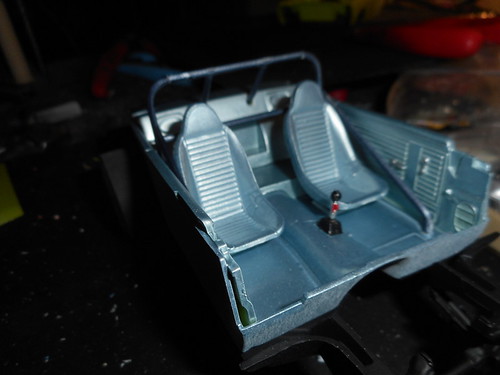 workbench 07-04-2021 017 workbench 07-04-2021 017 by David Keim, on Flickr  workbench 07-04-2021 018 workbench 07-04-2021 018 by David Keim, on Flickr  workbench 07-04-2021 019 workbench 07-04-2021 019 by David Keim, on Flickr Lets get some work done on the motor. Since my eyes are not what they use to be and I get hand shakes from time to time, I no longer drill and wire my own distributors. Instead I go with a model masters pre wired with a coil. Then all I have to do is drill the spark plug locations. I google the firing order and try to stay true to the car. Carefully bend your wires and cut them a bit long so you have something to slide into the hole you drilled.Heres a little trick. I whittle down a tooth pick and once I have my wire in the hole where I want it, I slide in the sliver of wood and twist it off. It is so small you can barely see it but it will hold your wires tight and you can keep on going.  workbench 07-04-2021 020 workbench 07-04-2021 020 by David Keim, on Flickr  workbench 07-04-2021 021 workbench 07-04-2021 021 by David Keim, on Flickr  workbench 07-04-2021 022 workbench 07-04-2021 022 by David Keim, on Flickr  workbench 07-04-2021 023 workbench 07-04-2021 023 by David Keim, on Flickr 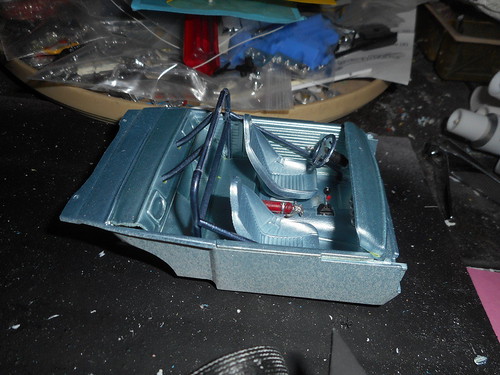 workbench 07-04-2021 024 workbench 07-04-2021 024 by David Keim, on Flickr Ok last test fit before primer, wet sand and paint  workbench 07-04-2021 025 workbench 07-04-2021 025 by David Keim, on Flickr 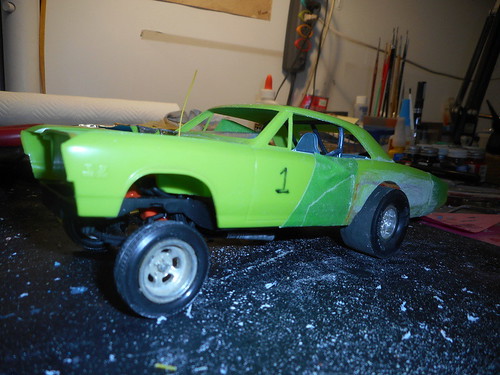 workbench 07-04-2021 026 workbench 07-04-2021 026 by David Keim, on Flickr 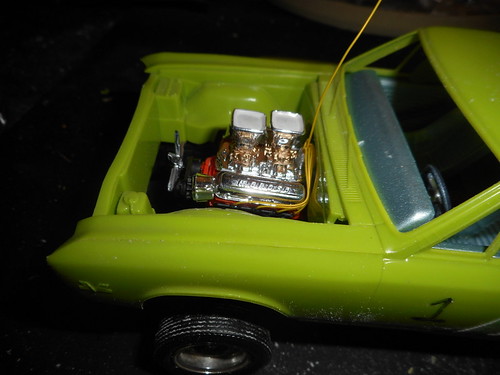 workbench 07-04-2021 027 workbench 07-04-2021 027 by David Keim, on Flickr With the body in full swing I thought I would dress up the trunk area since I opened the trunk lid ( still dont remember why I did that but oh well ). I put in a floor and some tubs . 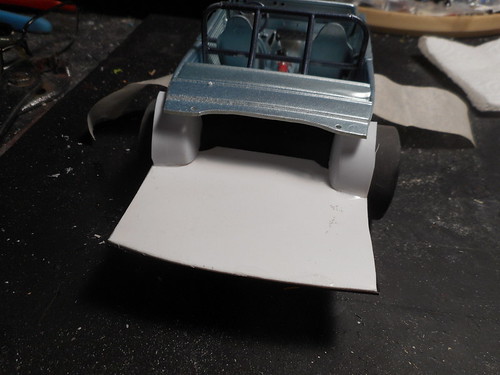 workbench 07-04-2021 034 workbench 07-04-2021 034 by David Keim, on Flickr  workbench 07-04-2021 035 workbench 07-04-2021 035 by David Keim, on Flickr  workbench 07-04-2021 036 workbench 07-04-2021 036 by David Keim, on Flickr  workbench 07-04-2021 037 workbench 07-04-2021 037 by David Keim, on Flickr  workbench 07-04-2021 038 workbench 07-04-2021 038 by David Keim, on Flickr  workbench 07-04-2021 039 workbench 07-04-2021 039 by David Keim, on Flickr  workbench 07-09-2021 006 workbench 07-09-2021 006 by David Keim, on Flickr  workbench 07-09-2021 007 workbench 07-09-2021 007 by David Keim, on Flickr  workbench 07-09-2021 013 workbench 07-09-2021 013 by David Keim, on Flickr 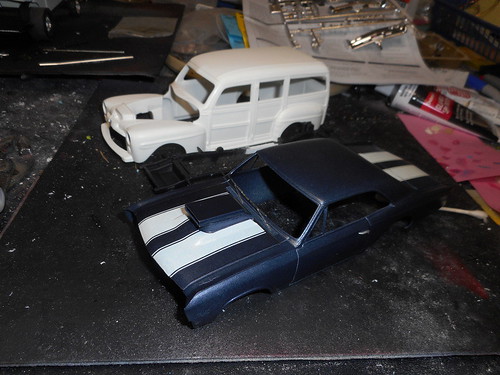 workbench 07-09-2021 014 workbench 07-09-2021 014 by David Keim, on Flickr Ok, I hope this was fun for everybody. A little glue, some putty, a dremal and some rattle can paint. Really , all I can tell yo is its only plastic. Dont be afraid to try something new and if you have problems ask  We will be happy to help. My promise is if you wreak some plastic trying something new, well if I have it in my junkyard its yours free of charge. To see the finished car check out Jerrys Cherrys Finished Projects under Hot Rods and rat Rods and Street Machines. |
|