Deleted
Registered: May 19, 2024 1:52:03 GMT -7
Posts: 0
|
Post by Deleted on Jan 14, 2016 13:57:03 GMT -7
I've been working on this truck forever now, it seems like. I've been having so many problems with the paint. I finally ditched the auto paint i was using and found some bright orange Tamiya paint. I dont really care for the color all that much, its too warm and dark. I wanted something brighter. I did have to redo the hood again, for some reason the paint would not stick to the peaks in the hood. I put at least 4 heavy coats on it and could not get it to stick. So now its sitting in Super Clean again going for round 5. I will say this, Im really liking the Tamiya paint, it laid down so much nicer then the auto paint i was using. I have a lot of the other parts painted and ready for install, Ill post more pictures as I progress. I was after something like this  You cant really tell in this picture but the outer peak of the hood would stay white after its been painted. I tried spraying a heavy coat and then holding it upside down, but i think i sprayed too much because it started to run on the front side.  The body came out really nice, now i just need to figure out what grit i should start sanding it with. The stripes are gonna be another huge challenge for me, not sure what to do there. Id like to paint them, but im scared that when i do the hood its going to find a spot to seep and ruin the paint. There is a decal kit on ebay. I might play it safe and go that route.   |
|
Deleted
Registered: May 19, 2024 1:52:03 GMT -7
Posts: 0
|
Post by Deleted on Jan 14, 2016 14:22:44 GMT -7
I actually really like this color. I think it fits the style of build you're going for. About the hood, I can think of a couple of reason why the hood doesn't hold on to the paint. Might need a good wash with soap and or, the primer you're using is not doing its job. I also think that a base coat of silver or gold might help balance the color out.
|
|
|
|
Post by jbailey on Jan 14, 2016 14:58:09 GMT -7
Instead of just drowning it paint, do many light mist coats until it's completely covered. Once it's completely covered from mist coats, then lay a decently wet coat on it. Light colors don't stay on ridges well at all, but there are ways to get them covered. Heavy wet coats are not the way to go with any paint.
Do you plan on clear coating this? If so, I would lightly wet sand with 3000 or higher grit just to loose some orange peel. After clear it should just need a "buff" job, by that I mean polished out lol.
|
|
Deleted
Registered: May 19, 2024 1:52:03 GMT -7
Posts: 0
|
Post by Deleted on Jan 14, 2016 16:06:15 GMT -7
I did wash the hood with soapy water, when i was using the old paint, for some reason when i put the first coat of paint on, it would crack and craze a lot, I figured out that it was left over residue from the masking tape when i switched sides. I hadnt thought of using silver or gold as a base coat, I always thought it was generally gray or white for bright colors, black for black and dark colors, and red for redish colors.
I do find myself using a lot of paint, for some reason i have this fear that if i dont get a full even coat that it will turn out textured. When i did the black and silver charger, I did a little better at it, but i think i lot of it had to do with very forgiving paint.
I did buy the novus cleaning kit a while back, i have used it with varying success, I might be expecting too much from it though, trying to polish out orange peel that should have been sanded first.
I have some of those foam pad sanding pads, can i use those? I also have some sanding film, but most of it feels like glass. Maybe i should just get some regular sandpaper.
|
|
Deleted
Registered: May 19, 2024 1:52:03 GMT -7
Posts: 0
|
Post by Deleted on Jan 14, 2016 18:32:41 GMT -7
Sounds like Jesses got you covered.
|
|
Deleted
Registered: May 19, 2024 1:52:03 GMT -7
Posts: 0
|
Post by Deleted on Jan 21, 2016 18:13:28 GMT -7
So over the last couple days I decided to paint the headliner and the engine bay flat black. I used some 3M automotive Fineline tape to start the mask. The headliner didn't turn out too bad. The engine bay is meh...  For some reason i guess i'm not getting the tape down well enough. Some of the lines aren't as crisp as i want.  I need to do a better job of masking as well =( evidently I missed a spot. Lucky me it didn't bleed through to the outside of the body.  Unmasked it looks decent, until you get a closer look at it  Again, masking issues. I used the fineline and cut the corner out with a xacto knife. I did have a feeling i was going to have a problem with these corners. Im gonna try and brush on some orange paint and hope for the best.  This side had a similar problem, but it should be covered by the hood anyway. I think the reason the paint bled under the rest of the mask might have been due to a dull blade.  So here's to learning another lesson. Next stop, Bare metal foil....should be fun.. Seems to be pretty straight forward. Id like to do the window channels, windshield and trunk. Should those all be done with one large piece? or smaller strips? Any other suggestions before I make a go of it? |
|
|
|
Post by jbailey on Jan 21, 2016 19:02:02 GMT -7
If you're 3M fineline tape is vinyl like mine, you'd be better off not using it. It's so thick that it seems to bunch up the paint on the edges creating a ridge. I prefer to just use blue painters tape and make sure the edges are burnished well. Another is the fineline tape has some very strong adhesive on it and could be left behind or pull the bottom layer of paint off.
On BMF, I like to cut strips about 3 times wider than I'm covering, mainly cause I'm a cheapskate lol. I think it's easier to work in smaller sections, plus when I mess up I don't have to remove the whole area just the piece I screwed up.
|
|
|
|
Post by sharp on Jan 21, 2016 19:09:47 GMT -7
I do all my BMF one strip at a time, makes it much easier that way,and you don't waste all that BMF.
|
|
Deleted
Registered: May 19, 2024 1:52:03 GMT -7
Posts: 0
|
Post by Deleted on Jan 21, 2016 19:57:54 GMT -7
I do all my BMF one strip at a time, makes it much easier that way,and you don't waste all that BMF. 2x |
|
|
|
Post by CoyoteCrunch on Jan 21, 2016 20:06:14 GMT -7
I do all my BMF one strip at a time, makes it much easier that way,and you don't waste all that BMF. 2x x3 - and have a few beers to relax your hand. and ALWAYS use a brand new blade for the BMF |
|
|
|
Post by stitchdup on Jan 22, 2016 3:48:41 GMT -7
I do my bf in pieces too, but I also put some low tack masking tape around it, so it doesn't take paint off with the extra foil.
|
|
Deleted
Registered: May 19, 2024 1:52:03 GMT -7
Posts: 0
|
Post by Deleted on Jan 22, 2016 4:58:39 GMT -7
When I do my BMF, i always use a new blade, and cut the foil as close to the width i need, less wastage, and the thinner it is,
the easier it is to work with. As for masking, find a good painters tape, the thinner the better,
and always run the back of your thumb nail across ALL the edges for the best and sharpest line mate.
It is looking good too..
|
|
Deleted
Registered: May 19, 2024 1:52:03 GMT -7
Posts: 0
|
Post by Deleted on Jan 22, 2016 5:14:46 GMT -7
As far as the fine line, it's a green paper masking tape, seems pretty thin, I can actually see through it a little bit and because of that you can really see if the tape has adhesion. When i get home I'll show you guys, I did use a flat and a pointed toothpick to apply the tape and it seemed ok.
With BMF, I have a feeling I need to clear the car first, rather then clearing after. Looks like strips is the way to go, maybe I can do the grill surround also, lots of inside corners though. Does any one have a close up shot of a item that use multiple pieces? I'd be interested to see how the seems are suppose to look.
|
|
|
|
Post by jbailey on Jan 22, 2016 7:01:38 GMT -7
As far as the fine line, it's a green paper masking tape, seems pretty thin, I can actually see through it a little bit and because of that you can really see if the tape has adhesion. When i get home I'll show you guys, I did use a flat and a pointed toothpick to apply the tape and it seemed ok. With BMF, I have a feeling I need to clear the car first, rather then clearing after. Looks like strips is the way to go, maybe I can do the grill surround also, lots of inside corners though. Does any one have a close up shot of a item that use multiple pieces? I'd be interested to see how the seems are suppose to look. The side trim and rear window trim on this are in about 6 pieces each lol... 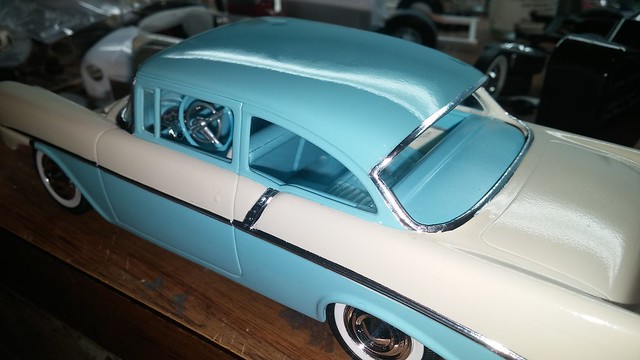 20160103_212802 20160103_212802 by ratrodfanbobcat, on Flickr |
|
Deleted
Registered: May 19, 2024 1:52:03 GMT -7
Posts: 0
|
Post by Deleted on Jan 23, 2016 8:16:02 GMT -7
Thanks for the pic jbailey, but it seems like i might have bigger problems on my hands now =( I was getting ready to throw a little bit of paint on that corner of the hood when i noticed some of the old tape residue that was still on the car. I didnt think much of it at the time, normally I havent had an issue with it. I took a microfiber cloth and clean water to try and remove it, and it didnt even budge. Sigh...there goes my half way decent paint job, this car just wants to fight me every step of the way. Im gonna try using some really fine sandpaper and see what happens. It almost looks like the tape ate into the paint, but we shall see. I've never had tape do this to paint before, on the other hand, I never used tamiya paint. This was the fineline i was using, i did use this on the 68 charger with out issues   I've used frog tape for a long time  This is what the frog tape caused  This is what the fineline did...  The paint sat and cured for at least a couple weeks, i know some paints take forever, but this one seemed good to go. edit - So I might have jumped the gun a little, I used a 4000 grit pad and initially it looks like it all came off, I dont have anything higher then that atm, my order of sandpaper hasnt show up yet. I might as well just start calling my posts, diary entries lol Edit 2 - Looks like the 4k didnt take it out after all. at this point i think i might as well give the whole car another good sand and do a light spray again. I need to paint that corner on the hood and a paint chip i made anyway. I tried spraying the color out on a piece of glass and then brushing it on the patch i needed, but it ended up making it worse. I wonder if baking the car in my heat box for a couple hours and letting the car sit for another day or two with all the tape on is what caused this, that would make the most sense to me. |
|
Deleted
Registered: May 19, 2024 1:52:03 GMT -7
Posts: 0
|
Post by Deleted on Jan 23, 2016 13:16:12 GMT -7
More progress this morning Getting the engine bay taped off   notice the paint chip, there was one on the trunk as well, not sure how they got there though.  Had to tape the underside just to be sure, didnt want to go through all that again.  And the roof liner  Acutally didnt turn out too bad, tape marks are gone and im pretty much back to a sanding stage  The lines turned out pretty decent, im gonna have to do some touch ups with the brush but its workable, at least on my level.  Now if i can just keep my eyes off the tv, i might actually get something done today... |
|
Deleted
Registered: May 19, 2024 1:52:03 GMT -7
Posts: 0
|
Post by Deleted on Feb 9, 2016 17:47:06 GMT -7
I've been pretty occupied lately but i did manage to get a little more progress on the body parts. i've got it sanded down to 3000grit, im afraid to sand any more. I've already had to respray a few parts (edges and emblems and such) because I cut through the paint. It was pretty glossy before I sanded, but there was visible orange peel in it. The 3000 grit sandpaper smoothed it out some, but made it much duller, which i expected. Id like to clear coat the body, I feel that if i do manage to burn through that, its not nearly as big a deal as burning through the paint. Im hoping the 3k will be enough. I have a couple different clears available to me. Alclad II lacquer gloss clear coat (no idea why i bought this), Createx Gloss topcoat, and some Dupicolor Acrylic enamel rattle can. The paint was a tamiya rattle can. Im leaning more towards the dupi-color. I think more because im just being lazy with this car, its been such a pain in the butt. I do need to try the createx, since i will be using them for the firebird. but i may just do a spray out on a card. Im still kinda leary about using the airbrush for body painting. Not a great pic, but this was one of my problem area's, no matter how hard i tried, i kept buring the paint off the emblem.  Side turned out pretty good, the light on the car is actully the shape of the lamp, so thats a good sign.  Visible marks from sanding, but lamp still quite visible  Another problem area. At least with this car, I learned to just sand off all the emblems, outside of just sanding deep enough its much better to deal with. 
Im not really sure what to do about the excess paint in the rear window channel. Im gonna chalk that up to using too much pain in one pass. But hey, at least its progress |
|
|
|
Post by stitchdup on Feb 14, 2016 3:33:35 GMT -7
The sanding marks will disappear when you polish it. I only have up 2500 which I used to flat and the cheapest scratch remover possible which got a little of the shine back, then a couple of goes with polish and it turned out ok. Still have to give it a polish with the good polish after all the bmf and chrome is on but it's not looking too bad so far. 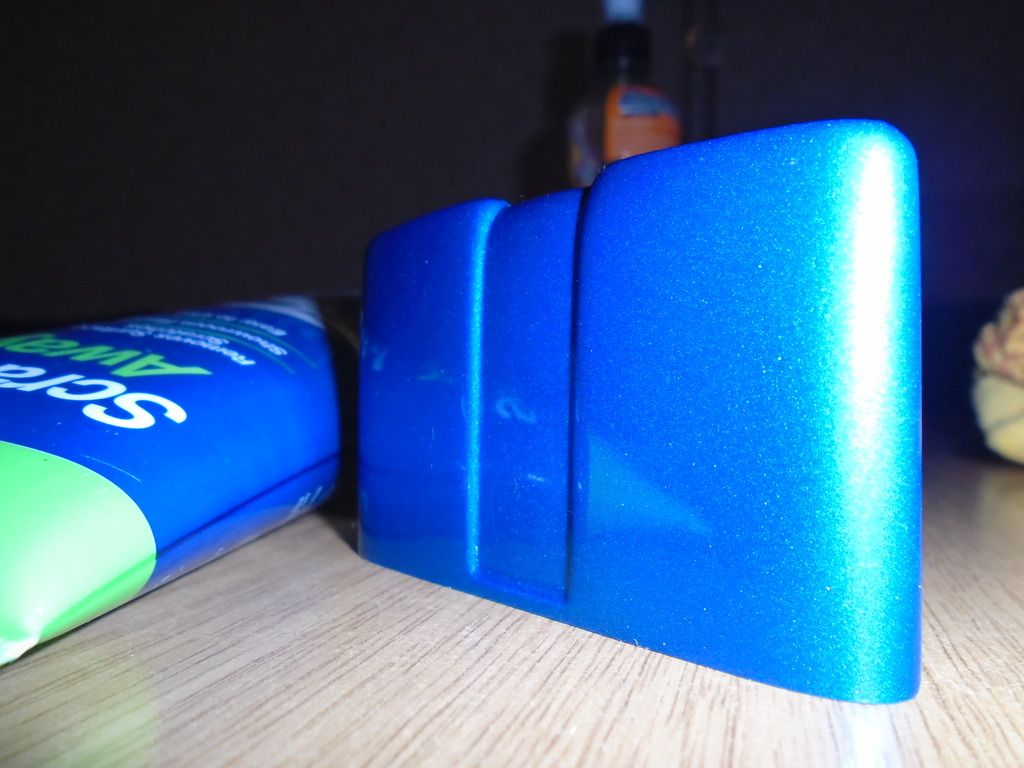 |
|
Deleted
Registered: May 19, 2024 1:52:03 GMT -7
Posts: 0
|
Post by Deleted on Feb 14, 2016 3:49:21 GMT -7
Regarding you paint issues mate, i can only tell you what i have found through experience, and am not telling you what to do, but just what i have found..
Tamiya paint, i found that masking tape, no matter how good it was, always left those horrible marks in the paint. I also found, the more you pay for tape, the better it usually is, that thin green stuff
you use looks perfect, and the longer the roll says you can leave it on, the better.
I don't know how well duplicolor goes over Tamiya, but i try to stick to one type of paint, if you use Tamiya, use it all the way through, i put all my Tamiya in the rubbish bin,
as it was costing me money in having to redo stuff all the time. I now only use automotive acrylics, including a lot of duplicolor, (as it hardens up very fast) , only i decant it and blow it through the airbrush.
If you stick to one type of paint, you will quickly work out what consistency to put it on etc, and know what paper you need to block back between coats,
and a good clear coat usually only needs a quick polish.
That blue hood looks awesome too..
|
|
Deleted
Registered: May 19, 2024 1:52:03 GMT -7
Posts: 0
|
Post by Deleted on Feb 18, 2016 22:03:38 GMT -7
I now only use automotive acrylics, including a lot of duplicolor, (as it hardens up very fast) , only i decant it and blow it through the airbrush. How do you decant the paint? |
|
Deleted
Registered: May 19, 2024 1:52:03 GMT -7
Posts: 0
|
Post by Deleted on Feb 19, 2016 0:17:10 GMT -7
I now only use automotive acrylics, including a lot of duplicolor, (as it hardens up very fast) , only i decant it and blow it through the airbrush. How do you decant the paint? I just squirt it into the air brush jar as i need it, add a tiny bit more thinners, and away i go straight away, some people say you need to let it gas out, but never ever done that, and never had a problem either.. ( just be careful, there is a knack to it, or you will wear it. )  |
|
Deleted
Registered: May 19, 2024 1:52:03 GMT -7
Posts: 0
|
Post by Deleted on Feb 19, 2016 5:11:35 GMT -7
How do you decant the paint? I just squirt it into the air brush jar as i need it, add a tiny bit more thinners, and away i go straight away, some people say you need to let it gas out, but never ever done that, and never had a problem either.. ( just be careful, there is a knack to it, or you will wear it. ) Ive seen some people that will tape a straw to the end of the nozzle and spray into a jar, or in your case right into the airbrush cup. And it's a lot more forgiving on the mess. |
|
Deleted
Registered: May 19, 2024 1:52:03 GMT -7
Posts: 0
|
Post by Deleted on Feb 19, 2016 11:46:54 GMT -7
Yes, that would be me. Using a straw sounds like a good idea.  |
|