|
|
Post by stitchdup on Mar 6, 2015 14:44:27 GMT -7
Well I should have waited for the rules before posting the last one(I'm a special type of dumba*s). This time I'm going to play it safe and use a 32 ford roadster(The one I was looking for a frame for,turns out it's moulded to the fenders(As I said I'm a special type of,well you get the picture,lol)) Going to build this box stock other than plug wires manifolds and maybe a wheel change depending what I can find in my parts. Definately removing the engraved side windows though 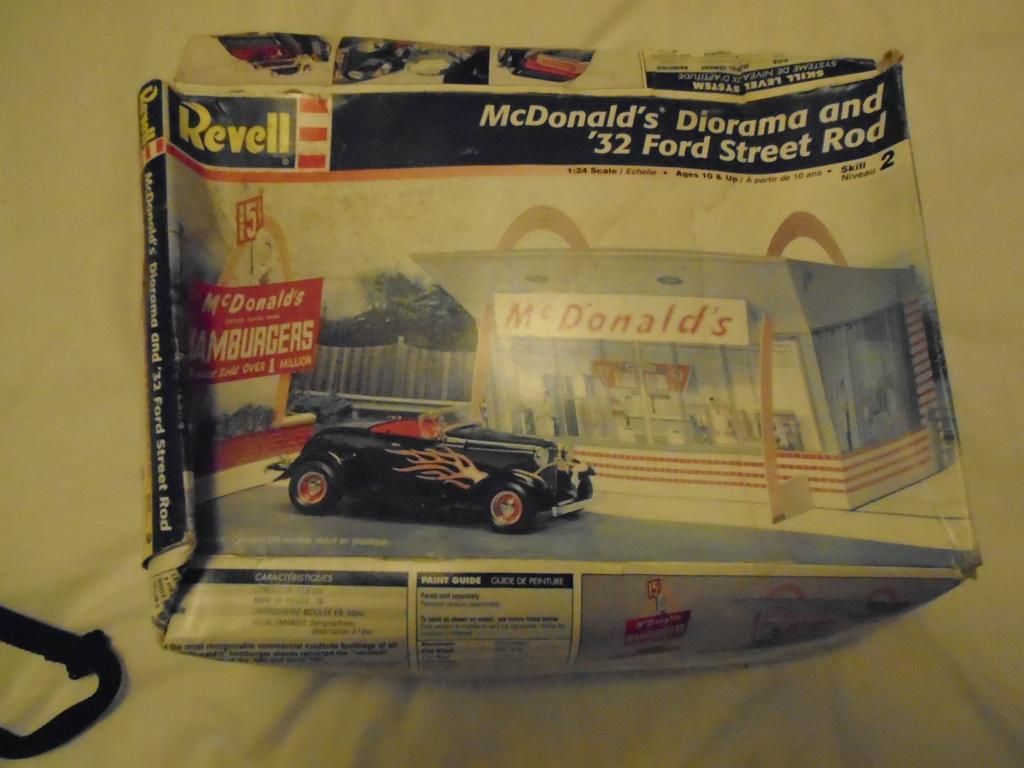 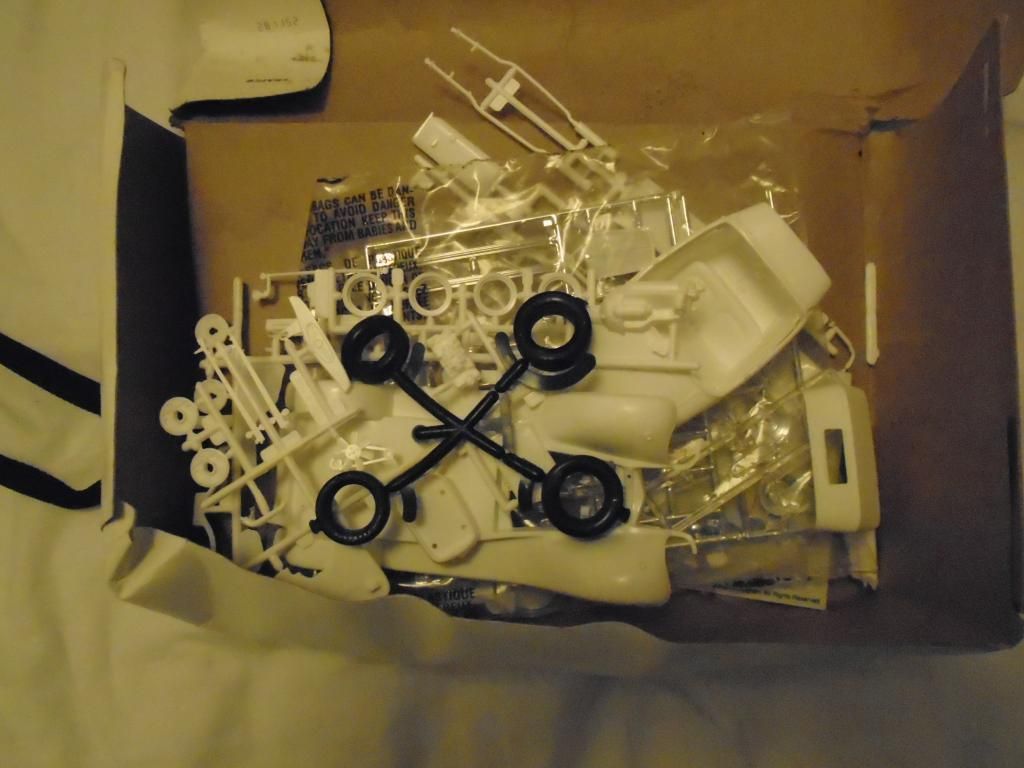 |
|
|
|
Post by Grandpabeast on Mar 6, 2015 15:02:15 GMT -7
very cool !
|
|
Deleted
Registered: May 6, 2024 11:21:16 GMT -7
Posts: 0
|
Post by Deleted on Mar 6, 2015 15:16:59 GMT -7
Nice choice mate.
|
|
Deleted
Registered: May 6, 2024 11:21:16 GMT -7
Posts: 0
|
Post by Deleted on Mar 6, 2015 18:01:41 GMT -7
great choice Stitch! did ya get the McDonalds with it?
|
|
|
|
Post by stitchdup on Mar 6, 2015 18:14:18 GMT -7
yeah and the best bit was the kit was free! its one of the extras the guy I bought the pile of kits from threw in after I bought them
|
|
Deleted
Registered: May 6, 2024 11:21:16 GMT -7
Posts: 0
|
Post by Deleted on Mar 6, 2015 18:26:06 GMT -7
woohoo freebie! gotta love 'em  |
|
|
|
Post by gardnerpag44 on Mar 6, 2015 20:38:16 GMT -7
Nice kit to start with but for free Very ccol can't wait  |
|
|
|
Post by stitchdup on Mar 7, 2015 6:12:28 GMT -7
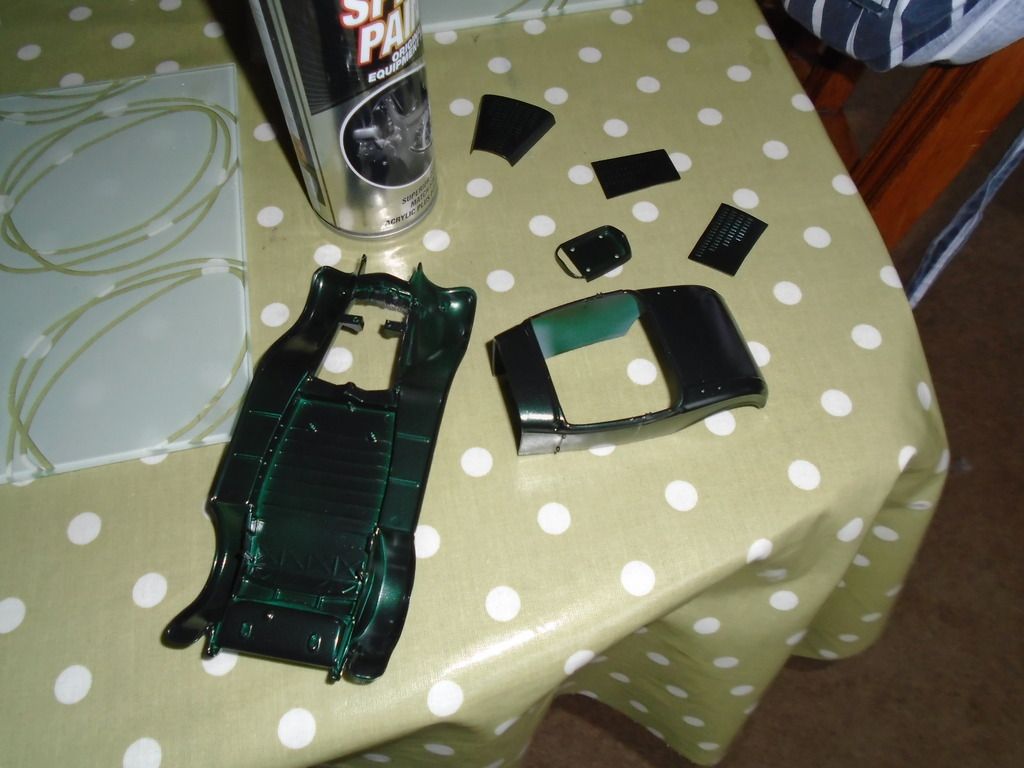
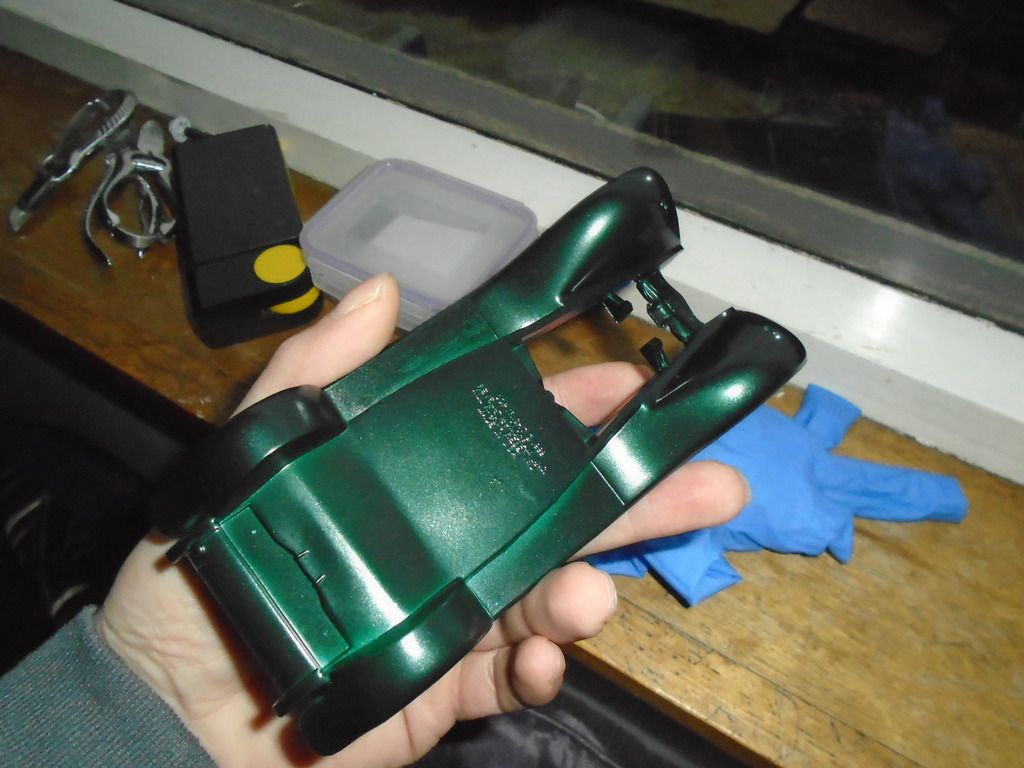
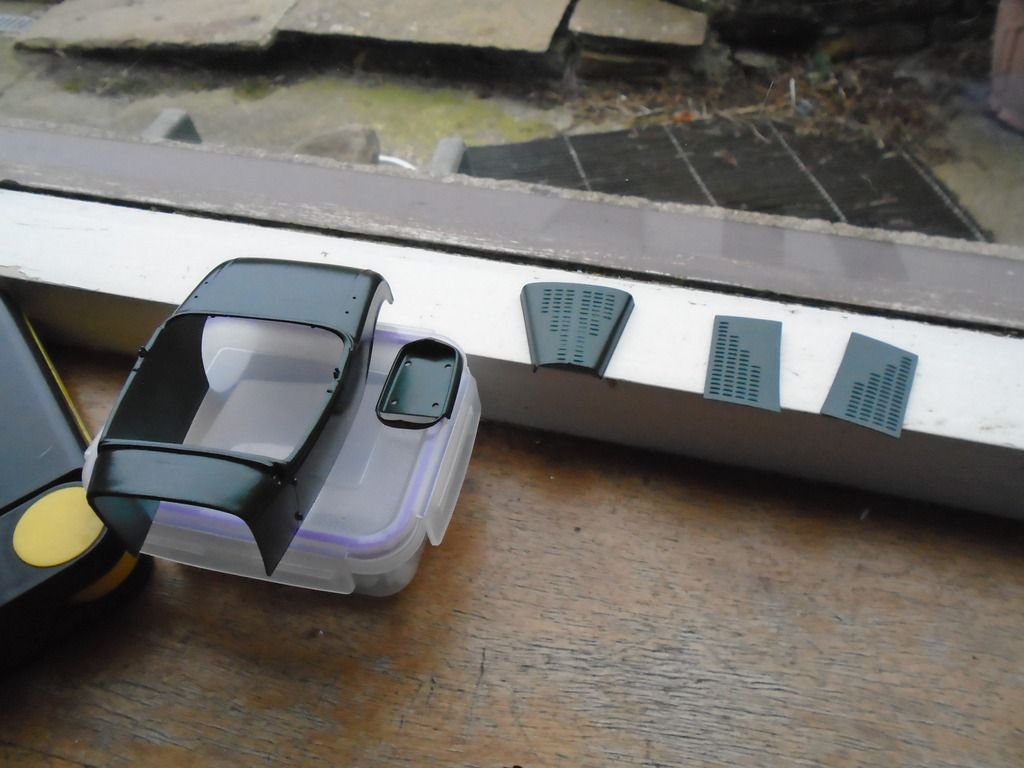
Got a lot of parts painted this morning then some idiot started mixing cement in the shed next to my freshly painted body,chassis/fenders and some other body parts. going to have to strip the lot again and not very happy about it as it was looking nice and smooth, and I don't think there is enough paint left to do it. Next time I will be putting a padlock on the door
|
|
|
|
Post by stitchdup on Mar 7, 2015 18:28:07 GMT -7
Decided I dont like the kit induction. Had a look in my parts box and had no set ups I liked the look of so have made a start on modding it into an injection set up. Still at a very early stage but it looks like it should go together without any problems and only a small amount of filling in the centre 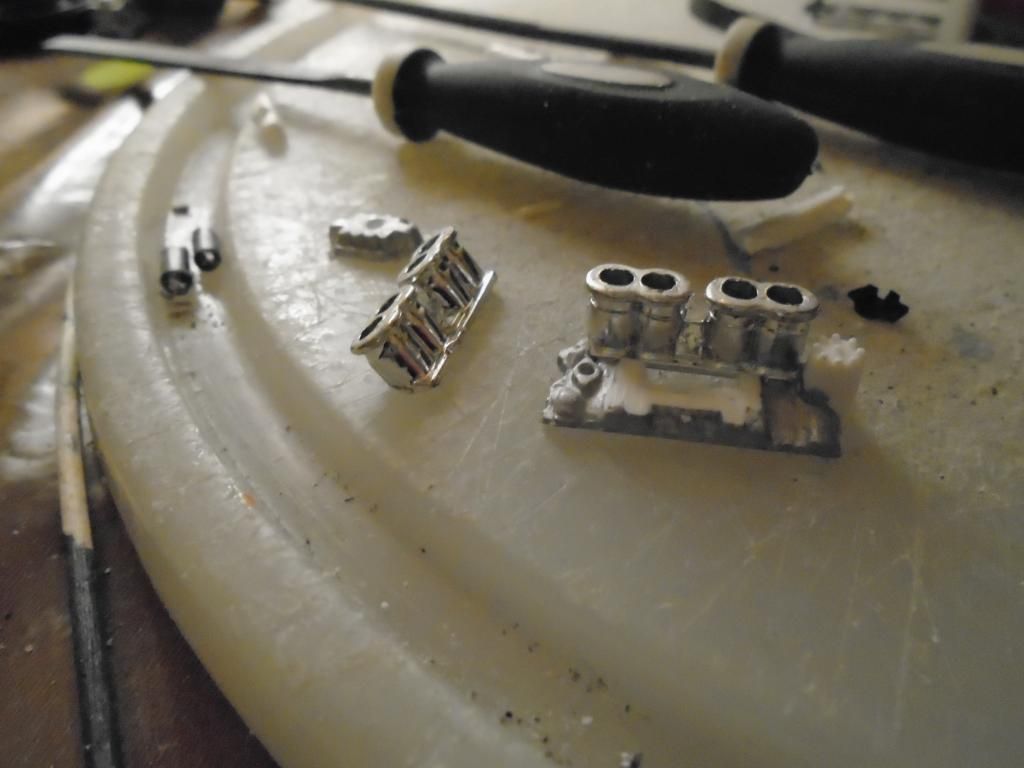 |
|
Deleted
Registered: May 6, 2024 11:21:16 GMT -7
Posts: 0
|
Post by Deleted on Mar 7, 2015 18:38:13 GMT -7
Les, She is going to be a sweet build. I have the exact same kit , I haven't built yet, but it is on the list...You have my attention... popcorn-and-drink-smiley-emoticon  Rick Rick
|
|
Deleted
Registered: May 6, 2024 11:21:16 GMT -7
Posts: 0
|
Post by Deleted on Mar 8, 2015 15:14:04 GMT -7
That intake will look great mate.
|
|
|
|
Post by Big D on Mar 9, 2015 10:26:44 GMT -7
Very interesting intake set-up Stitch. Anxious to see how it comes out.
|
|
|
|
Post by stitchdup on Mar 9, 2015 18:56:59 GMT -7
Have got the intake into paint tonight but not fully assembled yet. Tried stripping the paint using my usual oven cleaner but it didn't even touch it so a bit stuck just now. My car parts shop has never heard of super clean or purple power but put a post on a facebook group i'm on so got my fingers crossed i get a reply. If it wasn't for the louvers I would be able to sand it back but I don't want to lose them as I have a plan that I hope works out. Filled the indents inside the top as well so I can add the top bows to it and changed the alternator for a dynamo. I do have a question though, what is the square box on the firewall? Its on the passenger side so I don't think its anything for the brakes.
|
|
Deleted
Registered: May 6, 2024 11:21:16 GMT -7
Posts: 0
|
Post by Deleted on Mar 10, 2015 5:06:25 GMT -7
NICE kit Stitch! Definitely a different one to say the least that has a McDonalds with it!
Weber type intake, yes? Thats what it looks like your shooting for!
|
|
|
|
Post by stitchdup on Mar 10, 2015 17:43:54 GMT -7
I dunno what the intake is Hemi, I stole it from a plymouth diecast. I've got more painting done on the intake tonight so hopefully will get it glued together tommorow and possibly another coat of paint on it so I can call it finished. I have also drilled out the front axle tonight and the plugs, starter and dynamo drilled ready for adding the wires. Still have to paint the gearbox but the engine block is painted (copied your way Hemi and did the block first so I could hold the gearbox, much easier so thanks). If I had more sizes of drill bit I would have drilled out the hairpins too but none small enough for that, lol, and my eyes would probably give me a sore head anyway. Going into town tommorow to get more paint for this and my 50's build so hope to get at least one painted if the weather plays the game fairly. I have also used the same lace as my 50's build to line the inside of the top and plan to add hood bows to it so the joins in the lace are hidden. Haven't taken any pics off tonights work as they wouldn't show much but if I get the intake finished tommorow will post some pics of it
|
|
Deleted
Registered: May 6, 2024 11:21:16 GMT -7
Posts: 0
|
Post by Deleted on Mar 11, 2015 14:56:07 GMT -7
Yeah, I was referring to the type on intake your trying to make......The intake came off a Plymouth sure, but you look to be adding either Hillborne injection, OR Weber carburetors, not sure which it looks like Webers, BUT has that Hillborne tube look to it with 2 tubes side-by-side is all... KILLER idea tho! Something different for intake and carburetor set ups, from the normal offerings out there.....I TOO am trying to get different intake options on some of my builds thats not normally seen! And I blame a few of you out there for such insanity! As for the gearbox/transmission, it makes a NICE "handle" when the engine is done, you then simply paint that last just before the engine goes into the frame and no paint gets rubbed off from handling! Been doing it that way for years....EVEN years ago, when I was building model cars..... I even have a way to hold and clamp engines to a edge of a bench to keep the out of the way while paint is drying! I'll have to snap a pic of that when I'm doing it again! Can't wait to see what ya got did on it! Intake, or engine...... |
|
|
|
Post by stitchdup on Mar 11, 2015 17:23:28 GMT -7
made a slight mis calculation on the manifold so will have to narrow the centre a bit more to stop the valve covers from being under the carbs. I didn't have them on when I was measuring the space needed but I should have most of tommorow to get together.
|
|
|
|
Post by stitchdup on Mar 14, 2015 17:27:34 GMT -7
Got the intake finished tonight and most of the engine painted, just the starter, oilfilter and what looks like another filter to do now than I can put it together. Also got one final coat to go on the interior and a little details painting to do, and the last of the lace to do on the inside of top. 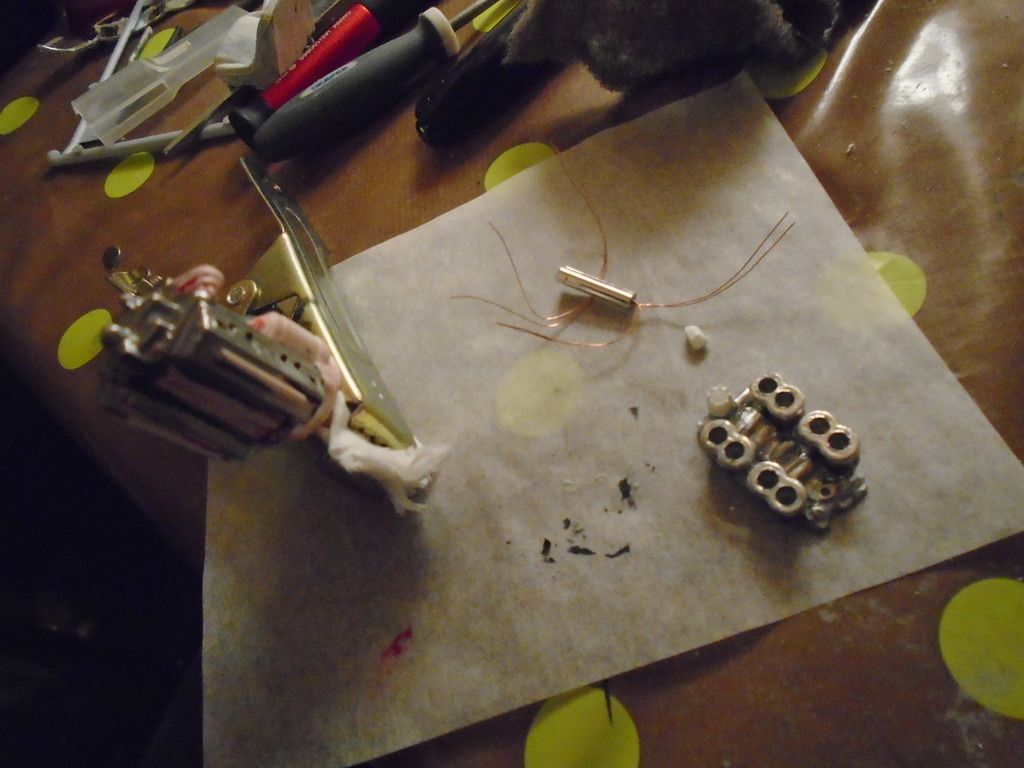  |
|
|
|
Post by gardnerpag44 on Mar 14, 2015 18:27:02 GMT -7
Looking good stich nice interior colors |
|
Deleted
Registered: May 6, 2024 11:21:16 GMT -7
Posts: 0
|
Post by Deleted on Mar 15, 2015 1:20:59 GMT -7
lookin good stitch!!!! two-thumbs-up-smiley-emoticon
Can't wait to see the engine and what all it has on it that you've done!
|
|
|
|
Post by stitchdup on Mar 17, 2015 10:50:20 GMT -7
Managed to get the green paint stripped from the body finally using brake fluid (dot 3 synthetic) but it's left me confused. Not sure how it happened but the body is now stained royal blue although the worst of the paint is gone. Next step is to give it a wash with degreaser and then with dish soap to get rid of any residue and then hopefully I'll get it primed.
|
|
|
|
Post by stitchdup on Mar 21, 2015 11:08:04 GMT -7
|
|
|
|
Post by gardnerpag44 on Mar 21, 2015 11:13:24 GMT -7
OOHHH nice color on this |
|
|
|
Post by sharp on Mar 21, 2015 13:00:18 GMT -7
Nice job Stitch,I like the color!
|
|
|
|
Post by stitchdup on Mar 21, 2015 13:37:54 GMT -7
Thanks guys
|
|
Deleted
Registered: May 6, 2024 11:21:16 GMT -7
Posts: 0
|
Post by Deleted on Mar 21, 2015 15:24:24 GMT -7
That color looks very nice mate, and looks very well done too.
|
|
Deleted
Registered: May 6, 2024 11:21:16 GMT -7
Posts: 0
|
Post by Deleted on Mar 21, 2015 16:34:51 GMT -7
looks pretty mean in that emerald green.
|
|
Deleted
Registered: May 6, 2024 11:21:16 GMT -7
Posts: 0
|
Post by Deleted on Mar 22, 2015 8:50:40 GMT -7
Nice color Stitch! Looks GREAT! Can't wait to see what it will all look like when your done!
|
|
Deleted
Registered: May 6, 2024 11:21:16 GMT -7
Posts: 0
|
Post by Deleted on Mar 22, 2015 11:50:55 GMT -7
this looking great Stitch, i'm lovin that color and the interior color combo |
|
|
|
Post by stitchdup on Mar 22, 2015 13:28:21 GMT -7
sprayed the white on the underside of the fenders this afternoon. Masking tape lifted in a couple of places(even after spending ages rubbing it on tight)and a couple of small places lifted the green but not too badly and it looks like it should wet n dry off so got my fingers crossed for that, but I have to rub it a little for clear anyway. Would have been much easier if the fenders weren't moulded to the chassis but it is what it is. I think it would have been worse if I hadn't seen a tip somewhere (on here maybe?) to give a coat of clear after masking before the second colour being sprayed over the sticky clear. Not sure that last line made sense but I'm sure you know what I'm trying to say
|
|


 Rick
Rick