|
|
Post by mustang1989 on Aug 13, 2022 7:24:34 GMT -7
These cars hold great interest to me because #1…The Baldwin offering has a big block in it and #2 The 1970 Z-28 was almost my first car…till dad stopped it. Smart guy because I probably would’ve been a grease stain on the highway at an early age. Now on the bench: 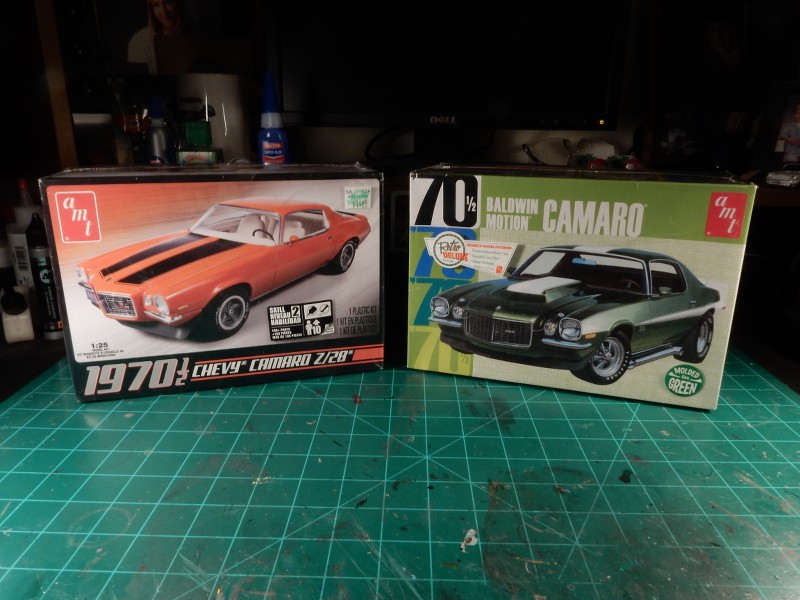 Baldwin Camaros are just evil …sporting a 500+ hp 454 and covering the 1/4 mile in the 11 second range. I’ve already got the MCW Forest Green paint for this car. The real thing: 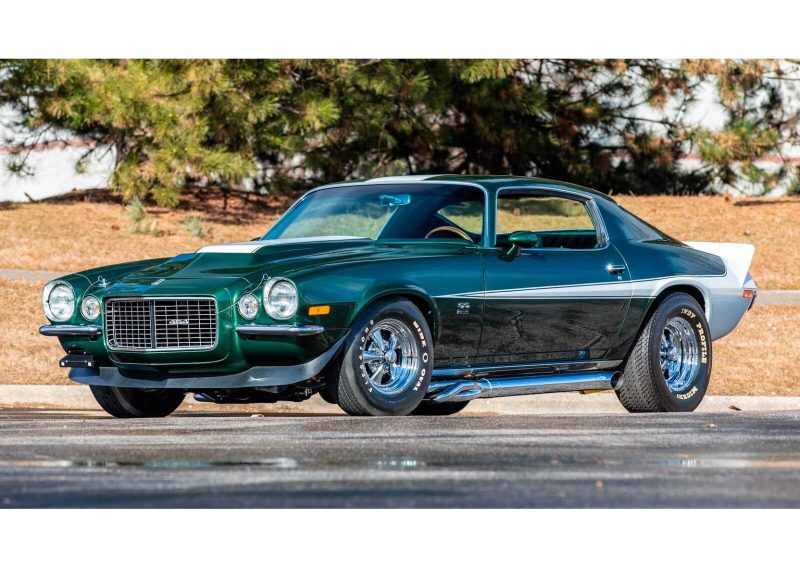 The Z-28 is a beautiful car as well sporting a 350 small block. Not as nasty as the Baldwin Camaro but still packs a decent wallop. I’ll be going with Cranberry Red for this one and will be turning to MCW for the color. 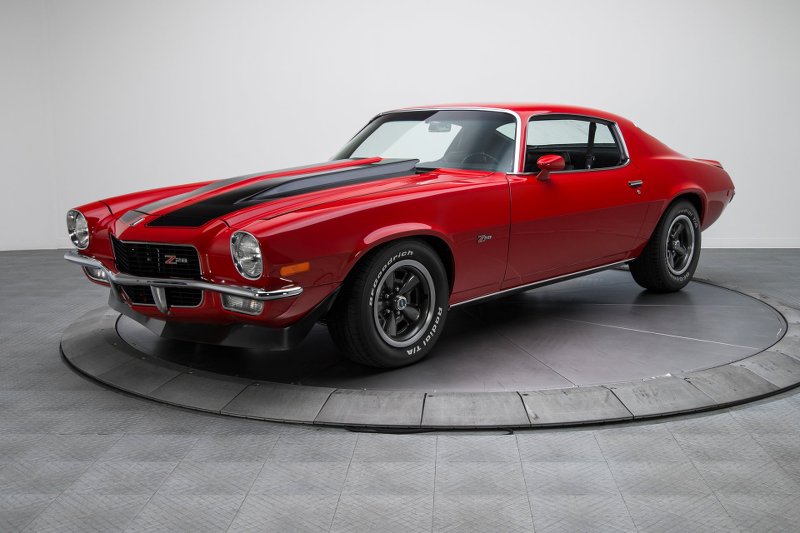 Stay tuned gang…...I hope to do these two cars the justice they deserve. |
|
|
|
Post by Grandpabeast on Aug 13, 2022 23:01:24 GMT -7
Nice , two at once , just don’t mix them up
|
|
|
|
Post by mustang1989 on Aug 14, 2022 10:59:39 GMT -7
Nice , two at once , just don’t mix them up Thanks Dave. It'll be a one at a time gig. |
|
|
|
Post by mustang1989 on Aug 14, 2022 11:03:51 GMT -7
Starting on the engine build for the Z-28. Here's the base engine completed. I'll be using the MAD pre-wired distributors to cut down on build time for the engines. Typical wire up for the way I usually do it takes me around 3 hours-which equates into 3 days of build time. 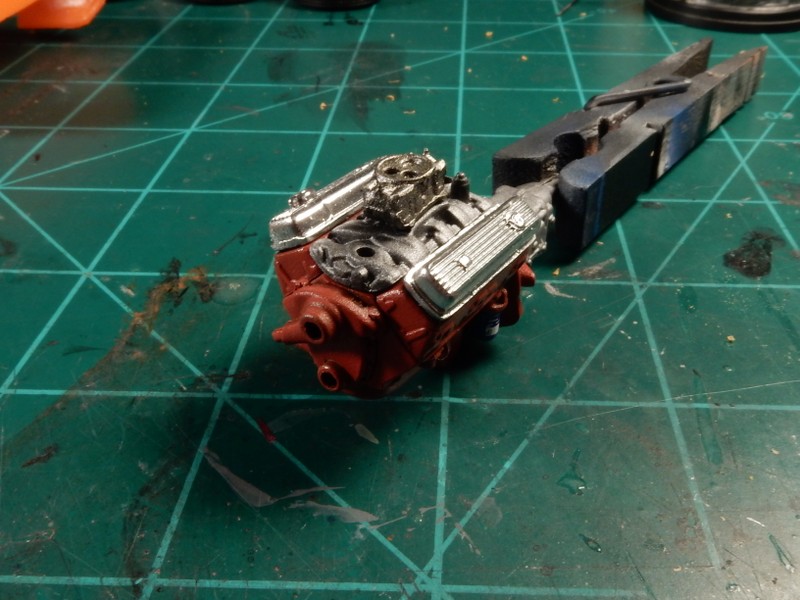 Base chassis all laid out ready for painting. Actually this aint a bad chassis having quite a number of parts. Per some of the reviews that I've read on these kits , I'll be attaching the front subframe assy at a later stage in the build for ease of assembly. 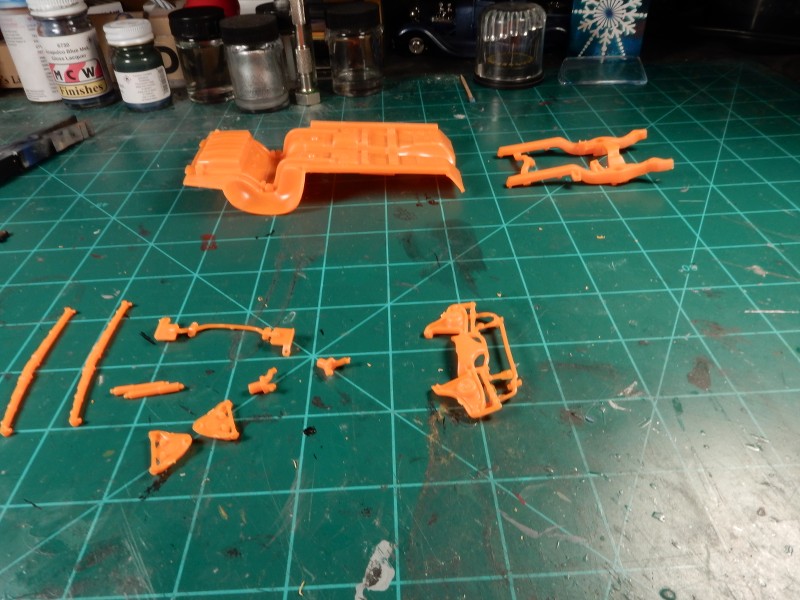 |
|
|
|
Post by mustang1989 on Aug 17, 2022 19:39:21 GMT -7
I've now got the wheels and tires selected for the Z-28 build. The rear tires will have those big ass GOODYEAR scripts shaved off and some BF Goodrich T/A ones will take their place. This'll be the stance/ look that I'll be going for. 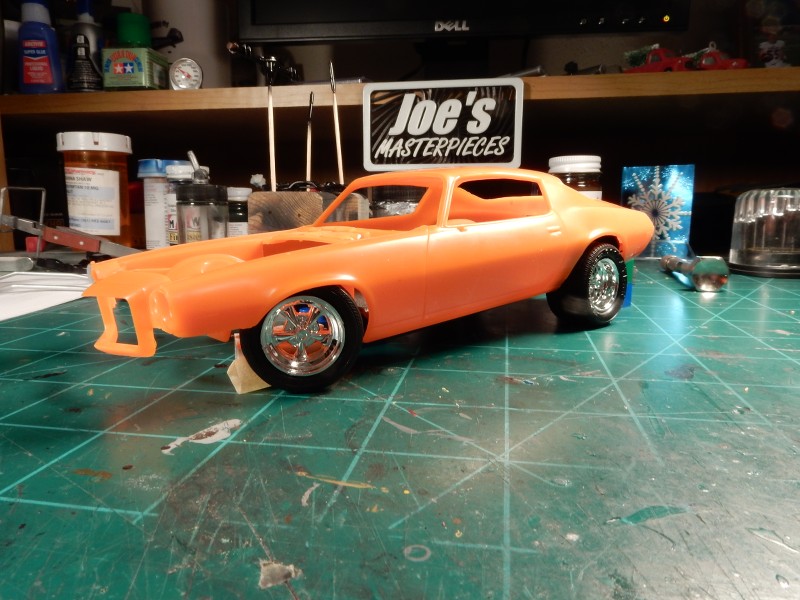 |
|
|
|
Post by Grandpabeast on Aug 17, 2022 20:36:31 GMT -7
that stance looks good, I dig the rims and tires especially the fat rears. Now I have never built this kit. how hard or easy is it to adjust the front and rear ride heights and how do you plan on doing it ?
|
|
|
|
Post by jkflash on Aug 18, 2022 8:07:34 GMT -7
Did you use and aftermarket carb?
|
|
malcox477
Loyal Member
   Registered: May 21, 2019 16:19:37 GMT -7
Posts: 1,039
|
Post by malcox477 on Aug 19, 2022 20:47:22 GMT -7
awesome start Joe
|
|
|
|
Post by mustang1989 on Aug 20, 2022 21:57:39 GMT -7
that stance looks good, I dig the rims and tires especially the fat rears. Now I have never built this kit. how hard or easy is it to adjust the front and rear ride heights and how do you plan on doing it ? Thanks Dave! It's not too awful bad. I did reposition the spindle on the steering knuckles and re-arched the springs in the rear. At the end of this build I plan on doing a build review so-to-speak for folks that want to build this kit will have a heads up here. |
|
|
|
Post by mustang1989 on Aug 20, 2022 21:58:45 GMT -7
Did you use and aftermarket carb? Not on this one Johnny. I stuck to the OOB carb to make things a little easier and to speed the build up some. |
|
|
|
Post by mustang1989 on Aug 20, 2022 21:59:07 GMT -7
Thanks for chimin' in Marcos and thanks man!! |
|
|
|
Post by mustang1989 on Aug 26, 2022 7:26:05 GMT -7
The rear part of the chassis is about 70% finished. Still have to install the rear sway bar, shock mounts and shocks but we're getting there. I had to take a break in the progress and narrow the rear end and arch the springs just a tad to achieve the stance I was looking for in the rear. I merely cut off the axle ends, shaved each end of the axle back about 3/16" , drilled holes in the axle and in the axle mounting ends and pinned them back to the axle. I've already done a test run and the wheel/ tire assemblies are right where I want em now.  One of the shortcomings of this kit is in the exhaust area. First off, there's LOTS of clean up to do, more so on this kit than most any other of the models I've built in the past. After that is the issue of the position of the tail pipe when it's all installed onto the vehicle and the fact that I'm not a big fan of square cut exhaust pipes exiting any give car. OOB exhaust: (Note: the tires will be re-positioned in the wheel opening so I'm still working on that) This crazy right?? 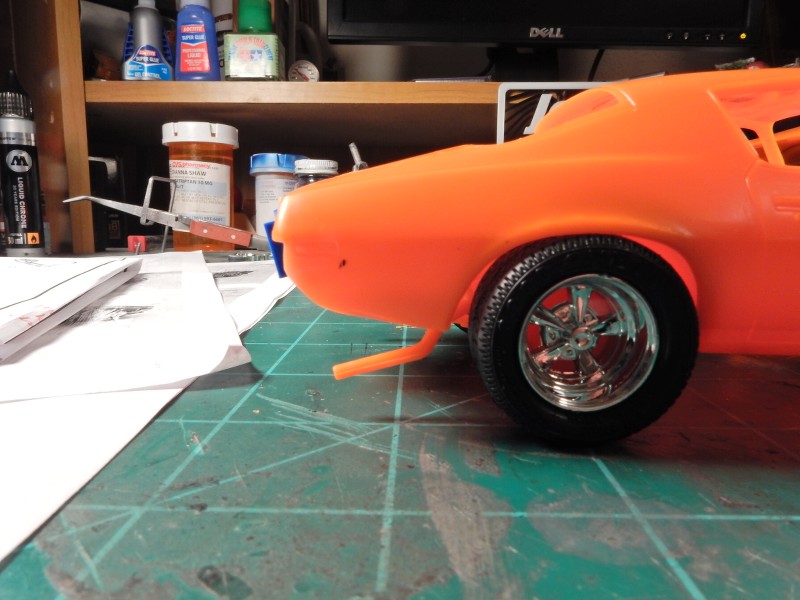 After tweaking the exhaust mounting points and bending the pipes to where I wanted them to exit the car (and adding my bevel cuts to the tail pipes and hollowing them out). That's MUCH better. 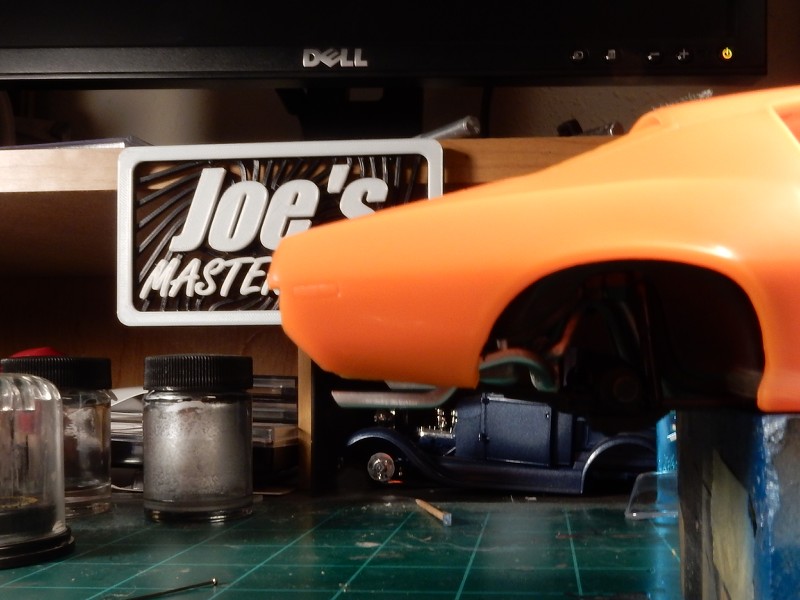 I still have some adjustments I'll make later on in regards to the final locations of each pipe but this is the preliminary result: 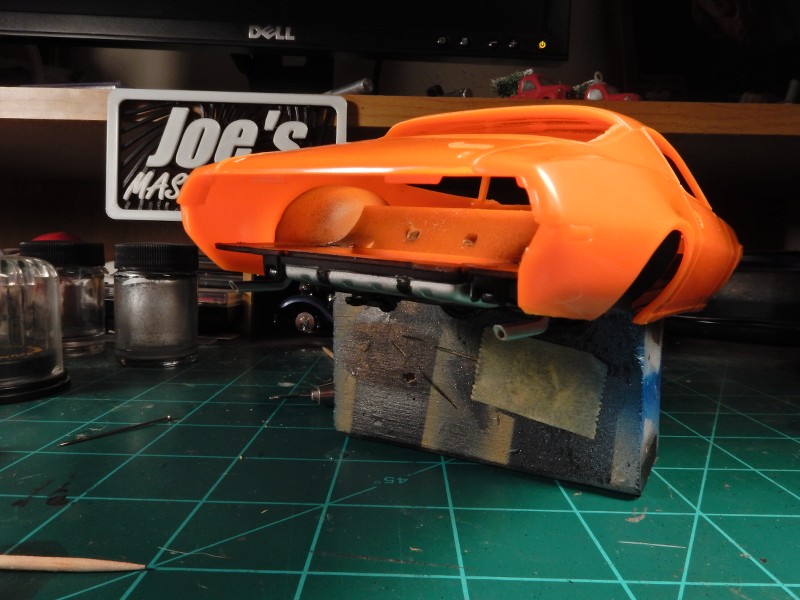 |
|
41chevy
Senior Member
   Registered: Jul 1, 2021 9:46:43 GMT -7
Posts: 705
|
Post by 41chevy on Aug 26, 2022 10:31:37 GMT -7
Your doing a great job. I recall the exhaust "project" on the kit and I compounded it by making the Chambered Exhaust on the Z.
I have a pair I bought to get the bodies to correct the Atlantic J.J. Camaro funnycar kit both a the Motion kits. Dealt with motion and Motion Minicar back it the day, always wanted a Motion Phase III Super Vega
|
|
|
|
Post by mustang1989 on Aug 27, 2022 3:40:52 GMT -7
Thanks Paul! Yeah that was some crazy exhaust in the box alright. I'd be interested in seeing this chambered exhaust system that you pulled off. A Motion Phase III Vega.....  .....tell me more of this car. |
|
|
|
Post by Grandpabeast on Sept 9, 2022 2:30:17 GMT -7
The exhaust looks great, good job on the adjustments.
|
|
|
|
Post by mustang1989 on Sept 11, 2022 4:24:43 GMT -7
That's frickin' crazy about the Baldwin Motion Vega!! A frickin' 454??!!!
|
|
|
|
Post by mustang1989 on Sept 11, 2022 4:25:14 GMT -7
The exhaust looks great, good job on the adjustments. 'Preciate it Dave!! Just couldn't leave the pipes like that. |
|
|
|
Post by mustang1989 on Sept 11, 2022 4:28:11 GMT -7
Managed to get the engine mostly done on this rascal. I'm mostly happy with this but that goofy looking fan clutch I'm glad to say will be mostly hidden in the fan shroud. 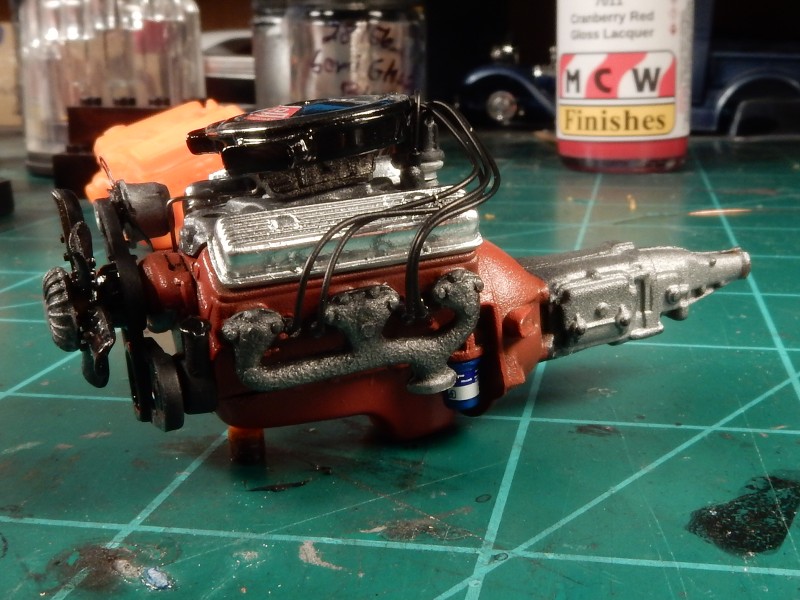 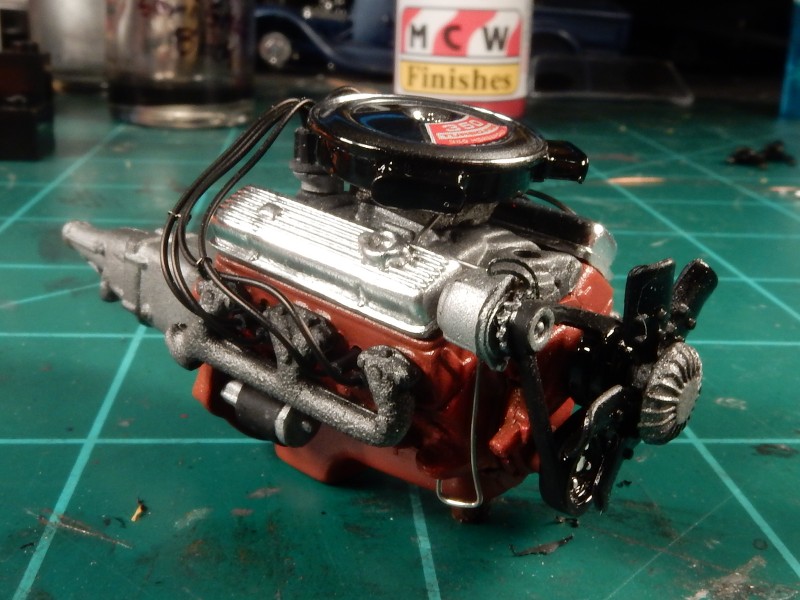 Here it is installed onto the subframe. I managed to shoot a coat of semi-gloss black on the chassis followed by a light over coat of super thinned out gray which helped to tone things down some and bring out some of the details. I also installed an engine oil dipstick on the driver's side of the engine. Here's everything all fitted up and ready to go now. 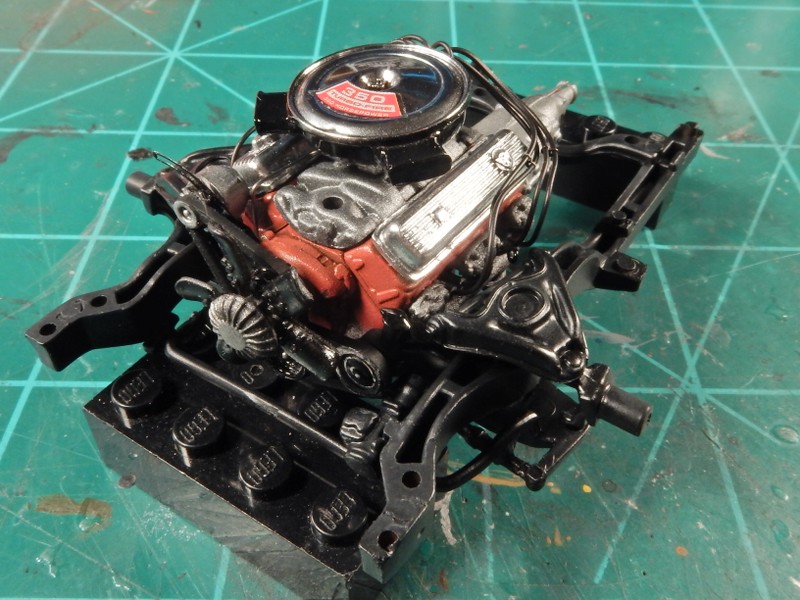 |
|
|
|
Post by mustang1989 on Oct 5, 2022 13:55:05 GMT -7
Here's with the body prepped, primed and the color shot on. We'll be going with Cranberry Red from MCW finishes. 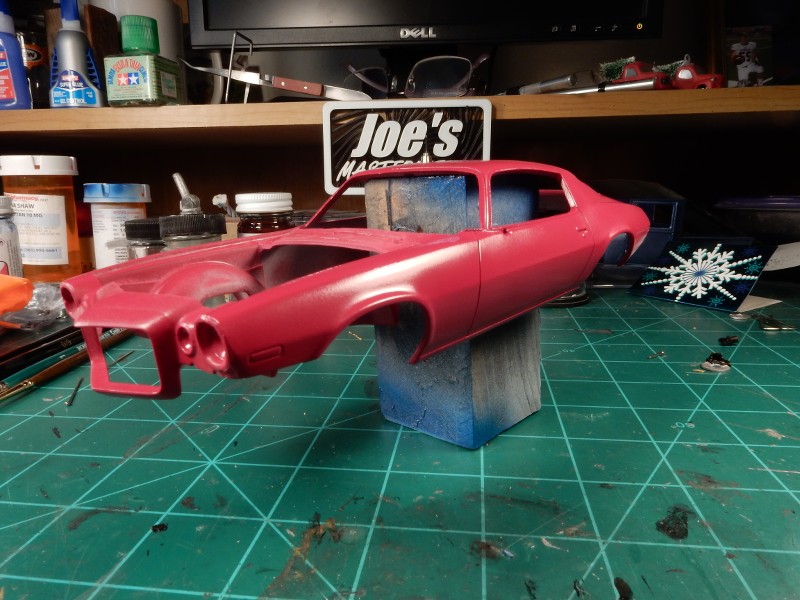 Here's with the stripe decals applied. Working on the display settings on the camera to improve upon the correct shade of red in pictures. 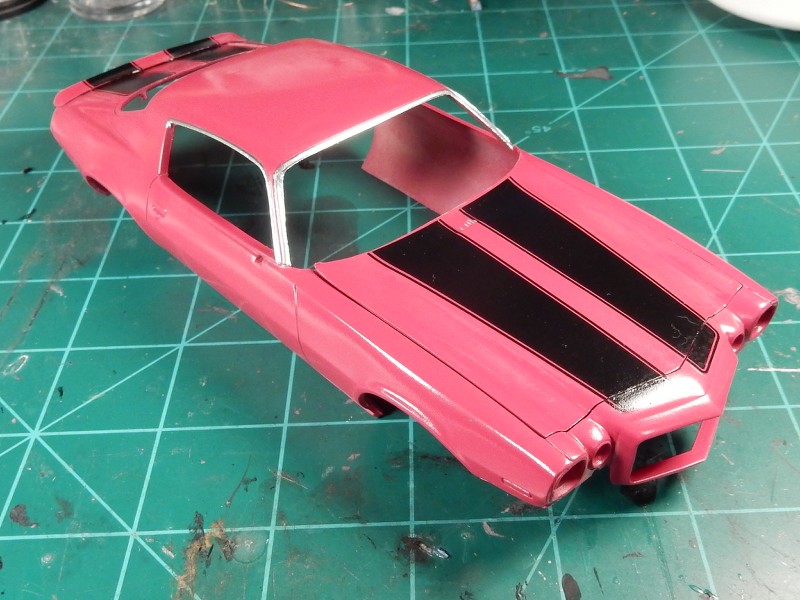 After he gloss / clear coat was applied. I'm very happy with this. 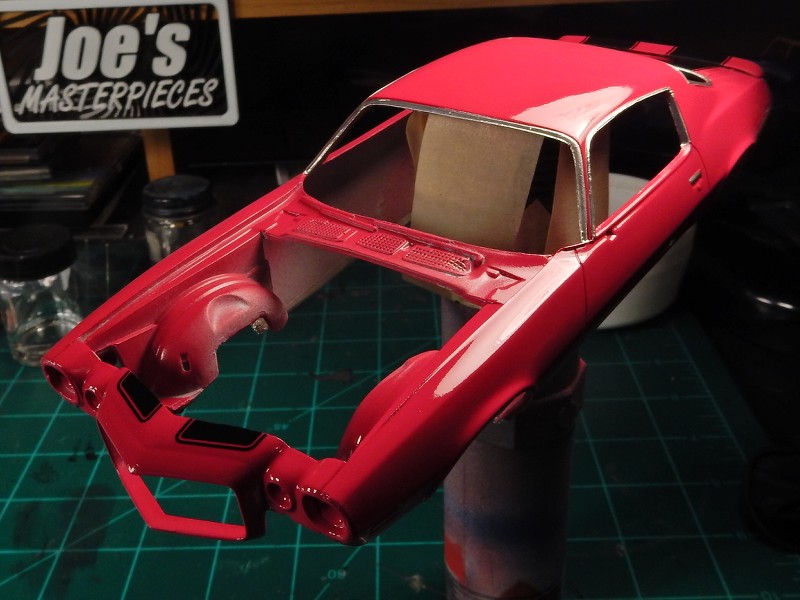 |
|
|
|
Post by CoyoteCrunch on Oct 6, 2022 7:29:29 GMT -7
Love this build Joe, LOVE IT!!  |
|
|
|
Post by mustang1989 on Nov 19, 2022 7:19:33 GMT -7
Love this build Joe, LOVE IT!!  Thanks Tom!! Great to see you around again fella. Been a while and you've certainly been missed. |
|
|
|
Post by mustang1989 on Nov 19, 2022 7:24:28 GMT -7
Ok gang!! It's update time!! After two months without any progress reports, I finally have something worth taking photos of. Here she is with the stance that I wanted and the wheel/ tire combo. All I can say is that this is one of the HARDEST car models to get the body over teh chassis that I've EVER dealt with. When I finally did manage to get it installed all the way into the body, the leading edge of the dash contacted the bottom of the windshield mounting tabs causing the whole front of the chassis to not seat properly. My fix was to trim the leading edge of the dash back until the body slid into the correct position. Total PIA but I got it. Here are the results of the labor over the last couple of months. Almost to the finish line with this one. Aside from the dash/ windshield fit issue this has been a great kit to work with. 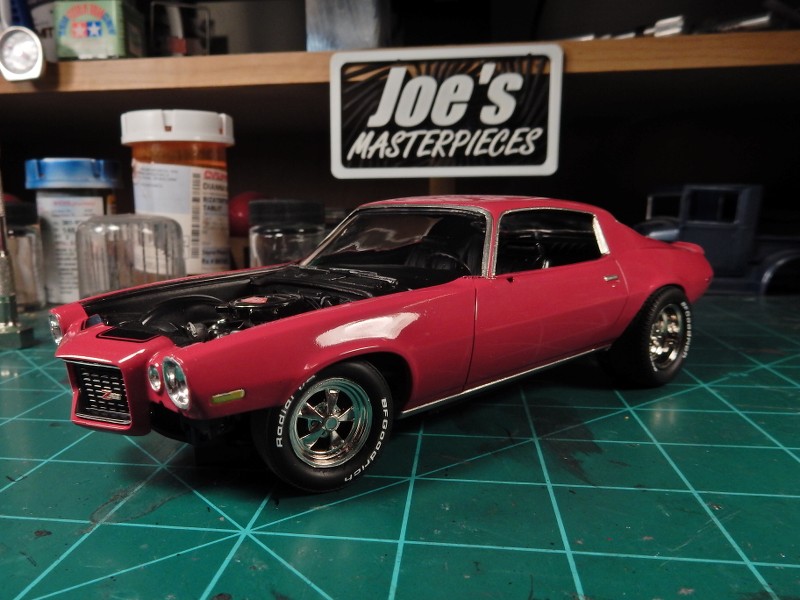 |
|
malcox477
Loyal Member
   Registered: May 21, 2019 16:19:37 GMT -7
Posts: 1,039
|
Post by malcox477 on Nov 23, 2022 0:46:14 GMT -7
that look badass
|
|