|
|
Post by mustang1989 on Jun 9, 2018 19:54:51 GMT -7
After finishing the '56 Ford F-100 "Demon II" build I've decided to take on another "Demon II" project. I'll be taking the original gasser idea and slamming it to the ground for more of a Pro Street look. Paint scheme will be the original Street Demons theme with the flames on the sides.
Here we go:
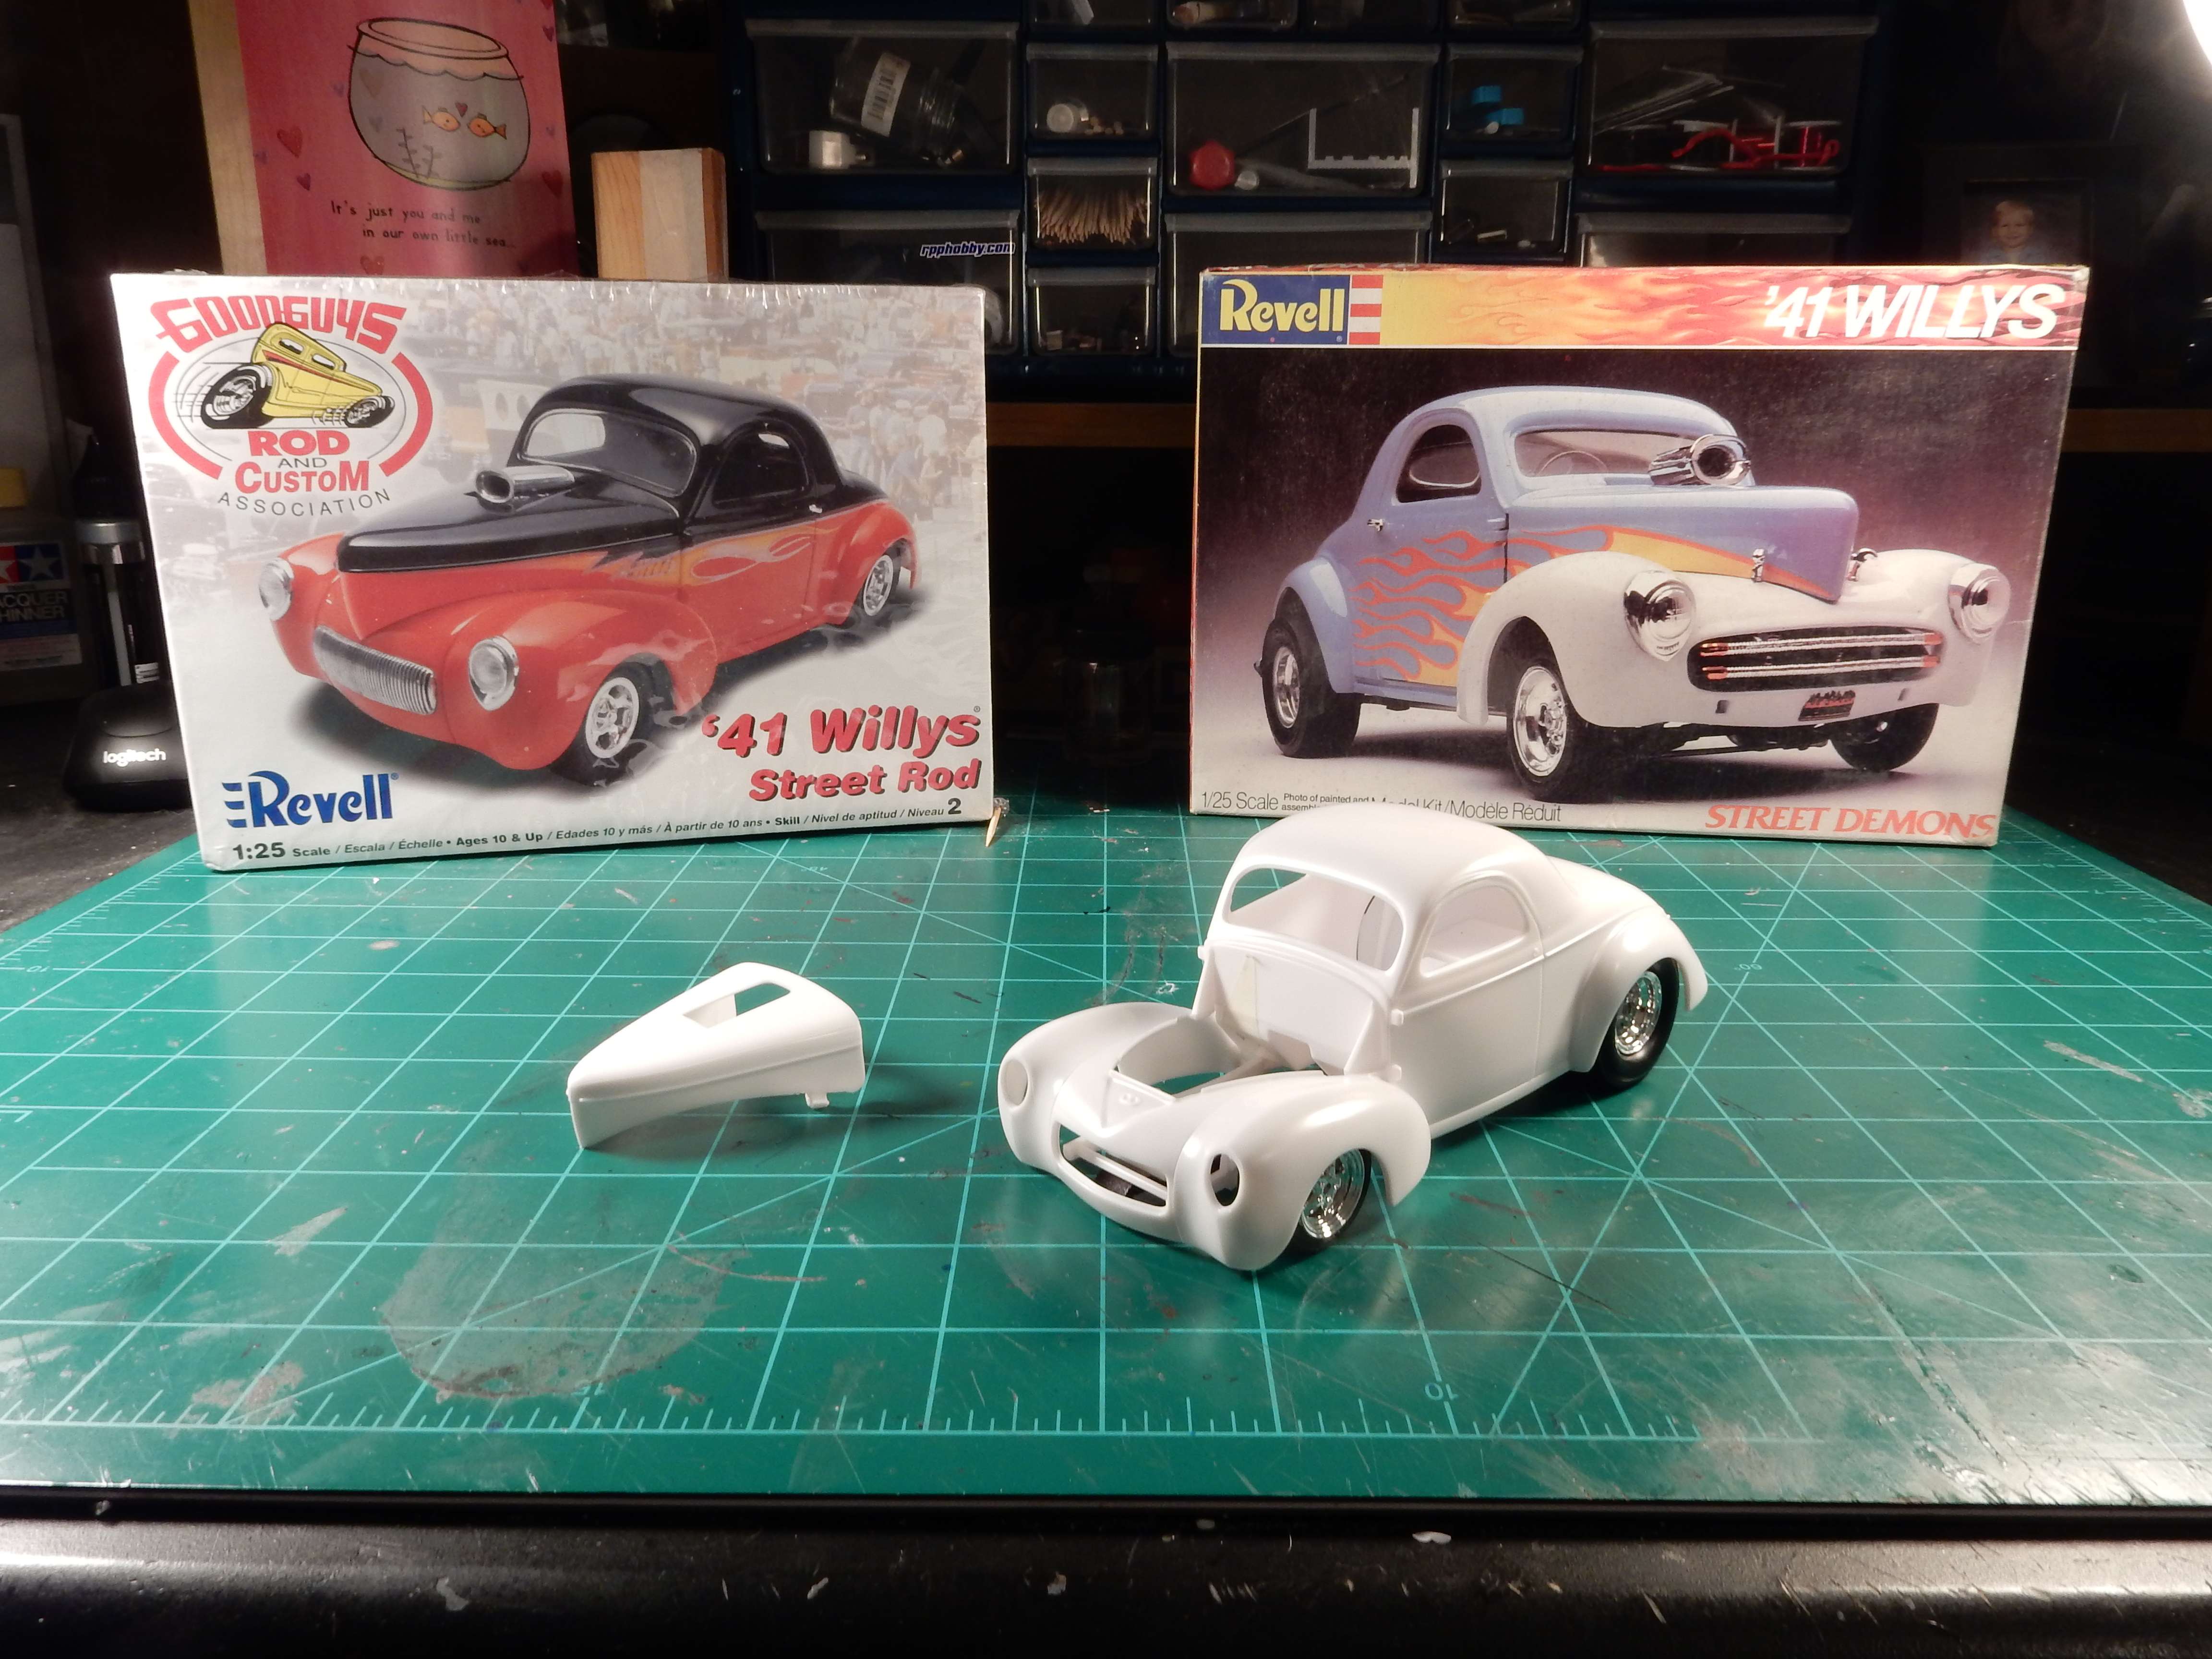
I won't be able to got this low with it but I'll get it lower than the box shows anyways:

|
|
|
|
Post by mustang1989 on Jun 10, 2018 19:22:05 GMT -7
This kit comes with a blown 426 Hemi but I don't like that nasty scoop coming up out of the hood. My aim is to fill in the hole in the hood and to change the induction up on the engine a bit. Gonna go with a Ramcharger 426 instead:
Just like the ones that were in the B029 RPO coded Barracudas and the L023 coded Darts:

|
|
|
|
Post by poet on Jun 11, 2018 5:49:52 GMT -7
I like!!
popcorn-and-drink-smiley-emoticon
|
|
tubbs
Loyal Member
   Registered: Jul 24, 2013 5:02:43 GMT -7
Posts: 1,017
|
Post by tubbs on Jun 11, 2018 6:20:16 GMT -7
I hate to start out with "I" on someone's build, but I really like this idea. why, you ask... yea, you didn't but I will tell you anyways. I started a build, this exact build a few years ago. filled the hood in and everything. then, like always, Tubbs indecision settled in and I was going to do injection, then a modern hemi, a BB chevy even crept into my head. I bounced around so much, I put it back in the box.
so, to the point of the post, I think this will be a great build. I may even try to sway you one way or another, according to what I was going to do. DONT LISTEN!!
just for thought, I closed up my hood by using epoxy. put masking tape on the outside of the hood, being carful to make sure of the contour of the hood. filled the backside up with epoxy, then a little mud and sanding, and its done.
are you keeping the gasser theme throughout? I had way too many directions I wanted to go. heck, the willys is that type of car, so many options. good luck with it and I will be watching.... hell, maybe I will pull mine back out and build with you?
|
|
|
|
Post by gardnerpag44 on Jun 11, 2018 9:29:42 GMT -7
Very nice , I'll be watching this one .
|
|
|
|
Post by mustang1989 on Jun 12, 2018 12:05:04 GMT -7
I like!!  Thanks Dennis! |
|
|
|
Post by mustang1989 on Jun 12, 2018 14:37:25 GMT -7
just for thought, I closed up my hood by using epoxy. put masking tape on the outside of the hood, being carful to make sure of the contour of the hood. filled the backside up with epoxy, then a little mud and sanding, and its done. are you keeping the gasser theme throughout? I had way too many directions I wanted to go. heck, the willys is that type of car, so many options. good luck with it and I will be watching.... hell, maybe I will pull mine back out and build with you? Thanks Al! I cut will be cutting a piece of Evergreen styrene and gluing into the hole with Tamiya thin cement and then filling in the gaps with super glue. After that I'll sand everything flush and polish the plastic up.
As far as the theme goes...........I'll be dropping this one down as low as possible but still retaining the original Street Demons paint scheme. I've already sent the decals off for re-mastering.
|
|
|
|
Post by mustang1989 on Jun 12, 2018 14:37:46 GMT -7
Very nice , I'll be watching this one . Thanks Paul. |
|
tubbs
Loyal Member
   Registered: Jul 24, 2013 5:02:43 GMT -7
Posts: 1,017
|
Post by tubbs on Jun 13, 2018 8:09:38 GMT -7
just for thought, I closed up my hood by using epoxy. put masking tape on the outside of the hood, being carful to make sure of the contour of the hood. filled the backside up with epoxy, then a little mud and sanding, and its done. are you keeping the gasser theme throughout? I had way too many directions I wanted to go. heck, the willys is that type of car, so many options. good luck with it and I will be watching.... hell, maybe I will pull mine back out and build with you? Thanks Al! I cut will be cutting a piece of Evergreen styrene and gluing into the hole with Tamiya thin cement and then filling in the gaps with super glue. After that I'll sand everything flush and polish the plastic up.
As far as the theme goes...........I'll be dropping this one down as low as possible but still retaining the original Street Demons paint scheme. I've already sent the decals off for re-mastering.
sounds good many ways to fill in that hole. here is one of my willys projects that I wanted to get a little lower...
|
|
|
|
Post by mustang1989 on Jun 13, 2018 10:38:24 GMT -7
Nice start on that Willy's Al. I do like the stance and the overall look!
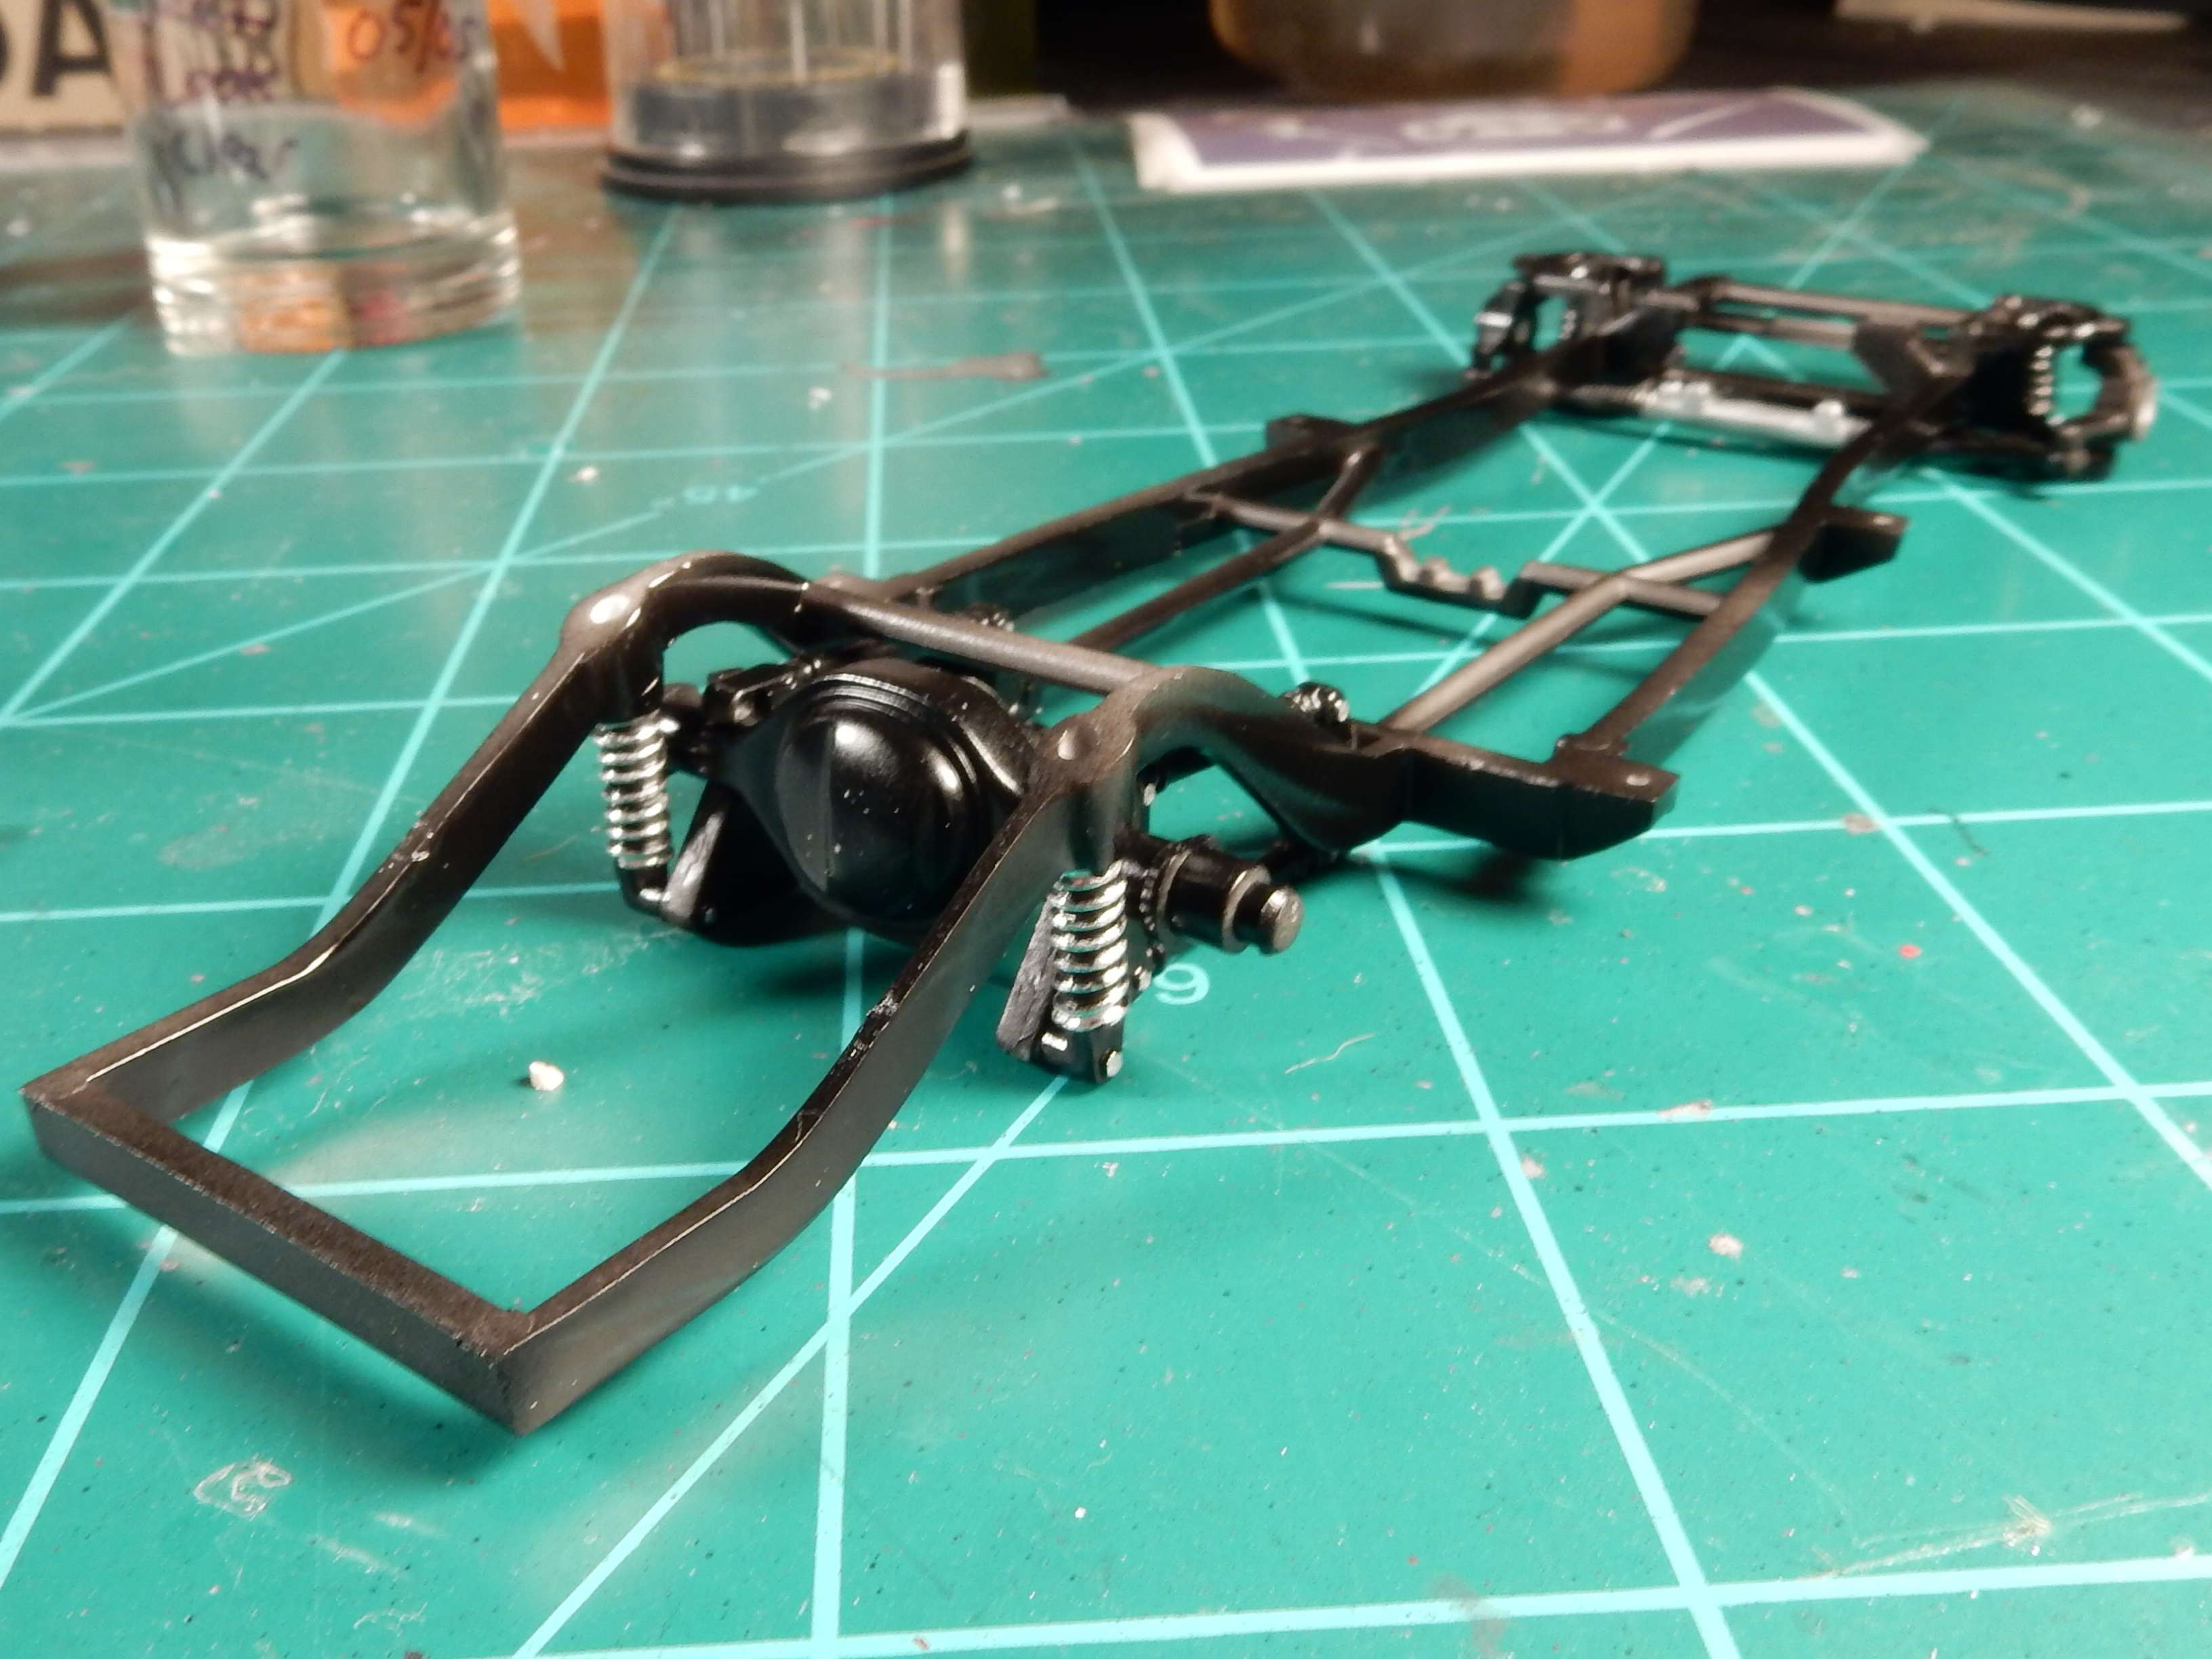
I've got the chassis mostly finished up except for the brake rotors up front and the exhaust system. I've also gotta tweak the toe in setting on the front end to keep the excessive toe in look from happening on the front wheels when fully assembled.
I narrowed the rear axle to get the wider tires underneath the rear fenders and lowered the front suspension a good 1/8" to make it an even drop all the way around.
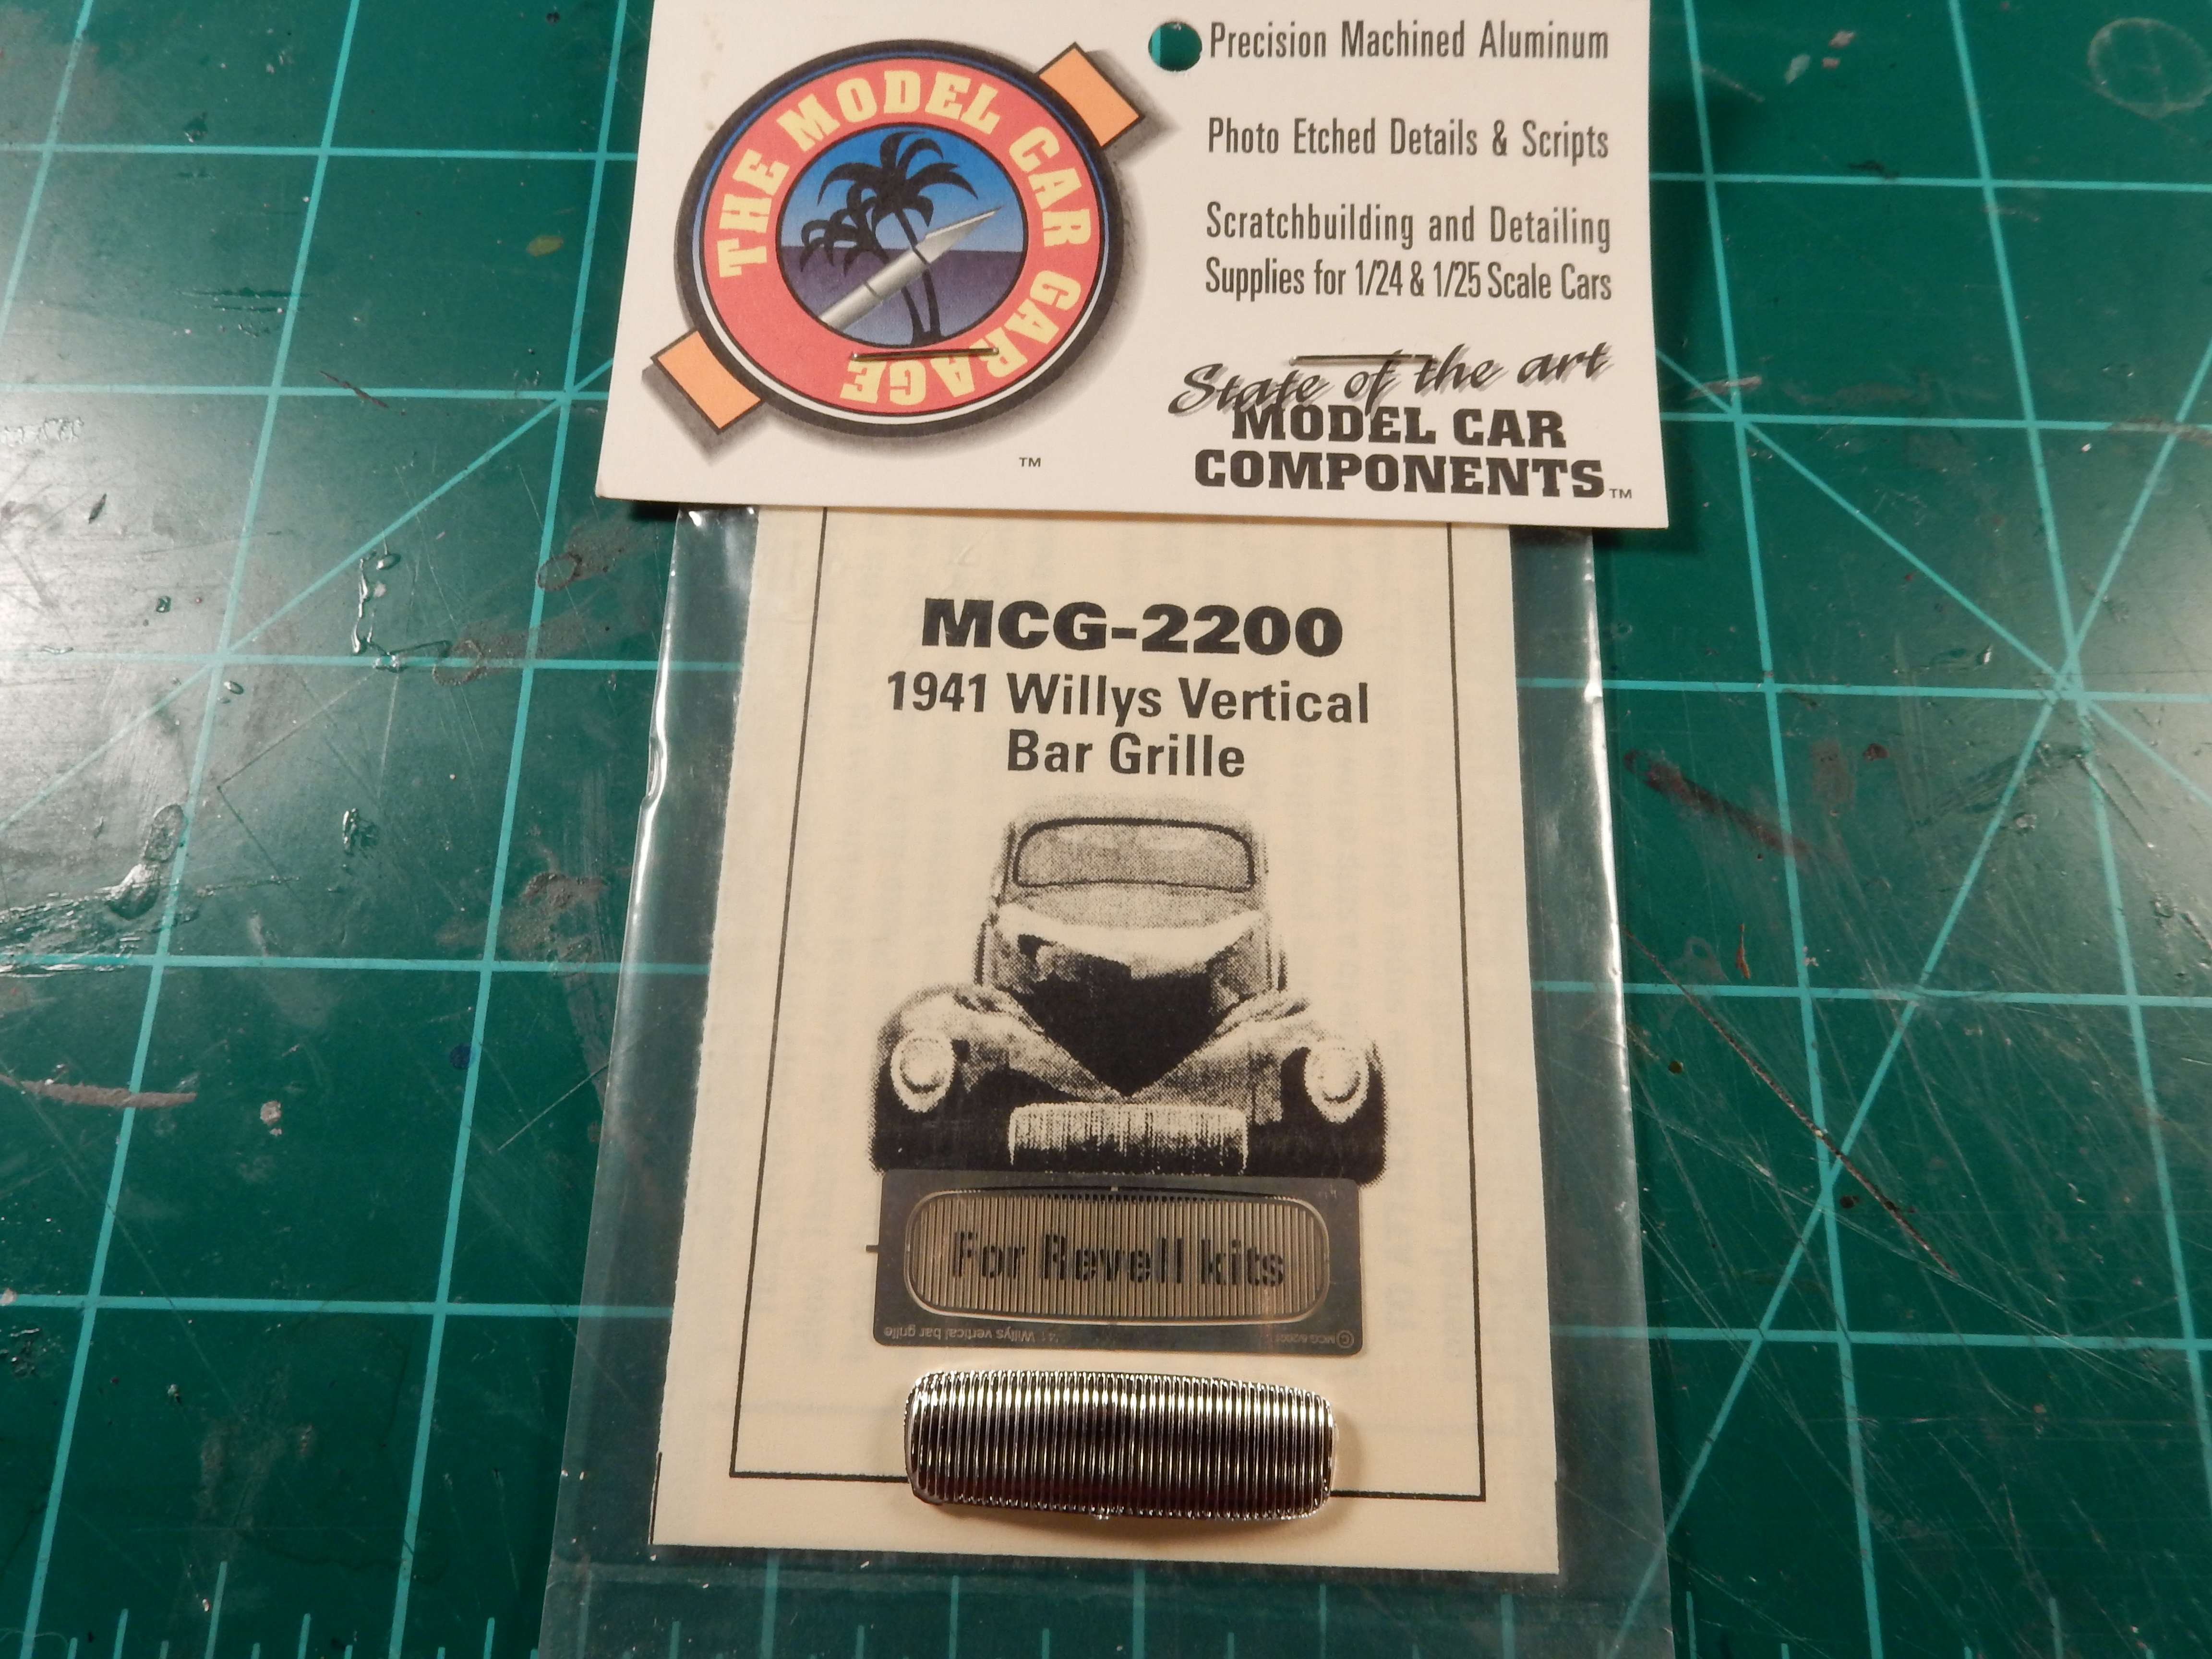
I did acquire the only PE piece made for this kit which will help the front end out ALOT. Sorry Revell..................that's good for OOB but it aint gonna cut it on this build.
I'm currently working on the engine which will take me a bit because of the detail I want to throw at this beast. I'll be robbing a lot of the parts except for the base engine block and transmission (which I'll leave OOB) from the Revell Hemi Dart kit. I was going to post some engine progress pics as well but the Spaz Stix clear doesn't work well with Model Master acrylic paint. Turned it white in the crevices so I'll be shooting another thin coat of orange on the block and re-coating the clear with Tamiya clear like I usually do the next time around. Learning curve complete.  |
|
|
|
Post by jkflash on Jun 14, 2018 11:51:40 GMT -7
Looking good so far. Can't wait to see the powerplant going in this animal!
|
|
|
|
Post by mustang1989 on Jun 16, 2018 8:47:11 GMT -7
Looking good so far. Can't wait to see the powerplant going in this animal! Thanks John.
Well guys I've been working on this one on and off this week. Engine build is under way. I've decided to NOT go the blower route and go with a dual quad super stock motor. I'll be using the heads, rocker covers, intake and timing cover out of the 68 Hemi Dart kit (which I'll have to replace because I do want to build a Hemi Dart) and retaining the block and transmission from the Willys Street rod kit so as to keep the mods to fit the engine into the frame to a minimum. I had to modify the timing cover and intake slightly to get them to fit together on this engine block. I've been doing a lot of studying on this particular powerplant because I want to replicate the fuel delivery system and throttle linkage.
Here's the base build up as of earlier in the week:
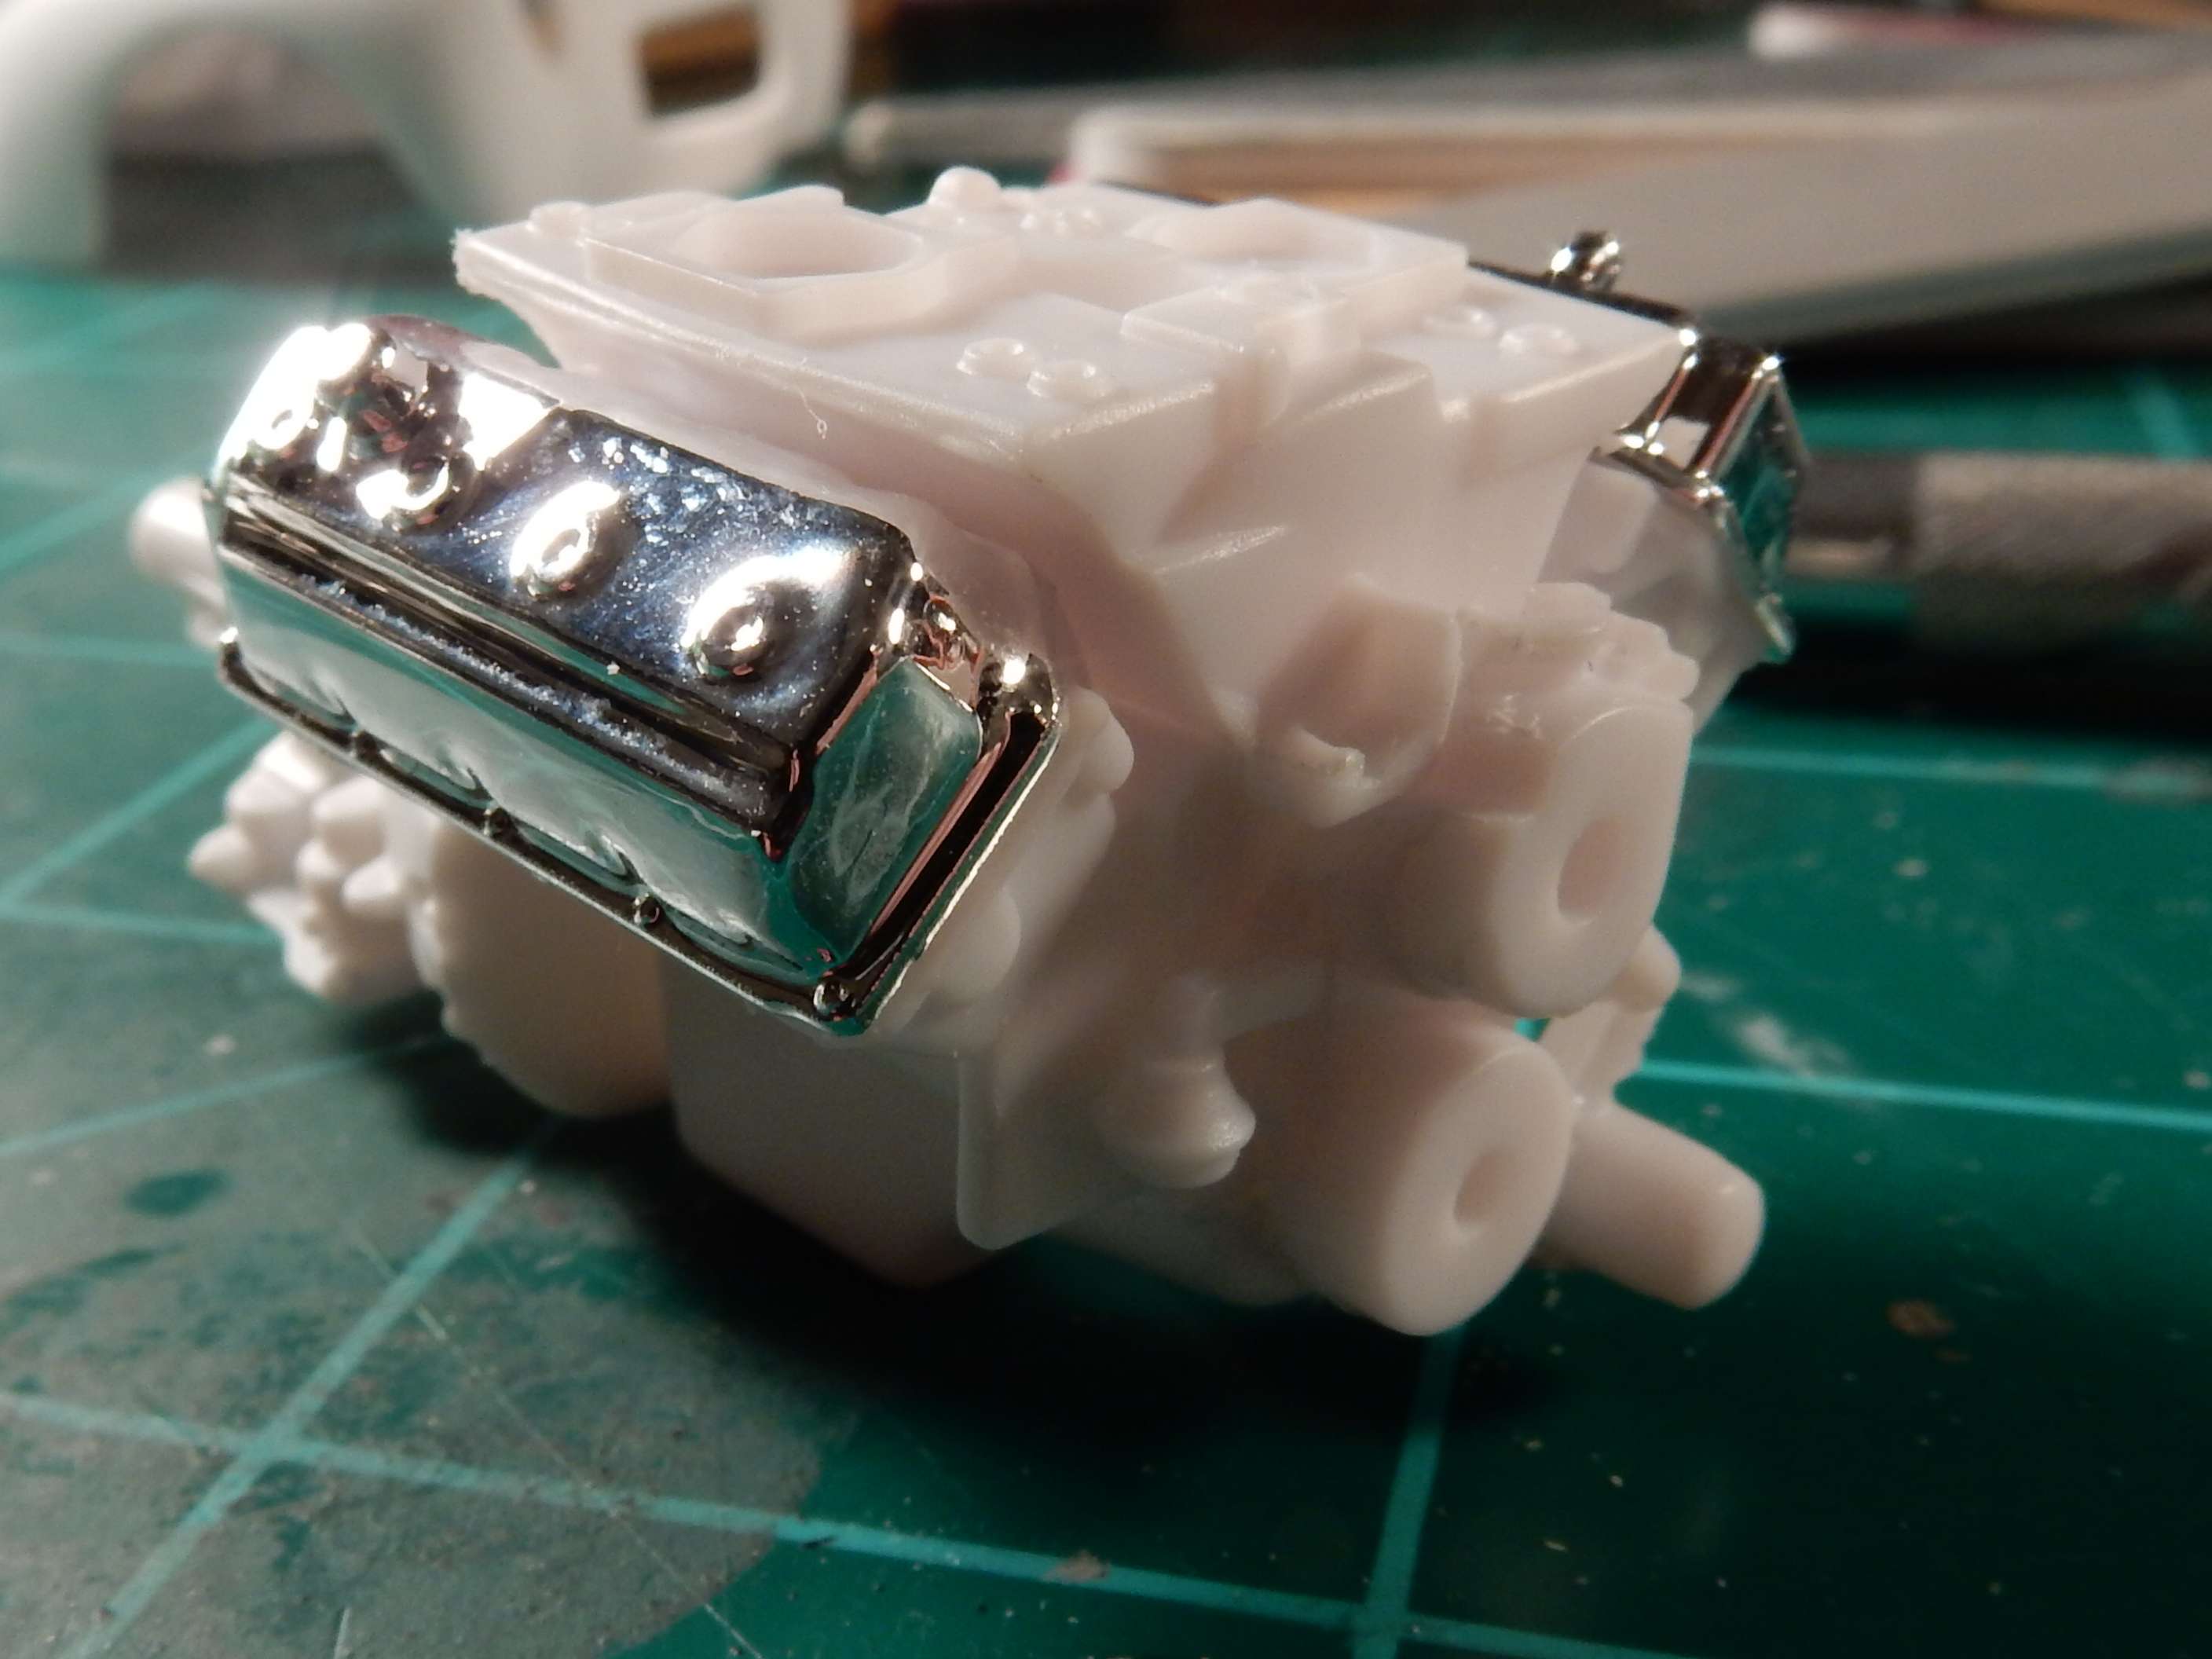
and here it is as of now:
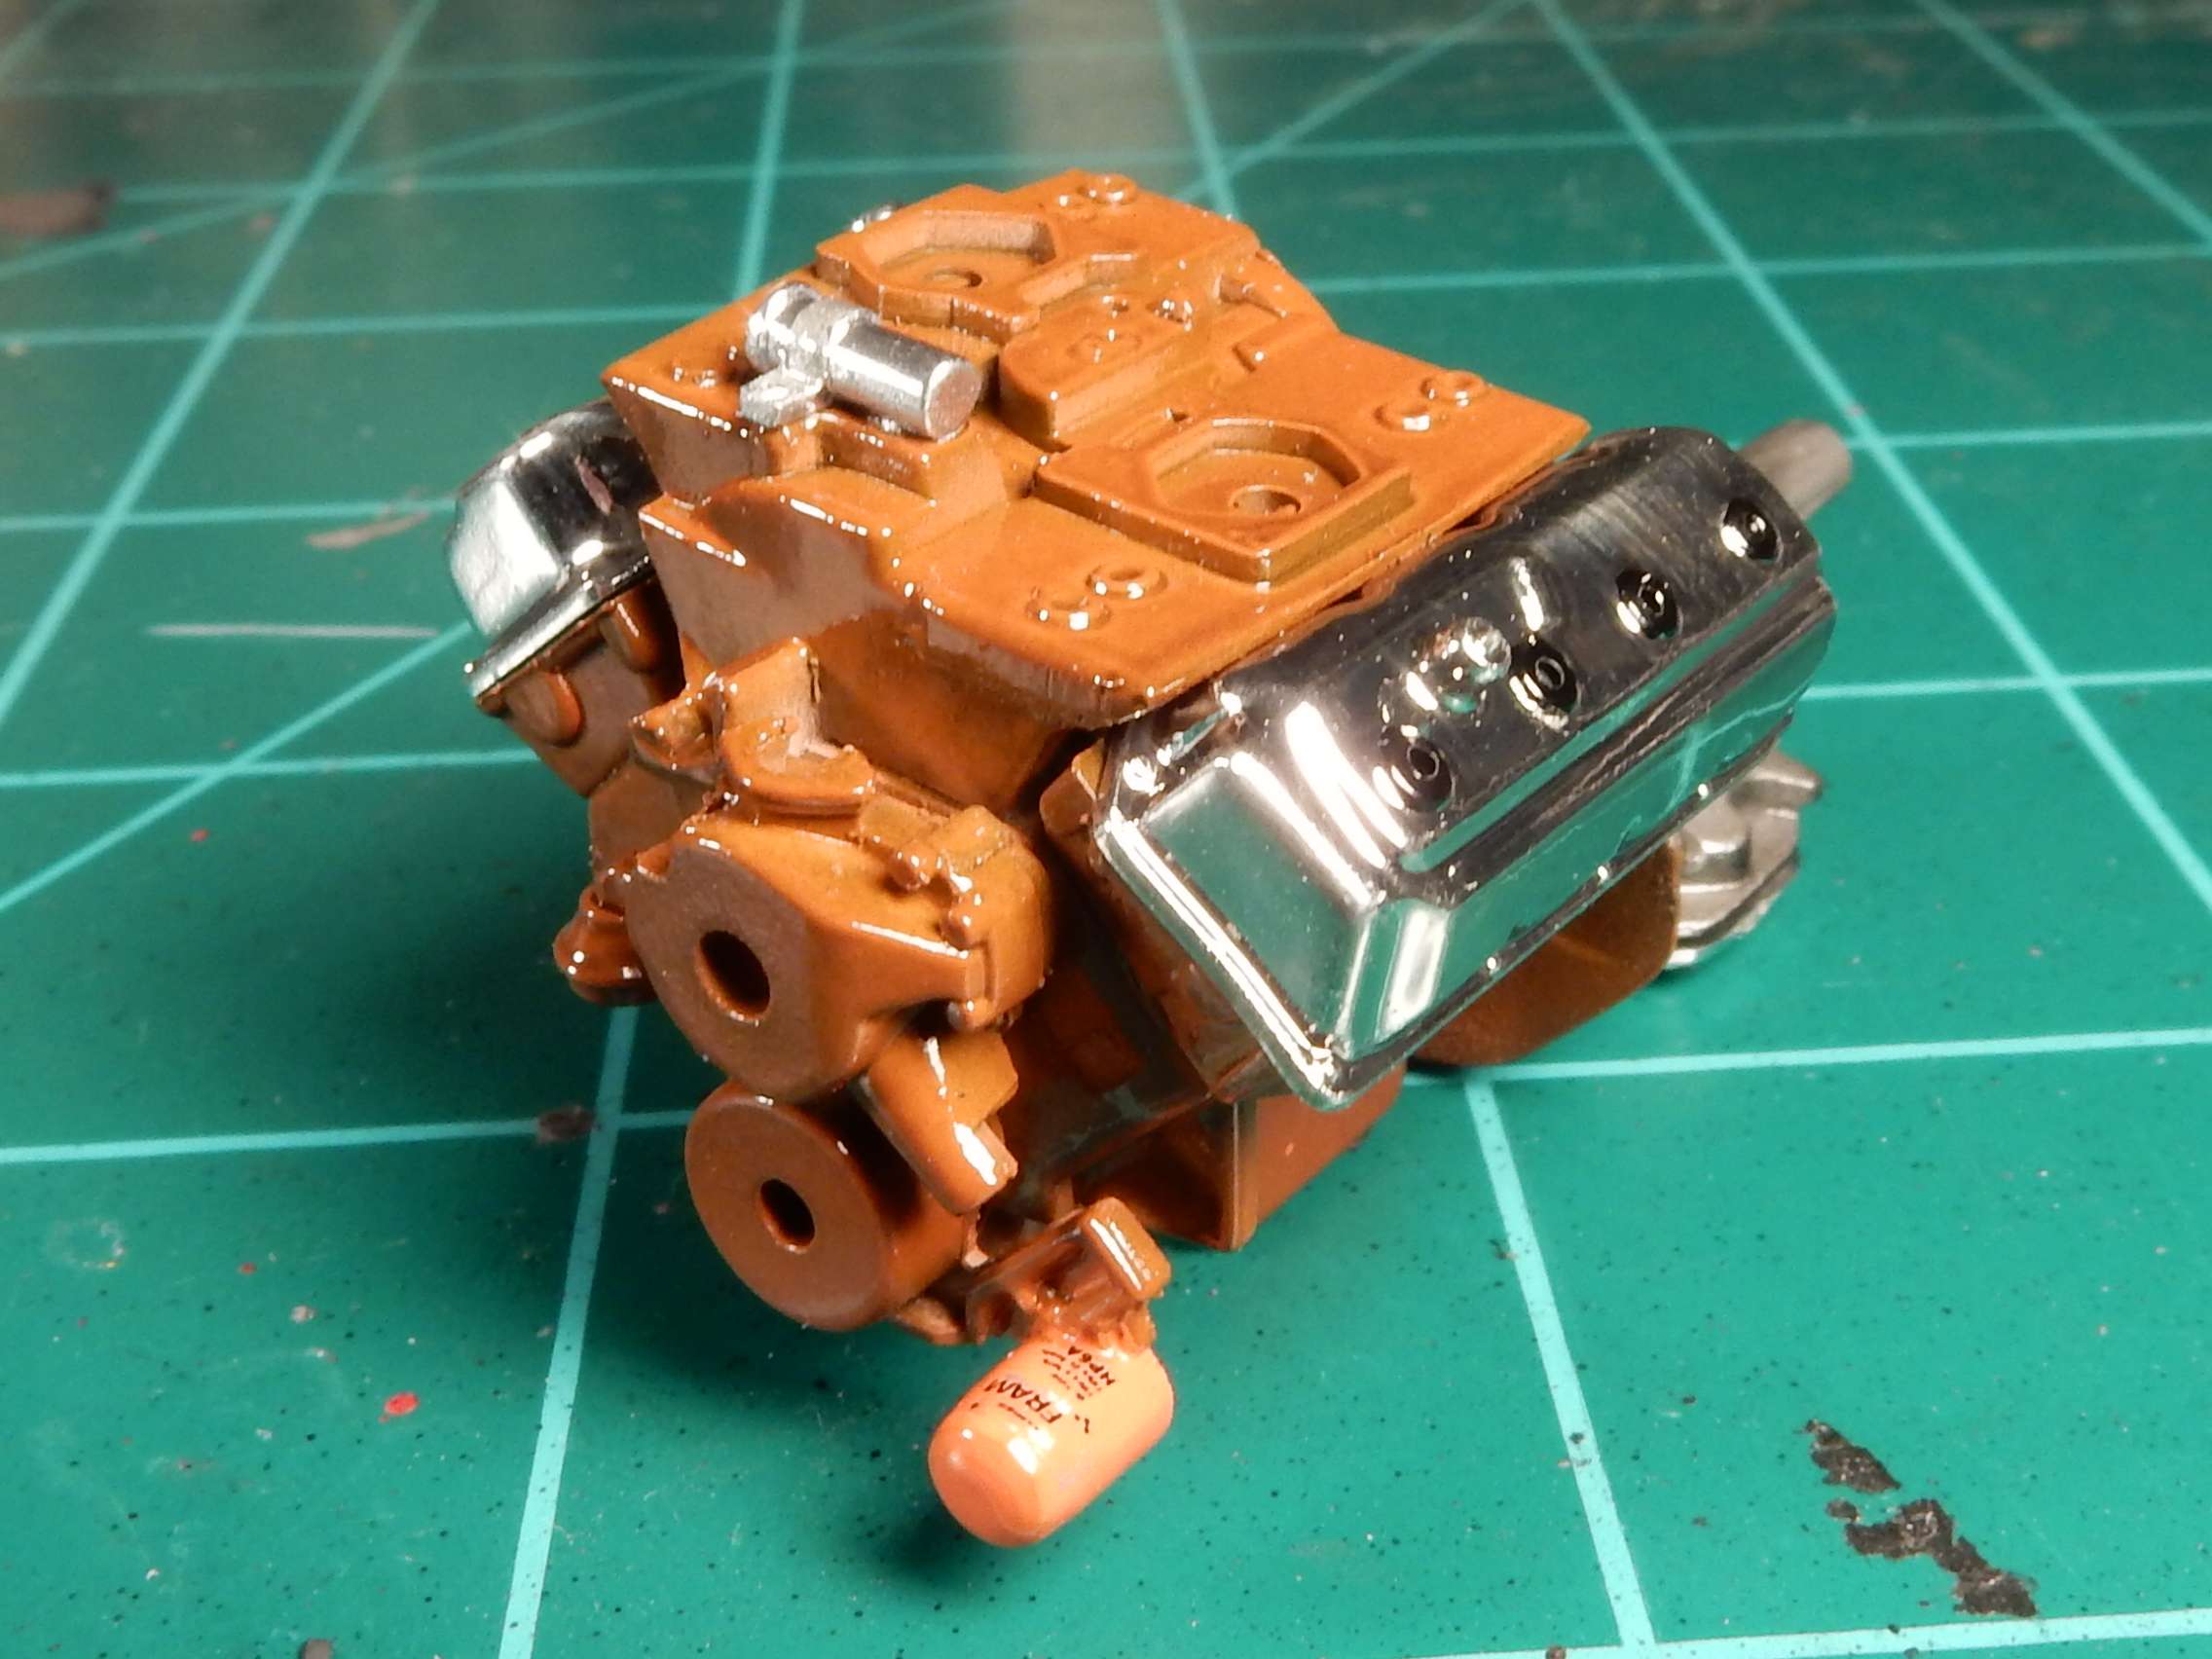
another thing that has caught my interest are the two piece aluminum wheels that are available these days. I actually acquired these wheels some time back but the rear wheels were so wide that I didn't have a tire wide enough to mount them in. So I took both of the wheel sleeves into a machine shop and had them cut the sleeve to the depth I wanted and "Walla!" , I've got myself a set of usable Pro Street wheels now. I'll have the wheel studs and lug nuts installed soon. 

|
|
|
|
Post by mustang1989 on Jul 4, 2018 20:07:54 GMT -7
I'm waiting on throttle linkage, spark plug wires and the like for any more progress on the engine.
Until then I'm marchin' on with the wheel construction. Since I've gotten the modifications to the rear wheel sleeves from my local machine shop , I've been waiting on the studs and nuts needed for the rear wheels.
I took the base wheel face and drilled all the lug nut holes out a little so the studs would fit.
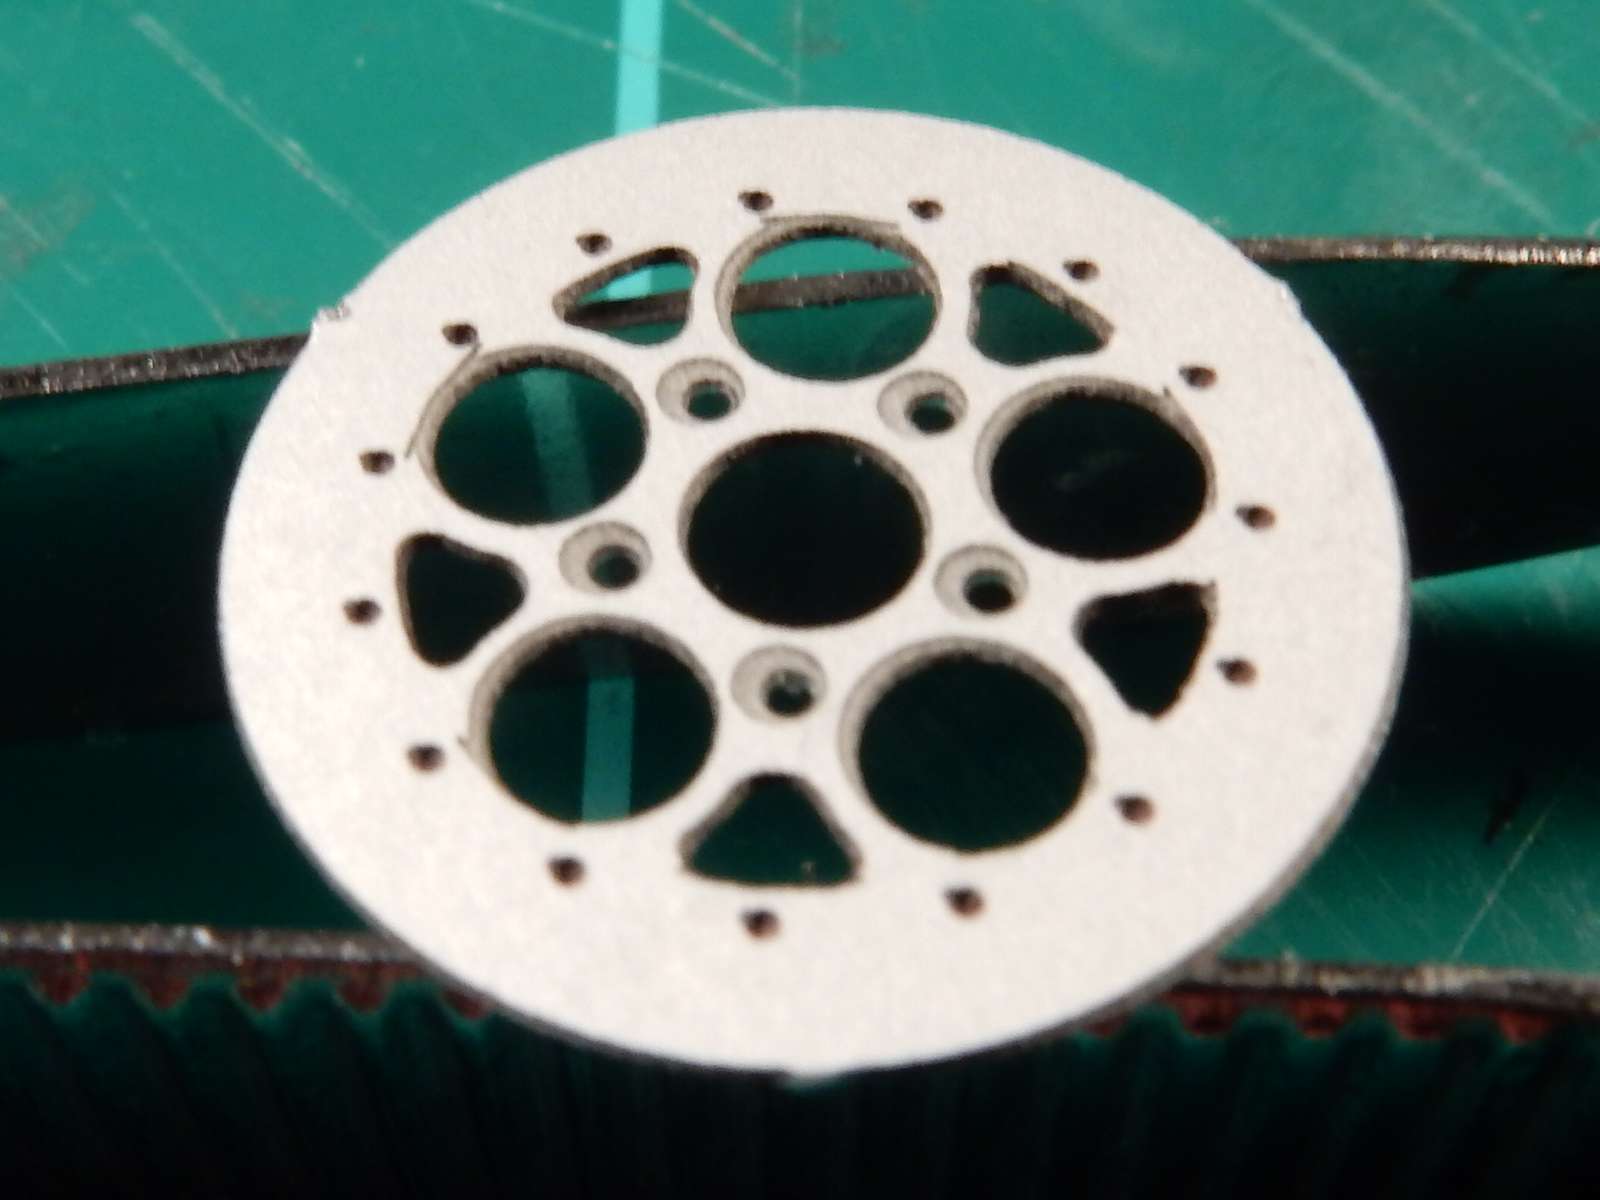
Here's the lug nuts that I acquired from RB Motion: (if none of you have checked THAT site out then you need to. AMAZING stuff on there)

Lug nuts installed.....

And here we are with the wheel face adhered onto the wheel sleeve and a light wash applied to the lug nuts to bring out the detail. Before installing the wheel face I hit the wheel sleeve with some steel wool and then followed that up with some Mothers Aluminum Polish to bring a nice shine to the sleeves. Each of the rear wheels were 8 pieces in total. Fronts were 4 pieces each.

|
|
|
|
Post by mustang1989 on Jul 4, 2018 20:09:29 GMT -7
BTW...…. Happy 4th of July guys.  |
|
|
|
Post by Grandpabeast on Jul 5, 2018 1:05:52 GMT -7
Man I really like those rims ! Where did you find them ? Your attention to detail blows me away ! Love watching your work
|
|
|
|
Post by mustang1989 on Jul 5, 2018 2:18:41 GMT -7
Man I really like those rims ! Where did you find them ? Your attention to detail blows me away ! Love watching your work Thanks Dave! These wheels are from Future Attraction. Finding slicks/ tires wide enough for the rear wheels is pretty tricky but if you've got a machine shop that you deal with then they should be able to cut the wheel sleeves to your desired width so you can use a set of tires from the AMT Nova or Chevelle Pro Street kits.
Here's the website. Hold on to your wallet too because these babies don't go for cheap. www.futurattraction.com/9.html
|
|
|
|
Post by sharp on Jul 5, 2018 19:48:30 GMT -7
Your doing a great job on this Joe!! and those wheels are pretty awesome too.
|
|
|
|
Post by jkflash on Jul 6, 2018 5:47:18 GMT -7
WOW! The detail so far is amazing. I'm staying tuned in!
|
|
|
|
Post by poet on Jul 6, 2018 13:11:16 GMT -7
Good stuff!
|
|
|
|
Post by mustang1989 on Jul 9, 2018 12:19:43 GMT -7
Thanks fellas!!
Here's the rolling chassis with the powertrain test fitted. This car is ALL motor and tire!!!
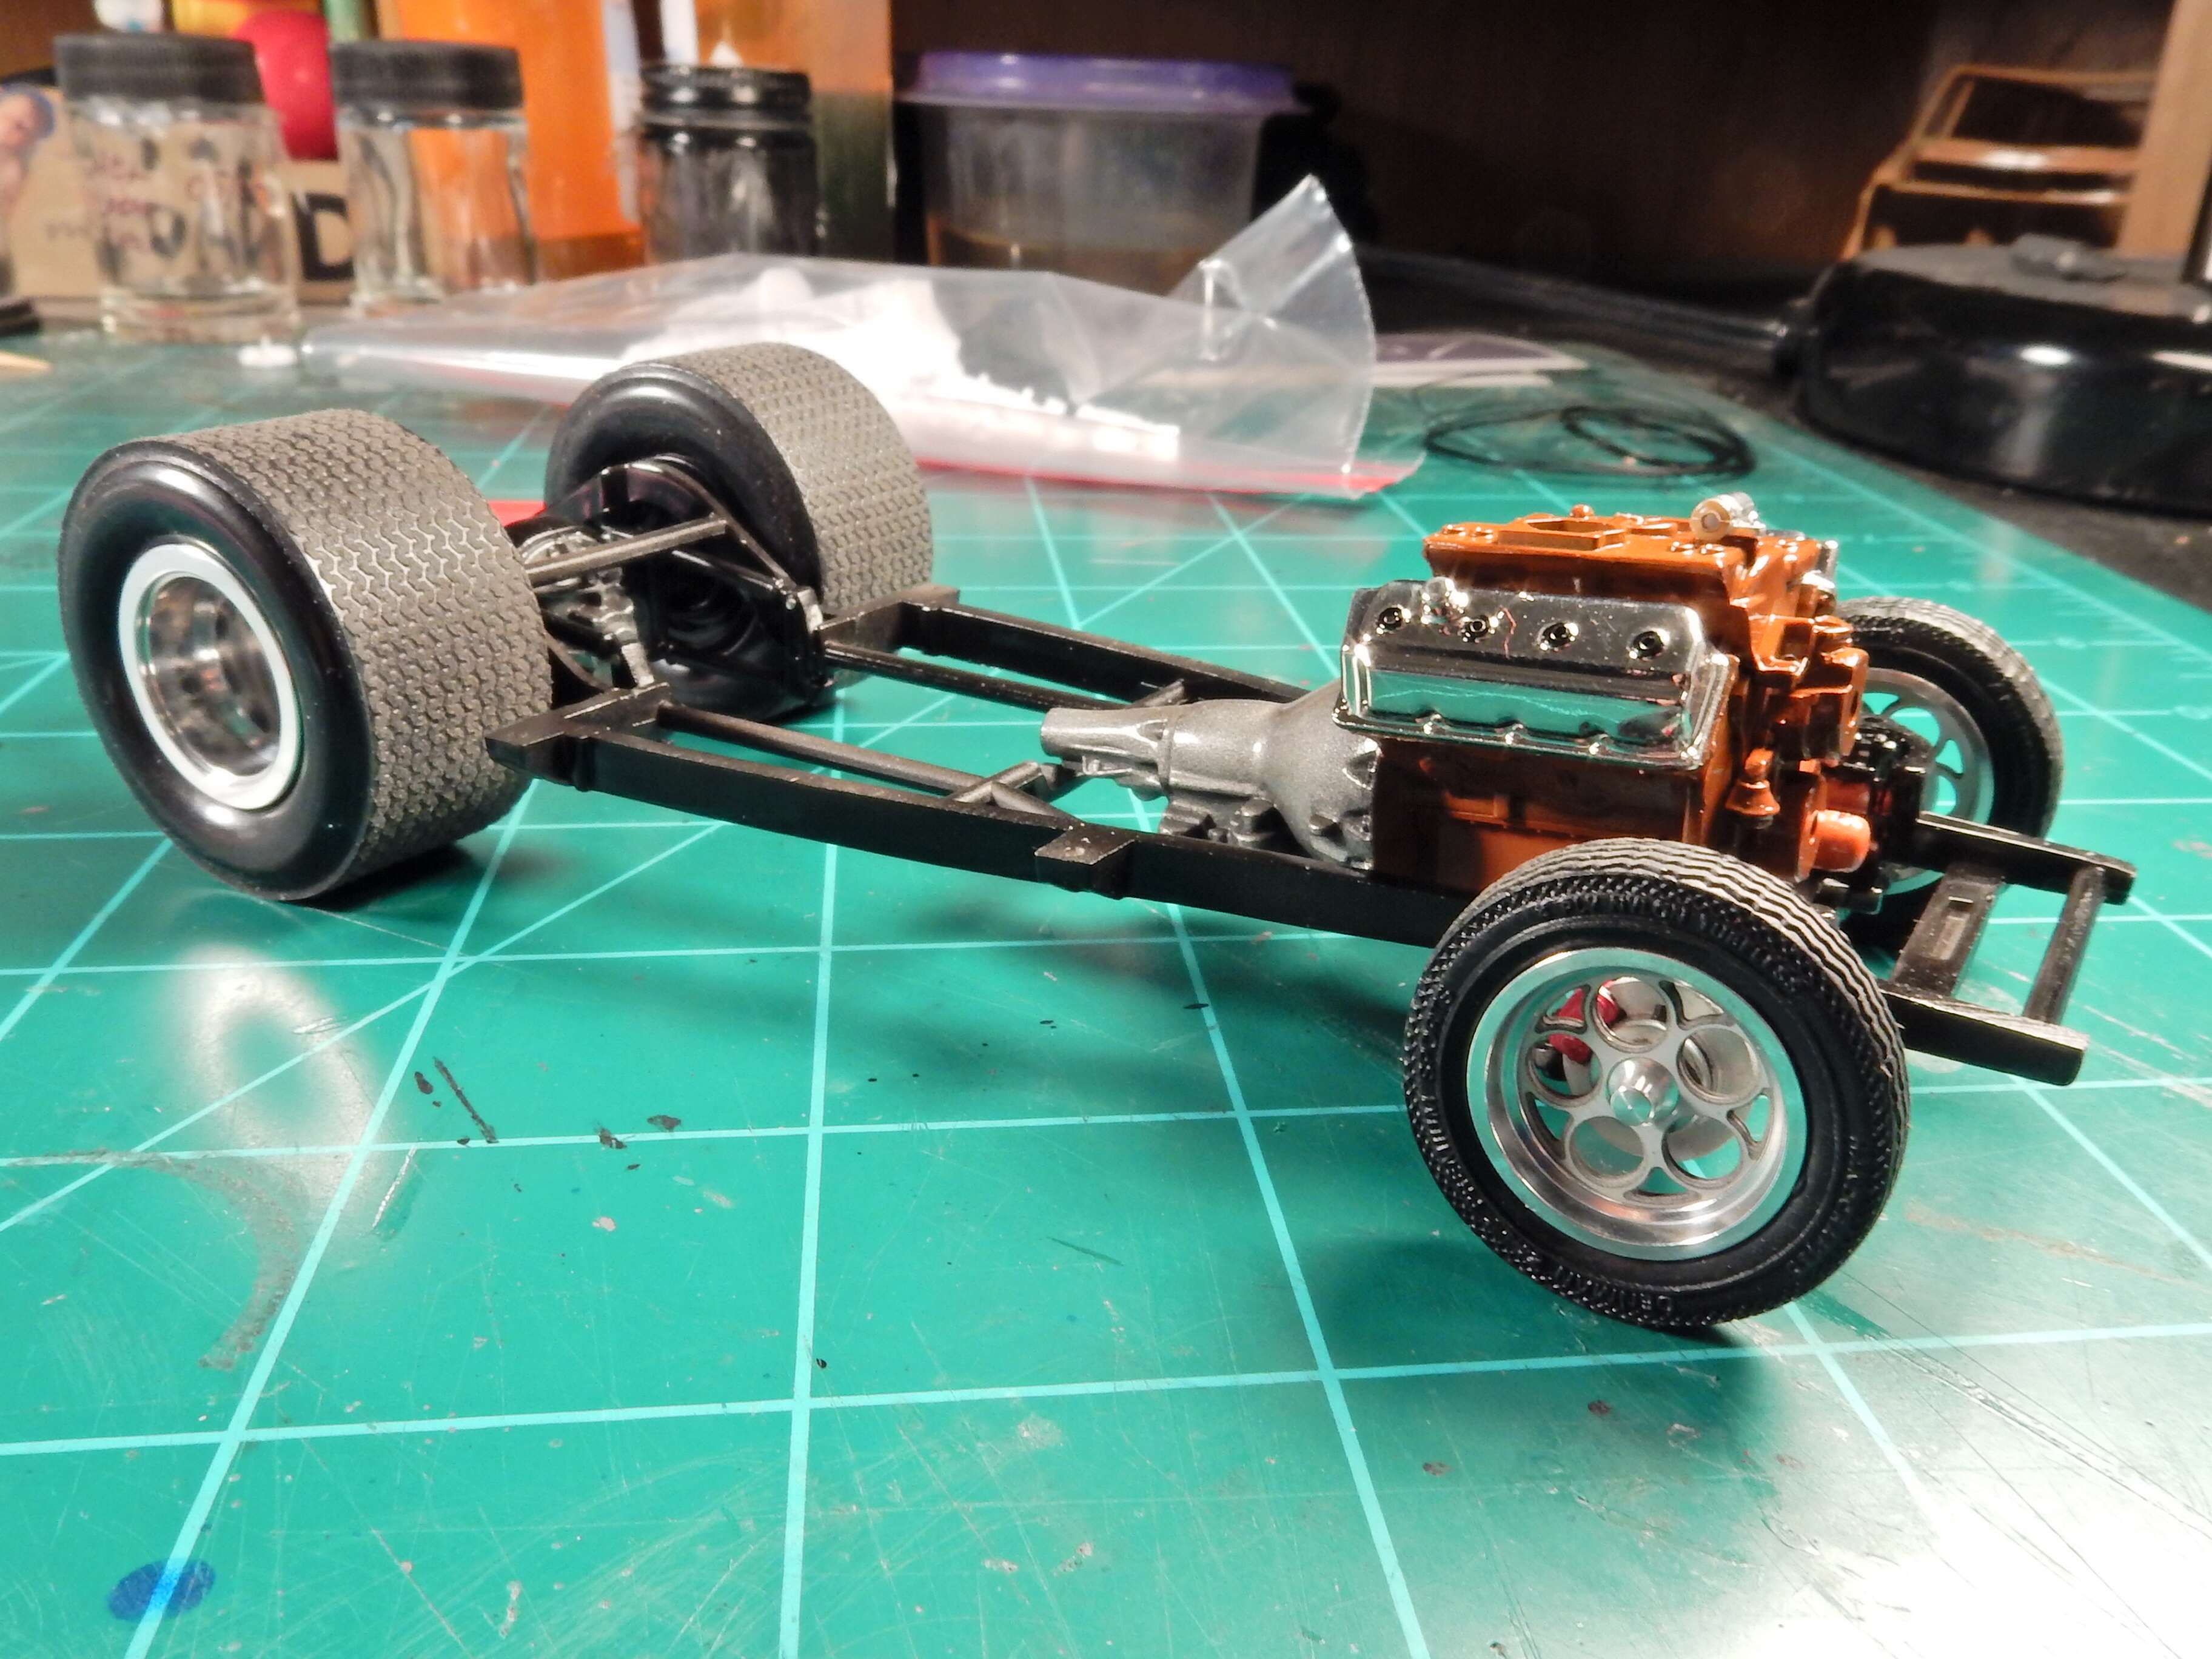
Got the distributor drilled a few days ago in anticipation for the orange spark plug wire arrival in the mail. I got the wires yesterday so I went to work on that.
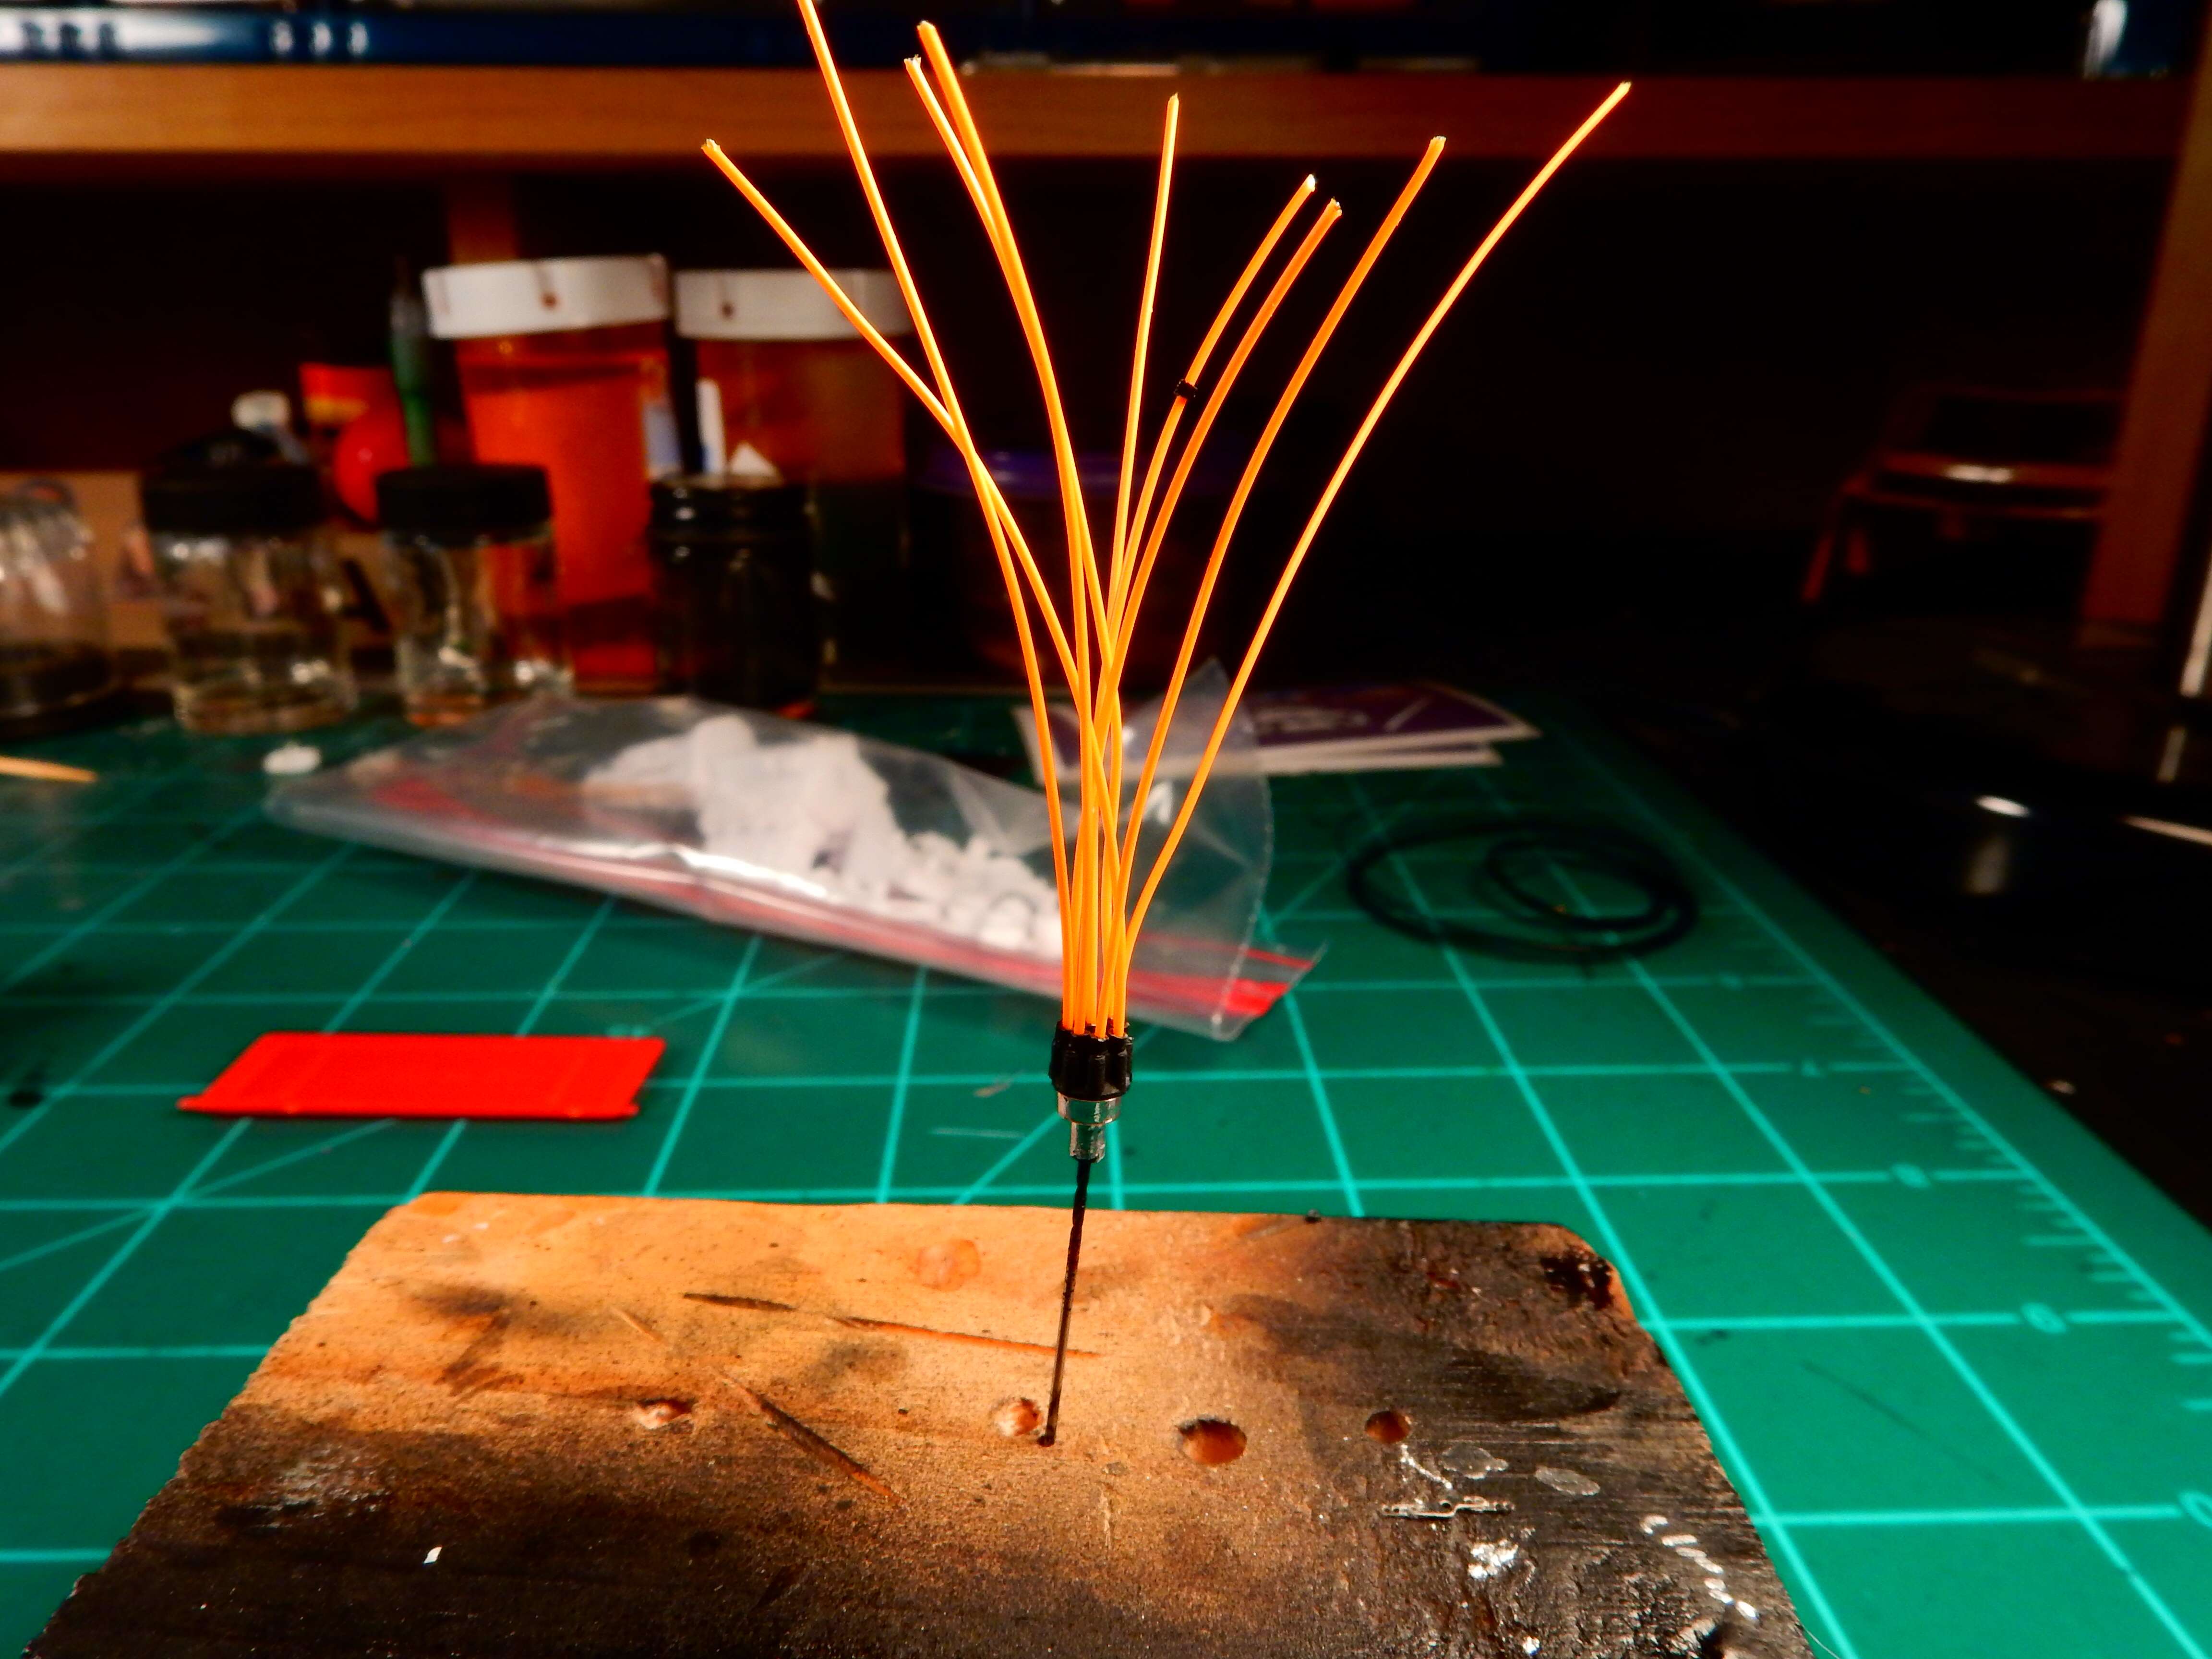
|
|
|
|
Post by mustang1989 on Jul 10, 2018 7:48:29 GMT -7
I didn't like the hole that was cut in the hood. I'm not much of a fan of that kind of stuff because most of the time it just looks cheap and half done. There are those cars that do look cool with a hole in the hood and a big tunnel ram dual quad setup coming out of the hood but this aint that car.
I cut some black Evergreen styrene to match the hole, glued it into place with Tamiya cement, filled in the cracks and low spots with super glue and sanded everything flush nice and purdy. I've found out how to re-size my photos to where they are not quite so overbearing in size. I guess it's about time I figured out how to do that over at Image Shack. 

Hemi is still coming along as well:


an "in chassis" shot with the engine wire harness installed:

It's gonna take up the whole engine bay opening when it's all said and done. Still gotta work on the stance some.


|
|
|
|
Post by mustang1989 on Jul 11, 2018 19:12:32 GMT -7
I've got the chassis finished except for the chrome exhaust tips install:

Got the throttle linkage done and have been working on other stuff like the fuel delivery system and radiator hose(which took three hose fabrications until I got a hose and clamp assembly that looked half decent!  ). Still have the throttle return springs to install, fuel lines from the fuel junction block and gotta clean up those air horns which I have temporarily installed for effect. ). Still have the throttle return springs to install, fuel lines from the fuel junction block and gotta clean up those air horns which I have temporarily installed for effect.
Here's where we're at now:
 
 
|
|
tubbs
Loyal Member
   Registered: Jul 24, 2013 5:02:43 GMT -7
Posts: 1,017
|
Post by tubbs on Jul 12, 2018 9:26:14 GMT -7
shaping up to be a really sharp, detailed build. still not a fan of that intake though. really nice, but one side is a little higher than the other. still looks killer!! great motor in a great hot rod. question, what gage is your wire, looks spot on. one detail you HAVE to put on and it gets passed up by a lot of builders, put a catch  can on the radiator. simple and highly effective. just bolt (glue) a small strip of styrene to the side of the radiator and run a line to underneath the cap. |
|
tubbs
Loyal Member
   Registered: Jul 24, 2013 5:02:43 GMT -7
Posts: 1,017
|
Post by tubbs on Jul 12, 2018 9:28:10 GMT -7
hmmm, I typed in puke, another name for a catch can and it changed to an amogie. strange.
|
|
|
|
Post by Grandpabeast on Jul 13, 2018 14:49:47 GMT -7
Looking awesome! Great detail
|
|
|
|
Post by mustang1989 on Jul 16, 2018 17:42:41 GMT -7
shaping up to be a really sharp, detailed build. still not a fan of that intake though. really nice, but one side is a little higher than the other. still looks killer!! great motor in a great hot rod. question, what gage is your wire, looks spot on. one detail you HAVE to put on and it gets passed up by a lot of builders, put a catch  can on the radiator. simple and highly effective. just bolt (glue) a small strip of styrene to the side of the radiator and run a line to underneath the cap. Thank you for the comments and the input Al. I'll be looking into that possibly. |
|
|
|
Post by mustang1989 on Jul 19, 2018 3:26:56 GMT -7
Now working on the interior. Having to plan out a color scheme and all but I think I have a good direction to go in now.
|
|
|
|
Post by mustang1989 on Jul 23, 2018 13:23:03 GMT -7
Here's what I started with. An all white scheme at first but I had some pre-shading to do to bring out the shadows before applying a medium coat of white paint. I applied a heavy wash mixture of dark grey and thinner to get the following results with the pre-shade.
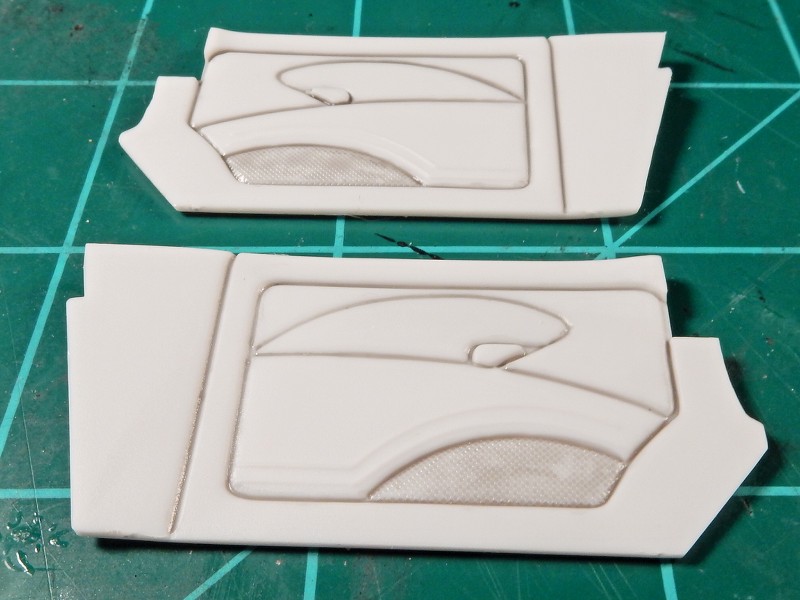
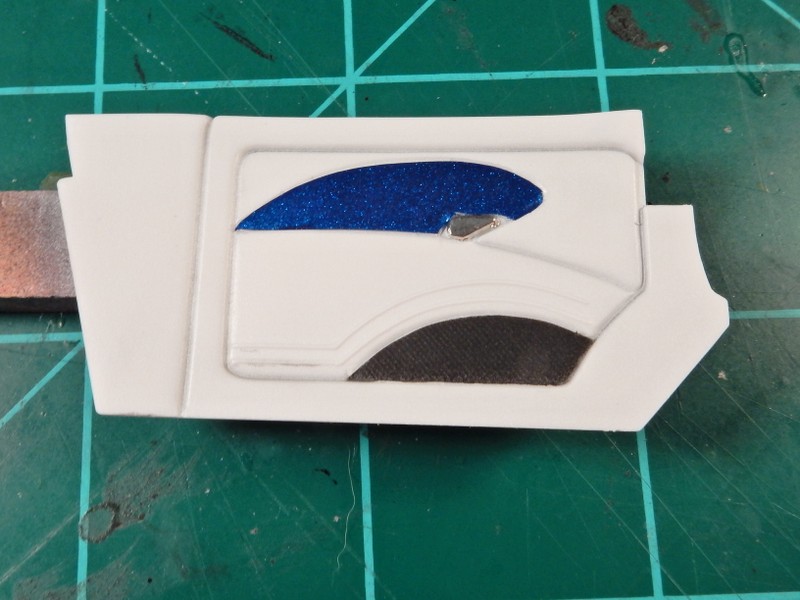
I found a piece of adhesive backed blue metallic sheet that I applied and cut out around the edges for a neat and clean door insert panel. Then I masked off and painted the door speaker grilles black. I'm still planning out the rest of the interior scheme.
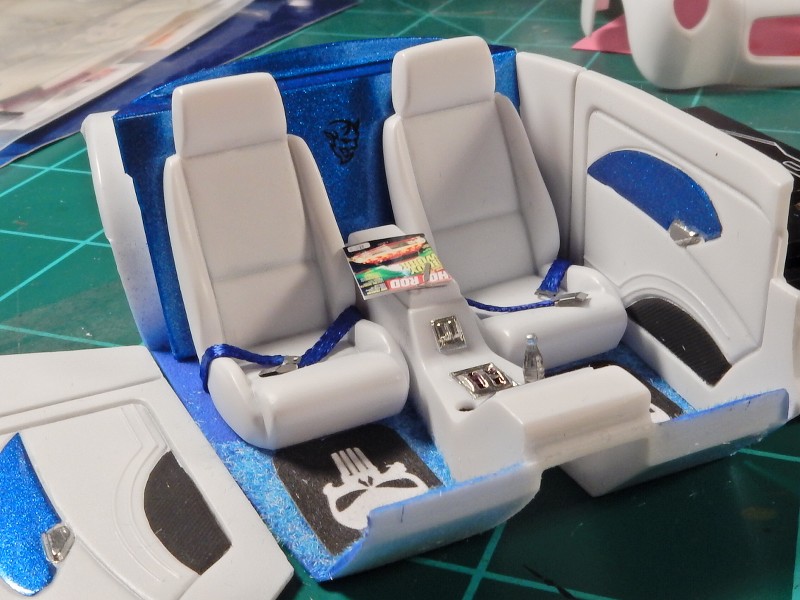
I did the same thing with the seats as I did with the door panels on pre-shading all the cracks and crevices with a dark gray, then a medium coat of white followed by a coat of semi-gloss clear. I'm trying to accent the blue lightly throughout the interior without overdoing it. Keep in mind that the seat belts and dash will be blue as well. I had some soda bottles so I drilled two holes to simulate cup holders and slipped a couple of sodas in the center console. Window switch and shifter bezels were picked out with Chrome BMF.

Radio face with CD halfway out of the slot will be going on the blue panel at the front of the console. Weird how Revell didn't have a decal slide or radio face molded on it.
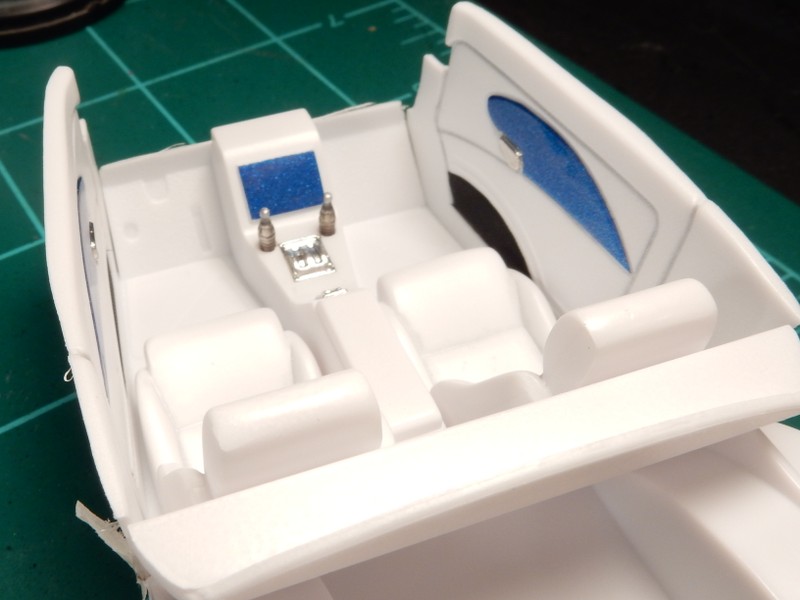
I knew I was way off base with the color balance so I made some changes. Phase one of the color balance. There'll be a light blue flocking applied to the floor by tomorrow and some extra details added. Then the floor mats will also be thrown on both sides of the floor.
I removed the soda bottle from the passengers cup holder and glued a piece of black sheet styrene on the bottom of the interior tub at that location to simulate that little black foam pad that's usually at the bottom of cup holders. I may put a bottle cap opener in there as well. I feel like I'm more on the right track here and happy with the results.

|
|
|
|
Post by mustang1989 on Jul 27, 2018 6:19:10 GMT -7
Well after adding the floor mats, blue seat belts and some other details like the magazine and bottle cap opener on top of the magazine, I think I've broken up the color pattern somewhat. I managed to sneak in a black demons head in between the seat. I had the choice of black or white but chose the subtle route. The interior color layout was a brainstorm of ideas I came up with so I really had no reference for it. Just vision. Still gotta pick out a few details like some switches and all but I've got it about where I want it. I also still have to install the accelerator and brake pedals, shifter lever and fire extinguisher to complete the base tub.
To recap....Before:

and after:
|
|
|
|
Post by poet on Jul 27, 2018 6:55:45 GMT -7
That is sweet! Nice fab work!
|
|