Deleted
Registered: Nov 21, 2024 9:23:37 GMT -7
Posts: 0
|
Post by Deleted on Mar 26, 2018 15:01:54 GMT -7
As I'm stuck here at home today with a bad case of the stomach grumblies, I decided to dig out the Mustang Turbo Cobra kit and see what I'm up against. The previous owner had removed a ton of pieces from the sprues, but fortunately it looks like everything's there. This kit is a proper '79-'82 Mustang, so it's a bit more anatomically correct to be a tribute to my first car, an '82 Mustang GL hatchback. I started building the 2.3L 4-cylinder (since that's what came with mine). I'll put the optional 5.0 V8 together later for a future project. I already have a model of my first Mustang, but it was built in '88 or '89, not even the right kit, and was done in a hurry and quite haphazardly. That kit was an '84 Silver Anniversary kit I found at Firestone of Alamogordo (of all places), and I found some wheels from some other kit that were kind of close (if 6-lug 15x10s with 12 holes on BFG T/As can be considered "close" to 5-lug 14x7s with 10 holes on Goodyear Eagle GTs, that is). I'd also taken some liberties and added a sunroof and trunk spoiler, which neither came to be since I traded the car in on an '85 Nissan 4x4 before I got that far. I also didn't have any rear window louvers on the kit, however the new kit has some so I won't have to scratch-build them. I just hope I can find that color again - one of the few things I got right!  So, here we go - here's my car: 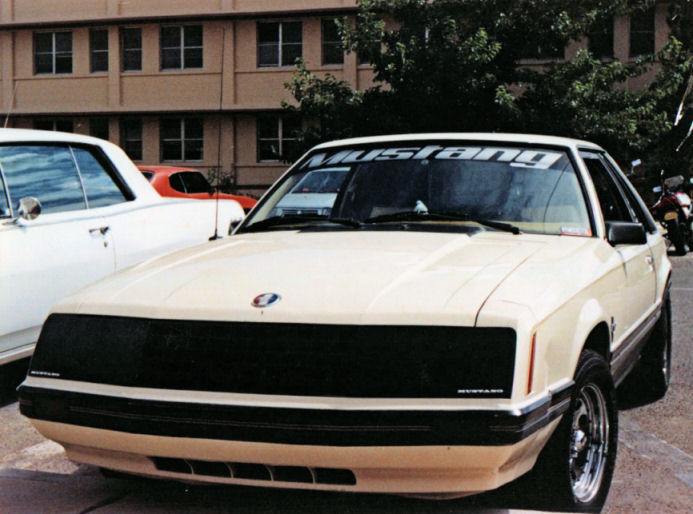 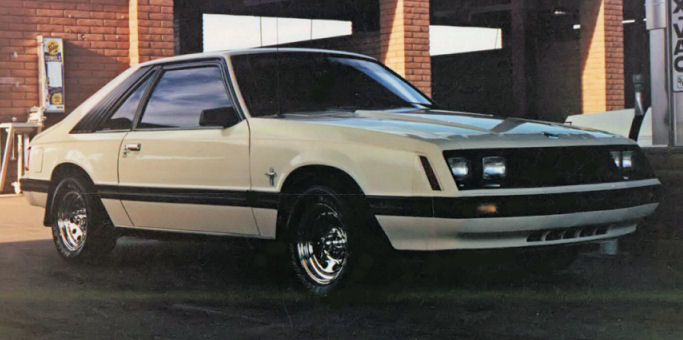 And here's the kit with my build from back in the day next to the pile of pieces of the new kit: 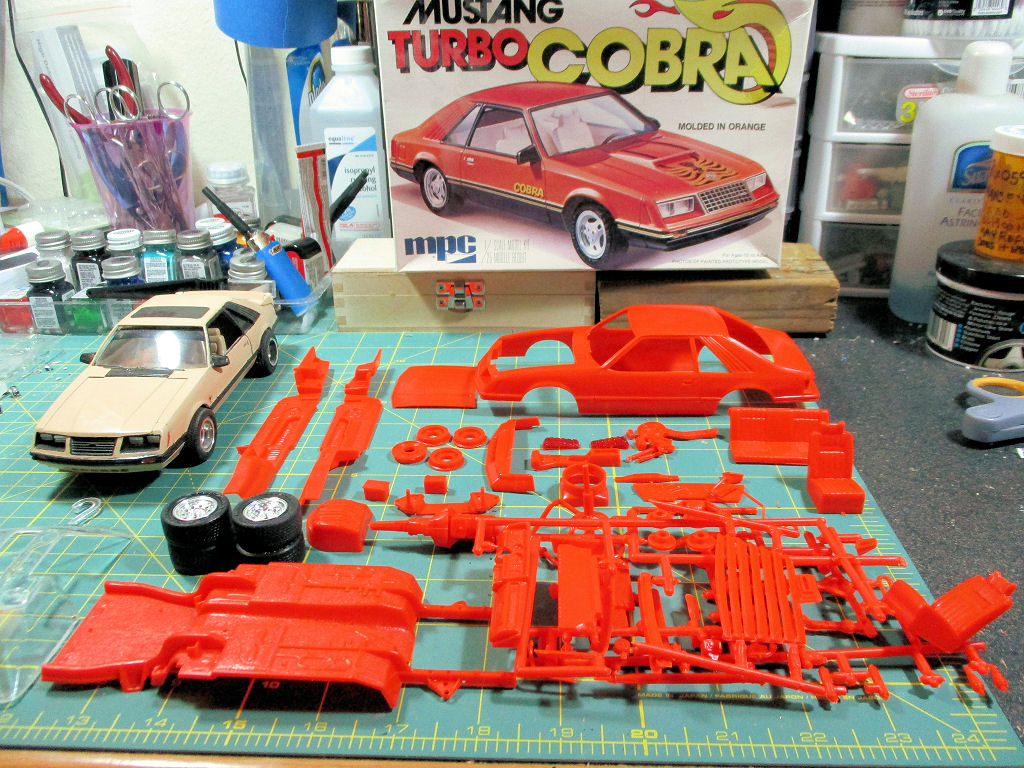 The biggest thing I'm anxious to correct is the engine compartment - I SO messed up on that first kit. I mean, who paints a radiator hose silver, anyway? LOL! |
|
|
|
Post by stevet on Mar 26, 2018 16:28:59 GMT -7
Can't wait to see more...  |
|
Deleted
Registered: Nov 21, 2024 9:23:37 GMT -7
Posts: 0
|
Post by Deleted on Mar 26, 2018 17:00:38 GMT -7
Thanks! I have this weird aversion to building things I've actually owned or seen, and try to get them as close to 'replica' as I can. Hopefully, this goes as well as my Jeep did.  |
|
|
|
Post by jkflash on Mar 27, 2018 14:32:10 GMT -7
Thanks! I have this weird aversion to building things I've actually owned or seen, and try to get them as close to 'replica' as I can. Hopefully, this goes as well as my Jeep did.  I have built a couple of models of cars I have owned, driven, or seen in person. It can be fun. Staying tuned in for this one. |
|
Deleted
Registered: Nov 21, 2024 9:23:37 GMT -7
Posts: 0
|
Post by Deleted on Apr 1, 2018 19:03:05 GMT -7
OK, so some progress. I went to Hobby Lobby yesterday and spent WAY too much money. Among the many things I brought home were a nice fine-tooth saw & miter box... which came in handy today when I noticed (and realized) that the transmission cast with the 2.3L 4-cylinder was a T-5 manual... not the AOD my Mustang had with its 2.3L. I thought I'd seen an automatic in the kit, and the floor of the car only has a brake & gas pedal... no clutch... and the 5.0L V-8 was indeed cast with the AOD automatic. Cool - so, now I get to use my new saw and miter box. First - separate the AOD from the 5.0, and the T-5 from the 2.3: 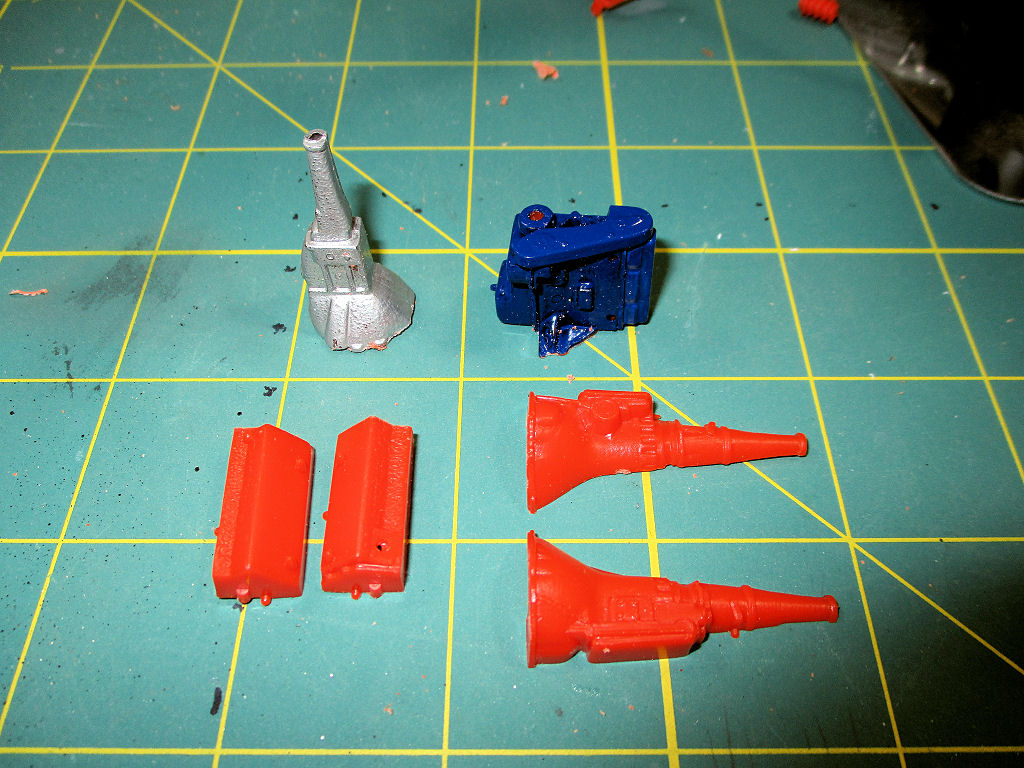 Meanwhile, with the glue and steel paint on the AOD dry, I've almost got it to rolling chassis (still need some details underneath like shocks, and paint the backsides of the wheels, and whatnot - but the suspension's on for the most part): 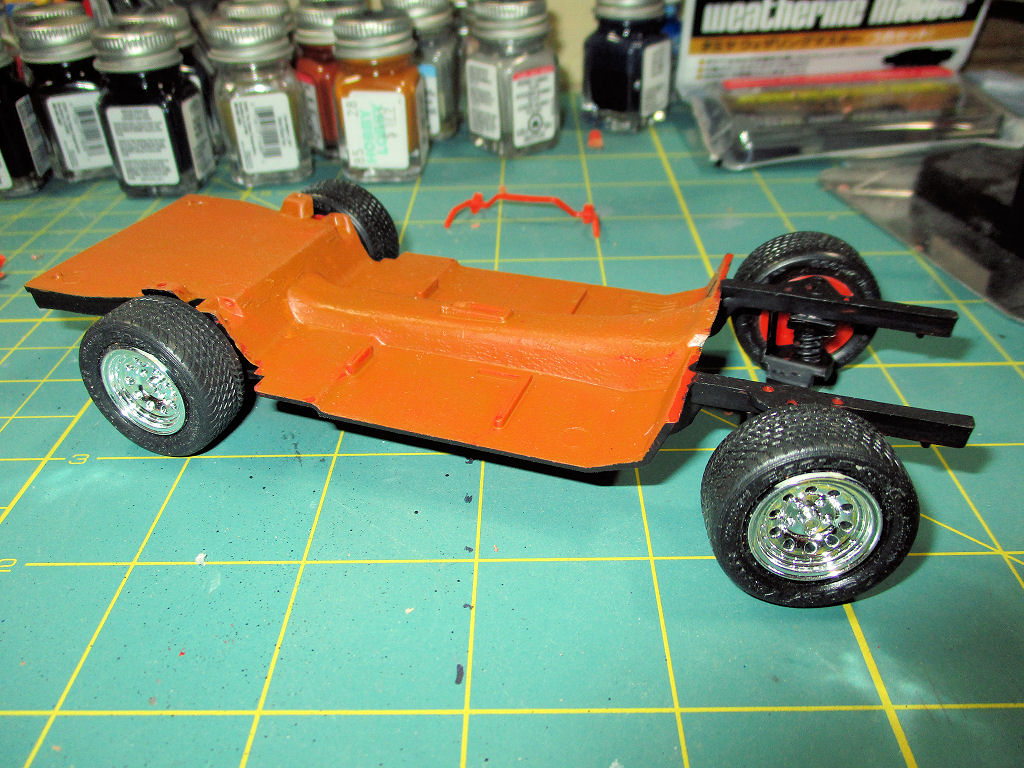 The floor of the interior is supposed to represent the tan carpet that was in the real car. This kit's a little odd in that it doesn't have a proper interior 'tub' like most car kits do. Oh well, it'll look right when it's all done. And finally, here we are with the 2.3 mated up to the AOD, as it was in the real car: 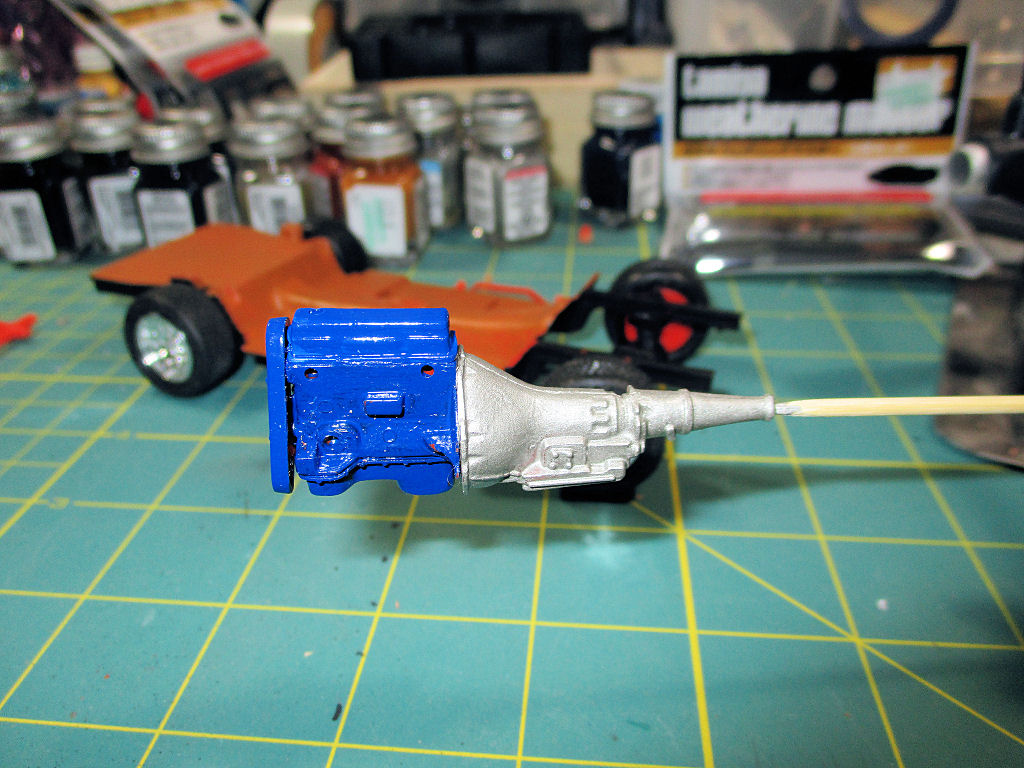 Still lots of work to do: gotta wire & plumb the engine, finish up the underside with the rest of the driveline, get the body ready for paint, and get busy on the interior. Most of the work so far has been painting all the little bits, which has become more of a process since after having actually [re]built some cars in my time, now I'm on a quest to get it all 'right.' |
|
Deleted
Registered: Nov 21, 2024 9:23:37 GMT -7
Posts: 0
|
Post by Deleted on Apr 6, 2018 17:07:53 GMT -7
So I think I'm [re]learning a valuable lesson about metallic paint and model glue - the glue turns the paint into an icky mess and the piece don't want to stick together as a result.
Gonna hafta do some scraping of the joint areas of the intake & exhaust manifolds to get this engine together, I guess. (Now, where's that tube of super glue gel I saw awhile back...)
|
|
|
|
Post by mustang1989 on Apr 6, 2018 21:32:42 GMT -7
Sweet!! I like these old Fox body Mustangs. Looking forward to this one Eric.
|
|
Deleted
Registered: Nov 21, 2024 9:23:37 GMT -7
Posts: 0
|
Post by Deleted on Apr 7, 2018 14:01:19 GMT -7
Thanks! I love the Fox-bodies as well. I almost traded my '82 in on an '84.5 SVO (but figured out I'd have about $20 at the end of the month after payment and insurance on E-3 pay).
I also have an '88 GT 'vert kit in the stash as well... along with plans of adding another 3 or 4 Fox-body kits down the road.
|
|
|
|
Post by sharp on Apr 7, 2018 16:15:05 GMT -7
Sounds like a cool build,can't wait to see more.
|
|
Deleted
Registered: Nov 21, 2024 9:23:37 GMT -7
Posts: 0
|
Post by Deleted on Apr 11, 2018 18:23:35 GMT -7
OK, so after taking it all apart a couple of times, I finally found a suitable substitute for a distributor, and also this really cool old pin vise set that belonged to my Grandpa I've been carrying around for 25 years or so. I used a 68 gauge bit to drill some holes for the spark plug wires, scratched up some linkage arms for the carb and transmission, installed the TV cable (from AOD to carb) along with an automatic shifter cable. I used a Molotow chrome pen (1mm) to dot the bolt heads on everything, and even scratched up an alternator bracket... and none of this will likely ever be seen again once I get all the rest of the engine components installed. 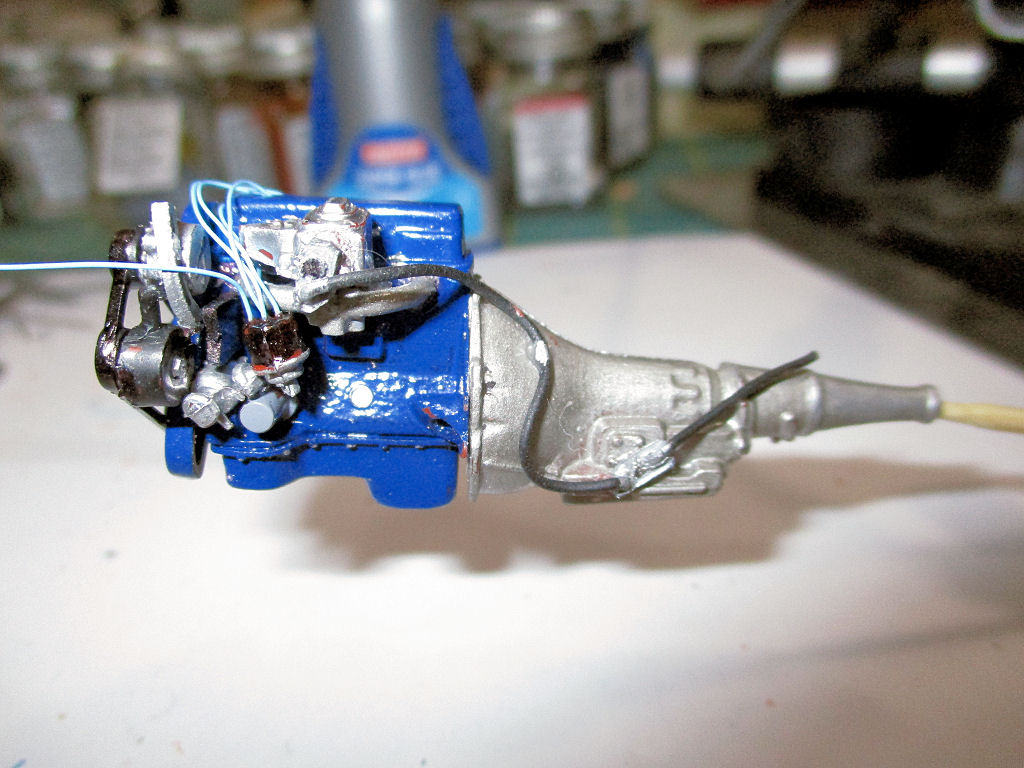 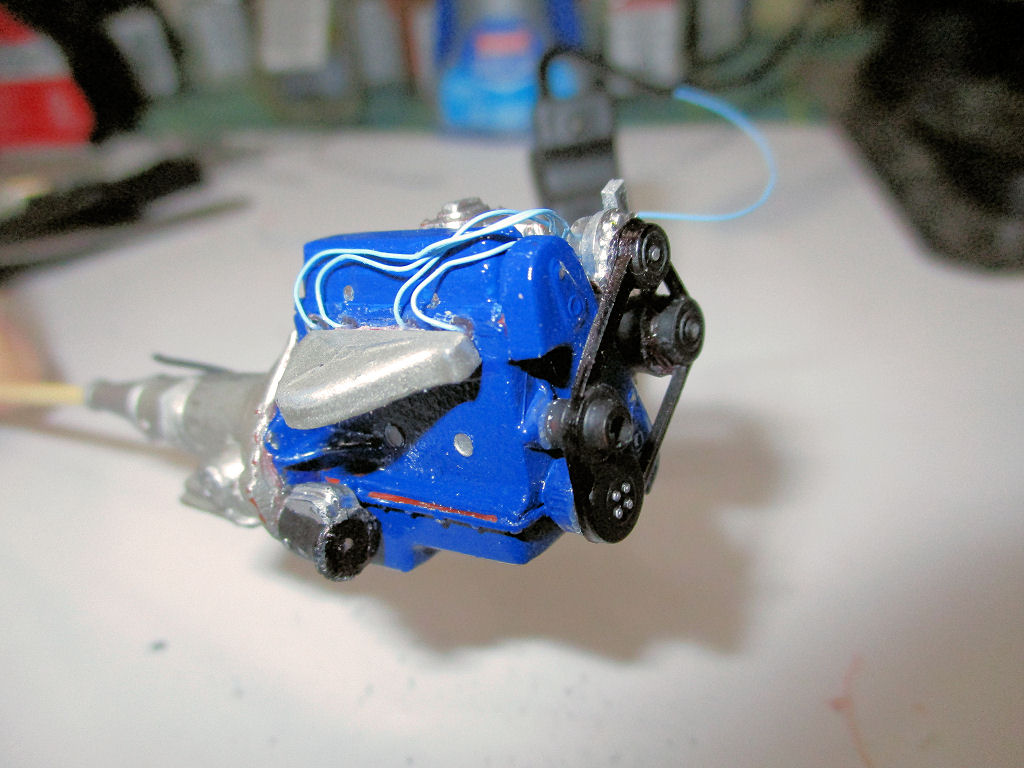 How 'bout 'dat? |
|
Deleted
Registered: Nov 21, 2024 9:23:37 GMT -7
Posts: 0
|
Post by Deleted on Apr 18, 2018 18:00:10 GMT -7
I've kind of hit that place where I need to prep the body for paint, along with the interior door panels/inner wheel wells/front aprons (each side is one piece) and firewall, since it's all body color on the car. I decided this past weekend to play with the Tamiya weathering master kits to age the underside a bit after seeing a phenomenal build underway of an '85 SVO Mustang. I didn't go nuts with it, but I think it made a little bit of difference using some rust, soot, silver, and gun metal. Also drilled some holes in the firewall for the heater hoses after carving off the molded ones. 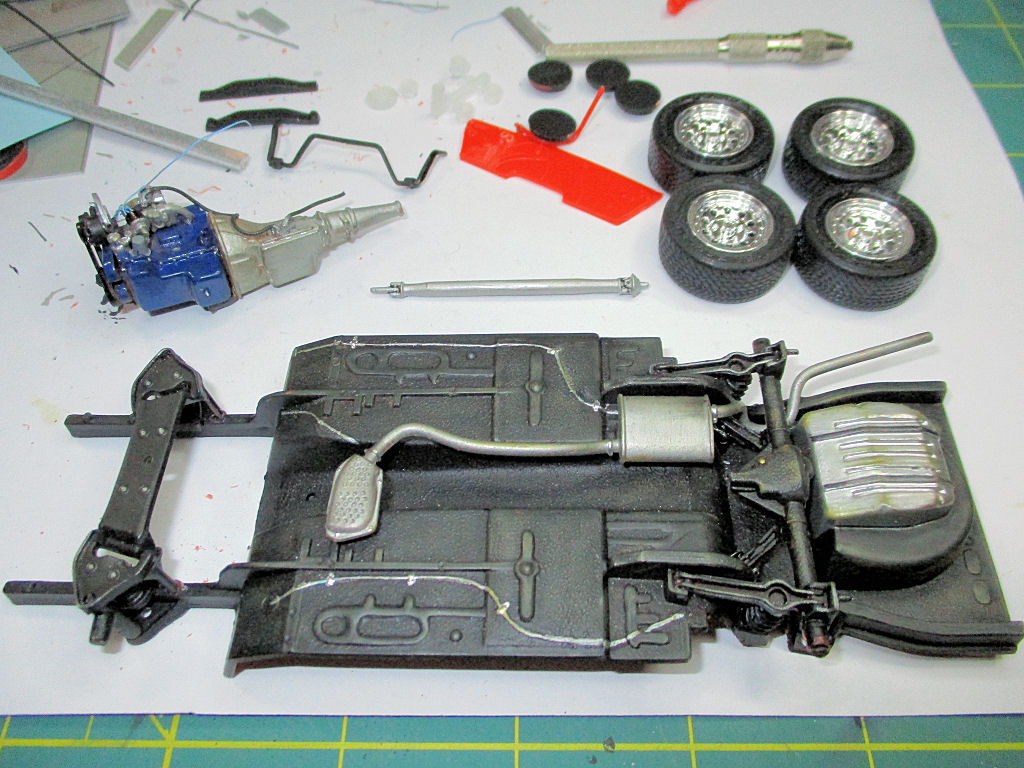 Hopefully, I'll have a chance to get some color on the body parts and interior so I can press on with those. Also need to score some embossing powder to make some proper sheepskin seat covers. |
|
|
|
Post by mustang1989 on Apr 18, 2018 18:17:49 GMT -7
Lookin' really sharp there Eric. I've got a Revell four banger Mustang that I'm hoping to swap a 460 into.
|
|
Deleted
Registered: Nov 21, 2024 9:23:37 GMT -7
Posts: 0
|
Post by Deleted on Jun 10, 2018 17:09:06 GMT -7
Wow, so it's been almost 2 months since I last posted any progress. Been all sorts of busy, and just hadn't gotten back to it in awhile. I picked up some embossing powder and decided to make some 'carpet' for the Mustang. Yeah... that turned out like crap. I picked up the 'extra thick' embossing powder, thinking that the bigger bottle of clear would be what I needed for many years of scale model carpet goodness. Nope - it looks like I've effectively spread tan gravel on the floor of the kit. Whatever... it'll be inside and nobody will be looking that close, anyway. 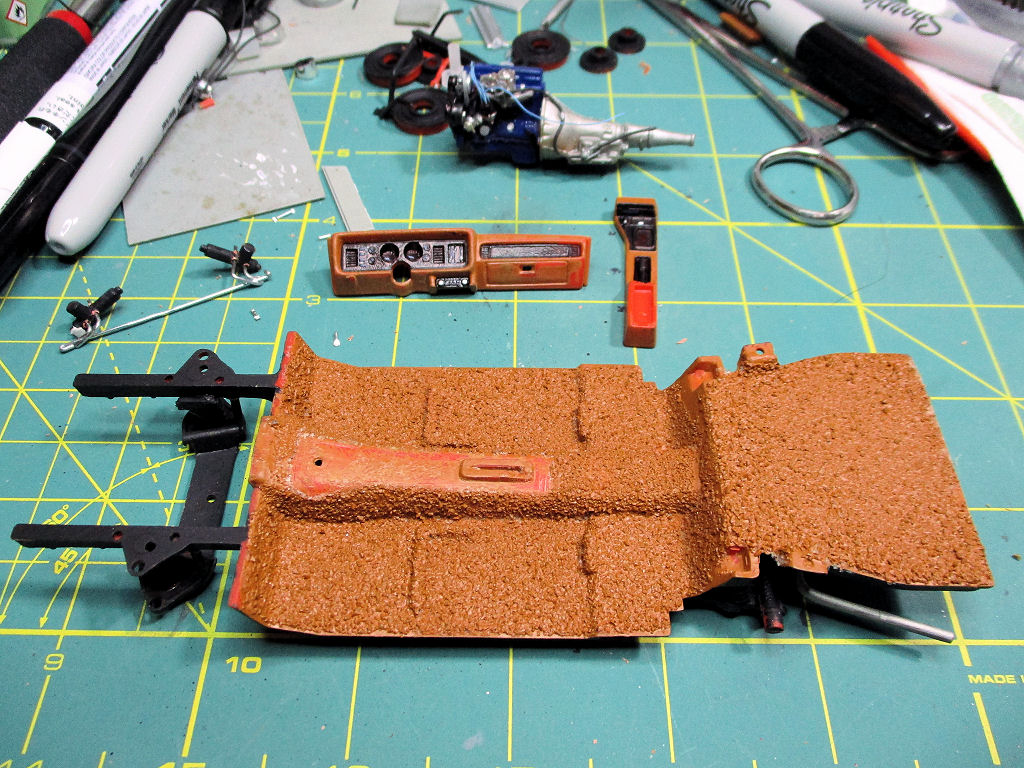 I played around a little bit today and worked on the center console and dashboard. I just need to touch up a couple of tan spots on both and maybe print some gauge faces (haven't decided yet). The kit came with front wheels that could be steered (or posed, rather), but didn't have a tie rod connecting the two. So, I busted out the trusty pin vise and drilled some holes through the 'spindles' and made some tie rod ends out of a paper clip along with an old school tie rod to span the gap between the two. I'll dress it up to look like the rack & pinion which is also missing on the chassis. Baby steps, I guess. |
|
|
|
Post by Grandpabeast on Jun 14, 2018 4:45:01 GMT -7
Looking great , can’t wait to see more !
|
|
|
|
Post by mustang1989 on Jun 14, 2018 5:59:05 GMT -7
Looking great , can’t wait to see more ! That'll make one more of us. |
|
Deleted
Registered: Nov 21, 2024 9:23:37 GMT -7
Posts: 0
|
Post by Deleted on Jan 21, 2019 16:57:10 GMT -7
Wow - been awhile. Apologies. So, a few years ago I built this cool shed on the side of my driveway, hoping it would eventually become a small shop in which I could permanently set up my airbrushing gear. Then, we basically made my mom get rid of her storage unit ($70/month bill she no longer had the money to pay), and her final leftovers wound in it while she was ‘going through the last bits.’ Well, as usual, she abandoned that since it was hot, in a place that she didn’t have to worry about it being destroyed or gone missing, and was boring so she didn’t want to do that anymore. That was sometime in late summer of 2016, and we’ve been waiting for her to finish ‘going through’ her BLAH_BLAH_BLAH_BLAH ever since. Over Christmas week, I decided I’d had enough of that and got busy on completing my small shop area. We boxed up the junk she’d covered our plastic table in, and basically shoved it aside so I could get the area I need cleaned out, organized, and ready for a transformation into functionality. I snagged a couple of work benches from Harbor Freight, along with a portable air brush booth, and a bunch of other cool things to make the workstation much better. 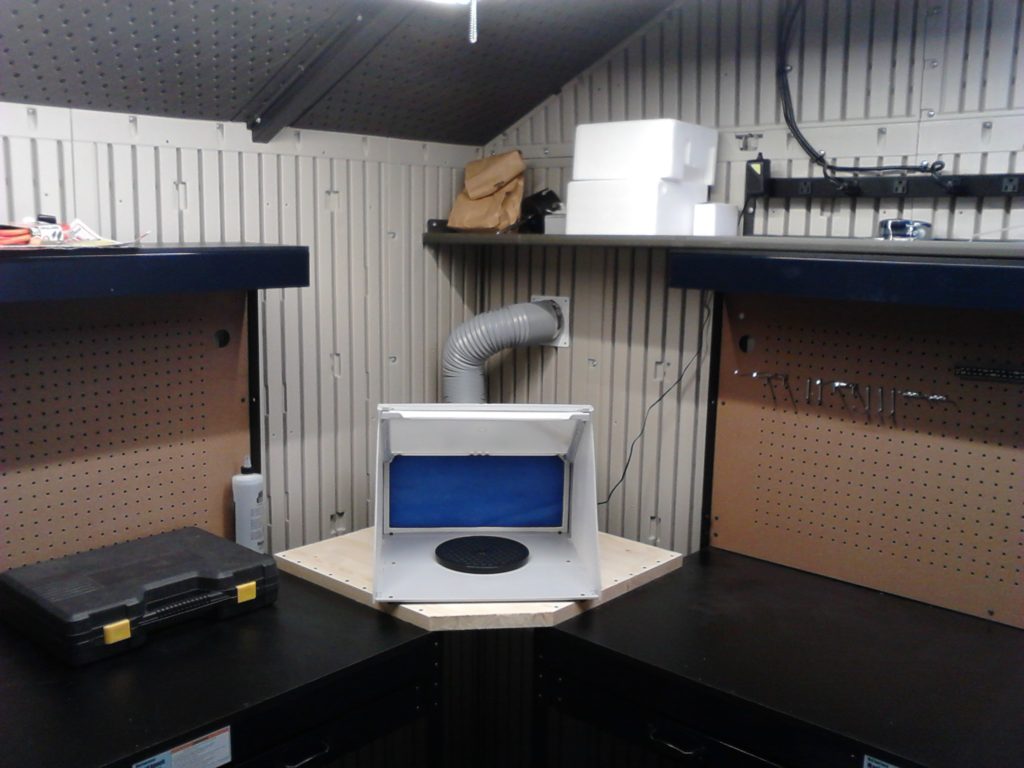 What does all that have to do with my '82 Mustang build? Last week, after adding a few more finishing touches to the work space (tunes, a trash can, cutting mat, a new caster to replace the broken one on my old computer chair, etc.), I got to shoot some paint. I have no idea what to use for ‘primer,’ so I found some interior acrylic ‘Feather Gray’ at the hardware store, thinned it out, and shot it through the El Cheapo Harbor Freight airbrush. Getting the right mix of ‘thin enough for the AB was a challenge, but I eventually got some “primer” laid down on the Mustang body parts. I have no idea if it’s even going to stay stuck, so I’ll let it sit for a few days before checking it out – it’s stuck to my fingers quite nicely, however. If it won’t stick, no worries – it’s water based, should come right off, and I can start again once I find some real primer for the airbrush. I also learned a few valuable lessons today, in the way of securing the work, setting the flow needle, and making sure the airbrush actually stays together while cleaning it. Good times! 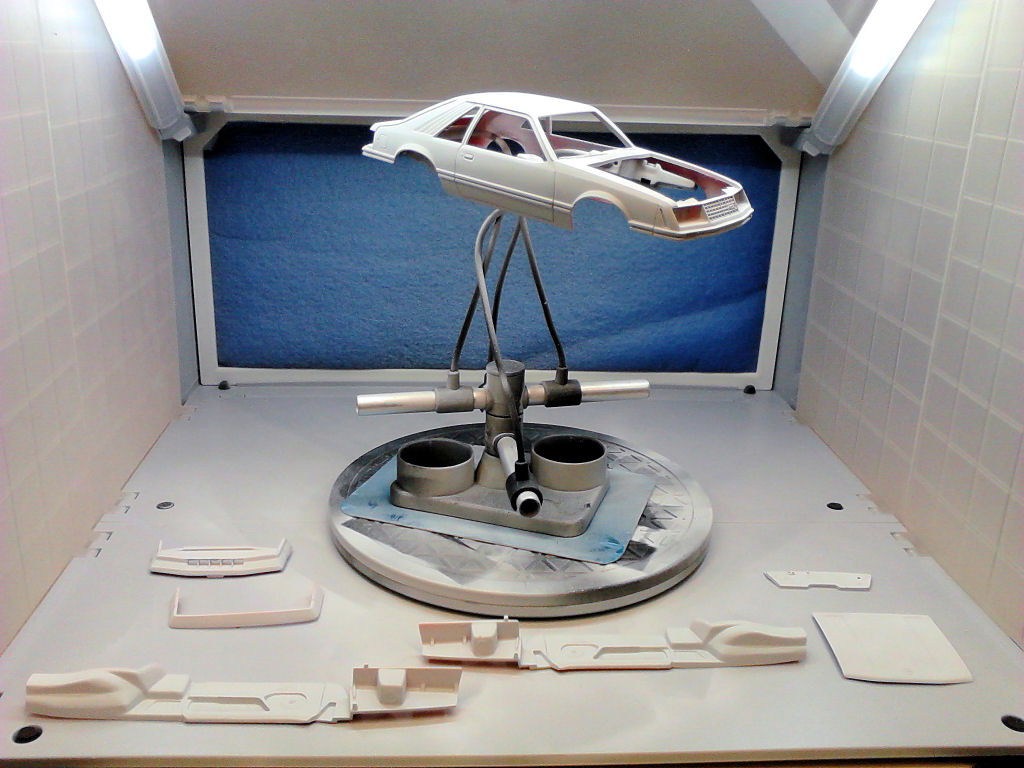 |
|
Deleted
Registered: Nov 21, 2024 9:23:37 GMT -7
Posts: 0
|
Post by Deleted on Jan 26, 2019 17:23:07 GMT -7
Well, the first run with the new airbrush station was a success in my book. The paint job however... mixed reviews. It was looking really good until I shot the clear, then things changed a little - the color went a little darker than I was hoping for, but it's probably actually closer to the factory color. I also got a little bit of trash in the clear, along with the Pledge Acrylic as clear coat didn't lay down as shiny as I was hoping (gotta do a little bit of polishing now). All in all, I'm still pretty happy with it. 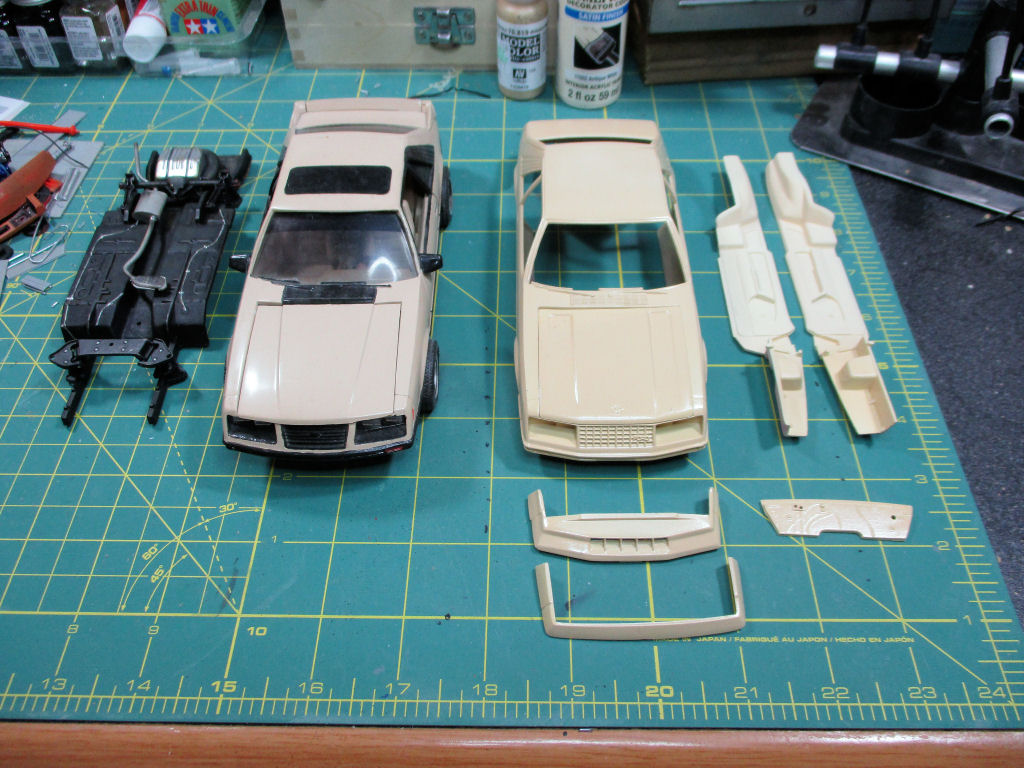 Now, if I can just get it polished and add the black trim without messing it all up. |
|
|
|
Post by Grandpabeast on Jan 26, 2019 19:30:51 GMT -7
Looking good!!!
|
|
Deleted
Registered: Nov 21, 2024 9:23:37 GMT -7
Posts: 0
|
Post by Deleted on Jan 27, 2019 16:44:14 GMT -7
Thanks! This one's definitely bringing things to a new level for me. I've never really weathered a model before, and I'm trying to do a lot more in the way of duplicating the real car (using reference pics, and whatnot), instead of just throwing something together like did with the one I built back in 1989 (on the left in the picture above). While it was fun to have something the mostly resembled my actual car, I think I'm doing a better job of 'getting it right' this time.
|
|
Deleted
Registered: Nov 21, 2024 9:23:37 GMT -7
Posts: 0
|
Post by Deleted on Feb 18, 2019 18:14:29 GMT -7
So I got some time to play around with some of the details I've been thinking about the past few weeks. I have this reference picture of the engine, and it's simply ridiculous how many hoses are running back and forth to various places and sensors on the engine... I don't remember having that many on mine, so I'm thinking my reference picture might actually be a California car. Regardless, I have to make some hoses and whatnot since I'm at the point of weathering things. Here are the interior side panel/engine aprons (or whatever they're called), along with the firewall and air cleaner. Rather than make all of the harness and hoses, I drew some of 'em on with a Sharpie, along with some brake lines with a Molotow Chrome Pen. Those big slots in the firewall are the kit's fault - it didn't come with any kind of hood hinges. 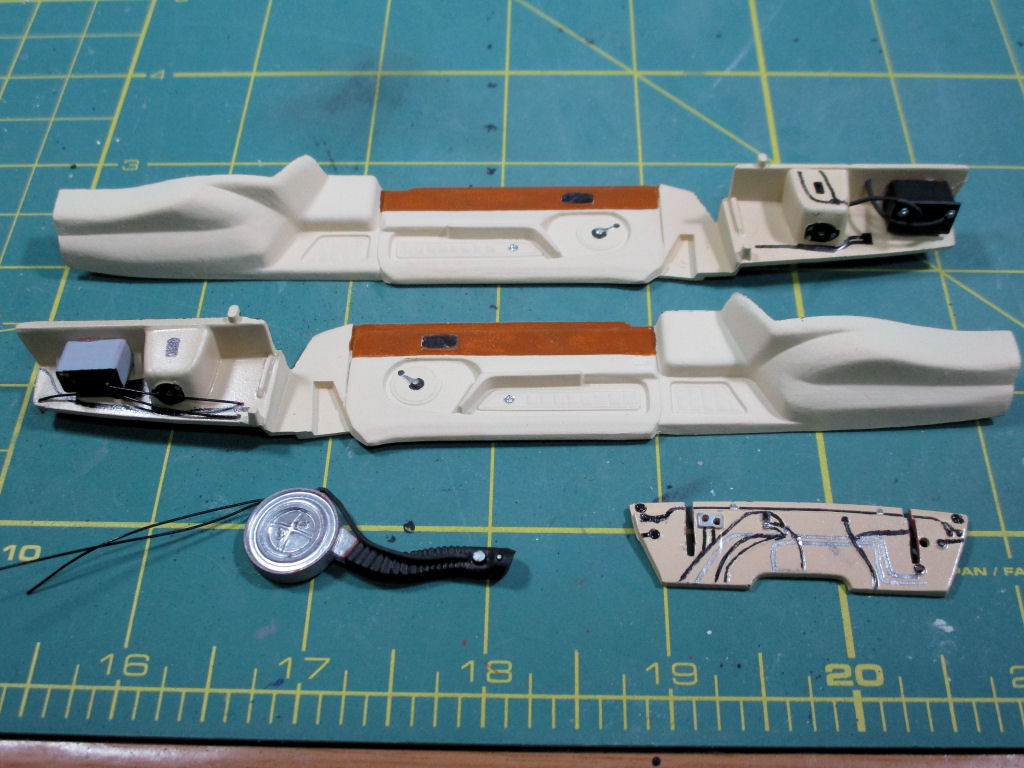 Another deficiency I found in the kit was the movable front wheels... with no tie rod or anything to keep them aligned with each other. Wow... way to go, Monogram (edit: Ooops - MPC... my bad) - this might just be the worst kit I've ever had. So, I made some steering arms and a rack & pinion using a paper clip, one of those little straws from a can of WD-40, and some masking tape. Looks pretty decent, if I might say so myself. I also weathered the exhaust system just a little bit more - the real car had a couple of holes in the muffler (rear seam) that I hopefully captured here with the extra soot. 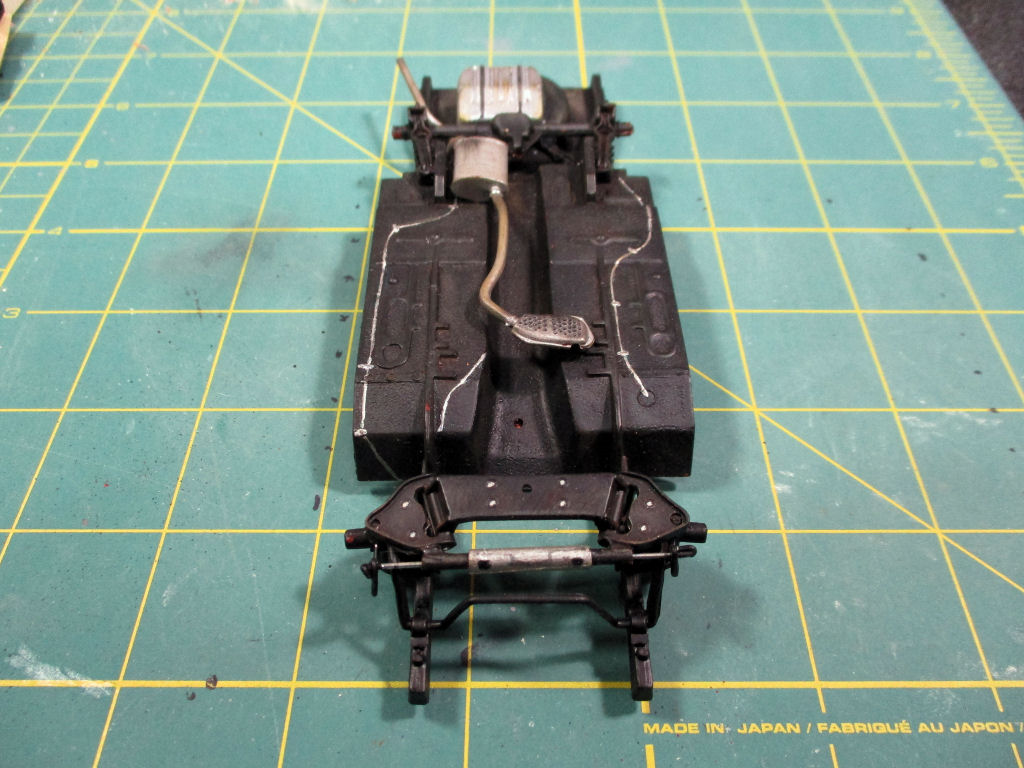 I also polished the body, which came out "OK," I suppose, but I still need to clean all of the 3M Perfect-It from the nooks and crannies. After that, I'll mask off all the black trim areas and see how that goes. I'm thinking the contrast of the black trim will help hide some of the trash I got in the paint while I was playing with the pressures on the airbrush and figuring out how to thin the acrylic paint I used. |
|
|
|
Post by sharp on Feb 18, 2019 20:04:40 GMT -7
Nice job! All the details look great!
|
|
|
|
Post by wisdonm on Feb 19, 2019 7:08:07 GMT -7
Your ability with a Sharpie is fantastic. I can't even imagine doing that well anymore. Great detailing overall.  |
|
|
|
Post by mustang1989 on Feb 19, 2019 12:29:08 GMT -7
This is looking good so far Eric. I've gotten away from painting molded in wiring on firewalls these days. I've gotten to where I'll sand the wiring detail off and go back over it with strands of copper electrical wire painted black. The effect is a lot more dimensionally enhanced.
|
|
Deleted
Registered: Nov 21, 2024 9:23:37 GMT -7
Posts: 0
|
Post by Deleted on Feb 19, 2019 16:59:18 GMT -7
Thanks for the kind words, guys. Sorry it's taking so long to do this - I keep trying to make time for it, but things just seem to come up. Probably the biggest reason for my 'skills' with the Sharpies is because I was a nationally ranked architectural draftsman before I joined the Air Force (back in the '80s) and I can draw well. Here's one of the more recent things I've done, and probably the nicest thing I've ever done, IMHO: 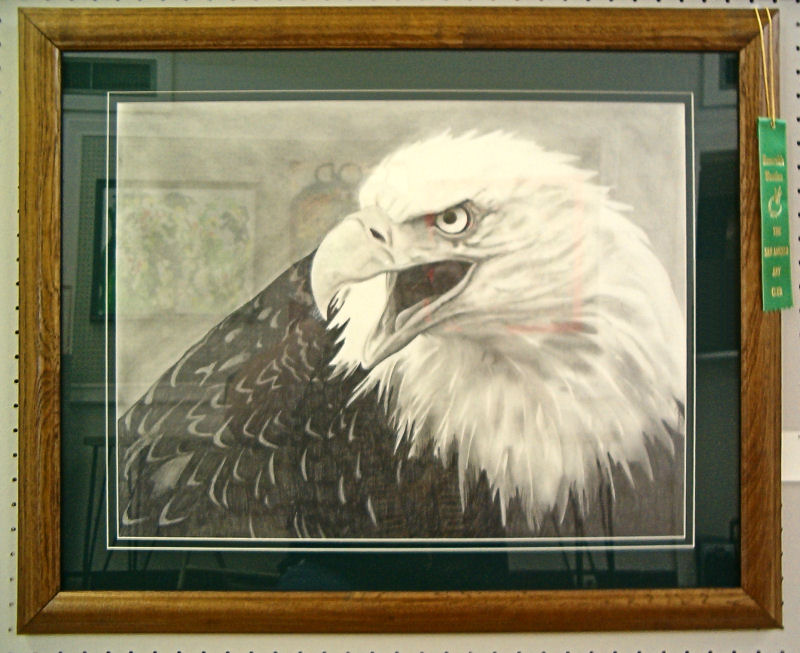 I'd thought about sanding off and re-running everything, but didn't get the inspiration until sometime after I'd already done the brake & fuel lines on the underside with a Molotow chrome pen (my first time using one, as well). I actually picked up 3 or 4 spools of jewelry wire from Michael's shortly afterward and kicked myself for not thinking of that earlier. Next time, I guess. Here's my engine reference pic, and I can honestly say I don't remember having half that stuff under the hood of my actual car (and also a little bit of why I chose to bail on some of that rat's nest).  I'm hoping I'll be able to get the body details taken care of on Friday, since I have a business trip next week and have to travel on Sunday. |
|
|
|
Post by Grandpabeast on Feb 19, 2019 17:06:42 GMT -7
Looking good!!
|
|
|
|
Post by mustang1989 on Feb 20, 2019 10:21:42 GMT -7
One day I would love to tackle an engine bay that looks like that in "miniature land".
|
|
Deleted
Registered: Nov 21, 2024 9:23:38 GMT -7
Posts: 0
|
Post by Deleted on Feb 22, 2019 9:34:52 GMT -7
Wow, that engine bay looks great. I love the detail.
|
|
Deleted
Registered: Nov 21, 2024 9:23:37 GMT -7
Posts: 0
|
Post by Deleted on Feb 22, 2019 13:53:45 GMT -7
Thanks! But unfortunately, that's just my reference picture. Mine won't be anywhere close to that kind of detail.
|
|
|
|
Post by Grandpabeast on Feb 22, 2019 15:57:56 GMT -7
Looking great , keep wowing us !!!
|
|
Deleted
Registered: Nov 21, 2024 9:23:37 GMT -7
Posts: 0
|
Post by Deleted on Feb 23, 2019 16:33:30 GMT -7
Surprise! I got something done and it didn't take months to do so. I decided to mask off the black trim and run some Testors matte black through the airbrush today. Suffice it to say, Testors' instructions on how to thin the enamel weren't the greatest, but I got through it. Looks like it's time for an eye-dropper or two as well. I still have some spots to tweak with the Sharpie, but overall I'm happy with how it went. The Tamiya masking tape did a great job, but the thinner Testors masking tape came up in a few areas and allowed some errant overspray (which I can hopefully get cleaned up as well). All-in-all, I'm pretty happy with it. 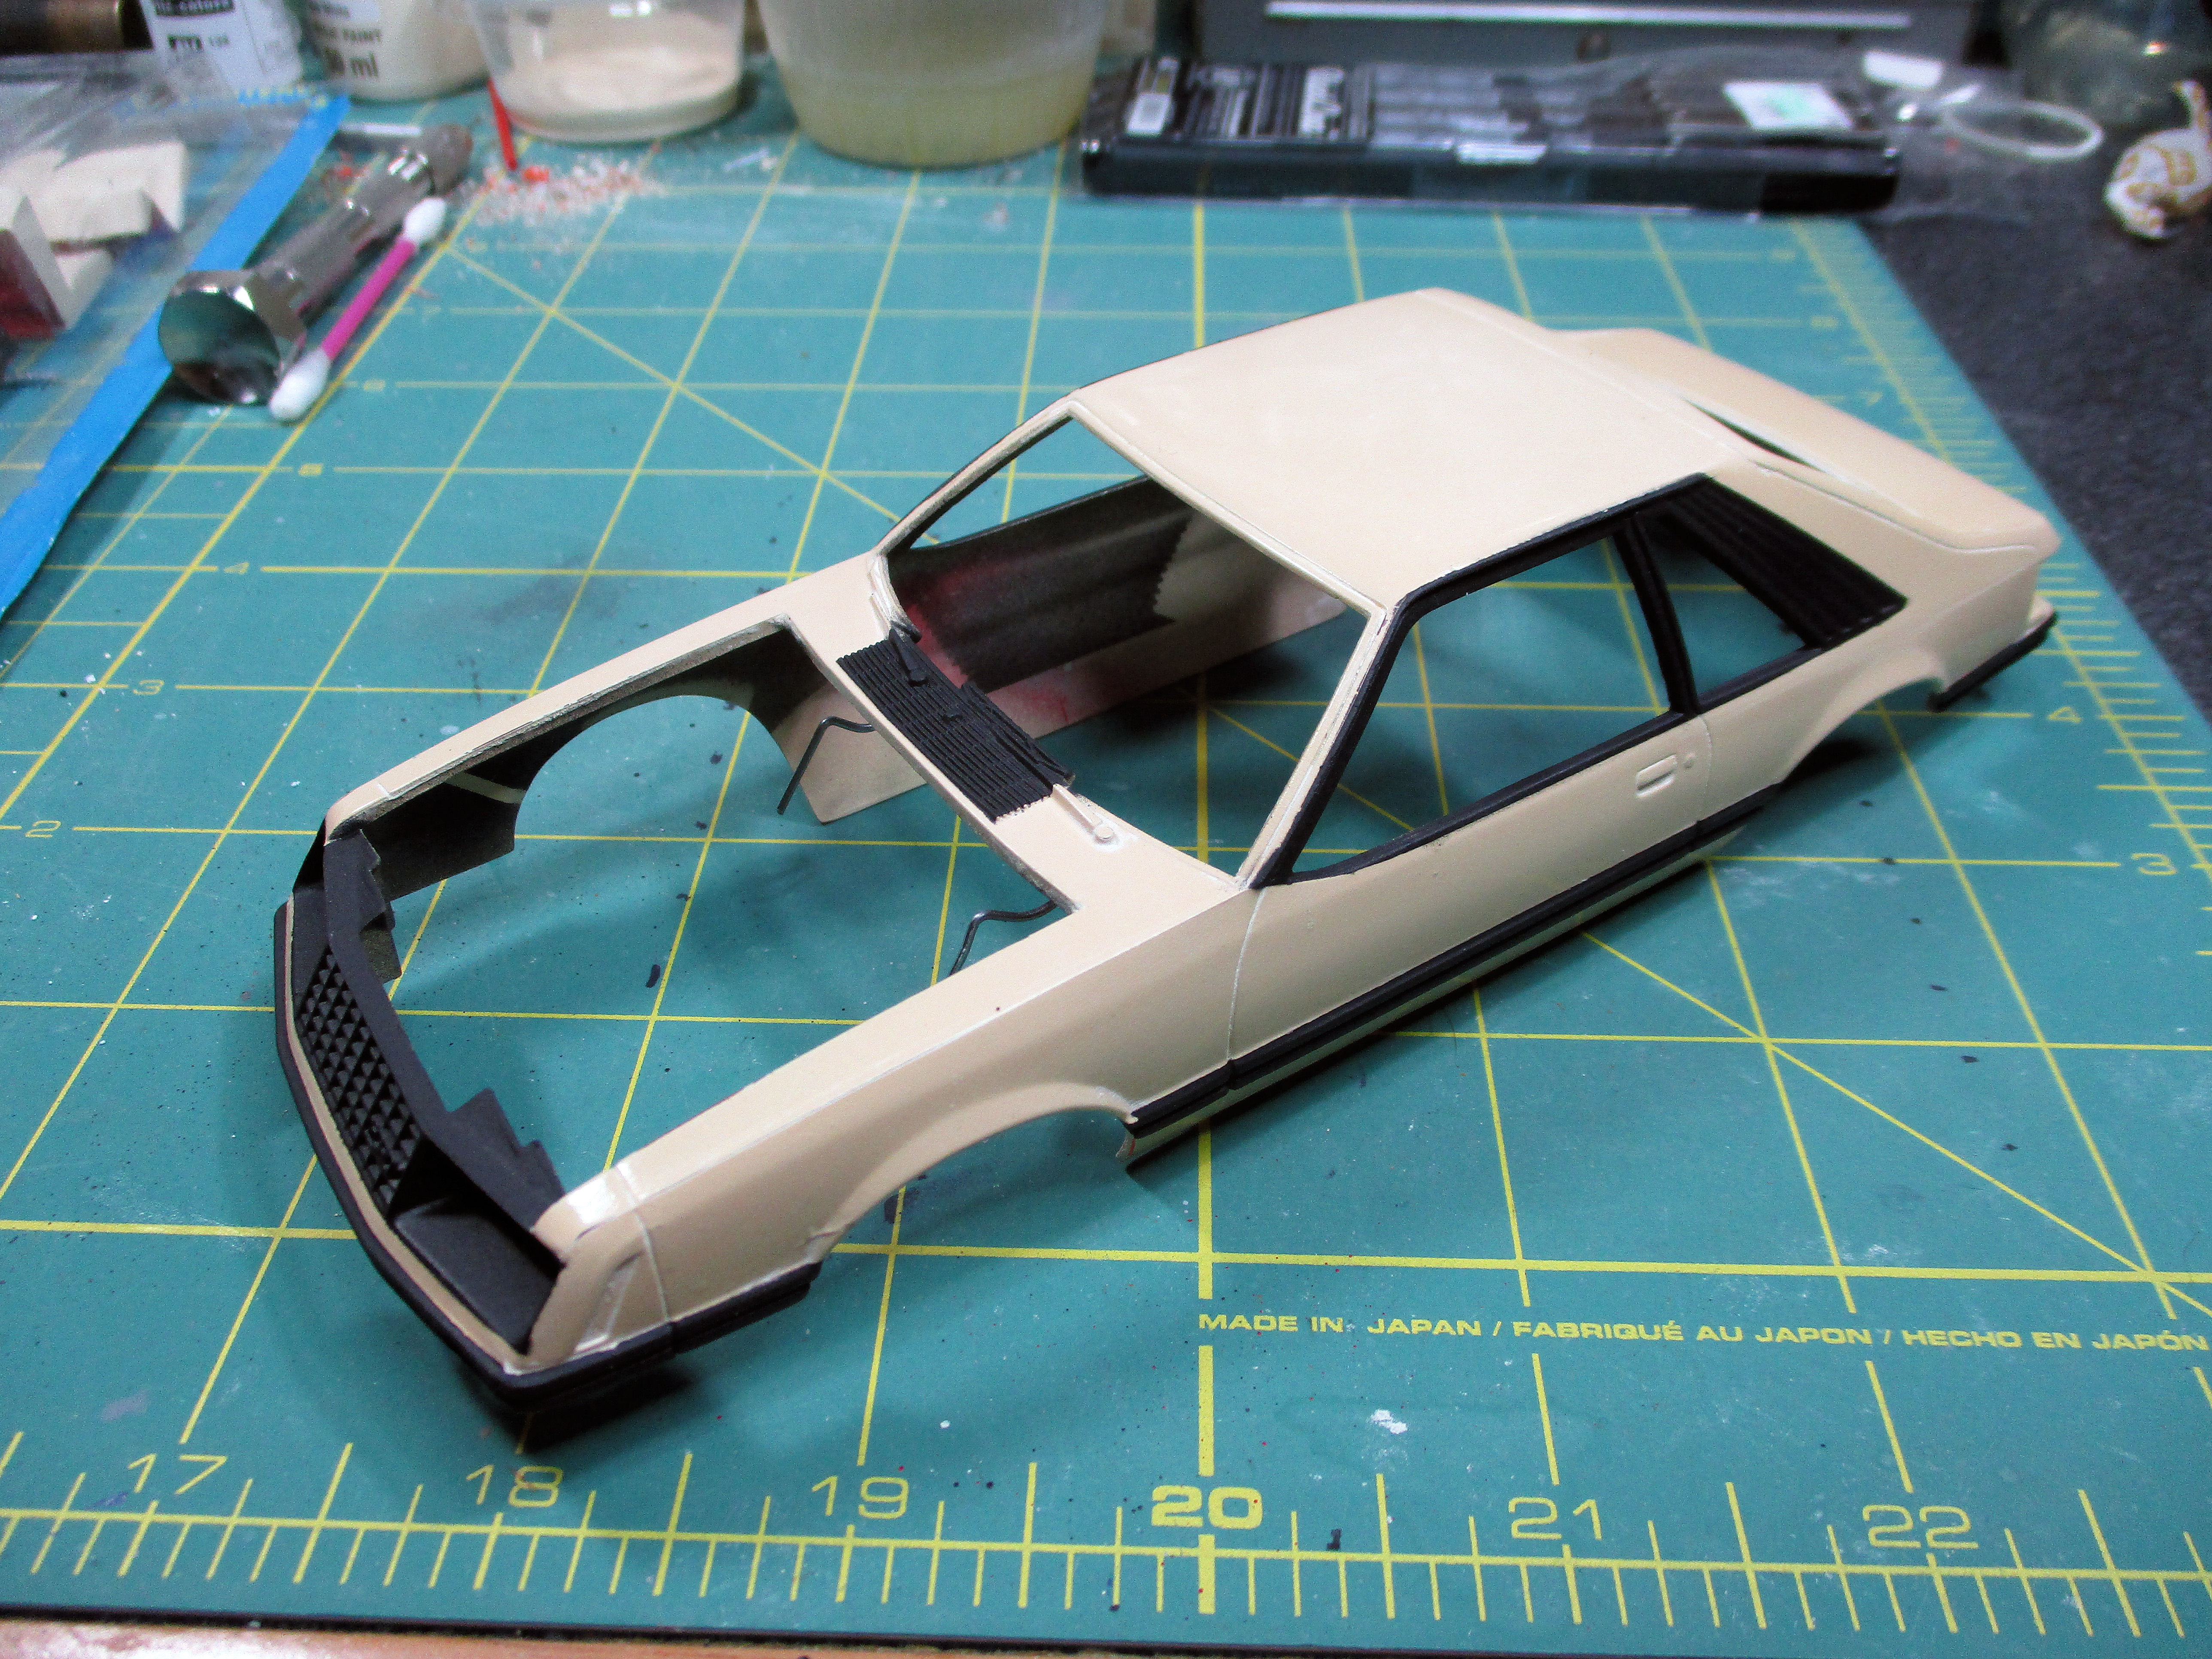 I have a business trip this week, so hopefully I'll get some time next weekend to work on it some more. |
|


